
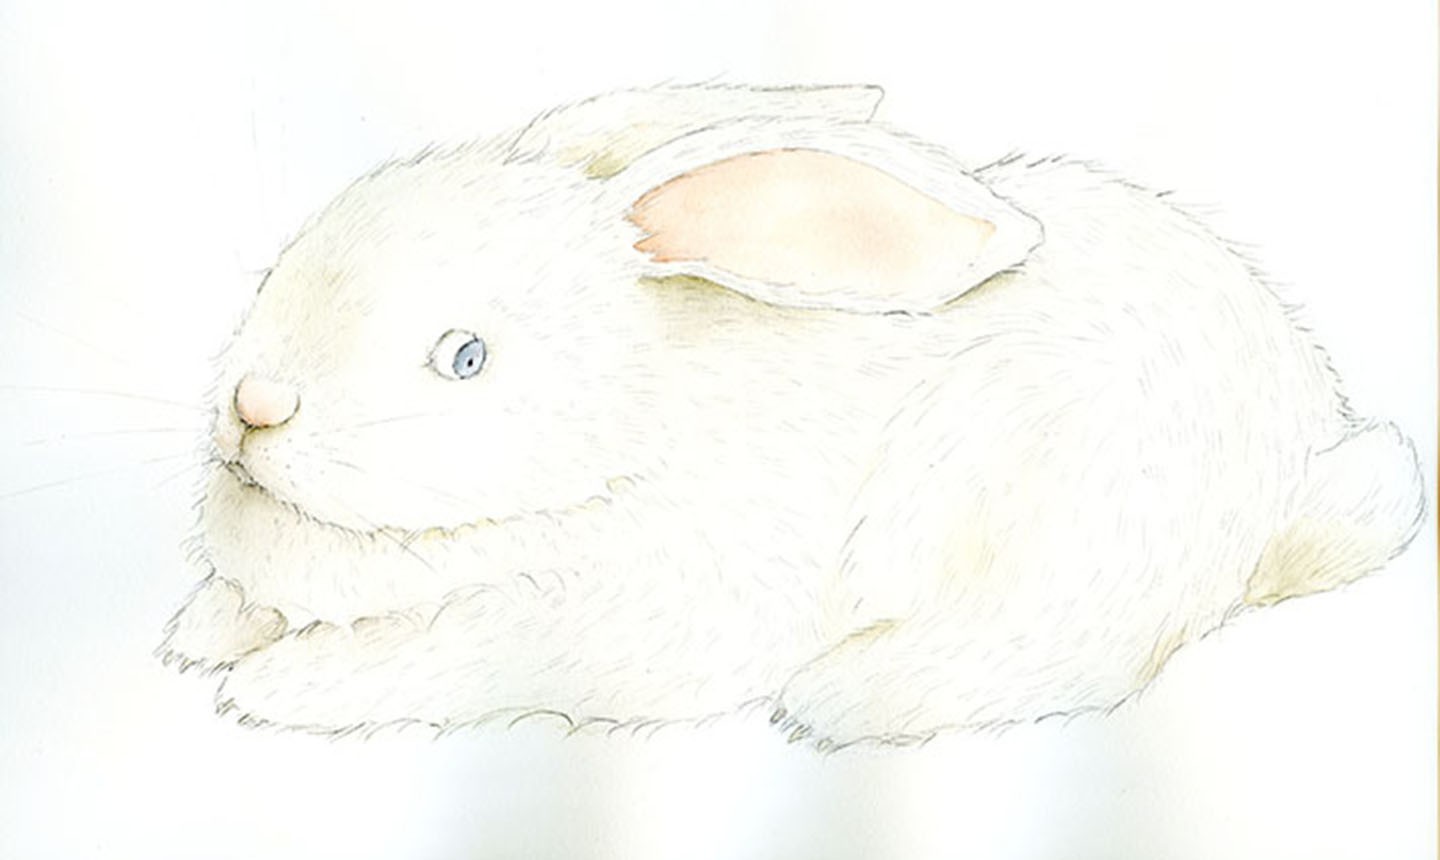
Real talk: you can never have too many adorable bunnies in your life. And in just a few steps, you can capture the twitching noses, gazing eyes and long, floppy ears in watercolor. Hop to it!
Painted Rabbit
Level: Easy
What You Need
Instructions
1. Sketch the Bunny

You can make your rabbit any color you want, but we’re going to paint a white rabbit to focus on shading. As you sketch, keep the pressure light — heavy pencil marks are more difficult to erase if you make a mistake.
2. Apply the First Wash

Mix a cadmium yellow with a bit of black ivory to get a sepia-like color. Add a small amount of pigment to a lot of water so it’s a pale, warm beige.
Wet the whole bunny, being careful not to wet outside your sketch. Apply your first wash lightly. This shouldn’t be a flat hue — the saturation should be heavier where you want shading to begin — underneath the ears, over the rabbit’s front legs, etc. Wait until this wash is completely dry before moving on.
3. Paint the Ears
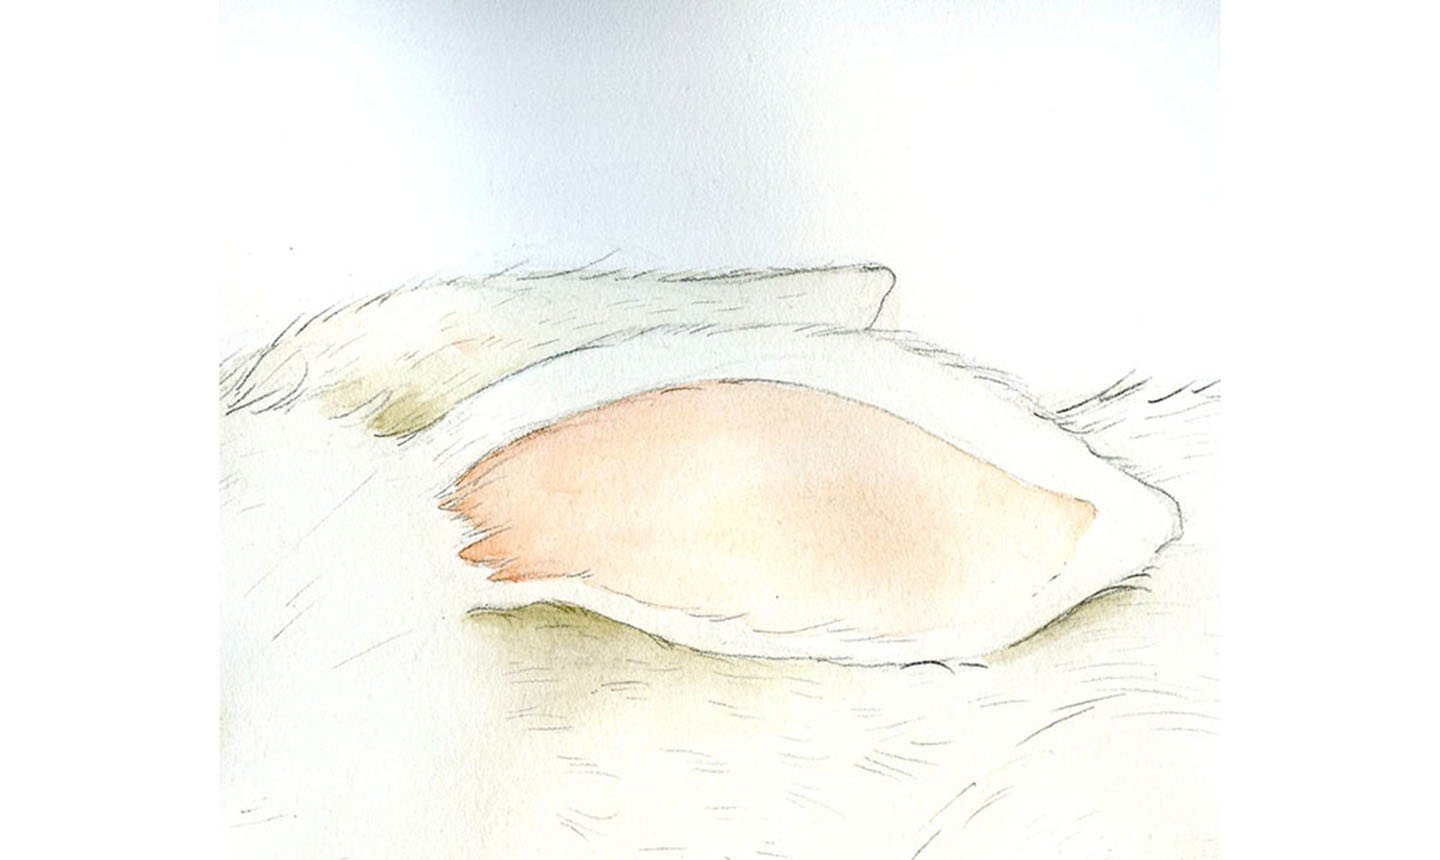
Wet the whole inside of the ear. You want them to be realistic (and not just pin ovals), so make sure to wet in between some of the fur at the base — this will create a relief effect and bring out some fur detail. A pointed round watercolor brush will be your BFF for this step.
Pro Tip: You can alter the beige mixture to be warmer for the inside of the ears, or use a light pink paint.
4. Shade
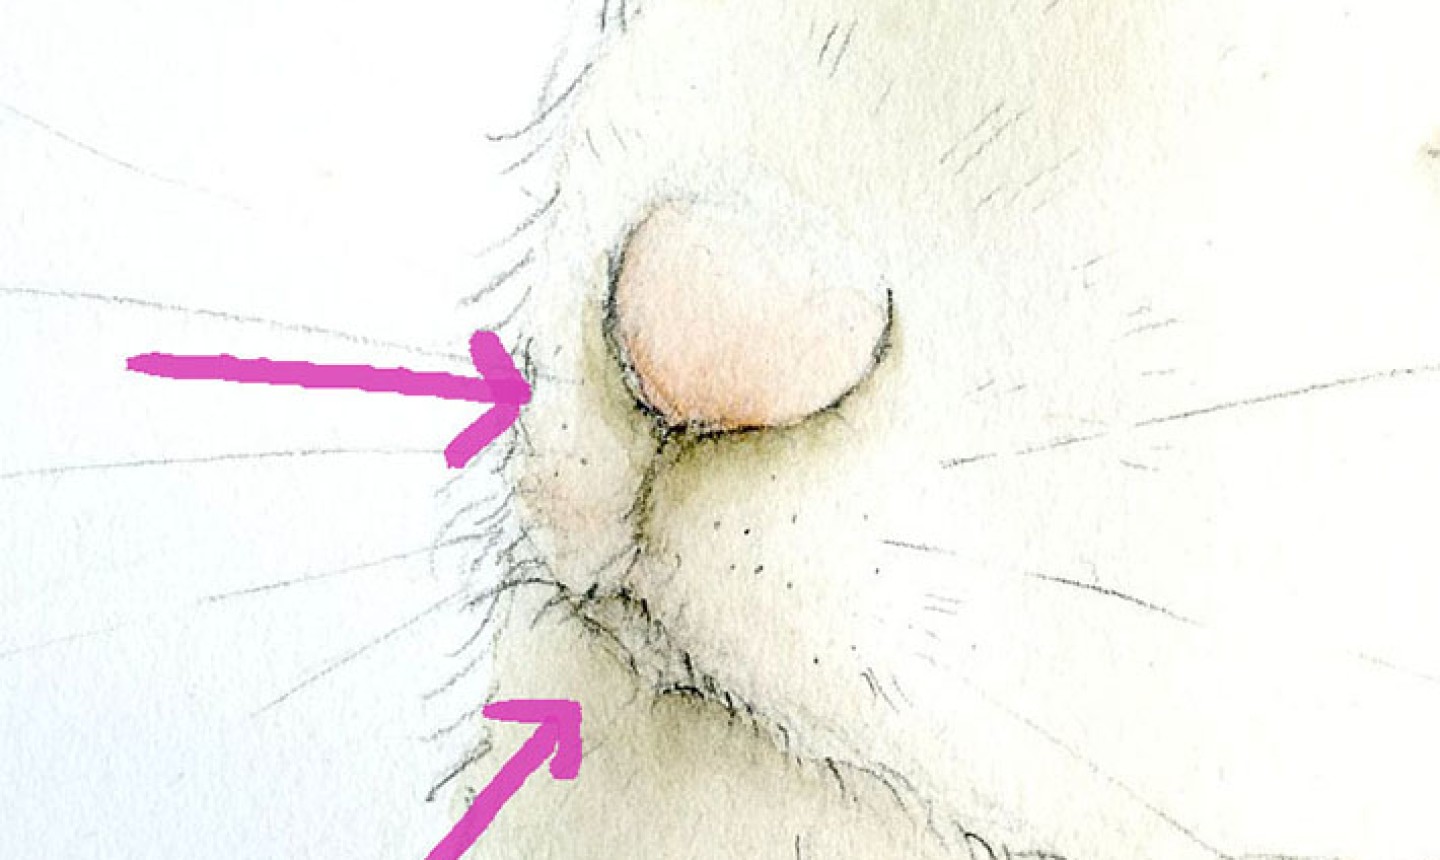
When painting the nose, add more saturation at the lower edge and shade under and around the area.
Pro Tip: The shading is done with the same beige mix used for the overall wash on the bunny. If you let it dry on your palette, it becomes a concentrated version of the same hue. You only need a slightly wet brush to lift the color and add it to your painting. Just make sure to wet the area you’ll be using it on first so you can blend it without any hard edges.
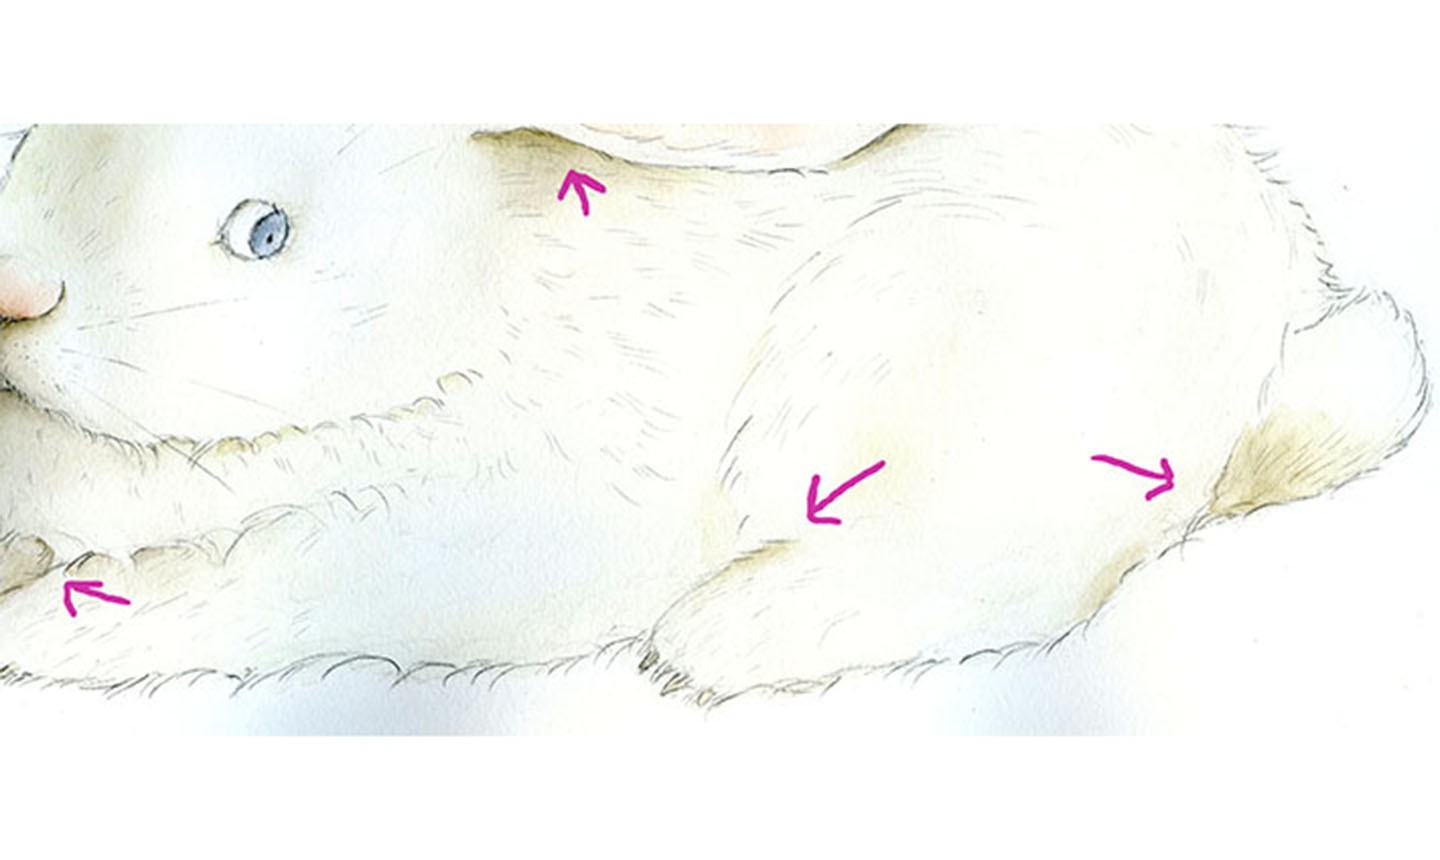
Add some shading under the mouth to give it depth and bring the dewlap a little forward. Then, gently apply shading to any area where the fur or limbs overlap — this should align with the more saturated areas of your first wash.
5. Define the Eyes and Whiskers

Carefully add blue to the eye, using a small pointed brush or a watercolor pencil. Draw on the whiskers with a sharp pencil.
Pro Tip: Whiskers are super thin and light, so stipple the line when you draw for a more realistic result.
6. Finalize the Fur
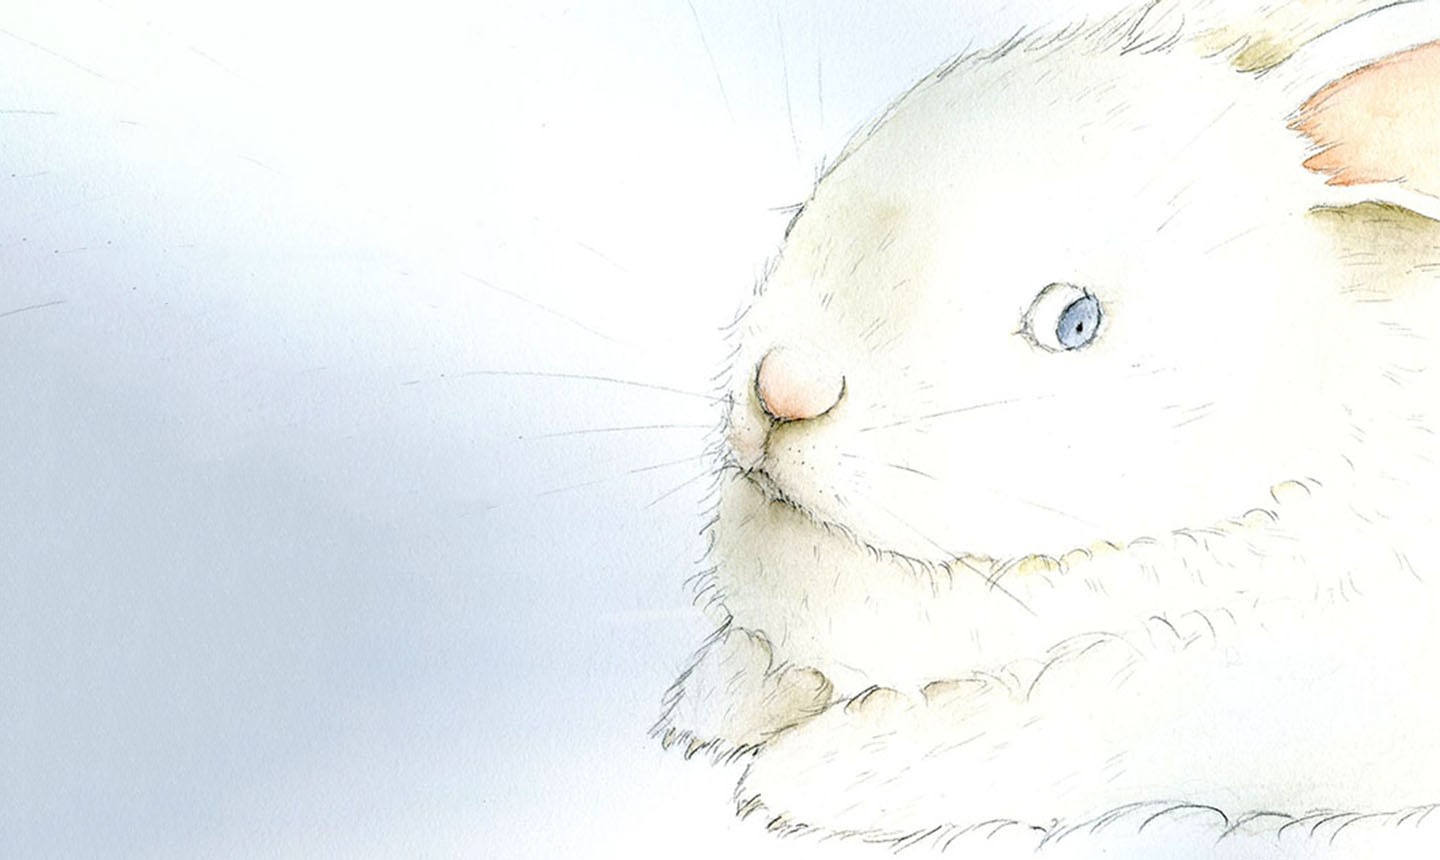
Use a sharp pencil to add fur all over the rabbit. Follow the directions of the rabbits fur. (Again, a reference photo can be extremely helpful.)
Make any adjustments as needed until you’re happy with your painting, then you’re done!
Share tips, start a discussion or ask one of our experts or other students a question.
Already a member? Sign in
No Responses to “How to Paint a Bunny That Basically Hops Off the Page”