
Here’s how to cast a nighttime effect with watercolors.
Step 1. How to prepare.
My sketch is finished and inked in. I have applied masking fluid to the stars, moon and a couple of flowers to prevent any color from saturating the paper underneath these details.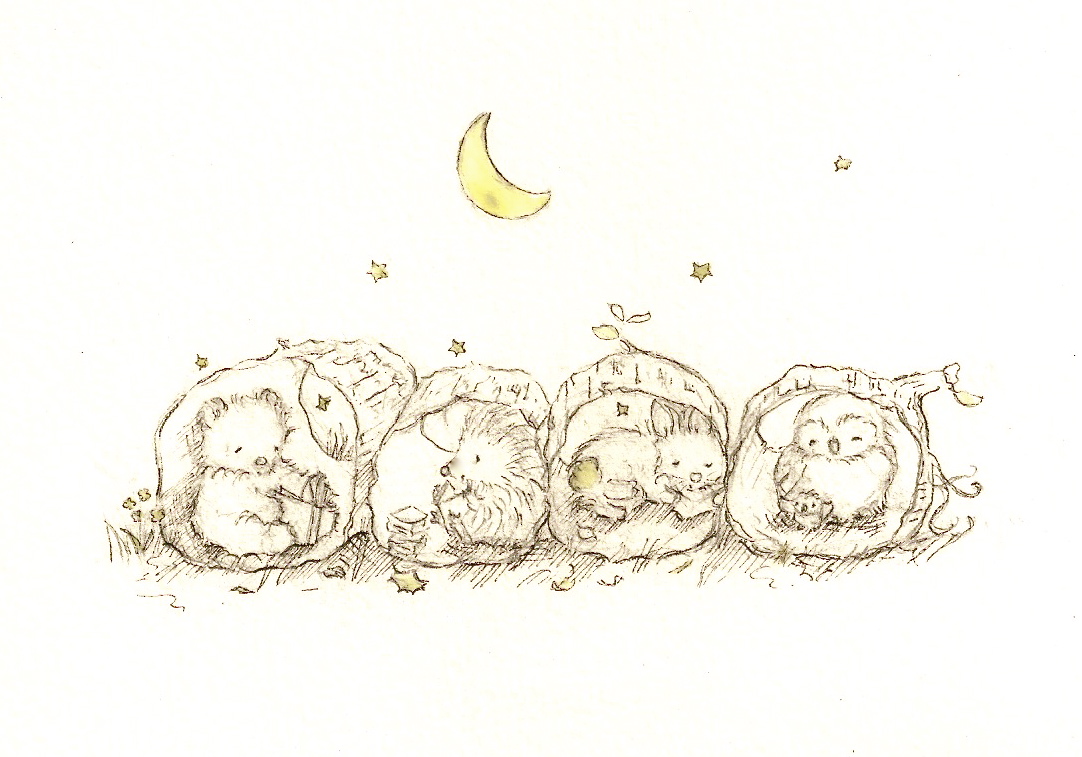
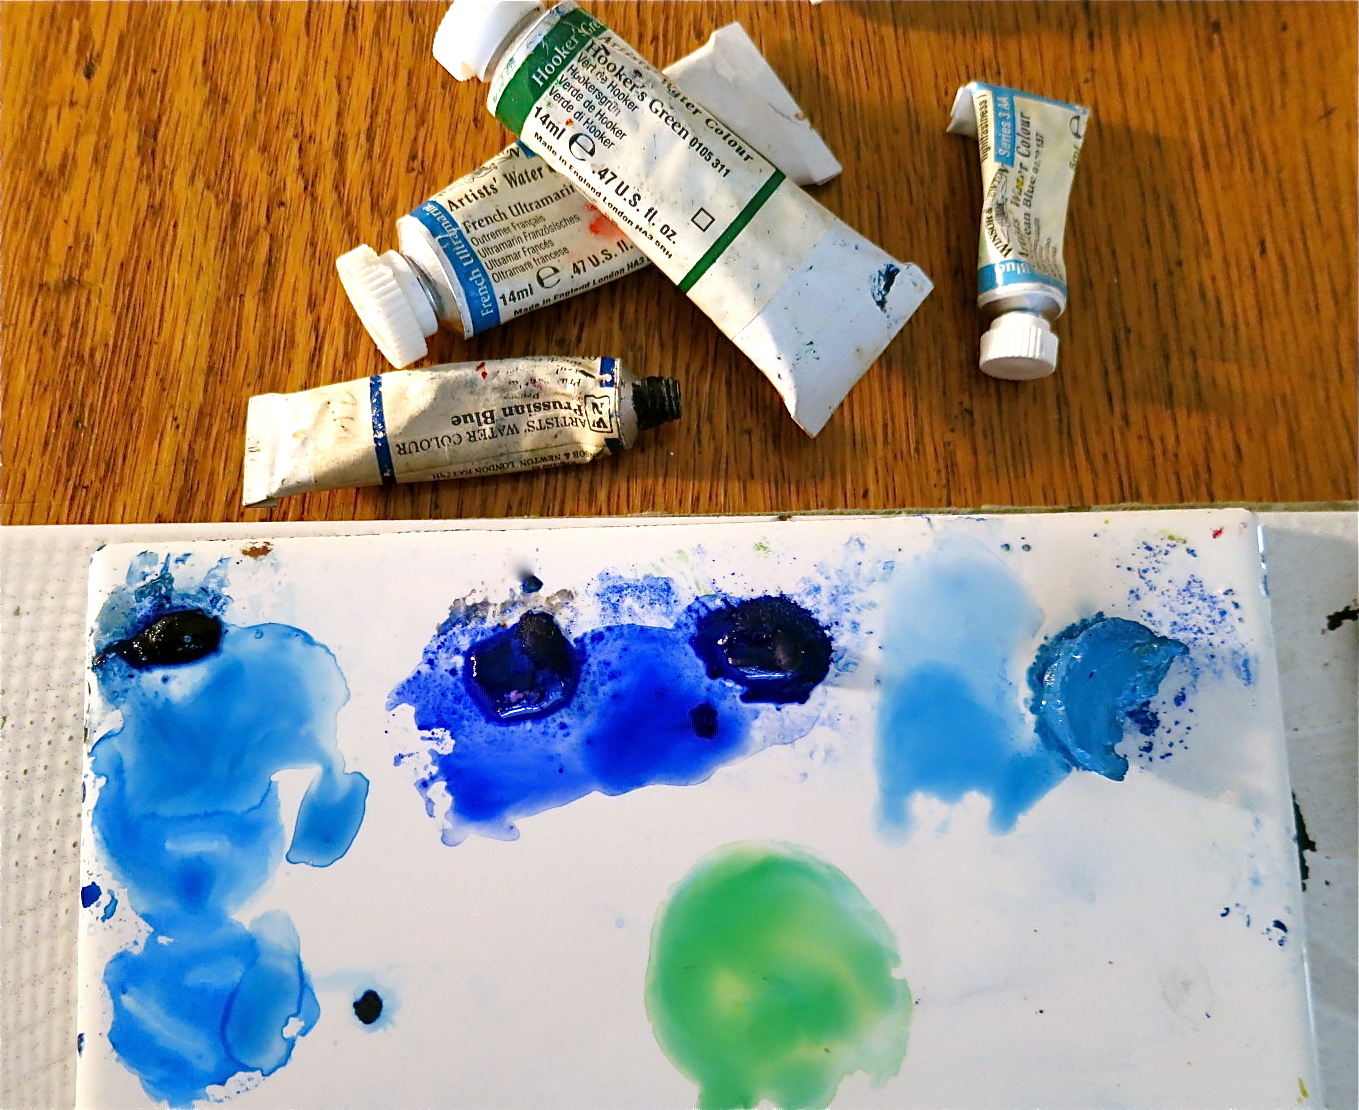
Step 2: Choosing your color palette.
For my night sky and general hue I want my painting to have, here I have chosen a pallet of ultramarine blue, Prussian blue and cerulean blue ready to mix and apply. I keep a little bit of green watercolor ready too, whatever shade my preference is for the particular painting. I may add this green right on top of the still wet blue wash in areas where green vegetation will be. This will make a nice blend of blue green in the shadows you are also creating. Here I have chosen hooker’s green.
Step 3: Applying color wash.
First I wet the entire sketch, then mixing and apply my blue watercolor first as a light wash, and, taking note of where I will want to stay a little lighter where my moon lite will fall. Then I deepen my color and saturate deeper in the sky and shadow areas which now help accentuate the areas where I want the moonlight to fall as well as the enhance the brightness of the stars. I will usually let the paper dry about now and then do one or two more layers of wash, (drying in between) and often deepening the areas I want the darkest shadows to be. It is good to take your time at this stage since it is the foundation for your painting. If I feel hesitant whether it about my color choices or not getting too much color where I do not want, I do a few washes, gradually building up my darker areas a little each time. This way you can step back after each application and make some adjustments and have a better idea of when this stage is complete. This piece is small, only 4 1/4″ wide, so I was able to just apply my base in two washes.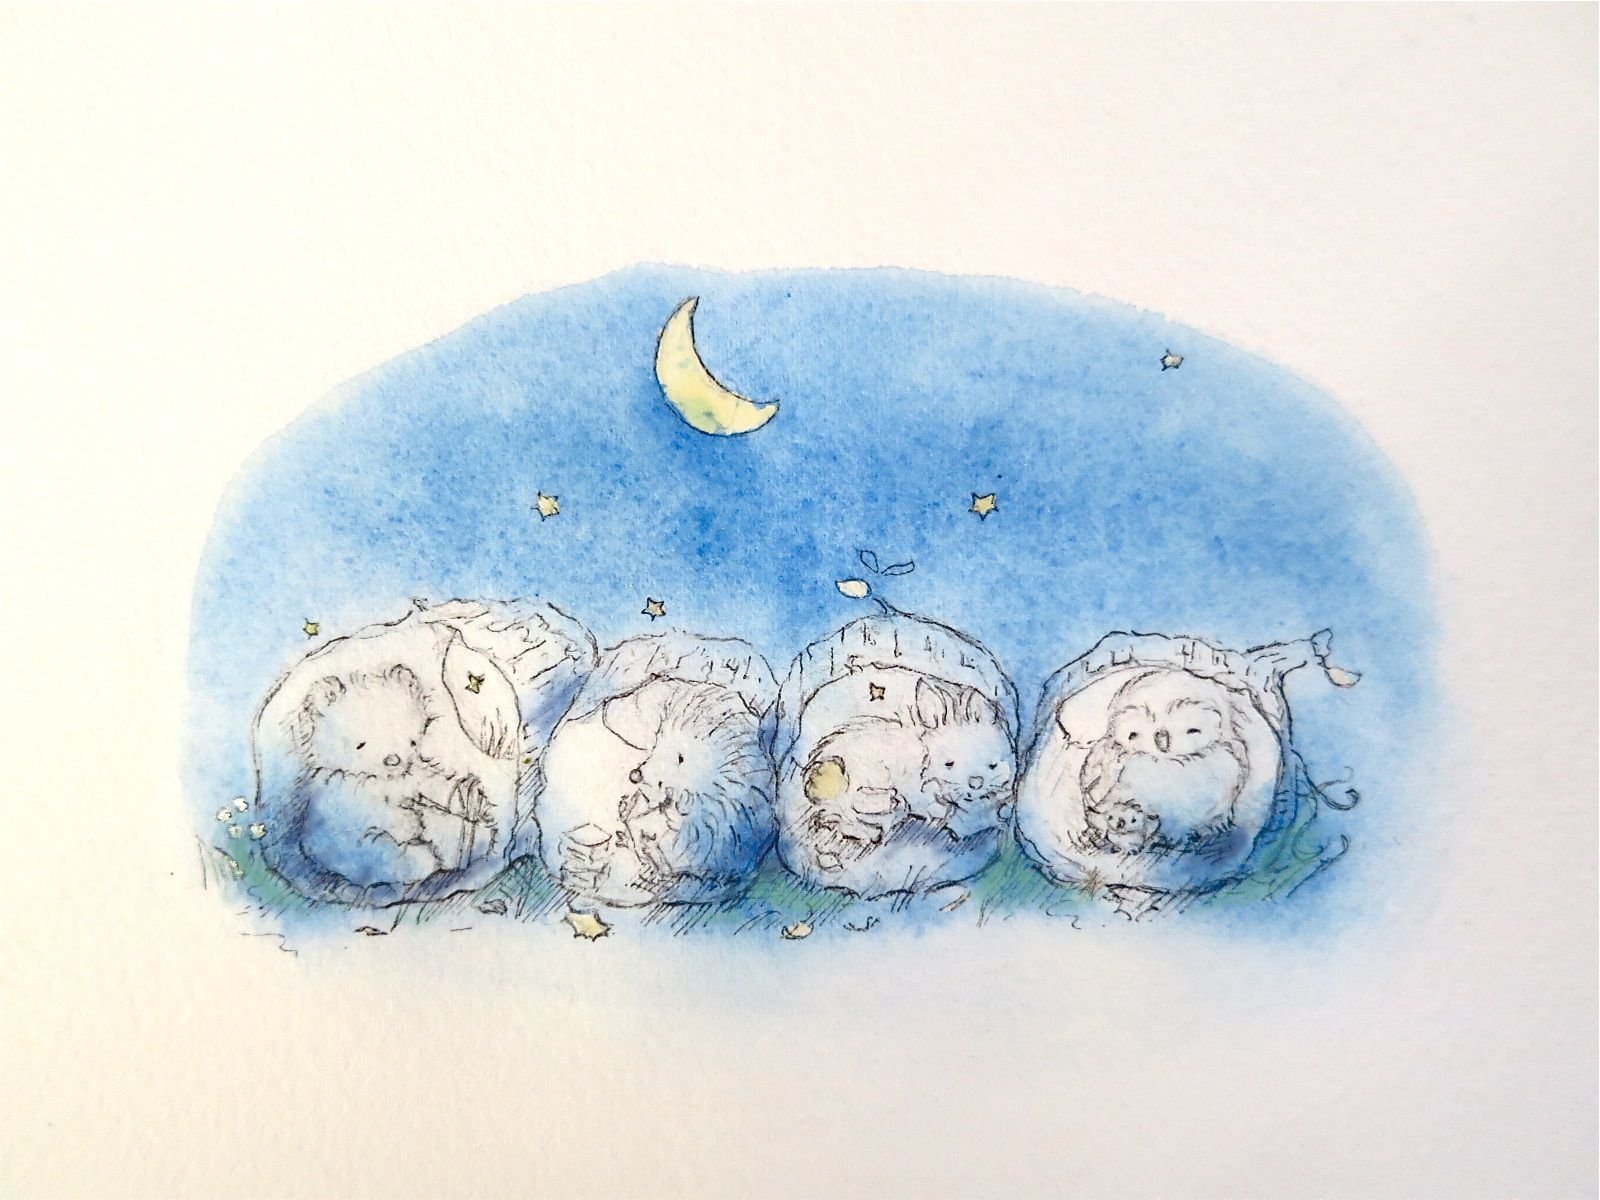
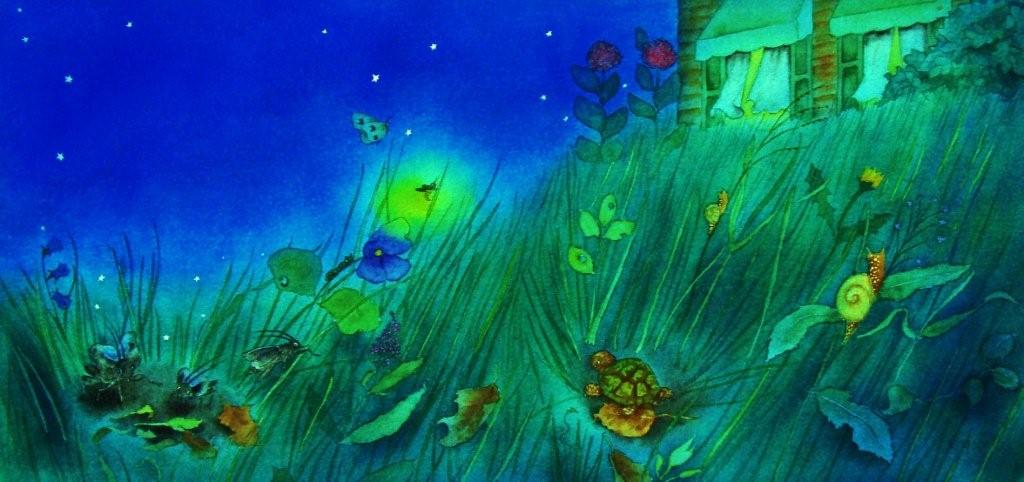
Step 4: Completing your painting.
As you can see here, I’ve painted in my little characters, tree trunks and other small details (remembering to remove the masking medium where it is no longer needed as I paint). The blue wash underneath gives a nice tint to the overall piece. It is visible and gives lovely night shade where I did not need to apply paint at all, the wash being enough color.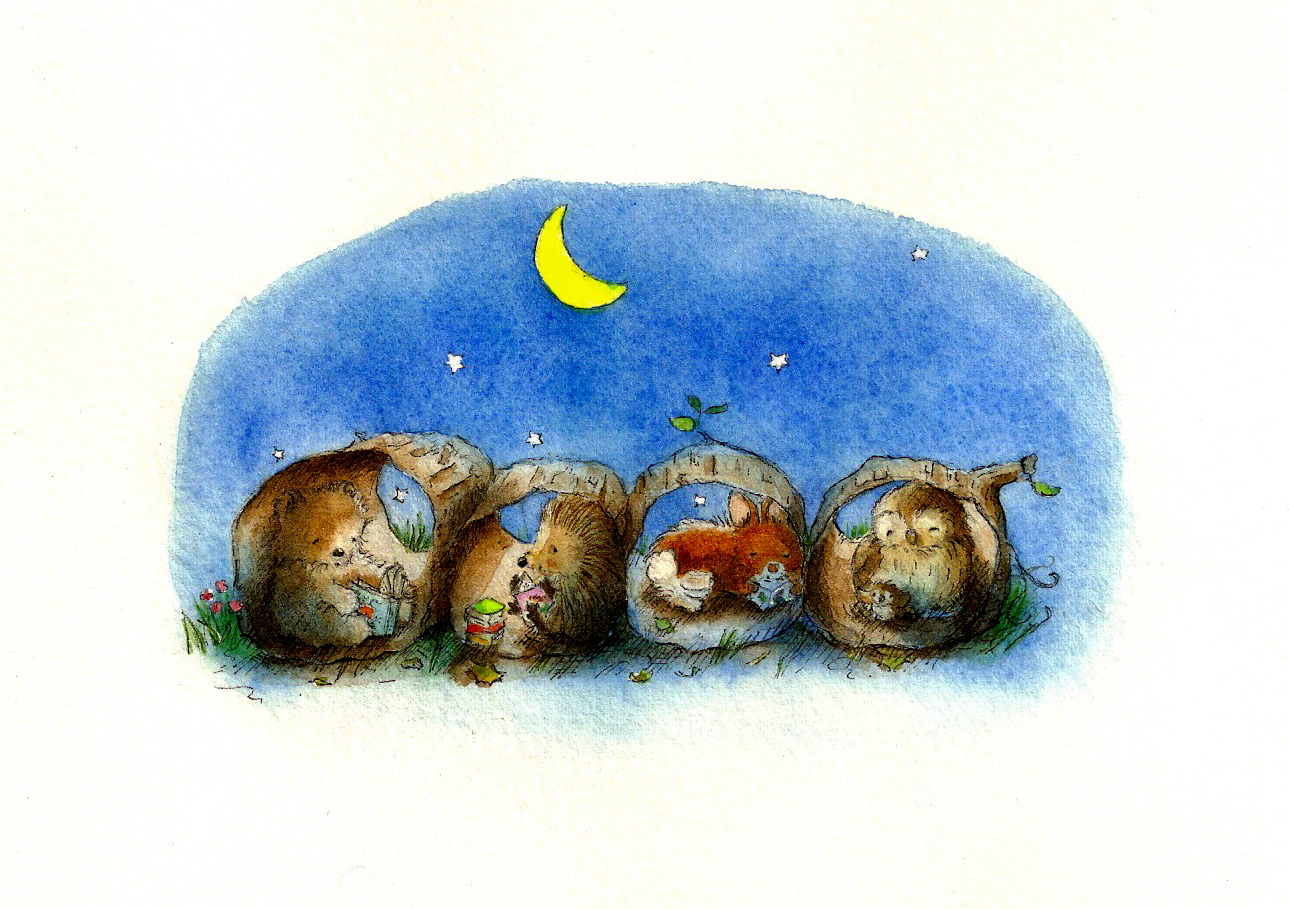
Share tips, start a discussion or ask one of our experts or other students a question.
No Responses to “How To Paint a Nighttime Effect With Watercolors”