
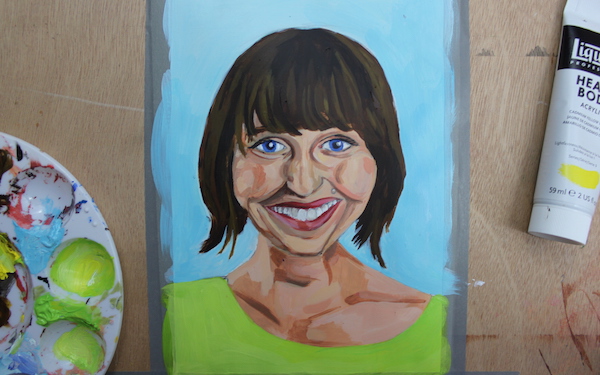
How to paint a portrait in acrylic
Step 1: Select your subject. (It can be you!)
 First, you’ll want to select someone to paint and have a clear reference photo of them. It can even be yourself — that’s what I did! If this is your first portrait, it’s best to have a reference that’s well-lit and not distorted.
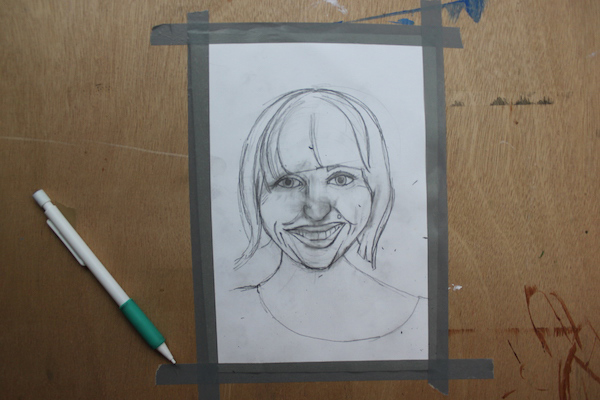
Step 2: Prepare your workspace
I prepared a piece of paper using acrylic matte medium and then sketched my portrait in pencil. Make sure that your drawing is in proportion and resembles the person before you start painting. Otherwise, you might have to correct a flaw with paint, which is always harder than erasing. You’ll notice that there are a lot of eraser marks on this paper, including a lot of smearing. This is OK — the paint will cover it up.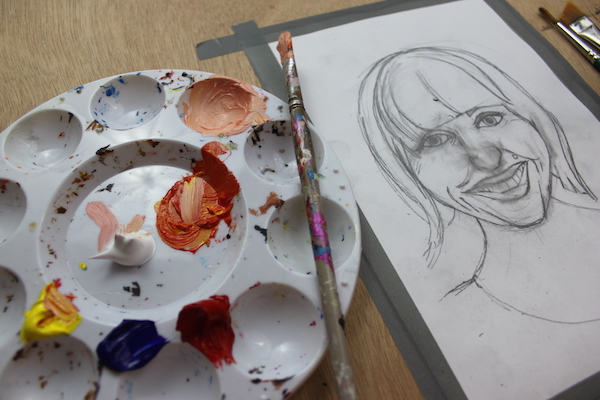 I’ve set out some of the acrylics that I’m using for my fair skin tone. White, yellow and red make up my base color. I’ll eventually add blue and a little brown for shadows.
Step 3: Paint your first layer of color
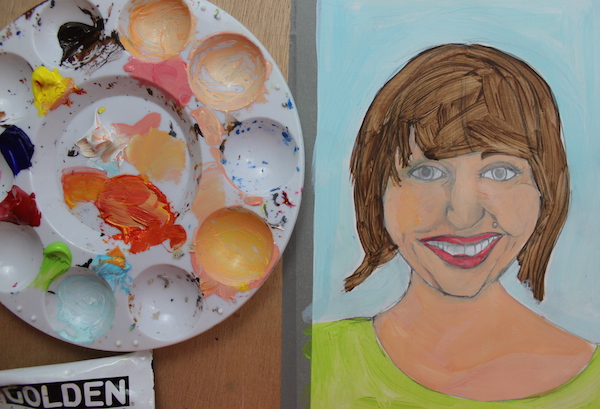 I like working in layers. Not only does it help you get a richer color base, but it’s more forgiving if you paint the wrong color or need to adjust something.
To begin, I mixed all of my paint and applied a thin layer of skin tone, hair color, background and clothing pigment to the paper. This gives me an idea of color relationships and a starting point for adding more hues.
I like working in layers. Not only does it help you get a richer color base, but it’s more forgiving if you paint the wrong color or need to adjust something.
To begin, I mixed all of my paint and applied a thin layer of skin tone, hair color, background and clothing pigment to the paper. This gives me an idea of color relationships and a starting point for adding more hues.
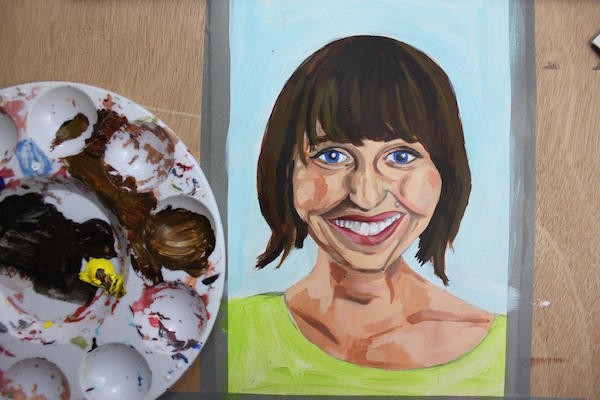
Step 4: Focus on the face
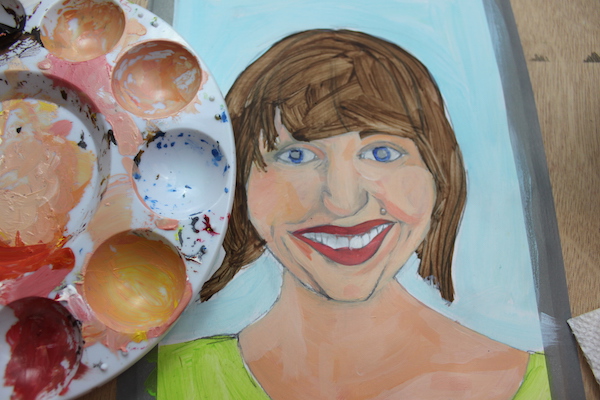 Looking at all of the colors I painted, it’s clear that there’s a lot to work on. But for now, I’m just going to focus on the facial features. I’ll deal with the hair, clothing and background afterwards.
To make the entire process easier, I worked in four phases, alternating between painting highlights and painting shadows. It went like this:
Looking at all of the colors I painted, it’s clear that there’s a lot to work on. But for now, I’m just going to focus on the facial features. I’ll deal with the hair, clothing and background afterwards.
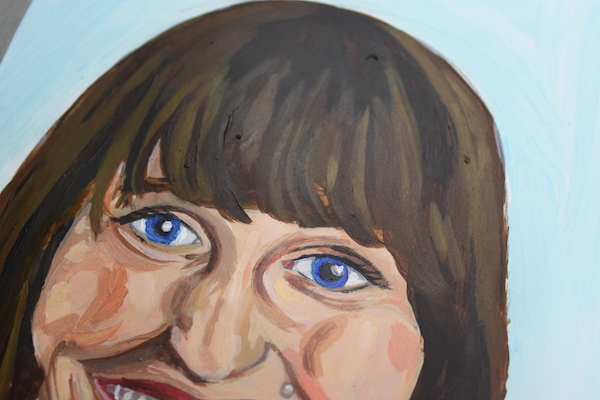
To make the entire process easier, I worked in four phases, alternating between painting highlights and painting shadows. It went like this:
- Highlights on chin, cheeks and nose.
- Shadows under cheeks, around eyes and on chin.
- Minimal highlights on the apple of the cheeks, tip of the nose, and bottom of the chin and a thin line on the eyelids.
- Minimal shadows around the bridge of the nose, bottom of cheeks and creases in eyelids
 If you follow that “recipe,” then your portrait should start to resemble its subject. But, you might need to adjust or tweak it depending on the lighting and facial features.
 Tip for adding shadows: Although your reference might appear dark, refrain from making your shadows too dark. It might make your subject look like they’ve got sunken features (and that is not flattering).
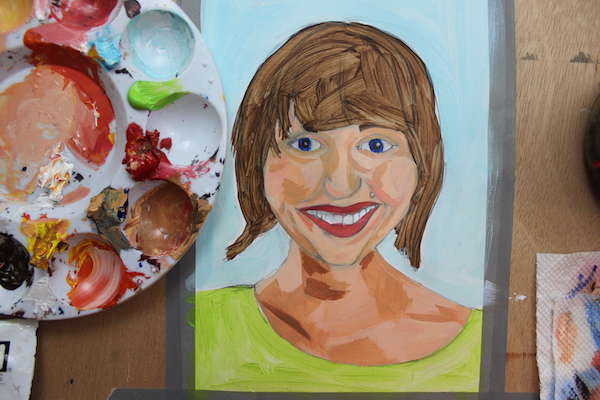
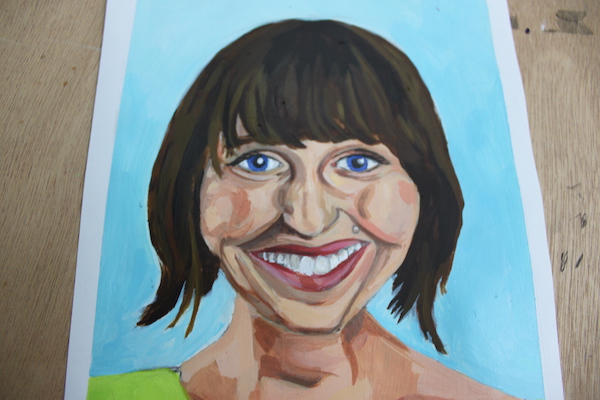
Step 5: Paint those luscious locks
 Congratulations! If you’re ready to paint the hair, then that means you’ve finished the face. And that’s a major achievement. The hard part is over.
 Addressing the hair won’t be as involved as defining the facial features, but it’s still important. Someone’s signature hairstyle will help make them appear more realistic and like themselves.
I started by painting the midtones all over the head, and then adding in the shadows. Afterward, I finished with highlights.
Addressing the hair won’t be as involved as defining the facial features, but it’s still important. Someone’s signature hairstyle will help make them appear more realistic and like themselves.
I started by painting the midtones all over the head, and then adding in the shadows. Afterward, I finished with highlights.
 If you have a liner brush, it will come in handy here. Remember, hair often moves in chunks, so it’s not necessary to define every strand you see. But, it’s good to paint a few highlighted strands to show body and texture.
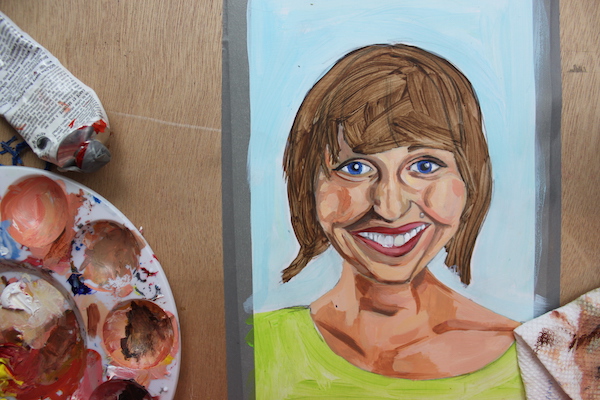
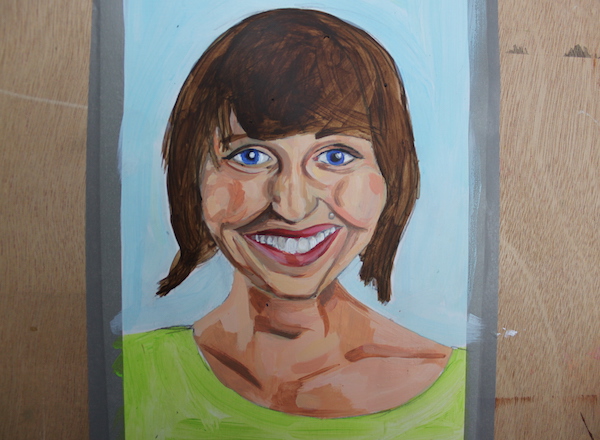
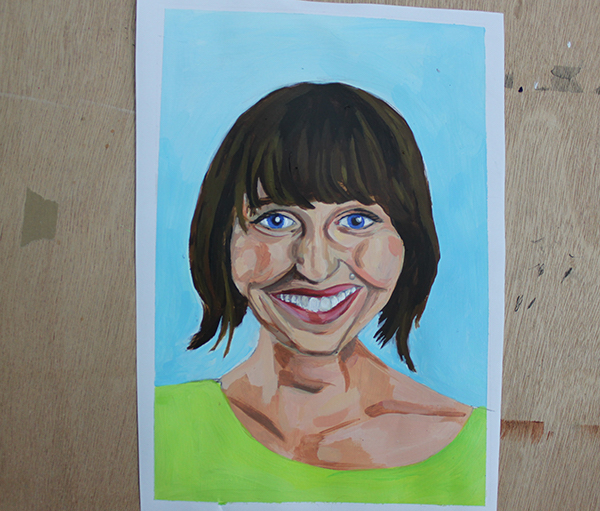
Step 6: Finish with the clothing and background
 Using the same method that I have throughout the painting, I first applied a middle tone, shadows and then highlights to clothing and background. You’ll notice my reference photo features a shirt with a pattern, but I chose to forgo that. It doesn’t effect the essence of my portrait, so it’s OK to change it. The same goes for the background.
Great... thank you.