
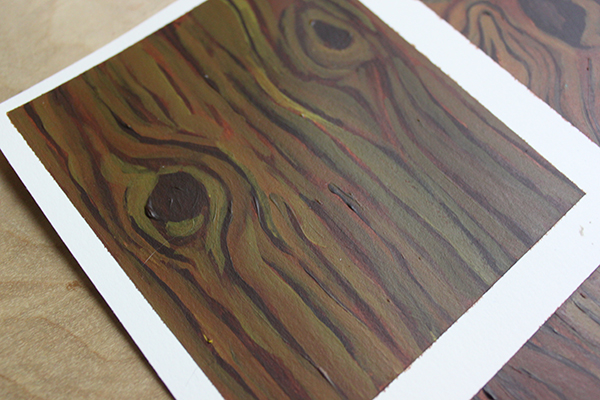
Wood texture is found everywhere. It’s a warm, comforting texture with a lot of interesting characteristics. And, it can be fun to paint if you know how.
Learn how to paint wood grain in three easy steps!
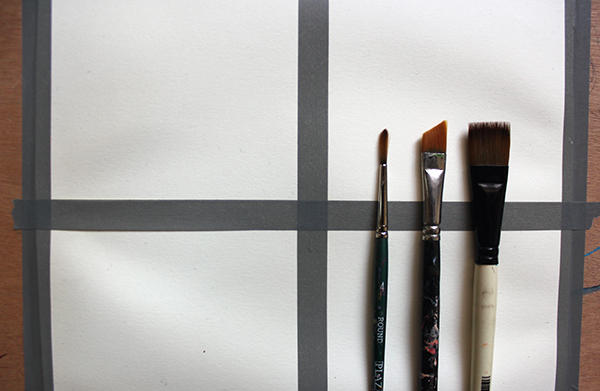
Supplies
As far as tools go, I’m keeping it simple. I have a few natural/woodsy colors (burnt umber, raw sienna, and yellow) and three paint brushes. One is a brush meant to lay down washes while the other two will help contour the fine details of the wood. For that, I have a liner and an angled brush. Feel free to use what’s comfortable for you.
If you research different wood grain textures, you’ll discover that there are a ton out there! They’re all different shades, shapes and have variation in line and texture. Some have knots in them while others have grains that are barely visible. I divided my prepared surface into four quadrants. That way, I can experiment with different wood grains.
Online Acrylic Painting Class
Learn essential techniques for painting trees in acrylic. Enroll Now »
Step 1. Paint a wash
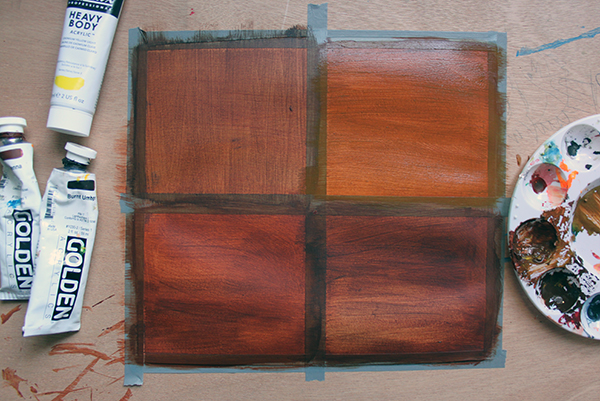
The first step is laying down a color foundation. I mixed water with my raw sienna to lighten it up, and then I brushed it over the four squares. You might want to keep everything the same color (like me), or you might want to make all four squares a different color. Remember — not all wood is brown. Red, black and white are other colors you might find, too!
Step 2. Loosely define the texture

If you look closely at wood grain, you’ll see that each grain is a teeny-tiny valley. It’s etched out of the wood and so it always looks a little darker than its non-etched counterpart. It only makes sense that we’ll draw darker lines (with paint) that give us an idea of what these textures will look like. I did this with my liner brush.
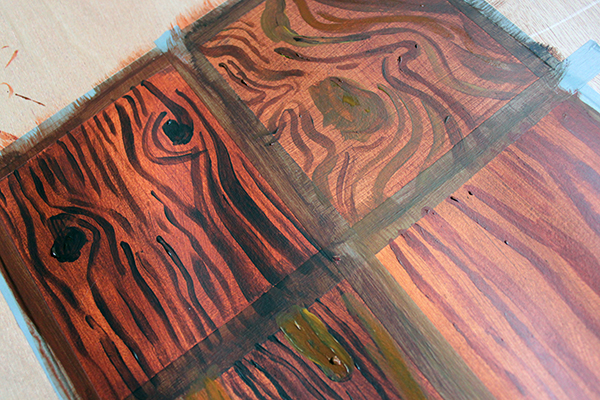
I didn’t paint the darkest lines, but did make them dark enough so I can easily see them. We’ll add more shading to them soon. You can see I created four different wood grains. Some are really close together in a relatively straight line. Others are wavy and centered around dark knots. One thing to keep in mind is that many grains actually resemble tiny feathers. Very fine lines are often offshoots of a bolder line.
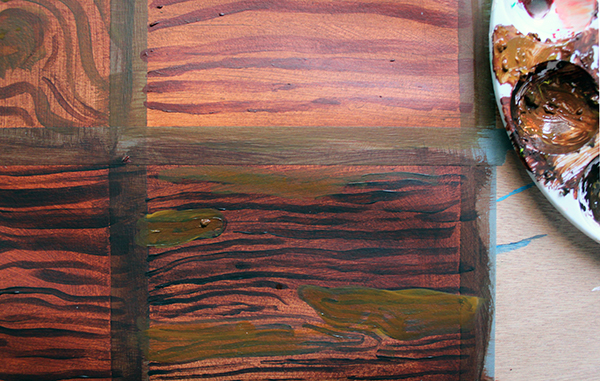
Remember, this is step best mimics sketching. So, if you want to alter the pattern, do so now before you move on to the final step.
Step 3. Fully define the wood texture
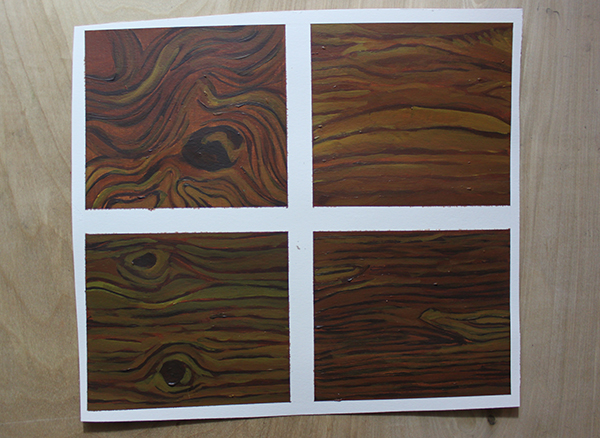
Now that you have your blueprint, it’s time to make it look realistic. All we need to do is follow what we’ve already drawn! This is where a super-fine tip comes in handy. Taking dark pigment, trace over the grains. Don’t worry about making them perfect because wood isn’t perfect. In fact, it will feel more realistic if your lines vary in thickness, length and don’t all match.
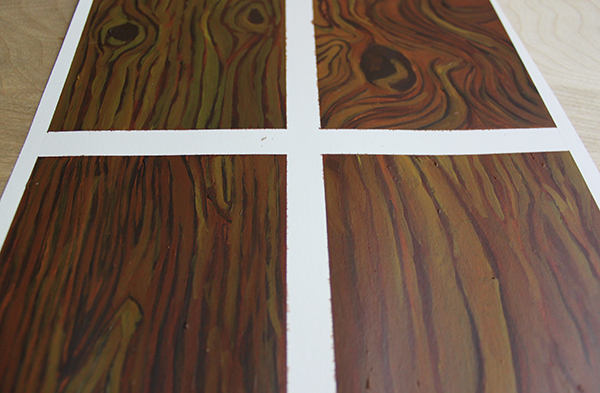
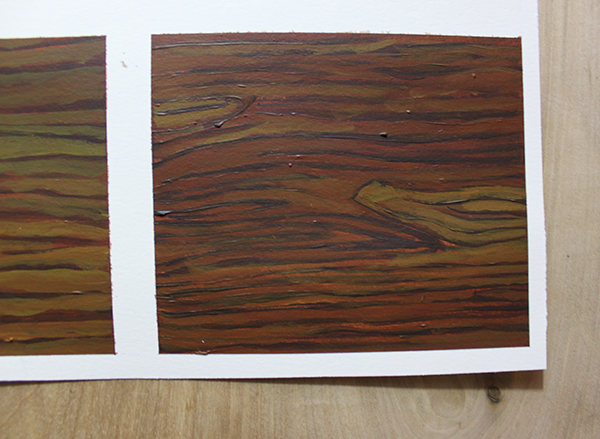
Once you’ve painted the dark, defining lines, go back and add highlights and color variation next to those lines. It will help them stand out and give a nice variation to color of the wood, too.
Online Acrylic Painting Class
Learn essential techniques for painting trees in acrylic. Enroll Now »
Share tips, start a discussion or ask one of our experts or other students a question.
No Responses to “Learn How to Paint Wood Grain in Just 3 Steps”