
Around this time of year, I can’t seem to get enough green, as it covers the trees and ground, causing us to forget the color gray ever existed. Greenery can have the same transformative effect in cake decorating. Cakes become lovely green gardens when adorned with beautiful fondant flora and icing fauna. Let’s explore how to pipe leaves so you too can achieve the artful and natural look of fresh budding foliage on your cakes.
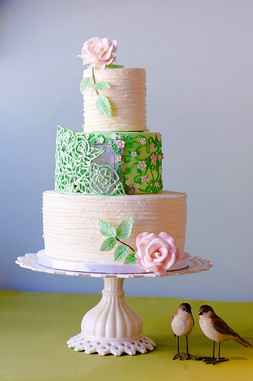
Secret Garden Cake via Wendy Woo Cakes
Here’s how to create beautifully piped leaves
Icing consistency
Let’s start with icing consistency. If you have spent time piping royal icing, you know that consistency is everything. For leaves, you want your icing thick enough to hold its own shape but thin enough to pipe. The same consistency rule applies whether you pipe with royal icing, fondant or buttercream, but I usually prefer the look and consistency of royal icing.
To achieve this, stir up your colors. Then, let the icing sit for just a few seconds. You should see it start to “melt” back into itself just a little bit while still holding most of its shape.
Different types of piping tips
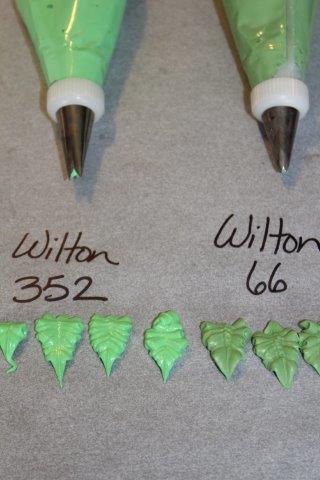
There are two main leaf tips made by most cake manufacturers. One tip looks like a slit across the top of the tip with two little teeth touching at the very top (Wilton 66); the second looks like the tip has been cut into a V shape (Wilton 352).
I like the Wilton 66 best because I think it gives better detail. However, the tip you choose is a matter of personal reference. Note that there are varying sizes of the same tip, so depending on the size of your flowers, you may need to adjust the size of your leaf piping tip as well.
View our Cake Tip Infographic to learn more about the various decorating tips.
Wilton #66
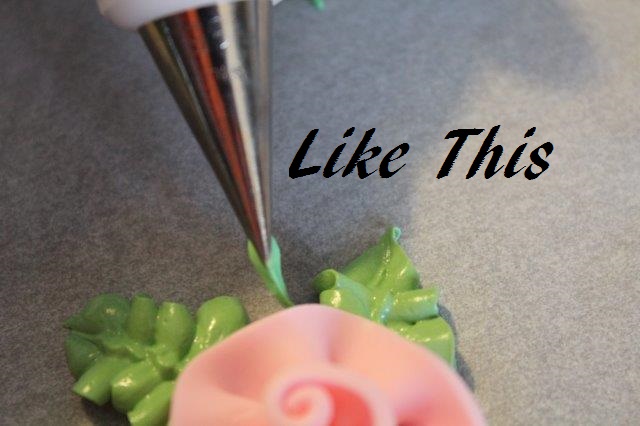
To use this tip, start piping at the base of the flower or in the center, wherever you plan to place the flower. Then, gently shake or wiggle the tip forward and backward in tiny movements to build up ruffles.
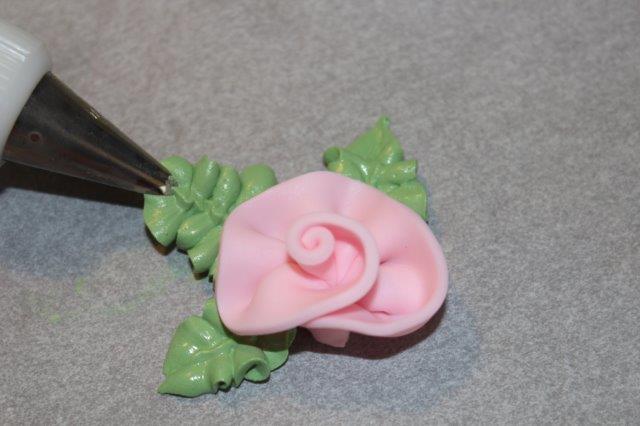
Once the leaf is the length you want, stop piping and gently pull the tip away from the leaf, making a lovely V-shaped tip.
Leaf Tip Wilton #352
Although this tip looks very different from the previous tip, the technique is the same.
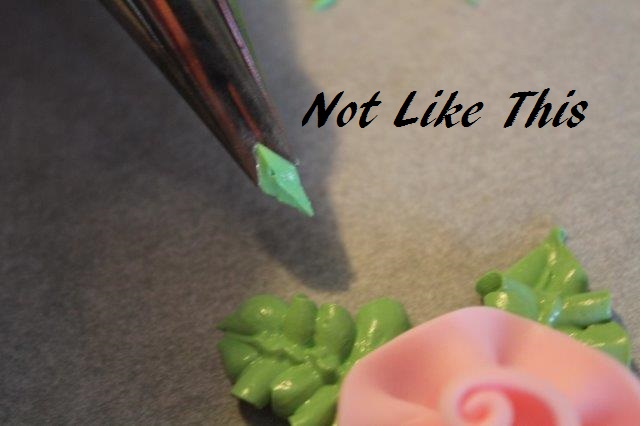
Make sure you are holding the tip correctly. When piping you want the pointed ends of the tip to be on the top and bottom, so you see a pointed tip and not the V while piping.
Vines Wilton Tip # 2
Once you get started piping your leaves, and you’ll probably find yourself in the piping groove. This is the perfect time to add some whimsical vines. For my flower, I used a Wilton #2 tip, but the size of the tip depends on the size of your flowers as well as your desired effect.
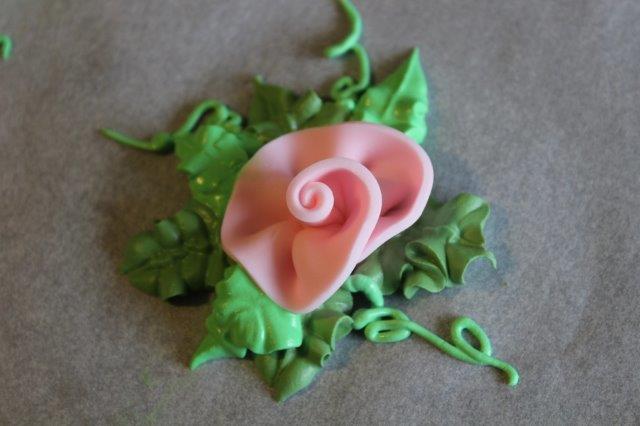
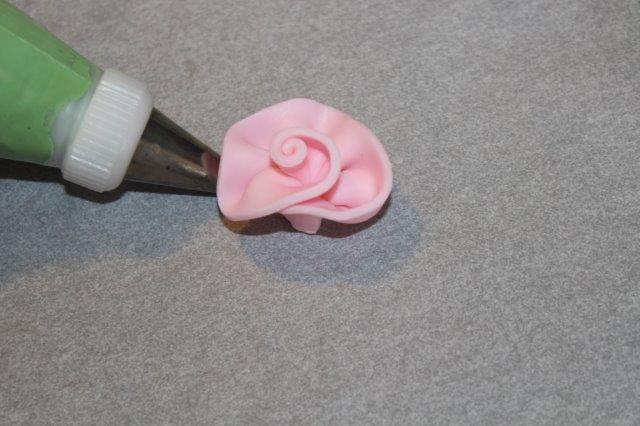
Simply, start at the base of the flower between the leaves and swirl and twirl until your heart’s content.
Piped leaves are a beautiful addition to flowers on cakes, cupcakes and cookies. Craftsy offers so many classes to help you improve your piping skills. To learn more about piping flowers and leaves, check out Beth Somer’s Craftsy class The Wilton Method: Piped Flowers or advance your royal icing skills in Modern Piping with Joshua John Russell.
Share tips, start a discussion or ask one of our experts or other students a question.
No Responses to “Secret Garden of Cakes: How to Pipe Leaves”