
1. Use stencils to create a uniform look.
Stencils are a great choice when you want to quilt a specific motif that repeats over and over, such as the Scottie dogs on this baby quilt, above. They are easily marked with a water soluble pen, a chalk marker, erasable pen or pencil made specifically for quilting. Choose a stencil that is the same width as the border or sashing of your quilt. If the design doesn’t easily fit the length of your sashing or border, you can slide it along as you trace the motif to either lengthen or shorten the design. To quilt the corners, you will need to angle or reverse the motif to make it fit. Look for stencils like the one above, that include a corner motif.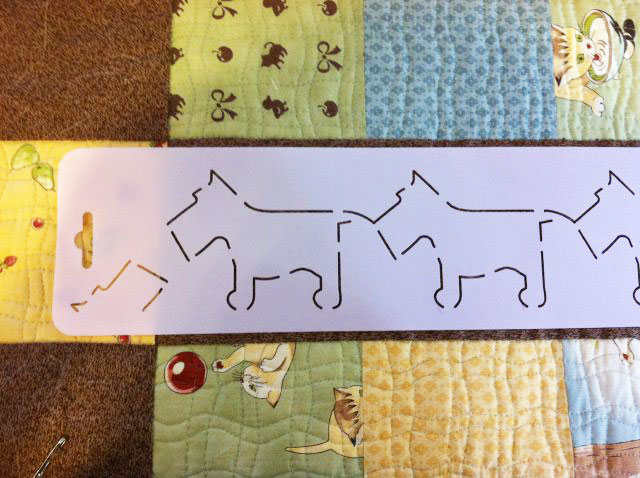
Choose a stencil that will allow you to turn the corner.
2. Use tear-away paper for custom or transfer designs.
Thin paper is a great notion to keep on hand. You can see through it to trace your quilting design from the design source right onto the paper. Pin the paper to your quilt and stitch on top of the lines. Then tear the paper away revealing the quilted design.3. Treat the border as part of the whole design.
My favorite way to quilt borders is to treat them as part of the overall design of the quilt and quilt an allover texture without regard to the piecing lines. In the mini-quilt shown below, irregular straight lines were quilted over the entire surface of the quilt, starting with the borders. Other allover designs that work well on borders include stippling and other continuous line designs that can be scattered across the quilt. When quilting an allover design, it’s important to choose a thread that blends with most of the fabrics in the quilt so that your eye notices the overall texture, not the individual stitches.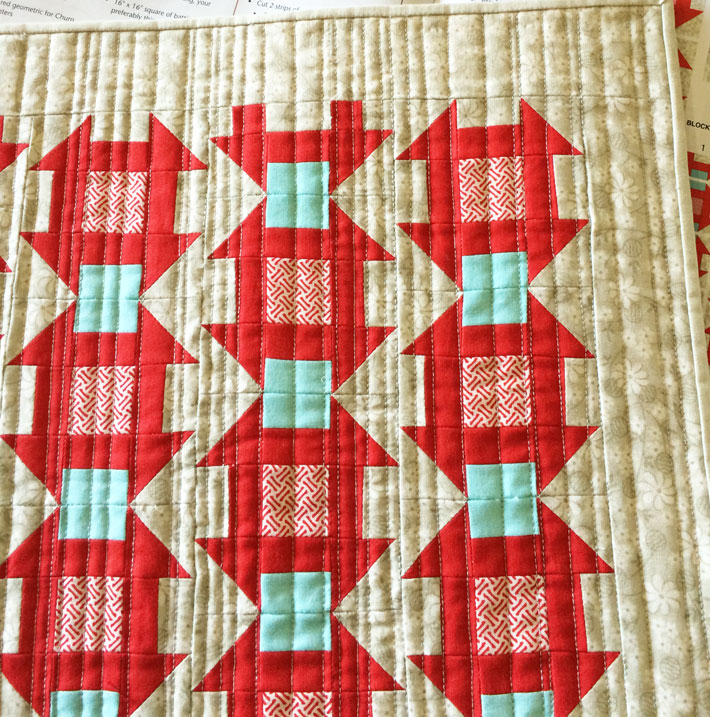
Craftsy Member Christa Quilts
4. Go for a more organic look without marking.
Free-motion fillers can be quilted on a large or small scale and can easily be adapted to quilt the borders of your quilt. Choose a fun motif like the organic flowers quilted in the borders above. Or quilt a more whimsical linear texture such as the loops and double loops in the sashing below. To quilt either of these designs on a border, start in one of the corner seams. Pull your bobbin thread up to top of the quilt and secure by stitching a series of tiny stitches in place. Quilt the design clockwise or counter clockwise around the quilt, ending up where you began. End your line of stitching in the same spot and secure by taking a series of very tiny stitches in a row and clipping your threads.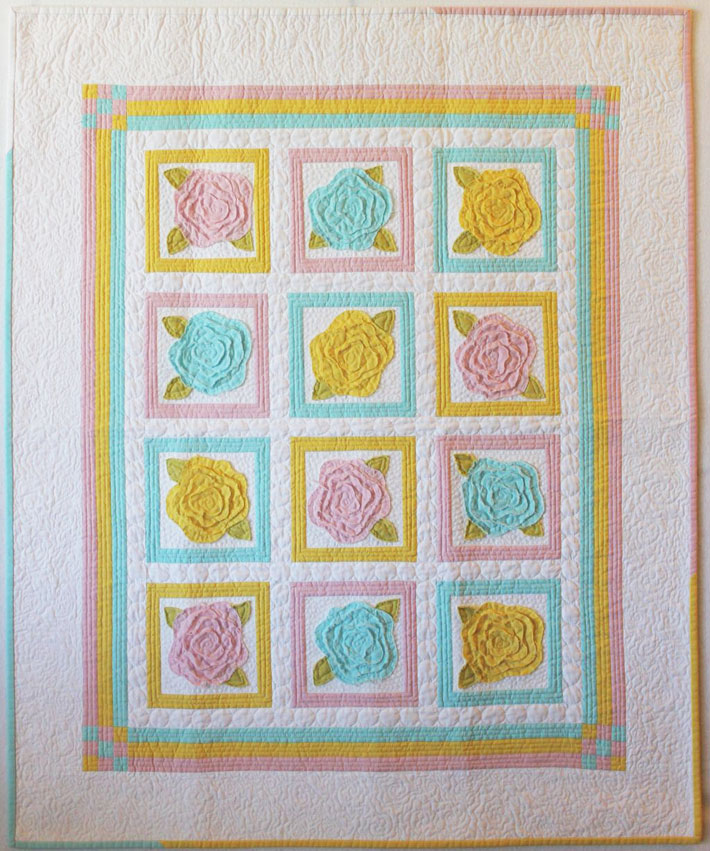
The borders of this quilt were quilted with an unmarked organic floral motif.
When quilting non-uniform free-form designs, quilt with a smooth, fluid movement so that any inconsistencies are less apparent. By making your shapes slightly different sizes, your eye notices the texture of the quilting, rather than the irregularity of the shapes. When you get to the corners simply rotate the quilt and continue quilting the same organic, flowing motifs.
Don’t be afraid of tackling your own quilts, especially the borders. Once you’ve tried these methods a few times, you will be more comfortable quilting that next quilt!
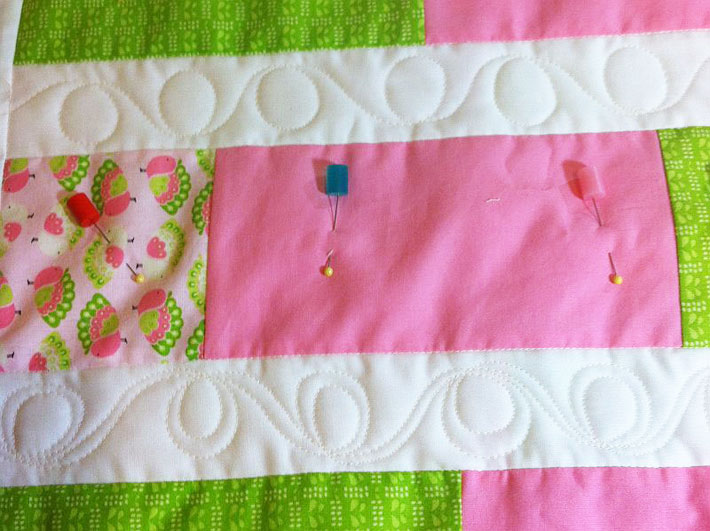
Quilting free-motion loops on Baby Bricks via ChristaQuilts
Share tips, start a discussion or ask one of our experts or other students a question.
No Responses to “4 Simple Ways to Quilt Borders”