
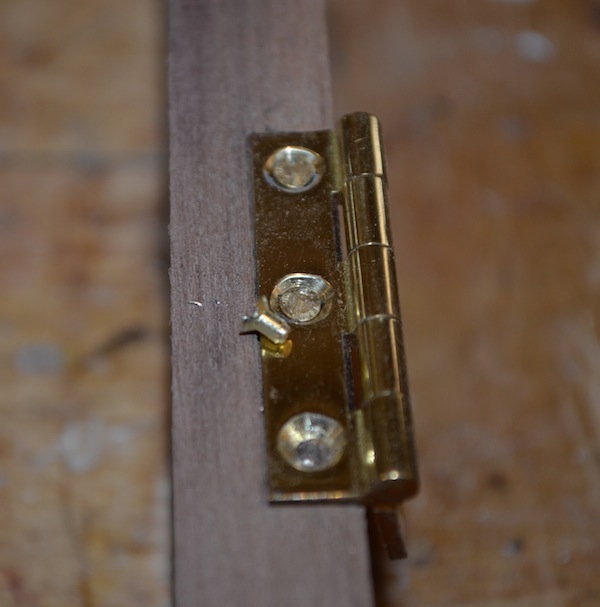
It happens to the best of us. Your box is beautiful, hardware is all installed, you just need to give that last screw one more turn. Snap! Now what?
Follow along to learn how to remove a damaged screw!
Photos via wooden-box-maker.com
In a recent post I showed you how to mortise a box hinge. This post will show you what to do if you have snapped off a screw while woodworking.
Avoid the problem
Obviously, your best bet is to avoid the problem altogether. You can do that by pre-drilling your screw hole with a drill bit that is just under the size of your screw.
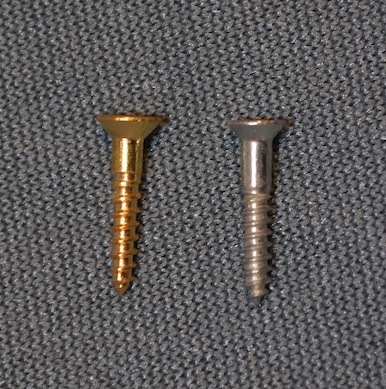
Another way to prevent snapping brass screws is to use a steel screw of the same size before using the brass screw. Brass is softer than steel. By using a steel screw first the stronger screw cuts the threads. Then you back out the steel screw and the threads are in place for the softer brass.
But for those times when your screw snaps despite your best effort the only real option is to drill it out. There are a couple of ways to do it.
Drill out the screw
One is to simply use a small drill bit and make a series of holes around the broken screw, then using a thin tool wiggle the screw back and forth until it comes out. (Dental picks work well for this – ask your dentist, maybe s/he has one to spare.) This method works, but then you are left with a mess to repair.
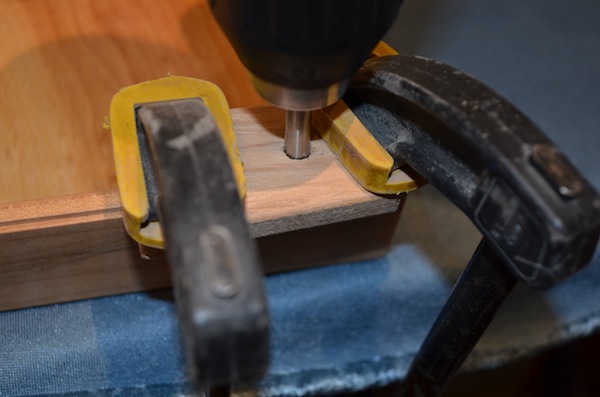
Tools to remove a screw
I solved that problem with this handy little tool:

It is a hollow tube with teeth on either end. It works like a plug cutter, only it doesn’t have any taper, so instead of cutting off the plug it just cuts around the screw.
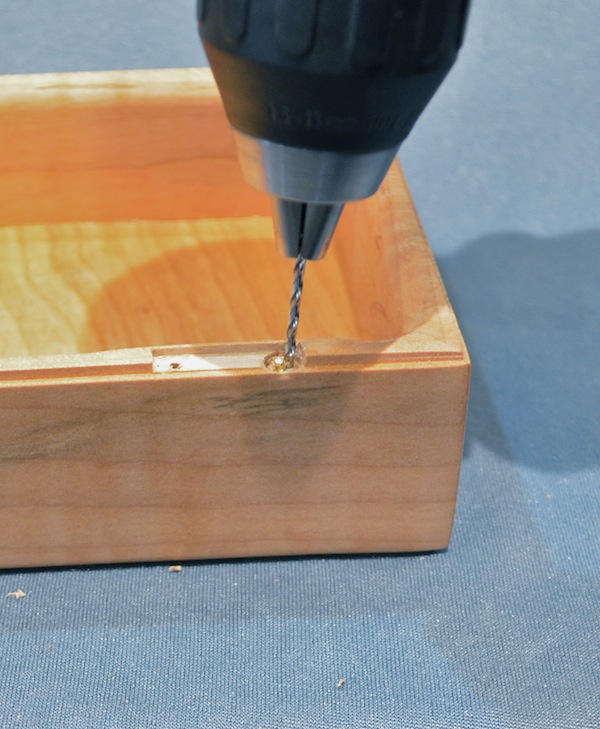
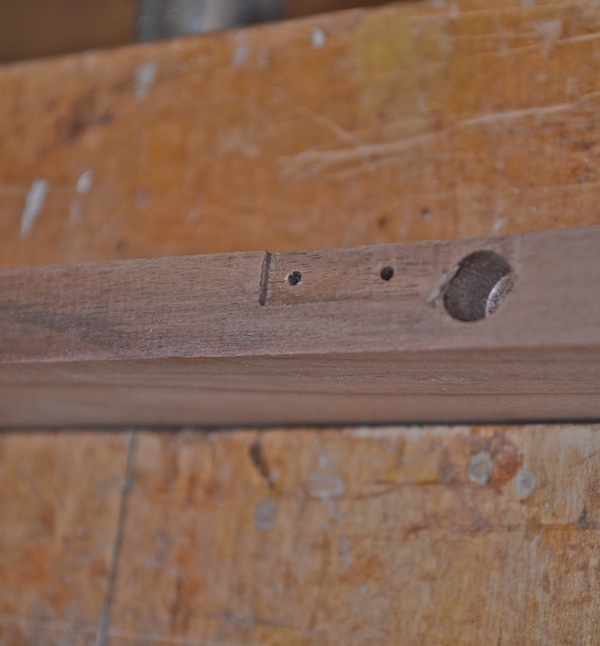
The block with the hole in it is clamped over the broken screw to guide the tool when cutting. If you try to cut without it the tool will skitter all over the workpiece.
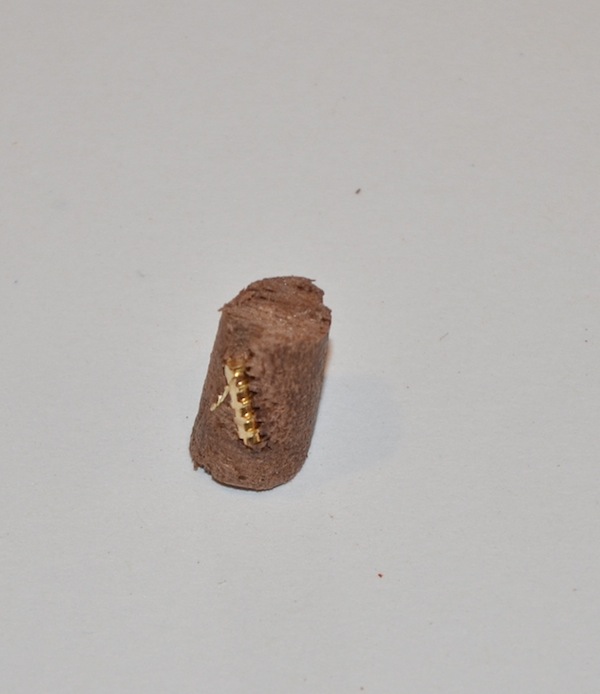
I drill a hole, being careful of the edge of the box. Then I take my handy dental pick and wiggle the “plug” back and forth until it pops out with the screw in the middle. I’m left with a nice clean hole, ready to take a 1/4” dowel to fill it.
Using a plug cutter
The only problem is that this tool (I don’t know what it is called, I refer to it as my tube tool) can be hard to find and it breaks easily. So I am sometimes left with my fall-back option. I use an actual plug cutter to make a plug with the screw in the center.
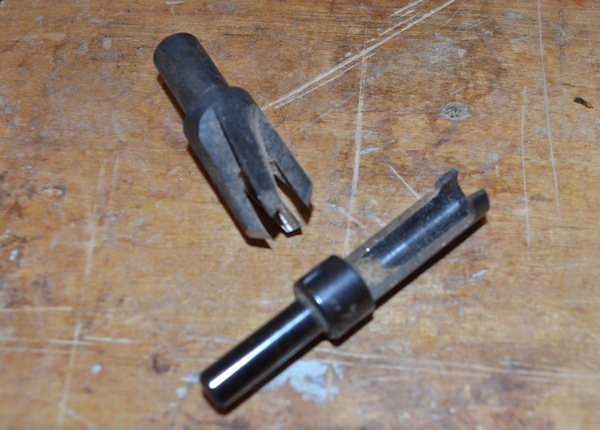
There are two common kinds of plug cutters, one with a tapered end and one with a straight end. You need to use the type on the right, the straight ended one. It will make a nice clean hole that is easily plugged. The one on the left leaves a larger and messier hole.
Using a plug cutter to remove a broken screw follows the same technique as the tube tool.
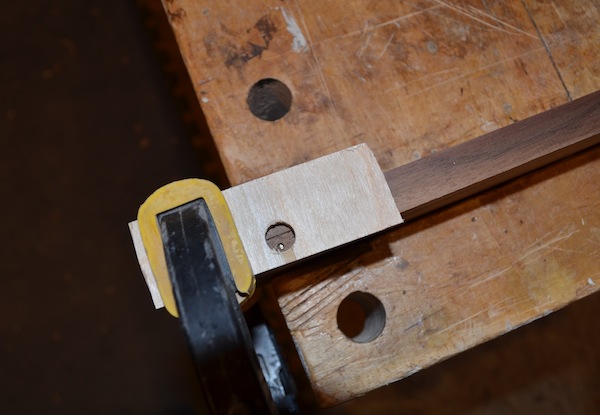
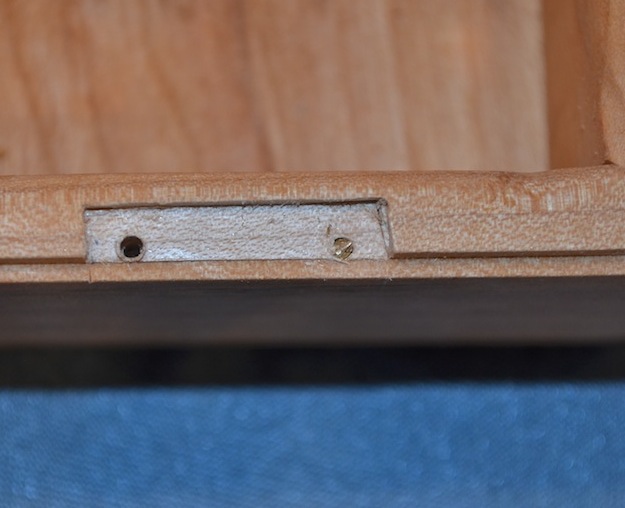
Start by making a clamping block with an appropriate sized hole. Clamp that in place over your screw. Note that in the photo above the screw isn’t centered in the hole. That is because I didn’t want to get too close to the edge of the workpiece. Make sure your block is well clamped, then drill out your plug and the screw will come with it.
Now all that is left is to fill your hole.
When filling plug holes make your plug from the same wood as your workpiece whenever possible. You should also watch the alignment.
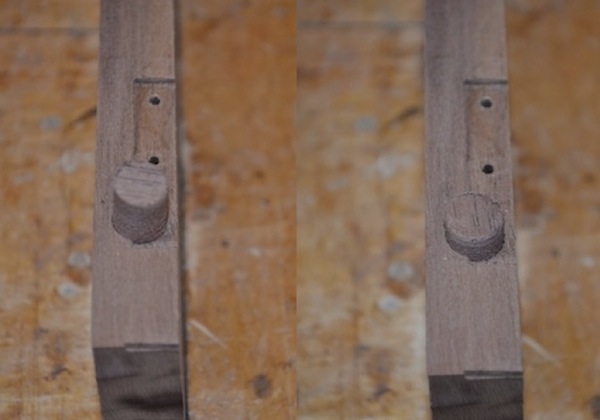
Notice that in the left of the photo above the grain of the plug is across the grain of the work piece, while on the right side both have grain in the same direction. The second plug will blend in much better than the first.
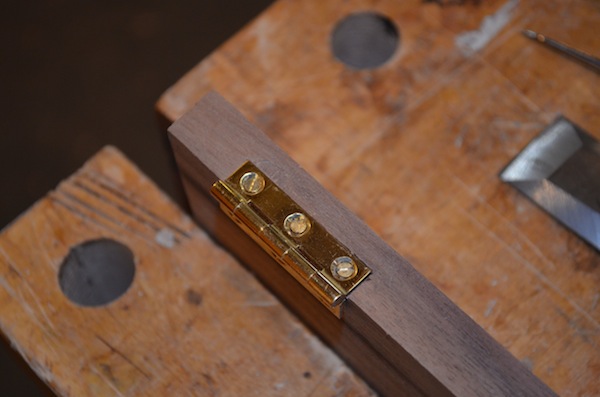
Finished repair
Glue your plug into place, re-cut the mortise for the hinge and your repair should disappear.
Share tips, start a discussion or ask one of our experts or other students a question.
No Responses to “How to Remove a Damaged Screw”