
Whether or not we do everything right, a quilt can get damaged at some point.
I recently had a quilt sent to me that had been ripped off a wall as the family home burned down. Not only did it have smoke and water damage, but ripped seams due to the force of getting it down. It was the couple’s wedding quilt. Thankfully though, we were able to restore it to near-perfect condition by following the quilting tips listed below.
Read on if you have a quilt that is loved so much that it is suffering from wear and tear, or if it was in a situation that caused damage. You never know when you can use these tips for how to repair a quilt.
Replace the fabric
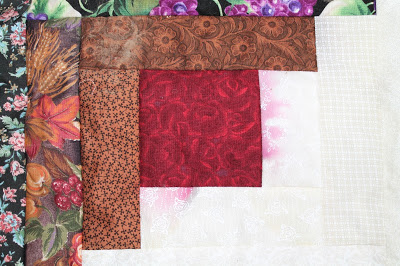
With time, quilts can get worn, fabric can start to fray or tiny hands can accidentally cause damage. If the area is small and manageable, this tip will work best for you.
Determine the size of the area you are looking at replacing. Find matching fabric or fabric similar in color and texture. Your goal is to make sure the fabric blends in with your quilt. What you don’t want is the eye to go right to the place you are repairing!
Next, you need to make a template of the shape that is being replaced.
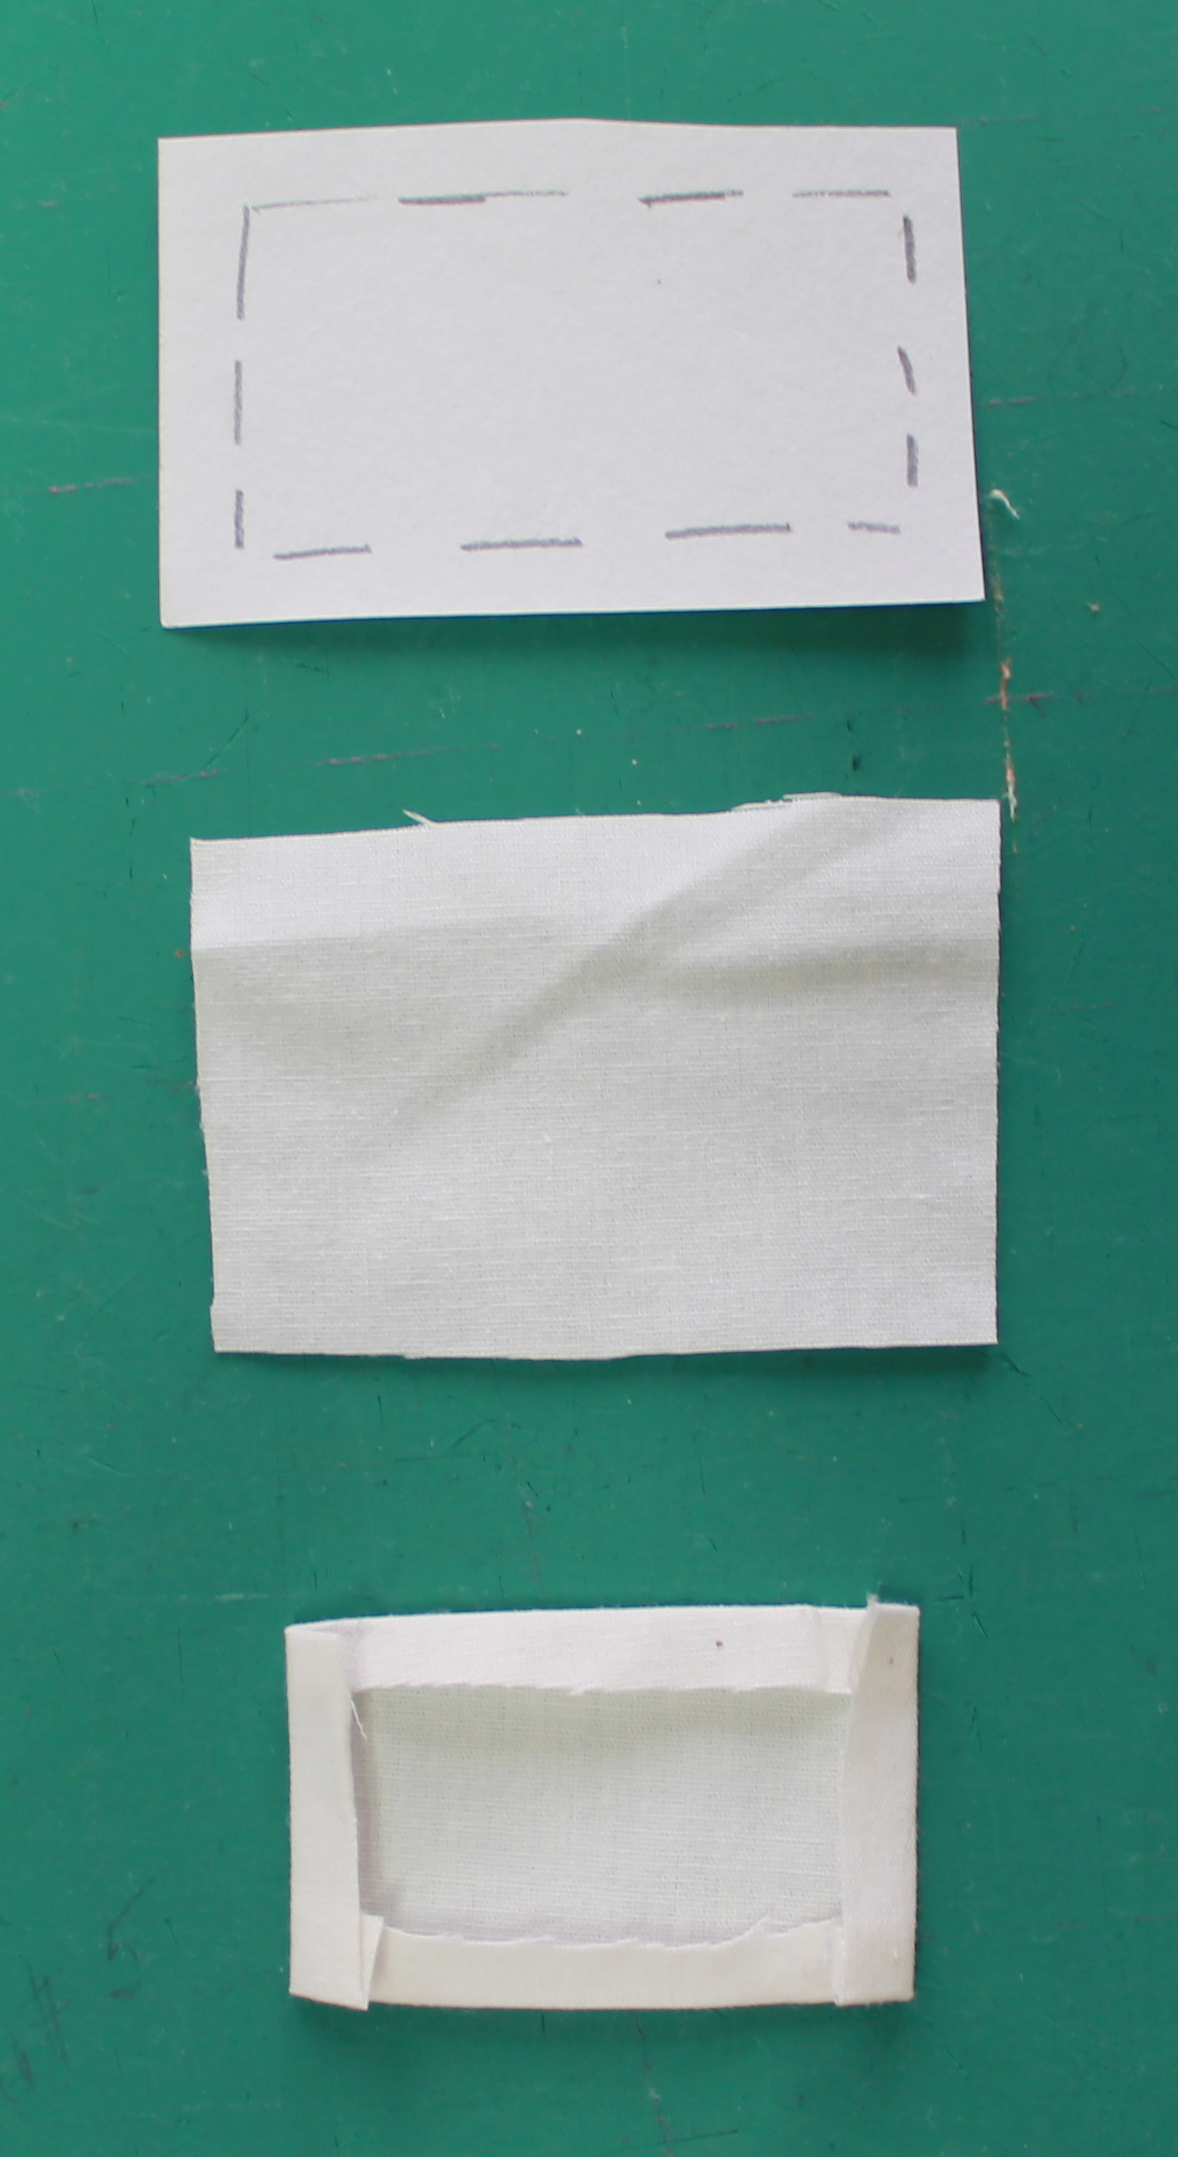
The easiest way is to fold a piece of paper up until you get the shape of the piece being replaced. Add .1/4″ around the edge and cut it out. Trace the outline onto the back of the new fabric that is going to cover the damaged shape. Press the .1/4″ edges in, with the wrong sides together, leaving you with the exact size of the fabric being hidden. Hand or machine stitch the new fabric in place.
Keep in mind that you want to continue with similar stitching of the quilt. Therefore, if the quilt is all hand-quilted, then doing some neat hand appliqué stitches to hold the shape in place would be your best bet.
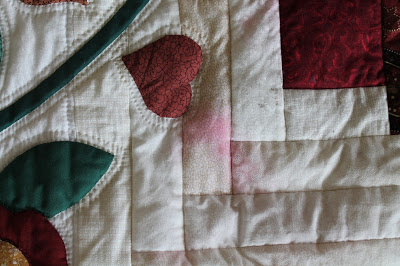
Use a bleach pen
Sometimes fabric runs after washing or if it accidentally got wet. If it is not a big area, considering using a bleach pen to remove the stained piece. This works best on light fabrics that have bleeding from darker fabrics. Keep in mind that the bleach is going to lighten the fabric wherever it touches. Always test with a sample piece of fabric first, and water down the bleach when you can.
Most bleach pens come with a fine point and a scrub end, like a small paint brush. Use sparingly and wear gloves when working with the pen. Ensure that you are in a well-ventilated area and follow the manufacturer’s instructions. The disadvantage of bleach is it can be harder on the fibers depending on how much bleach is used on the fabric.
Images via Jackie’s Art Quilts
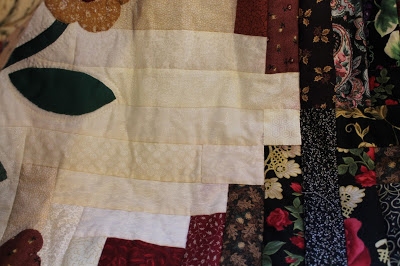
Appliqué a shape
If you can add some appliqué over the piece of the quilt that has damage, you are not only solving the problem, but adding more visual appeal to your quilt. You can do machine or hand appliqué, whichever suits you and the quilt. Even fusible appliqué will work and that is very fast and easy.
Make sure the fabric you are placing on top of the damaged piece is dark enough that it won’t show the damage underneath. If not, then double the fabric and try again. Ensure that the fabric does blend in with the rest of the quilt. Place the fabric on top where you plan to place it and stand back and look. Sometimes it may look fine close up, but when you take a few steps away and you see the whole quilt, it may not seem so visually appealing.
These tips should help you next time you find yourself in a situation where you need to save a quilt! Use your tips and jump in!
Share tips, start a discussion or ask one of our experts or other students a question.
No Responses to “Quilt CPR: 3 Tips for How to Repair A Quilt”