
I’m getting more and more interested in green woodworking: using wood freshly cut from a tree. A hatchet is an essential tool for this kind of work, so I started looking for one to buy. But instead of buying a new hatchet, I decided to buy a new old hatchet. I wanted a good quality hatchet but also one that has some history to it.
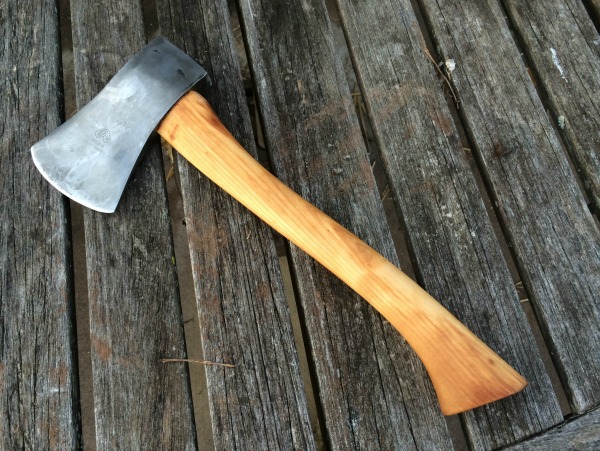
Fully restored Wetterlings hatchet.
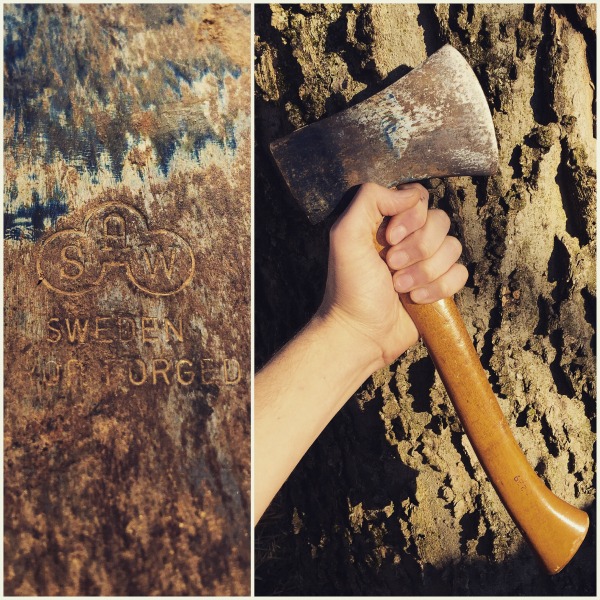
In thinking about which brand of hatchet to buy, I narrowed the field down to either Granfors Bruk or Wetterlings. Both are companies with great reputations for quality over many years. Granfors Bruk has been around since 1902. Wetterlings has been around since 1880. Both companies are in Sweden and forge their blades by hand.
In my search for hatchets, I came across Tennessee Axe and Tool on Instagram and found out the proprietor, D.A. D’Elia, happens to live in my hometown of Nashville. When he posted a photo of an old Wetterlings hatchet he found at a flea market, I had to have it. D.A. has worked with tools his whole life and hates to see a good one go unused, so he started a restoration for me. He took great photos along the way and was kind enough to share his process for making old tools new again.
Remaining photos via D.A. D’Elia
Anatomy of a hatchet
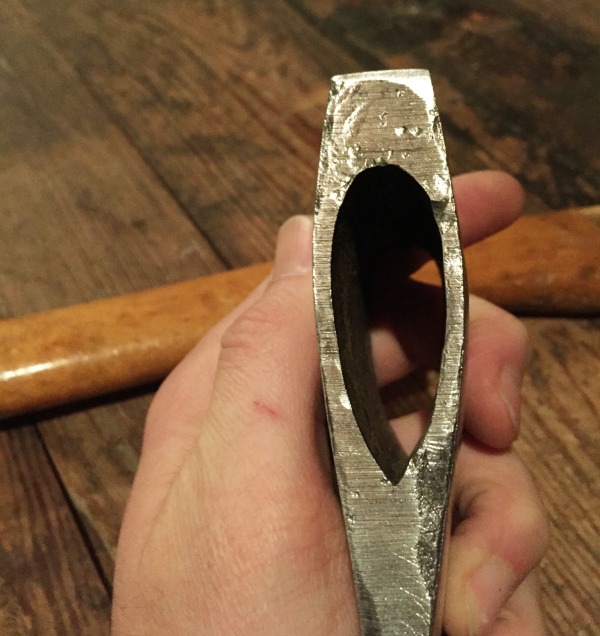
Before I go too much farther, here is a quick anatomy lesson for an axe or hatchet. The handle is called the haft. The large chunk of metal at the end is called the head, which consists of the bit (or blade) on one side and the butt or pole on the other side. The top of the blade is the toe and the bottom is the heel. The sides of the head are called the cheeks. The hole through which the haft is installed is called the eye. The installation of the head onto the haft is called hanging. The haft is attached with a wooden wedge, then secured even more, especially on hatchets, by a metal cross wedge.
How to restore an axe or hatchet:
Step 1: Disassemble the hatchet.
For a full restoration, it’s necessary to take the hatchet totally apart to take stock. If the haft is damaged or weak, it will have to be replaced so the hatchet can be used safely. The last thing you want is an axe head flying around because of a broken handle. Luckily, the haft for this Wetterlings was in great shape.

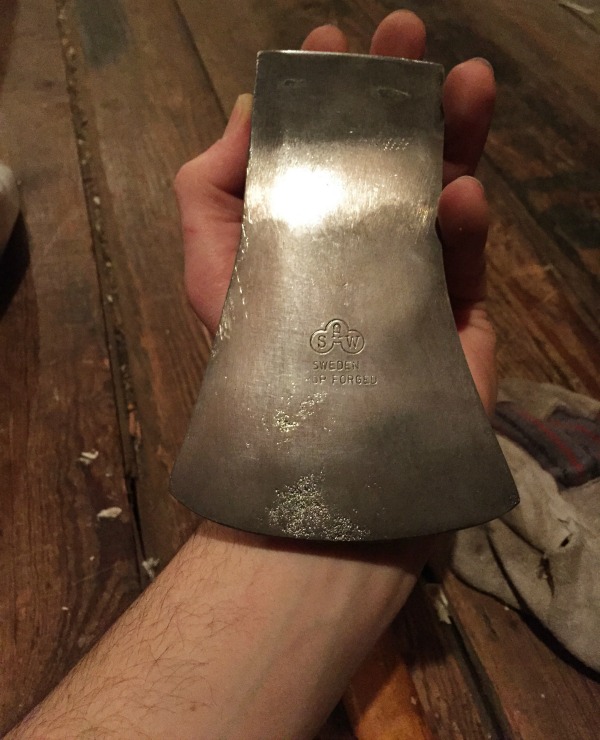
Step 2: Derust the head.
With a great brand like Wetterlings, you know the head is made of excellent quality steel. The next task is to get rid of any rust that has built up over the decades. D.A. uses different techniques depending on the amount of rust and whether there is pitting. Sometimes he just uses sandpaper to clean rust off the surface, especially when he likes the look of the metal. With mine, he soaked the head in Evaporust for a few hours, then polished it up with steel wool.
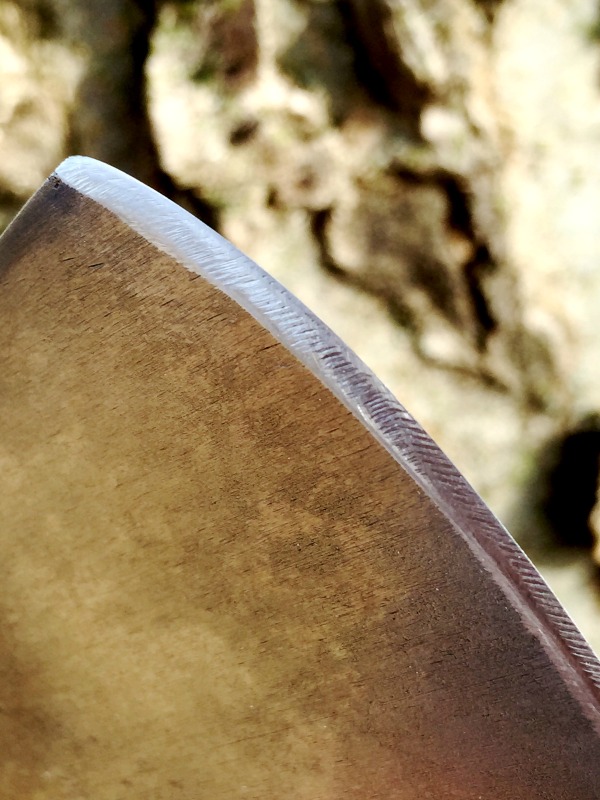
Step 3: Profile the blade.
With an old striking tool like a hatchet, chances are good that the blade has been dinged up quite a bit over the years. Blades get dinged in regular use, and they also can be damaged by sloppy storage — clanging tools together. D.A. noticed that someone had done a sketchy job with a grinder at some point. Profiling is the process of establishing new bevels that form the cutting edge of the blade. For this Wetterlings, D.A. started with a mill bastard file, then followed up with sharpening stones or sandpaper of 400-1,000 grit. The final sharpening is done with a leather strop.
Loving this tutorial? Download this easy, printable PDF, and enjoy it anytime, anywhere, forever!
Step 4: Clean up the haft.
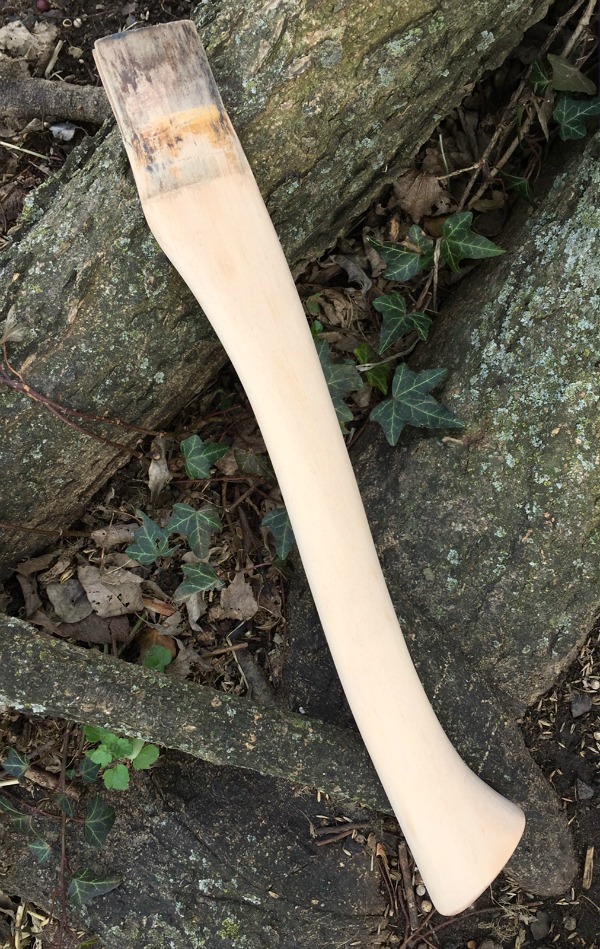
If the haft is structurally sound, you can either leave it with its patina or you can give it a new surface. D.A. sanded it to 400 grit. In the process, he discovered the wood for the haft is likely ash, which is a common wood used outside the United States because it is light and tight-grained. If the grain is curved, it will be short in some areas and therefore weak. In handles for striking tools (and baseball bats), straight grain is critical to prevent breaking.
Step 5: Hang the head.
With the head’s metal in good shape and the haft all clean and sanded, it’s time to attach the head. At the top of the haft, there is a cut that goes in line with the head. A wooden wedge is pounded into this grove. Then a metal cross wedge is pounded in at an angle to the wooden wedge. These serve to lock the haft in place, registering fully inside the eye. A slight bit of the haft protrudes proudly out of the eye. After the head is hung (or hanged?), it is soaked upside down in boiled linseed oil, which further expands the wood inside the eye to fit tightly. After the haft is oiled and rubbed out, the hatchet is ready for decades of service.
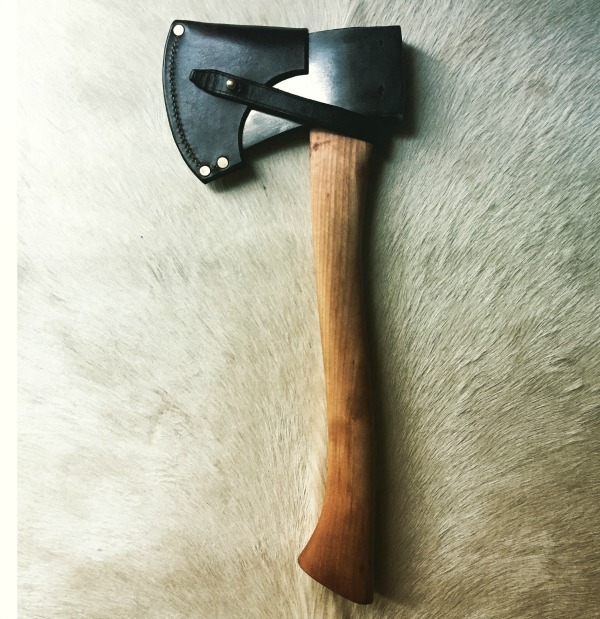
As you can see, restoring tools is an art. In the hands of someone as talented as D.A., a forgotten old chunk of rust becomes a useful, beautiful tool again. For good measure, D.A. had a custom leather sheath made for the hatchet by Phil Stone from Stone Leather MFG. The whole thing looks great. I can’t wait to give it a go.
Share tips, start a discussion or ask one of our experts or other students a question.
No Responses to “Hatchet Job: How to Restore an Axe or Hatchet”