
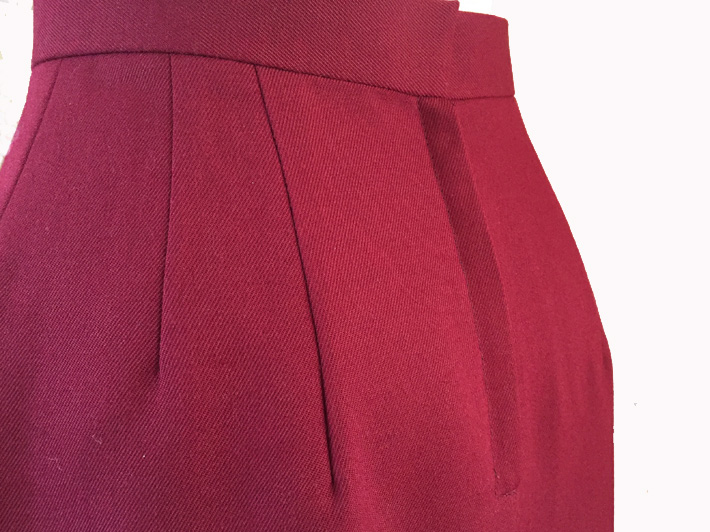
How to you make a flat fabric adapt to a three-dimensional form? The answer is a dart. Darts are used in so many garments for a better fit, as a decorative element, or as combination of the two. A dart should be smooth and come to an almost imperceptible point — with no bubble or pucker. Learning the correct way to sew a dart can set you up for sewing success!
How to sew a basic dart
Step 1: Mark the dart
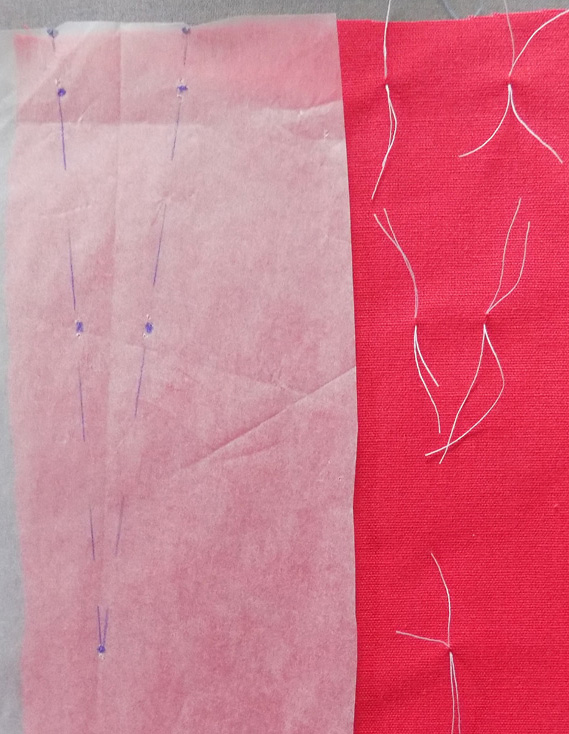
Accurate marking is crucial for accurate stitching. The end point of the dart is like a target and you are sewing to that exact point.
You can use tailor’s tacks, transfer paper, or thread tracing (read more about these techniques here).
Step 2: Match the dart legs
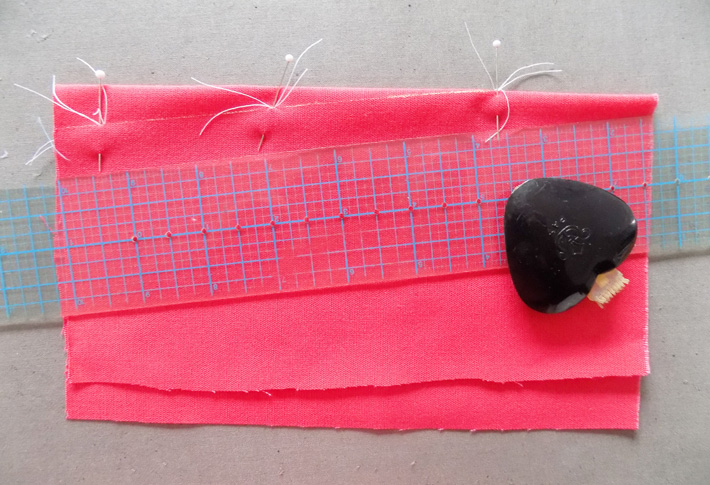
The fastest option is to run a thin chalk line along the dart and stitch along that line. This works very well on silk or sheer fabrics as well as wool, cotton or even knits. Be sure to use a chalk that brushes away easily. Put pins along the dart as needed to keep it together once you move to the sewing machine.
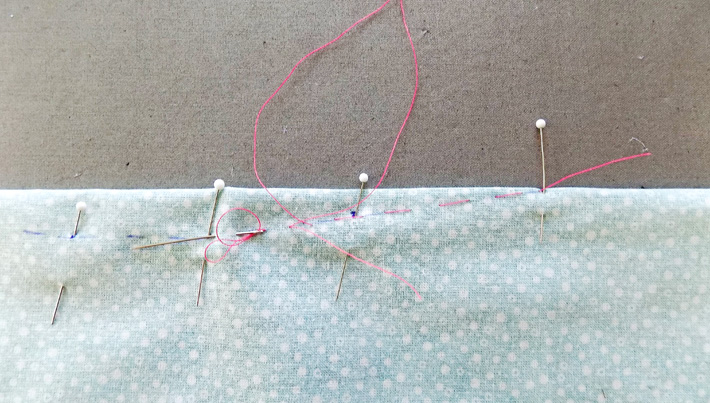
Another way to match darts accurately is to baste along the stitching line prior to machine sewing. Using a long, unknotted piece of thread, baste with long stitches along the stitching line. This holds the dart in place and also gives you a very good guide for sewing the dart on the machine.
Finally, here’s another easy trick for matching dart legs.
Step 3: Stitch the dart
Stitch the dart using a stitch length of about 2 to 2.5 (depending on what settings your machine offers). This smaller stitch gives you better control as you sew.
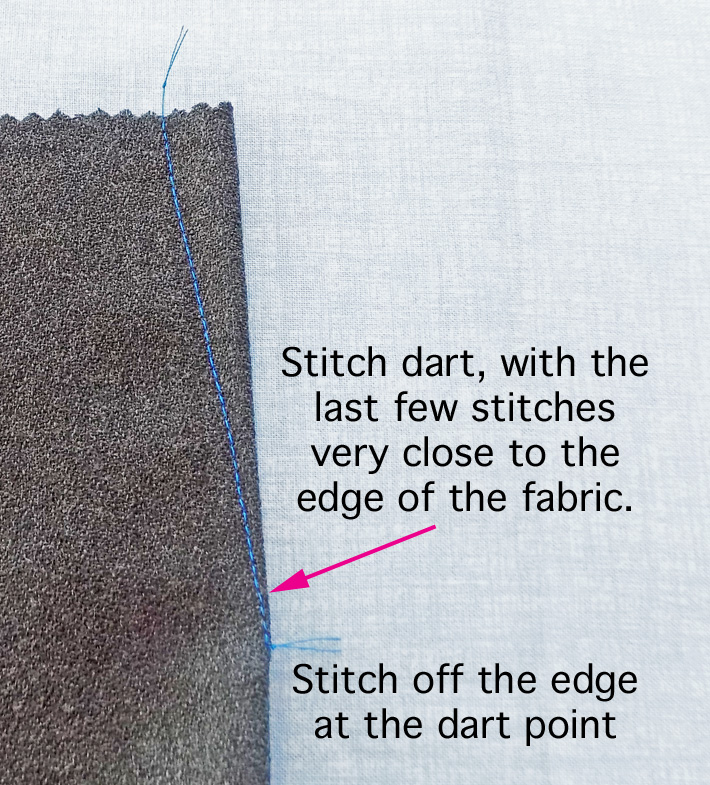
When you get near the end point (about 3/8″ or 1 cm) from the end, make the stitch length even shorter — about 1.8. Make the last few stitches almost parallel to the edge of the fabric, just barely catching it in the fold.
It takes some practice; I always do a few test darts on fabric scraps before actually sewing them on my pattern pieces, as it helps me get a handle on how the fabric behaves and what stitch length to use.
When you get to the dart point, stitch off the fabric, and leave some thread tails. Some people don’t but I always tie a knot at the end of a dart so it won’t come apart.
Press the dart on the wrong side towards the center. It helps to press darts over a tailor’s ham to maintain the shaping.
How to sew double-pointed darts
Another type of dart is the double-pointed or double-ended dart, sometimes called a fisheye dart. This is basically two standard darts that meet in the center. You’ve likely seen them on sheath dresses or shirts, where they pull the garment in and run vertically.
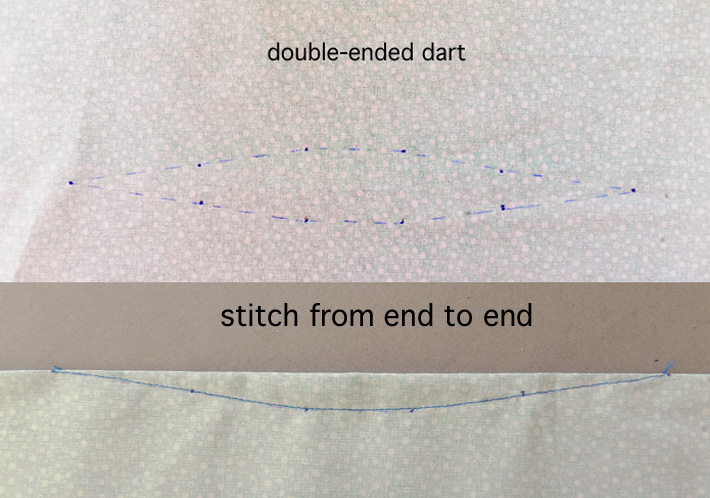
You can sew the double-pointed dart from one end to the other; however, if you’re concerned about the starting point, it also works to sew from the middle out to each end. Use whichever method you find more successful for you.
If you’re starting from a pointed end…

Place a pin at the end of the dart point. Pull the basting thread tails out of the way, lower the needle down and then move the fabric against the needle. The pin helps you to find the exact spot where you will begin stitching. You can lower the presser foot, remove the pin and start sewing.
It helps to do the first few stitches by moving the wheel and advancing manually. Once you get past the first 3/8″ or so, you can sew normally.
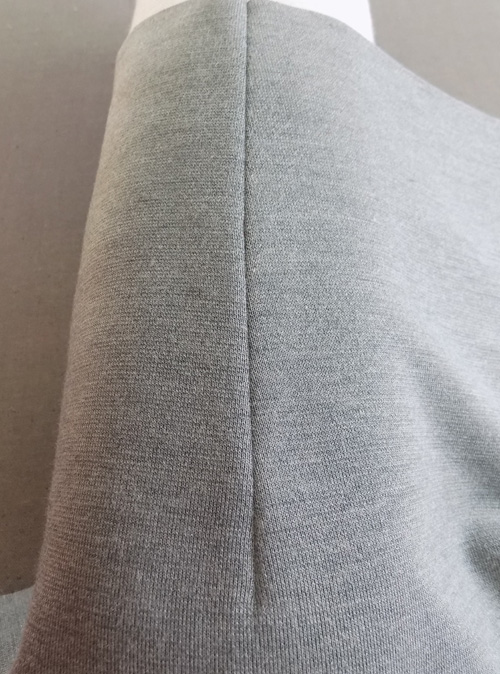
Here’s the completed double-pointed dart, where you can see the sort of shaping it provides. Vertical darts like these are generally pressed toward the center of a garment, and if needed you can snip near the center to make pressing easier.
So now you should have dart point perfection! Darts are one of those components of garment sewing where practice really pays off, so give your darts a run-through before you move to your garment.
Share tips, start a discussion or ask one of our experts or other students a question.
No Responses to “Beginner Basics: How to Sew Darts in 3 Steps”