

It makes sense if you dread sewing the neck binding on a cotton knit T-shirt. After all, make a sewing mistake and it’s literally in your face (or at least right below it). But if you follow a few basic steps and tips, you’ll nail the neckline and be able to finish your shirt with no snafus.
Pro Tip: We recommend using a stable and forgiving knit, like a 95 percent cotton, 5 percent spandex blend. This fabric, along with plenty of practice, will be easy to work with.
Round Neckline
Level: Easy
What You Need
Instructions
1. Start With the Shoulders
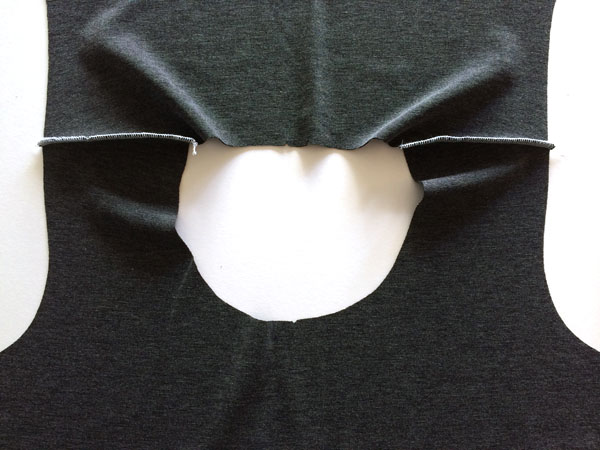
Before you sew the neck binding, sew the shoulder seams. That way you’ll be able to flatten the entire T-shirt and create a larger neckline opening, giving you easier access.
Good to Know: If the pattern directs you to sew the sleeves and side seams before the binding, it’s OK to work out of order as long as it doesn’t affect the rest of the shirt.
2. Sew the Neck Binding
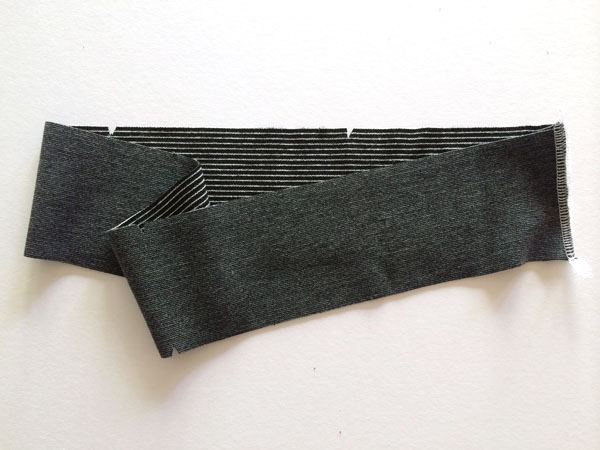
Sew a short seam by folding the binding in half, right sides together, then stitching at the pattern’s seam allowance. This creates a circle (like in the photo above).
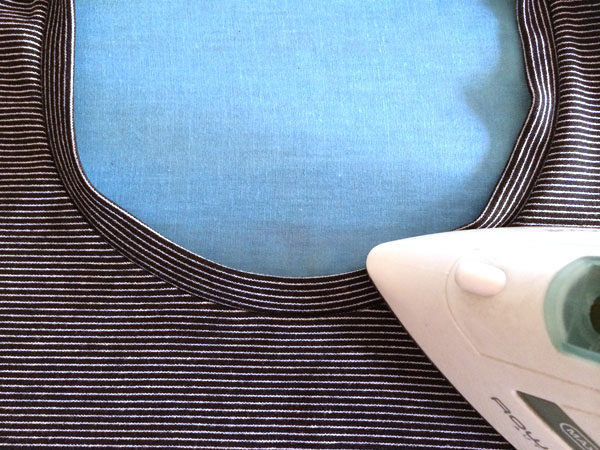
3. Press
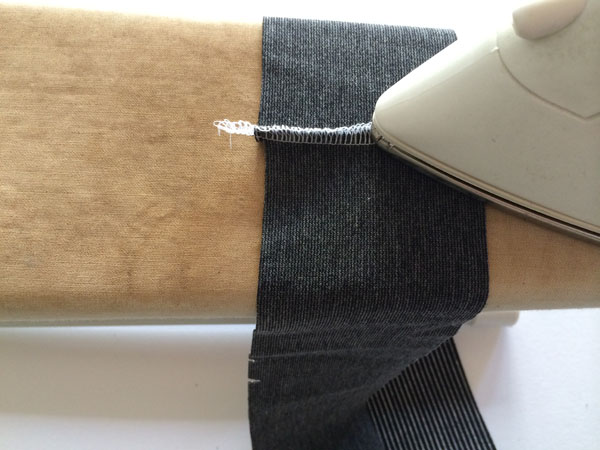
Press the seam allowance flat on one side. It’ll be a cinch if you use a sleeve board.

Fold the neck binding in half, wrong sides facing. Line up the raw cut edges and press the binding in half, creating a center fold around the entire loop of fabric.
4. Pin the Neck
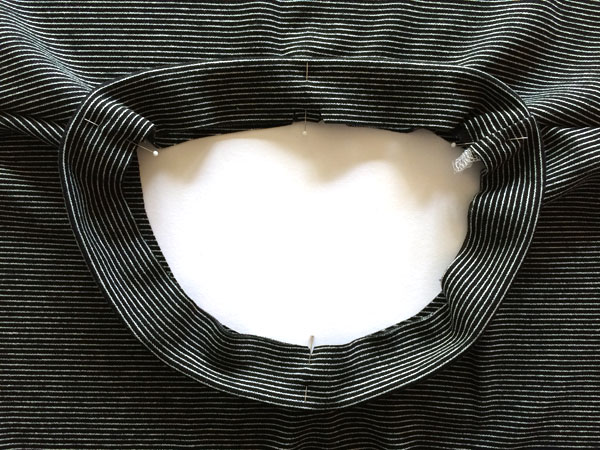
Open the shirt so it’s flat, with the neck opening right side up. Place the neck binding on top of the circle, right sides together. Line up the raw edges of the binding with the raw edge of the neck opening. Pin in place at each of the pattern’s notches, creating four anchor points.
Pro Tip: If the pattern doesn’t have notches or has fewer than four, make them by folding the neck opening in half to find the center back and front. Then place those spots together and find the halfway point between them, so the neck opening is divided into four equal segments. Repeat this process with the binding and line up the four marks.
5. Keep Pinning
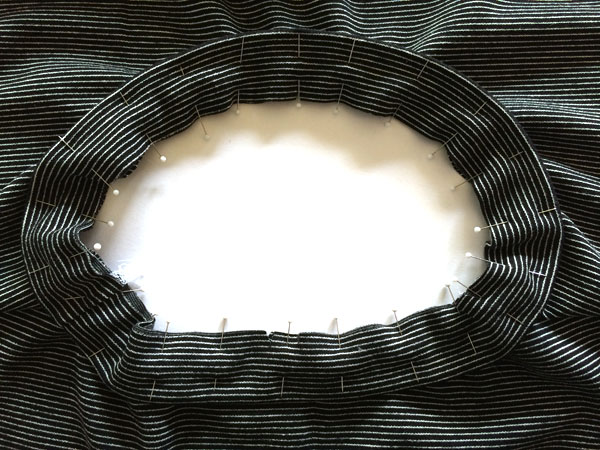
Once you’ve anchored the binding, pin between each anchor. The binding is usually a little shorter than the opening, so as you pin you’ll notice the fabric stretching slightly.
Pro Tip: Make sure the stretch is evenly distributed. If one area is stretched out more than the others, it can pucker and warp.
6. Get Out Your Machine
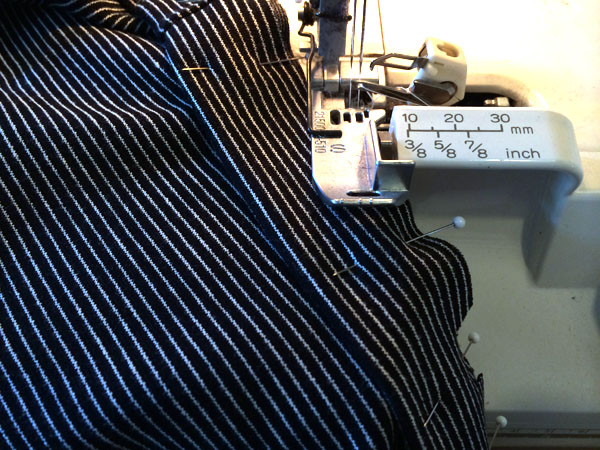
Tuck the neck onto your machine’s open arm and line it up with the seam allowance. If you’re using a serger or overlock machine, start at an angle to get into the seam with the stitches and blade.
Pro Tip: Take out the pins while you sew your way around the neck. You don’t want to sew the pins, but you also want to keep them in as long as possible to hold the stretch.
7. Backstitch
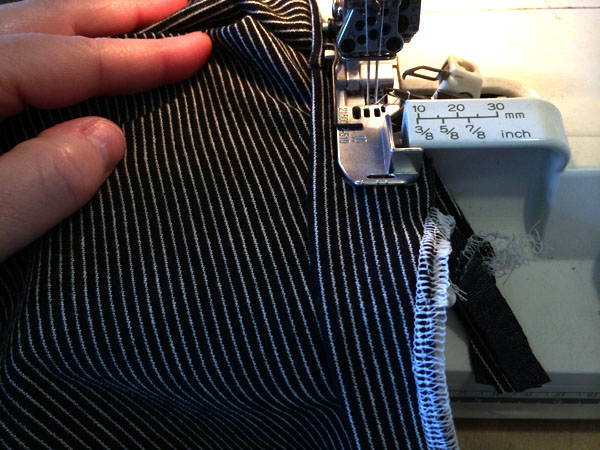
Line up your original stitches and backstitch. If you’re using a serger, you’ll meet up with the original stitches and the new stitches will blend into the old ones.
8. Finish Off the Seam
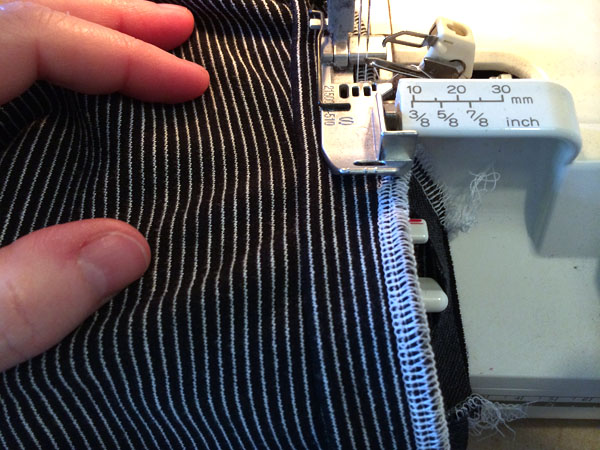
Once your serger’s stitches overlap cleanly at the seam allowance, quickly turn off the seam to end the stitch.
Pro Tip: This is a tricky process on a serger because there’s a knife that’s continually cutting the fabric, so practice a few times on scrap fabric first to make sure you’re comfortable doing it on the real T-shirt.
9. Press the Neckline
If you’re using a serger, press the seam allowance away from the neckline toward the T-shirt. If you’re using a regular sewing machine, trim the seam allowance to ¼” and press in the same way.
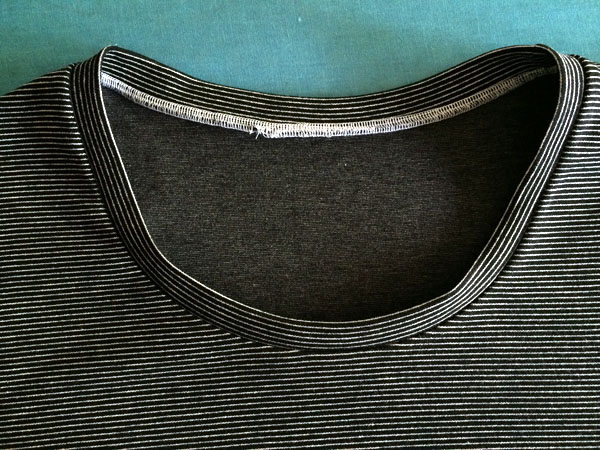
You can stop at this point if you choose — after all, the neckline looks pretty professional now. But many patterns will direct you to top stitch the seam allowance down just outside of the stitching line from the binding.
10. Topstitch
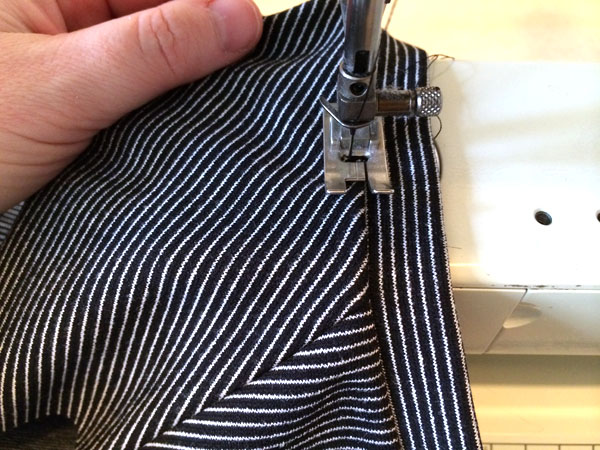
To topstitch the binding in place, make sure you’ve pressed the seam allowance well. If the knit material isn’t staying flat on its own, pin the seam allowance in place before stitching.
Use the inside of the foot to sew ¼” around the seam. You can sew a straight stitch, a zigzag stitch, or a coverstitch.
Once you’re done stitching, give the neckline one last press and you’re done! Now you can move on to sewing the rest of the T-shirt.
Nice
What about V-necks? I tried pinning it evenly, but it just didn't work out as nicely as the round collar. Any hints can be helpful!
Your Comment here...very interested
I don't understand it please
How come when I do it the neck gapes out at a right angle instead of being flat?
How long and how wide do you make the neck binding?
Thank you!
This is a good way to sew the neck.