
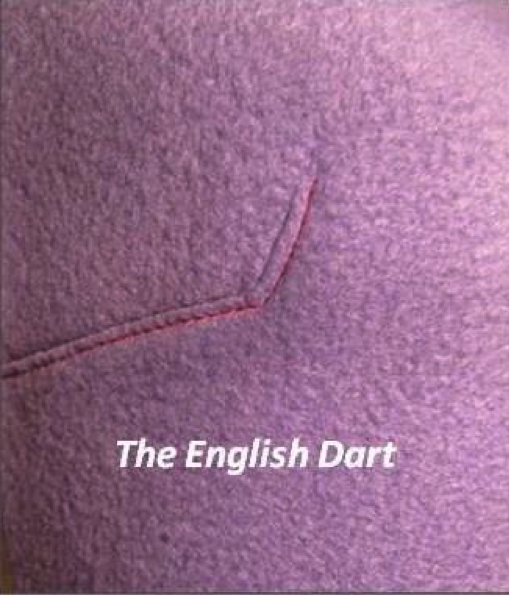
Darts are one of the most fundamental sewing techniques. Almost every garment sewer executes them in some form on a regular basis. I recently learned about one type of dart that you might not know of — the English dart.
Let’s learn more about the English dart, including how to add this fashionable design element to your own patterns!
What makes English darts different?
The primary objective of a perfectly sewn dart is to create the fullness needed, allowing garments to conform to the contours of the bodies as well as giving a garment its shape. But, in addition to performing primarily a structural purpose, darts can also serve as interesting styling details.
There are many different types of darts. The French dart, that moves from the waist towards the bust, is a good, basic example. Its elongated dart leg adds an intended style-line to a garment, especially when curved. The same can be said for the fisheye, contour dart or princess seam. The vertical lines they create in the central part of a garment become focal points that both shape and accentuate the waistline.
Most darts are done in a single step. Stitch from the base to the dart point, that’s it. Some darts, like the fisheye dart is best sewn in multiple steps and as such can be considered a compound dart. Another compound dart is the English dart. Like the fisheye, it is sewn in two steps.
Truth be told, I have yet to find any information about this dart on the Internet. It does not appear to be incorporated into any commercial pattern that I know of. Not even Marfy patterns, the most revered among couture-oriented sewers, feature this type of dart in any of their U.S. pattern offerings.
I first learned of this dart in Heather Claus’s book, Sewing and Fitting with Darts. It is an intriguing dart designed primarily for style rather than function. The English dart can add a bold design detail to a vintage or urban styled garment.
Since virtually no commercial pattern on the market uses this dart, converting either a bust or waist dart into the English version is the only method of creating it. That process is super easy (em) sewing the dart requires a bit of careful stitching, but if properly marked, the stitch is easily achievable. Here’s how it’s done:
How to convert a bust or waist dart into an English dart
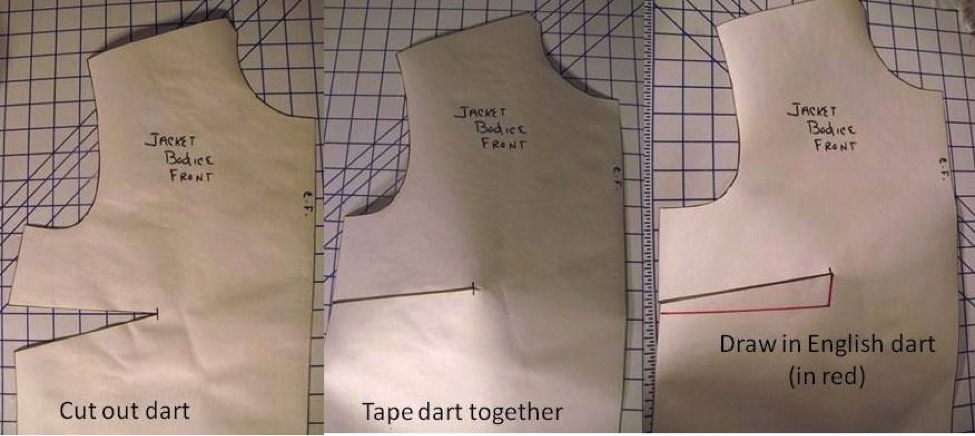
Steps 1, 2 & 3
Step 1:
Take a bodice pattern with either a bust or waist dart. Tape the dart closed as if sewn. The bust point will take the shape of the completed dart.
Step 2:
Draw a line perpendicular to the center front towards, but slightly below the dart point, as shown. This can be a straight or angled line depending on the look you want in the garment.
Step 3:
Draw another line connecting the horizontal line up to the original dart point. Again, this can be a straight or angled line.
Step 4:
Cut along the newly drawn lines to open up the English dart. The pattern will now lie flat. The cut edges form the stitching lines for sewing the new dart.
Step 5:
Insert paper to fill the dart void and tape in place. The pattern is now ready for use.
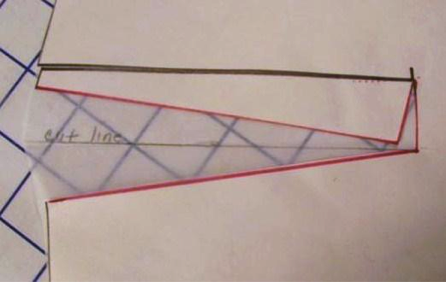
Step 6:
Before cutting out the pattern piece, draw a line through the center of the horizontal portion of the new dart to the pivot point.
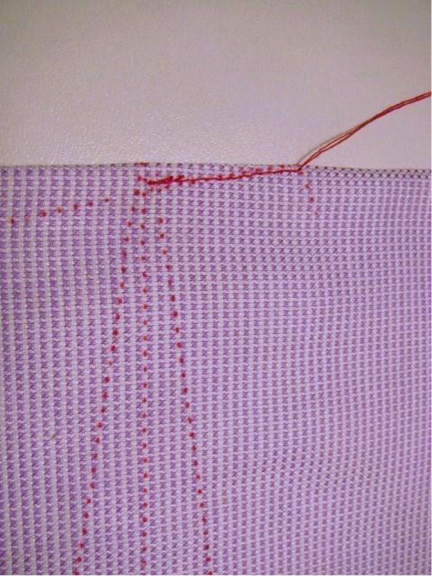
Step 7:
To sew the dart, begin at the dart point. Pinch the dart together matching dart legs and stitch to the point where the dart leg turns. Backstitch to lock this seam.
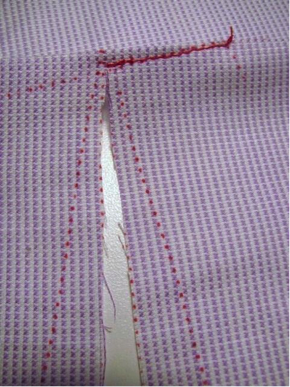
Step 8:
Cut along the center horizontal line to the end of the stitched portion of the dart,
Step 9:
Pin the legs together matching the marked line. Starting at the wide base stitch to where it meets the vertical dart stitching. The sewing portion of making the dart is complete.
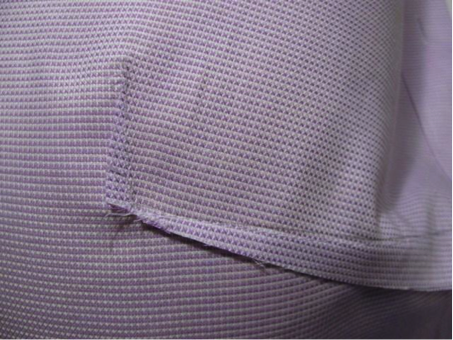
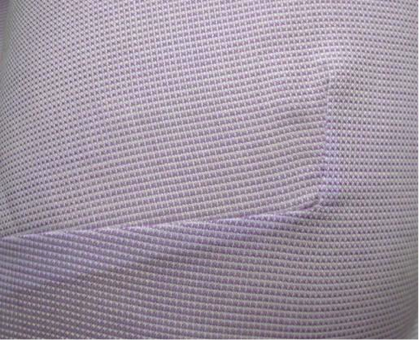
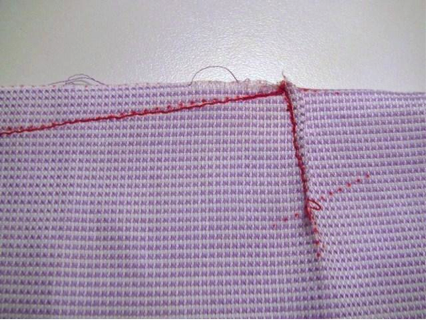
Step 10:
Press the horizontal portion of the dart downward and the vertical segment towards the center front.
There you have it! A fashionable dart for adding a new flare to your next garment sewing project!
Not yet familiar with the fundamentals of sewing darts? Check out Sewing Studio to learn the sewing basics all while creating fun projects like an envelope pillow and a naughty secretary skirt.
Dart making mavens? Move on to more advanced work by creating your own patterns! Check out Patternmaking + Design: Creative Darts & Seam Lines to learn how to manipulate darts and silhouettes for perfectly tailored garments that rival ready-to-wear boutique items!
I have used this type of dart and know it as the hockey stick dart. I have a vintage sleeveless top where this dart starts just above the waist and ends at the bust point. iI really creates a nice sillouette as it shapes the waist and bust at the same time.