Dazzle With Embellishment: How to Sew Beads on Fabric

Part of the appeal of sewing your own clothes is making garments that flex your creativity and reflect your unique personality. There’s no better way of doing this than by adding some embellishment, so I’m going to show you one way to embellish your sewing projects with individualized style an flair!

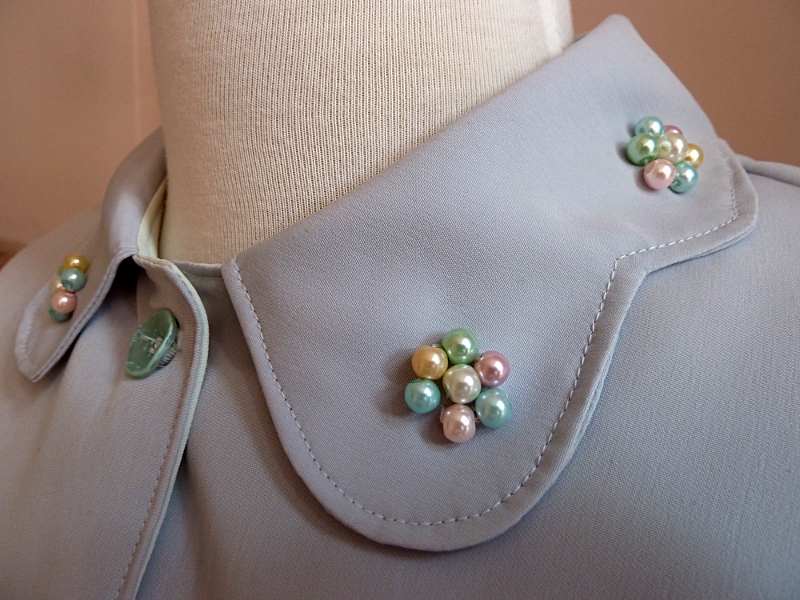
Learn how to sew beads on fabric for personalized garments.

Close up of an embellished collar

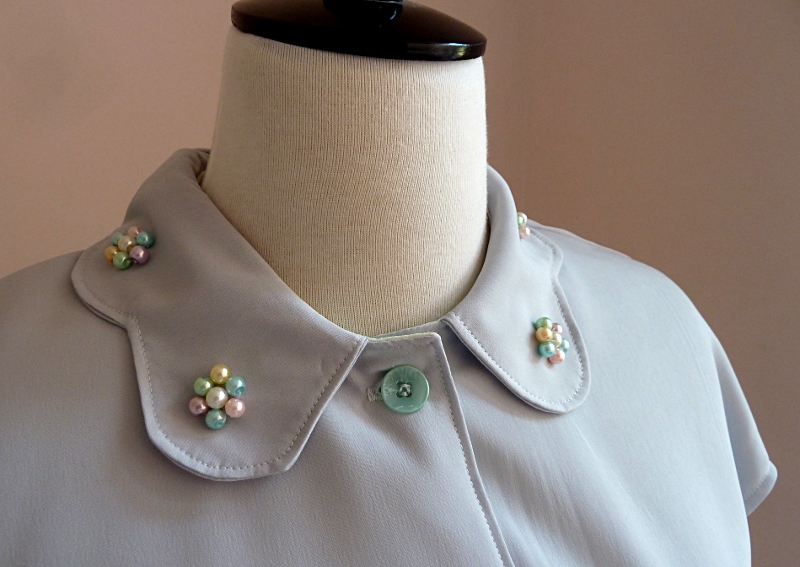
For this tutorial, I chose to sew round beads onto a collar. But no matter the type of bead you choose or the location you choose to embellish, the main principals remain the same.

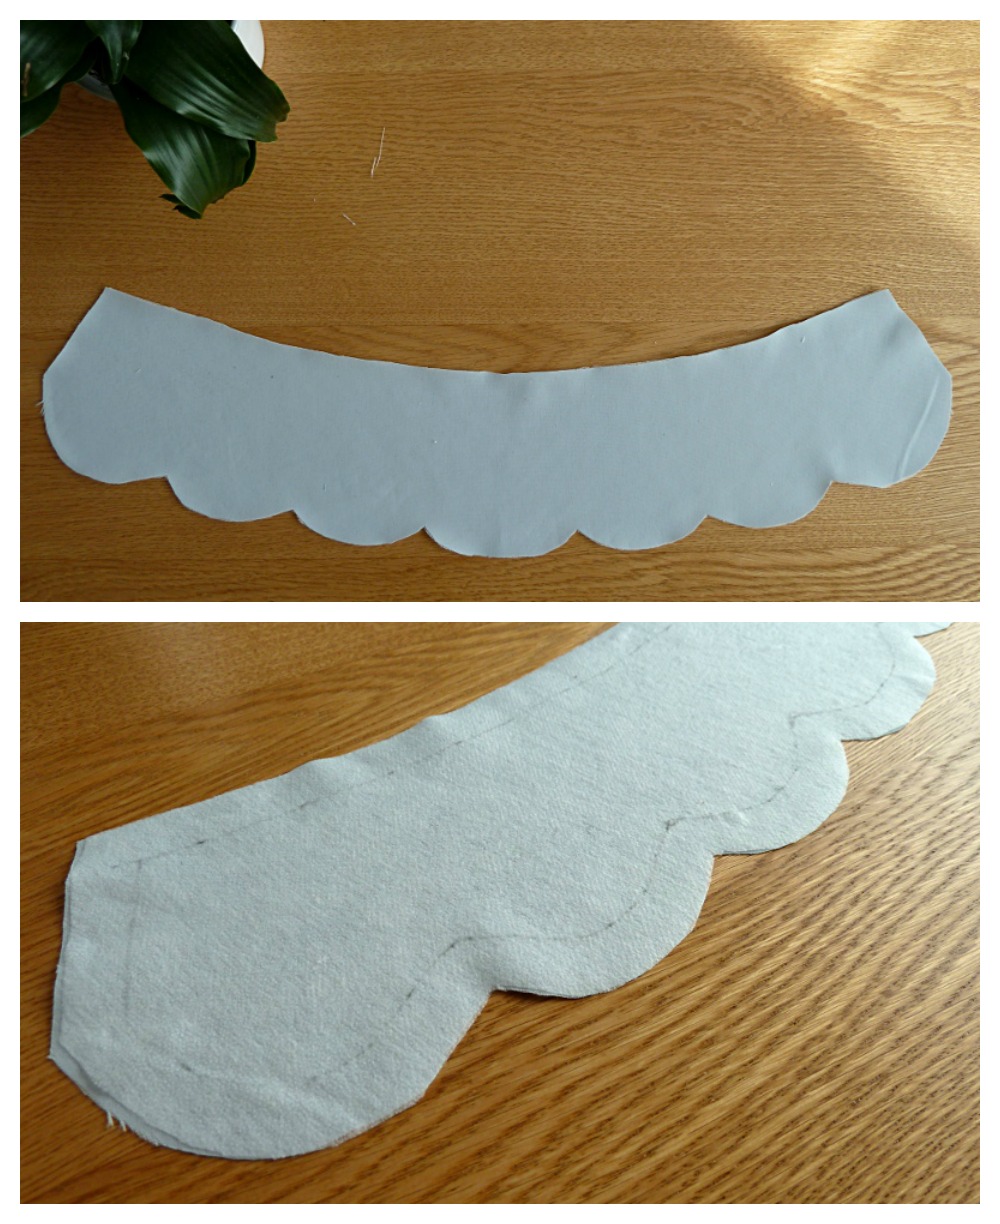
Step 1: Prepare your fabric.

Fabric preparations

Before you do anything else, press your fabric well. If you pattern requires you to interface, do so first. I’ve used a peachskin crepe for my collar, so the interfacing helped give it enough stability to support the weight of the beads. Make sure you also mark out your seam allowances (or stitching line) to help you with the placement of your beads — you don’t want them getting in the way when you begin to construct your collar. Although not shown in my pictures, I highly recommend stay-stitching any curved edges to avoid misshaping, as you’ll be manhandling your fabric quite a bit! Need help adding stability to your garment? Learn the secrets to pristine lining in the Craftsy class Underneath It All: Guide to Interfacings, Linings & Facings with sewing expert Linda Lee!

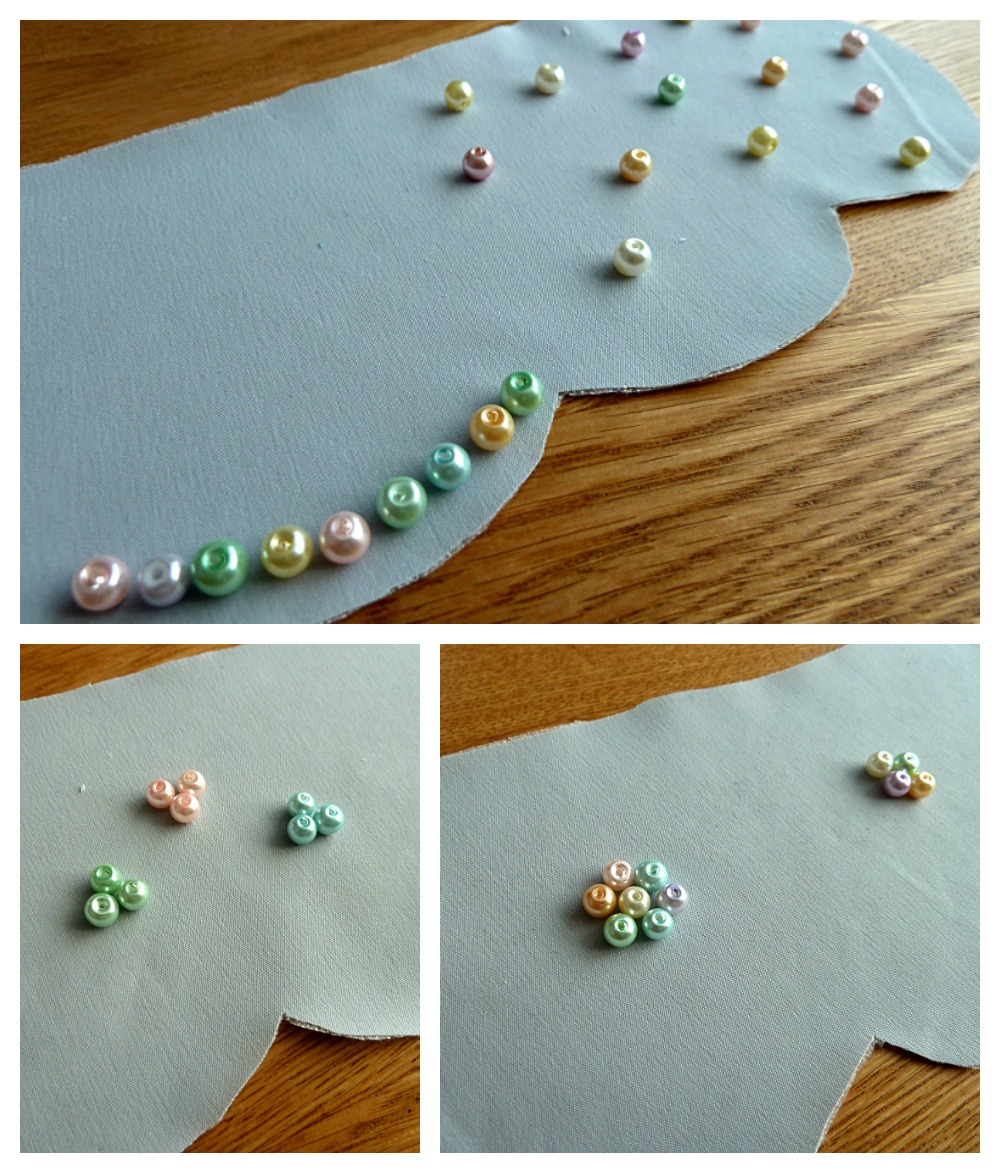
Step 2: Experiment with your bead placement.

Experimenting with bead placement

Now’s the truly fun part: Experiment with the placement of your beads before committing to a design! For mine, I tried out different formations and borders and even toyed with the idea of creating a polka-dot effect. I’m a sucker for florals though, so I settled for a flower-head design nestled on each scallop.

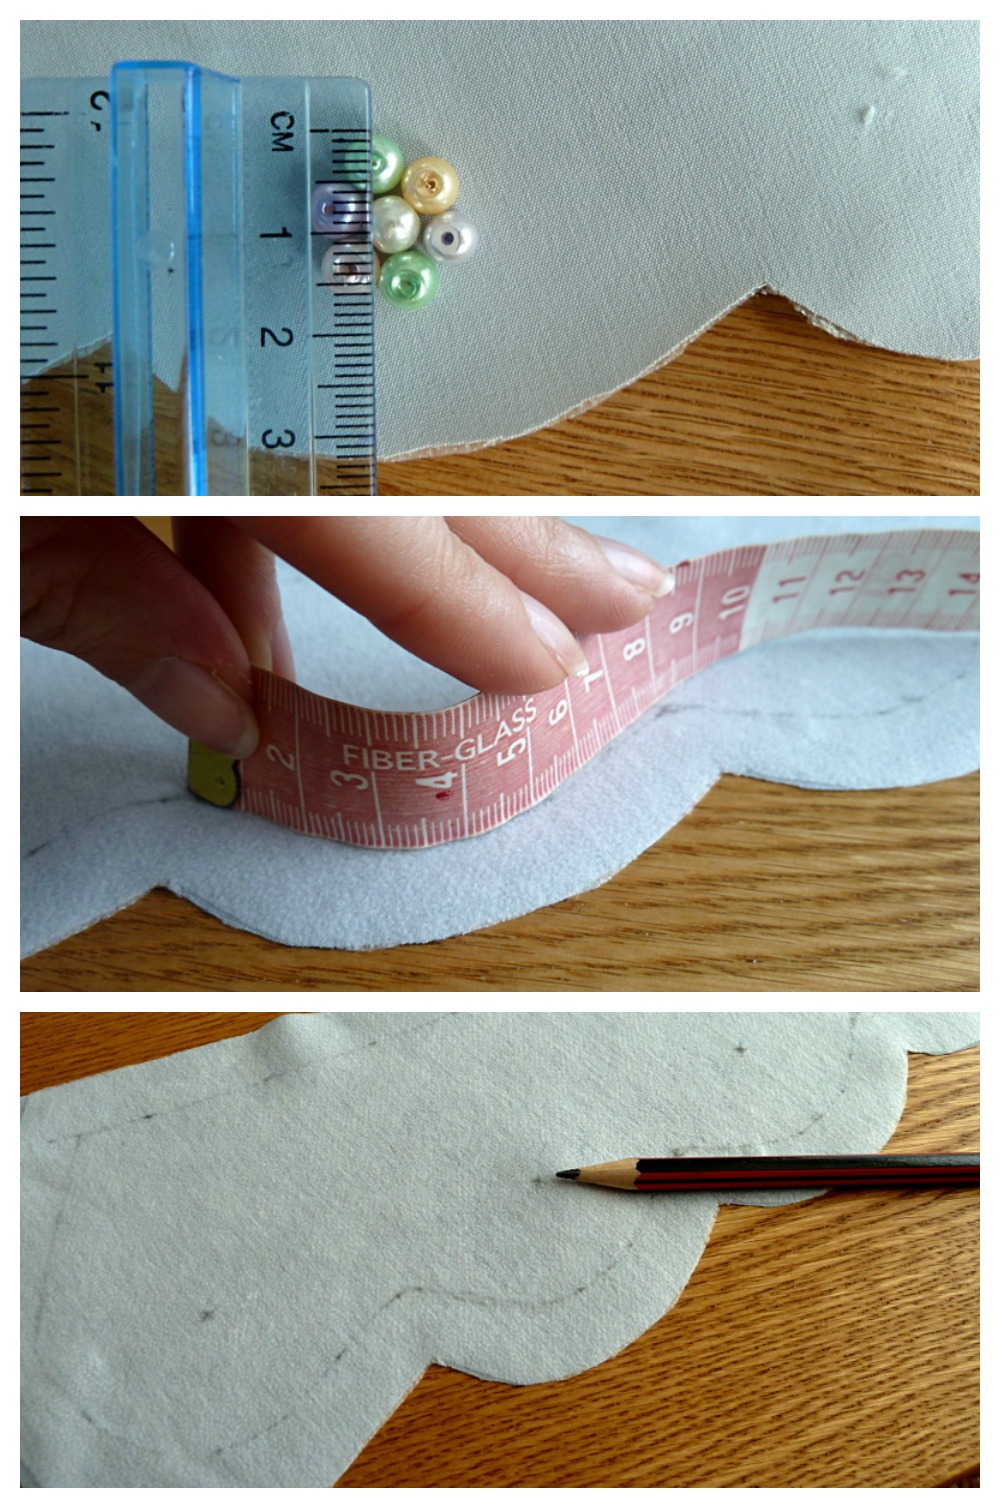
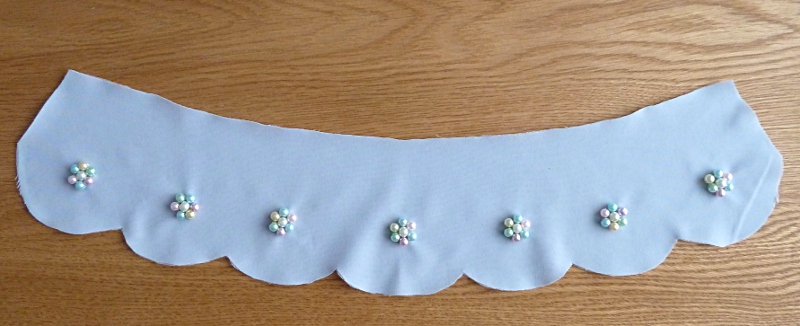
Step 3: Measure and mark your placings.

Measure and mark placings

Once you’ve decided how you want to show off your beads, a little measuring is required to put your vision into practice. First, I measured the length and width of my flower-head, then I measured the width of each scallop to make sure my design was centered. I marked the center of my flower-head with a little “x” on the back of my fabric.

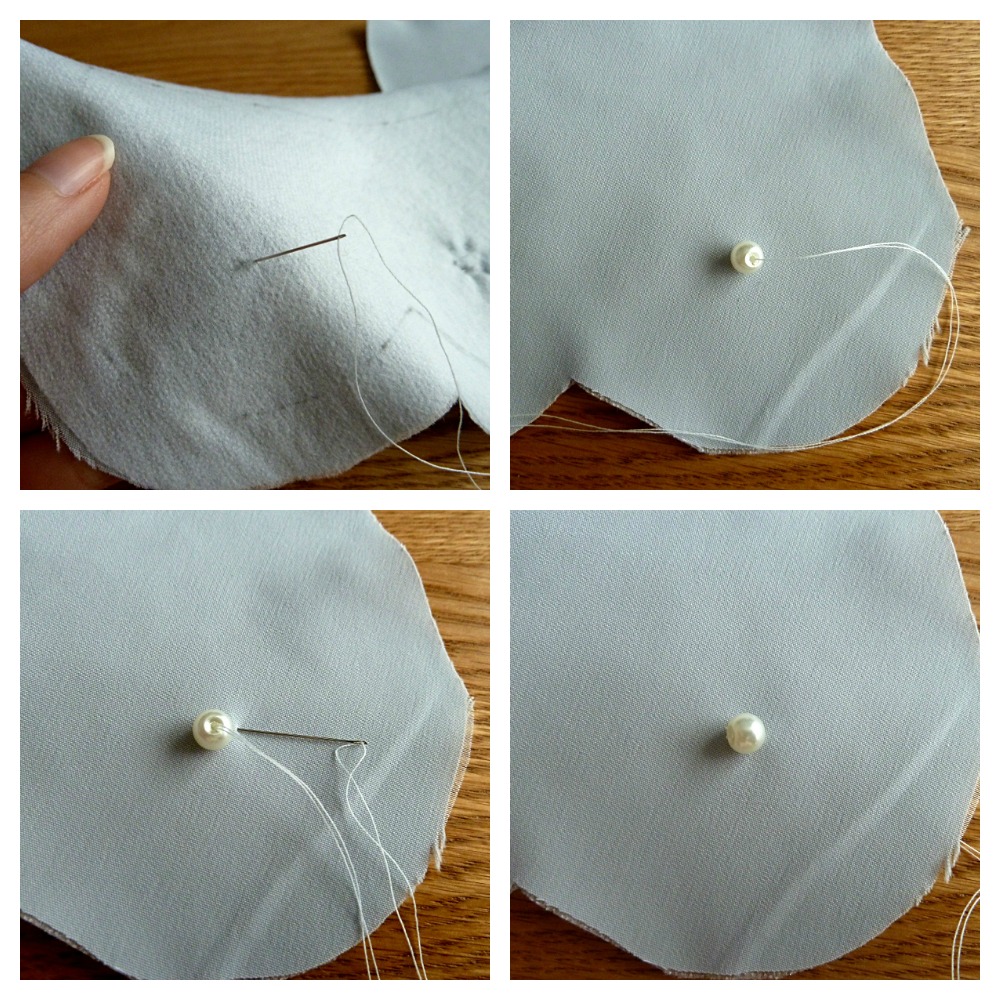
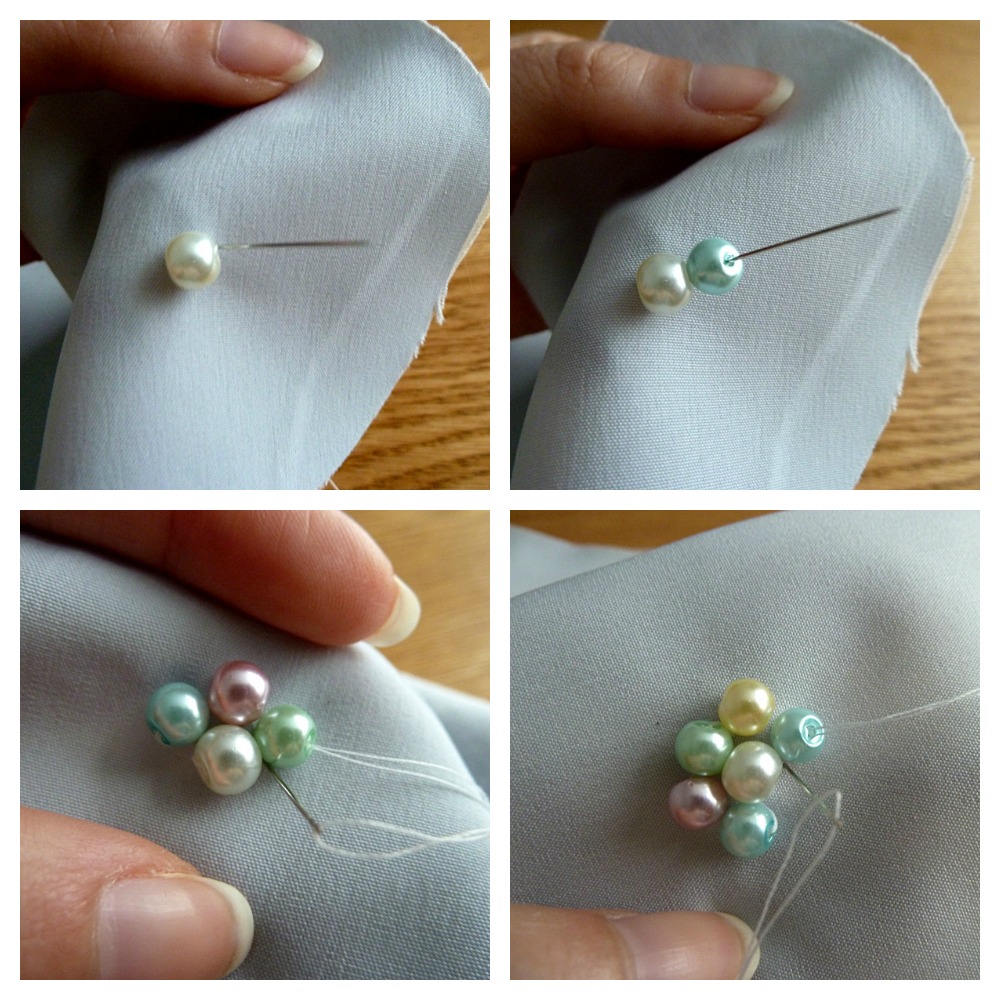
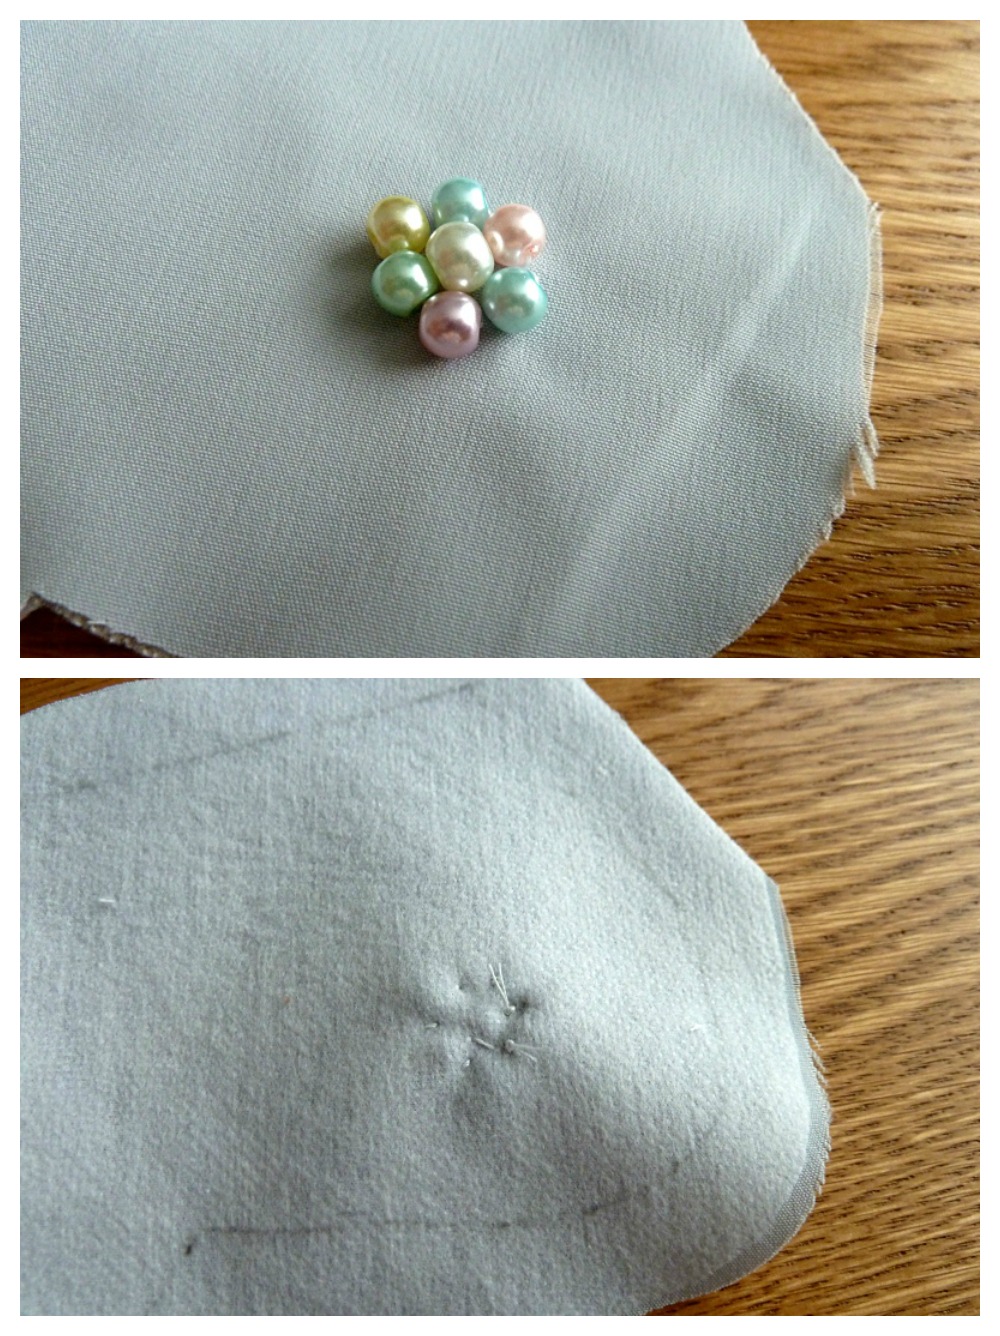
Step 4: Sew the beads onto your fabric.

Sewing beads in fabric

With all the prep out of the way, you can finally start sewing beads on your fabric — just double up your thread for extra endurance and you’re ready to go! Start by finding your mark on the back of your fabric and passing your needle through. Once on the right side of your fabric, thread a bead through your needle and down your thread. Then insert your needle quite close to your initial entry point and pull out to the back of the fabric again. Inserting the needle quite close to the initial entry point ensures the bead is tightly secured and will help keep the shape of your design.

Sewing beads on fabric

The pictures above highlight, once again, the movement you want to make with your needle in order to tightly secure your beads. Be careful not to pull your thread too tightly though, as you may end up with unwanted puckers on your fabric.

Step 5: Admire your handiwork!

Close up beads on fabric

Now that you’ve finished, you can step back and admire your embellishment, having created something unique and beautiful. And your inner perfectionist will be happy too, safe in the knowledge that the ugly threads will be hidden out of sight by the time you finish sewing up your garment.

Beads on fabric

Close up of embellished collar

Share tips, start a discussion or ask one of our experts or other students a question.

No Responses to “Dazzle With Embellishment: How to Sew Beads on Fabric”

No Comments