
Recently we covered how to sharpen a chisel and working on the bevel. Likewise, plane blades are tools that need to be kept sharp. Today, I’ll share a quick and easy method of how to sharpen plane blades. The good news is that if you know how to sharpen a chisel, sharpening a plane blade is a very similar process.
Like a chisel, a plane blade has two surfaces: the back and the bevel. The back is the flat part of the plane blade. The bevel is the short face at the cutting edge. The goal of sharpening is to get these two very smooth, flat surfaces to intersect. The smoother and flatter the surfaces, the sharper your plane blade will be.
How to sharpen plane blades
Equipment you’ll need:
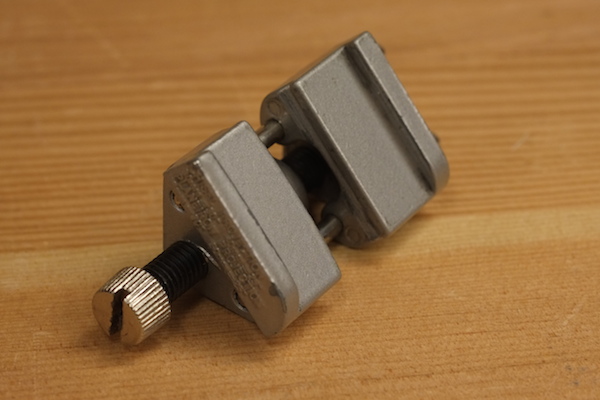
- A honing guide — there are many different kinds — the one I’m using (pictured above) is inexpensive and easy to use.
- Some scrap wood to make a setting jig.
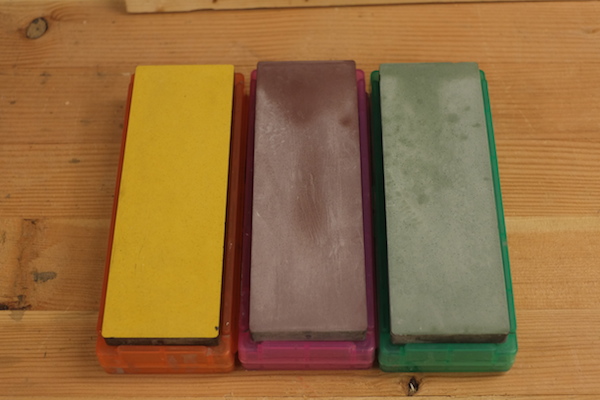
- Sharpening media — You will have three types of sharpening media: a coarse grit, a medium grit and a fine grit. In this example, we will be using waterstones that are 1000, 5000, and 8000 grit. You can use sandpaper, oilstones, diamond plates, or waterstones. Which one you use is not important, and the differences between these will be covered in a future post.
- Optional: a magnifying glass to look at the edge of your tool.
The back
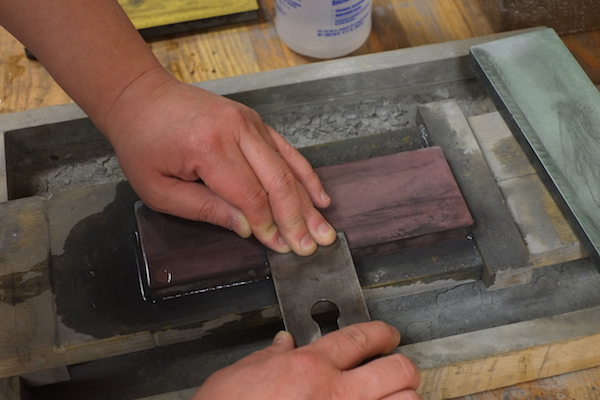
The first step is to flatten and polish the back of the plane blade. Just like sharpening a chisel, you will go through the coarse, medium and fine grits for this process. You only have to work on the 1” of the back that’s closest to the edge, but make sure you’re putting enough downward pressure on the plane blade so that it stays flat on the sharpening media. You’ll spend the most time on the coarse step, and the medium and fine steps will take relatively little time.
After going through the three steps, the back of the plane blade will really look like a mirror at this point.
The bevel
Now that the back is done, we can work on the bevel side. Like sharpening a chisel, you won’t have to deal with the back until you wear down that 1” of the plane blade that you’ve polished up. This will take years.
Because the area of the bevel is so small, it is difficult to keep the plane blade balanced on that area when using your method of sharpening. This is where the honing guide comes in.
The honing guide
Like a chisel, the honing guide is designed to hold a plane blade at a consistent angle while sharpening. The lower the angle, the sharper your plane blade will be, but the edge will have less durability. Just as it is for a chisel, 30 degrees is a good overall bevel angle for a plane blade.
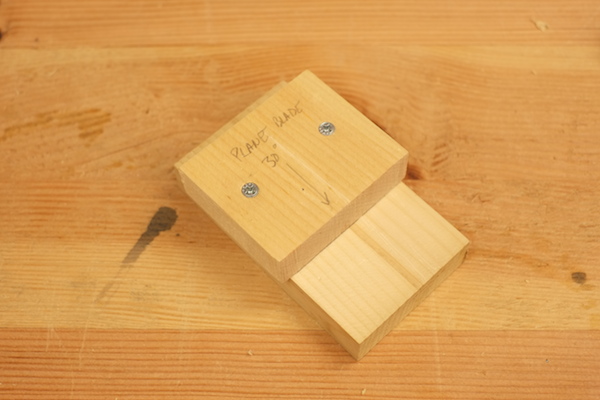
To set the honing guide for 30 degrees, you need 1-1/2” (38 mm) of the plane blade sticking out of the honing guide. A honing guide setup jig can be constructed in the same way as you would for a chisel, with a different distance for the stop block. Take two scrap pieces of wood, and make sure each one of them has one square edge. Make this jig, positioning one piece of wood so that it is 1-1/2” (38 mm) away from the edge of the other piece of wood. Use glue and screws to hold everything in place.
Now, when you use the honing guide, you can use this to set the plane blade at the same distance every time.
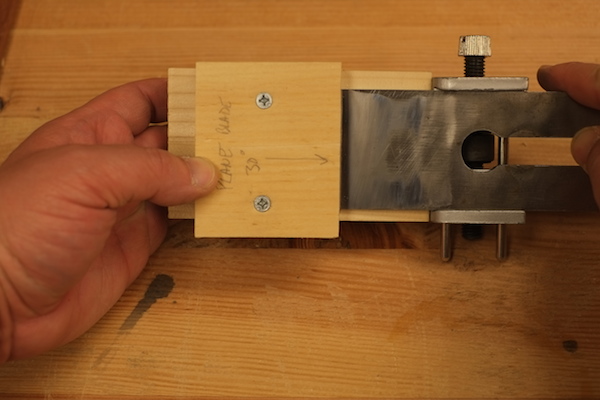
Make sure that the plane blade is snugly held by the jig. Use a screwdriver to tighten the adjustment knob. You don’t want the chisel to come loose in the middle of this.
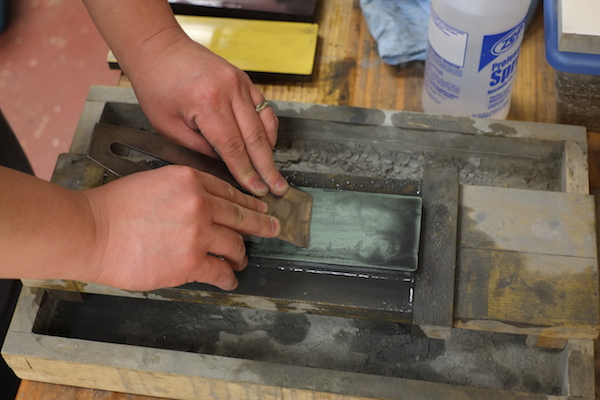
Sharpening the bevel
Take your plane blade and honing guide, and use it to rub the bevel on your coarsest grit sharpening media. Just like you did with the back, take your time, and make sure the entire face of the bevel is covered. Use a magnifying glass to keep track of your progress.
After this step is done, move on to the medium grit sharpening media. Just like when working on the back, if you took your time with the first step, this step will not take as long.
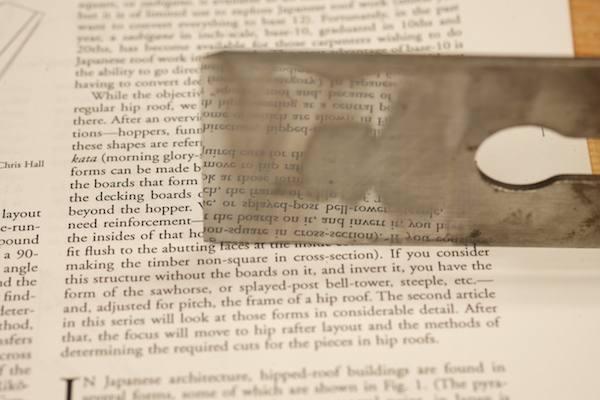
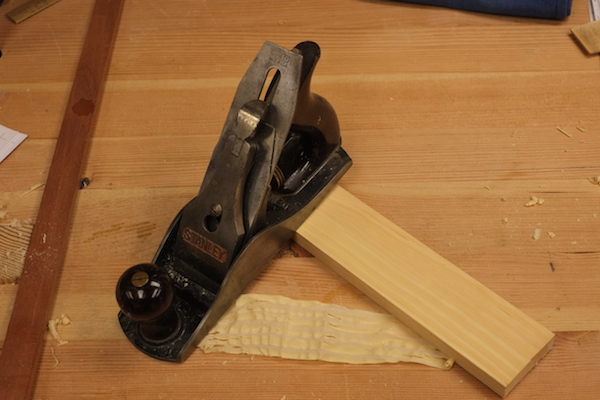
And finally, repeat the process with the honing guide on the fine grit sharpening media. After that, take a swipe or two of the back of the plane blade on the fine grit sharpening media. If all went well, your plane blade will be extremely sharp, and you will be able to take a thin shaving off of a piece of wood, which will leave a very smooth surface.
What to do when your plane blade becomes dull
Using a plane with a sharp blade is a joy, but the day will come when you need to resharpen the blade. If that is the case, simply put the blade in the honing guide with the setting jig, and work on the bevel again. You don’t have to rework the back side, since you set it up in the first part of this process. One day, when you wear down that first 1” of the plane blade, you will have to address the back of the plane blade again, but that will be a long time from now.
Share tips, start a discussion or ask one of our experts or other students a question.
No Responses to “Plane Blade Sharpening Made Easy”