

You’ve got a fun, strappy top you love to wear, but there’s one pesky problem: those straps always slip off your shoulders. Rather than constantly push them back into place, you can shorten them super fast — we’re talkin’ minutes here — and even make them adjustable. Problem solved!
What You Need
Instructions: How to Shorten Spaghetti Straps With No Lining
1. Pin the New Strap Length
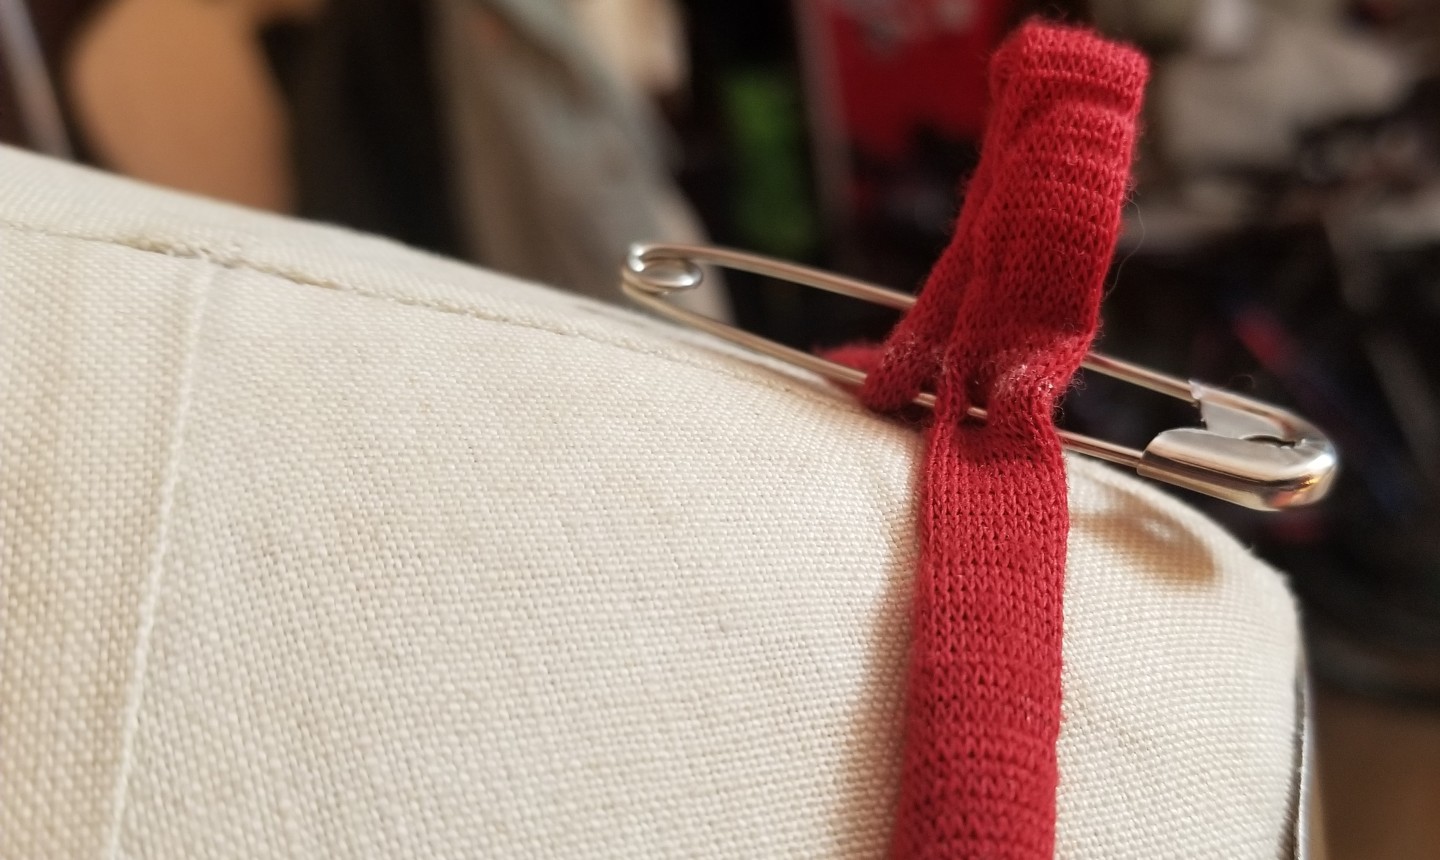
With your garment on, pin the amount of strap you want to be shortened with a safety pin at the top of the shoulder. Heads up: You won’t actually shorten the strap there. You should always shorten from the back, but if you were to pin there things would get tricky because, well, it’s behind you.
2. Mark and Measure
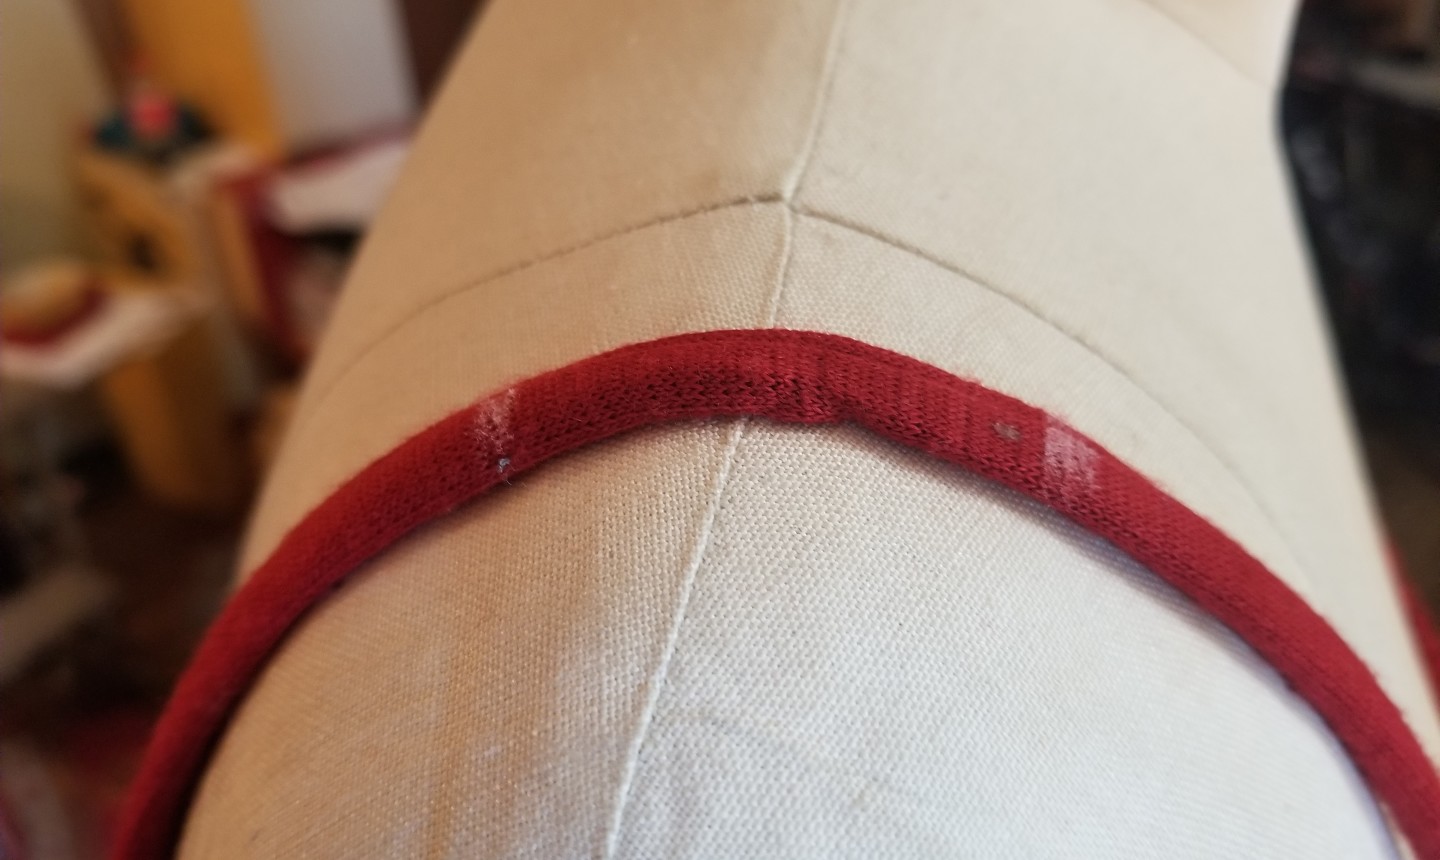
Take off the garment. Using tailor’s wax, mark where you’ve pinned on both sides of the safety pin. (Don’t worry, tailor’s wax disappears with heat.) Remove the safety pin and flatten the strap back out; you should see the two marks you made. Measure the distance between the marks. This is how much you need to shorten the straps.
3. Measure From the Back
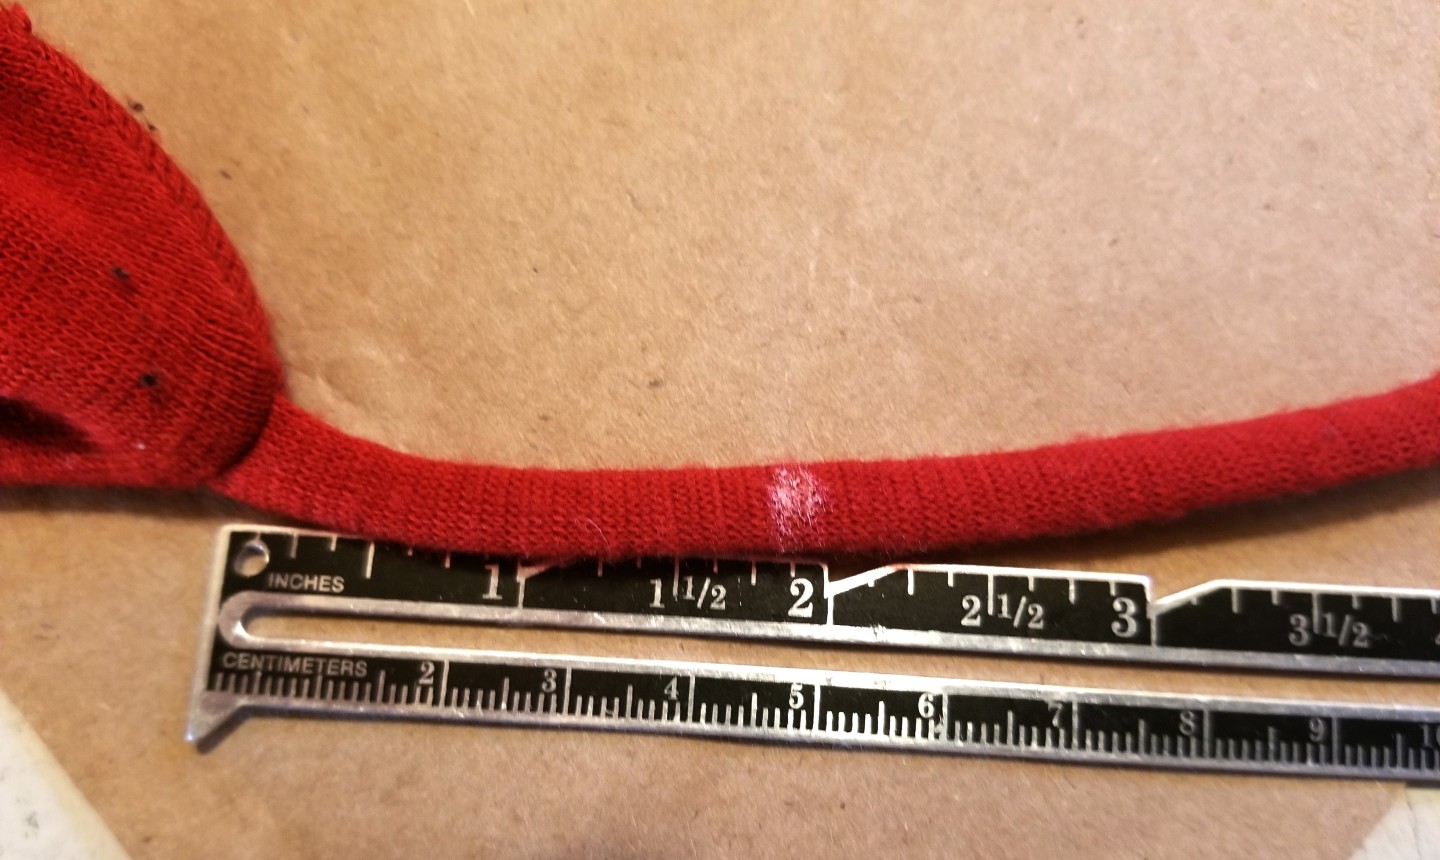
Using your measurement from step 2, mark that distance on the strap starting from the top back edge of your garment.
Good to Know: When shortening spaghetti straps, you always want to shorten from the back of your garment. Other styles of strap may need to be shortened from the shoulder or the front (depending on where your seam is). But spaghetti straps typically don’t have a seam, so a simple alteration in back is the way to go.
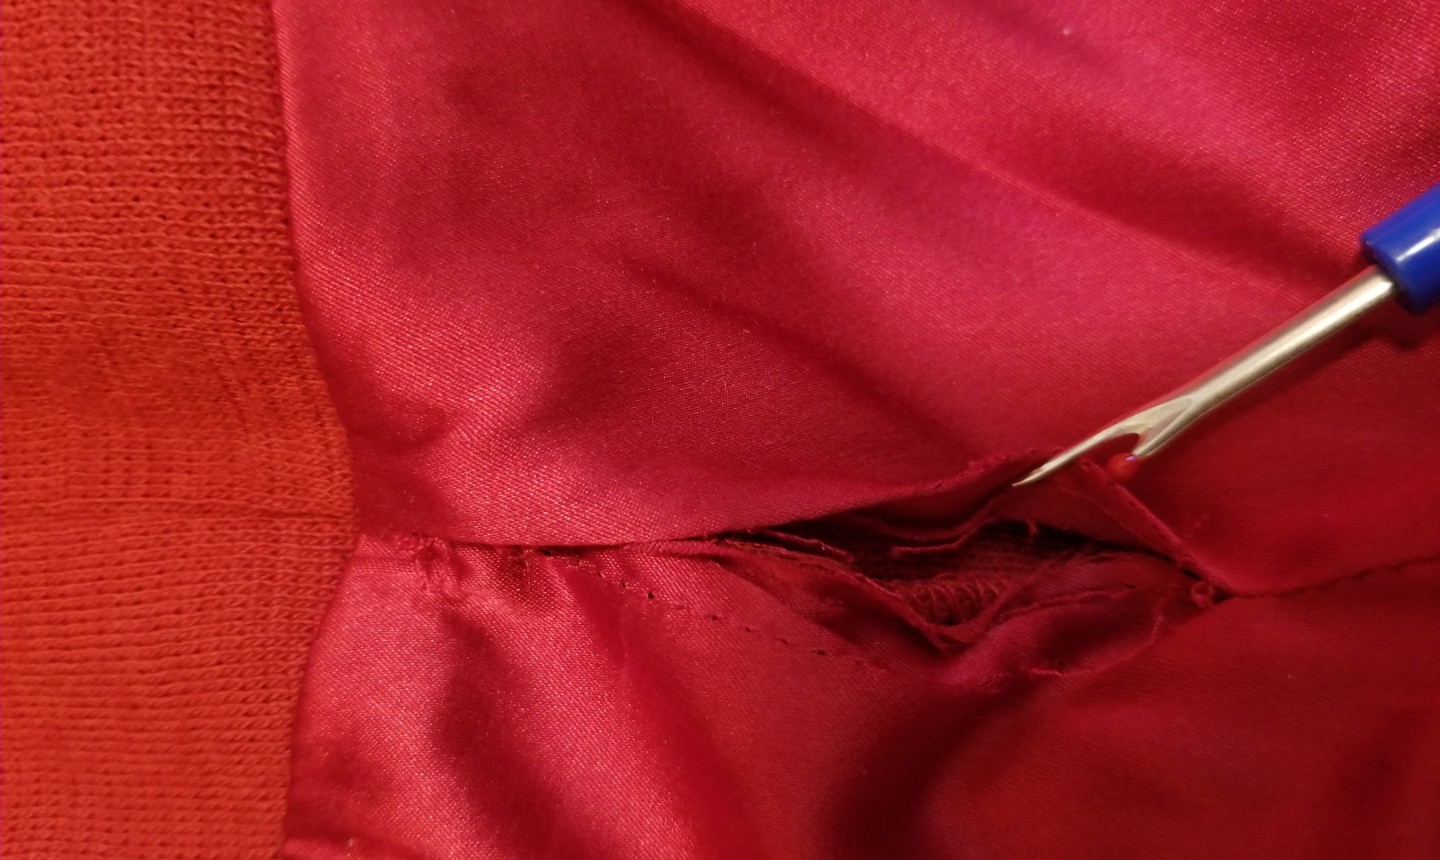
4. Rip Out the Seams
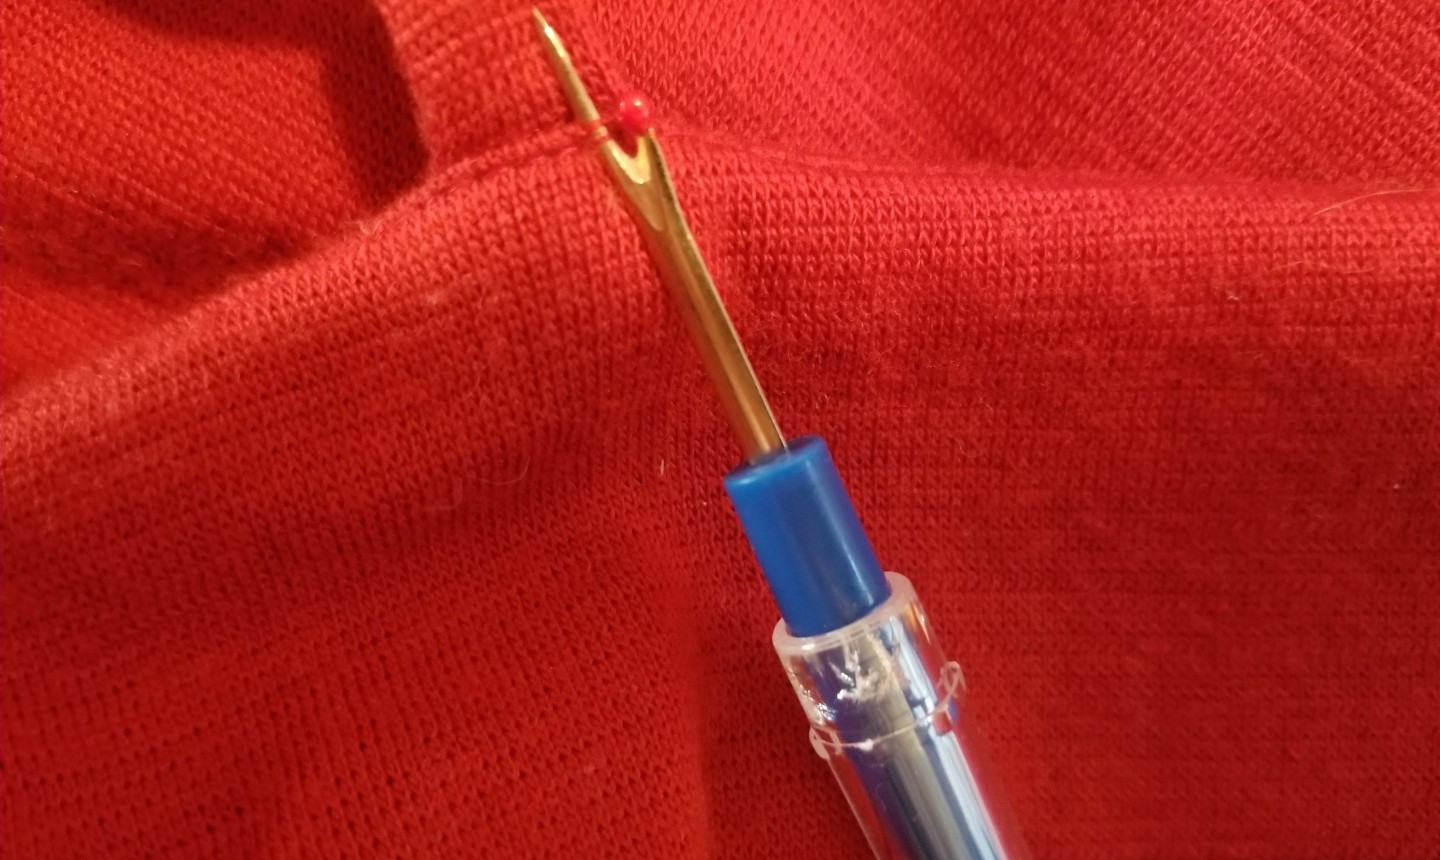
Most spaghetti straps will be stitched twice; once at the top edge of your garment, and again an inch or two down from the edge. Using a seam ripper, take out the stitches at the top edge of your garment. If the strap is stitched a second time farther down, it’s okay to leave those in.
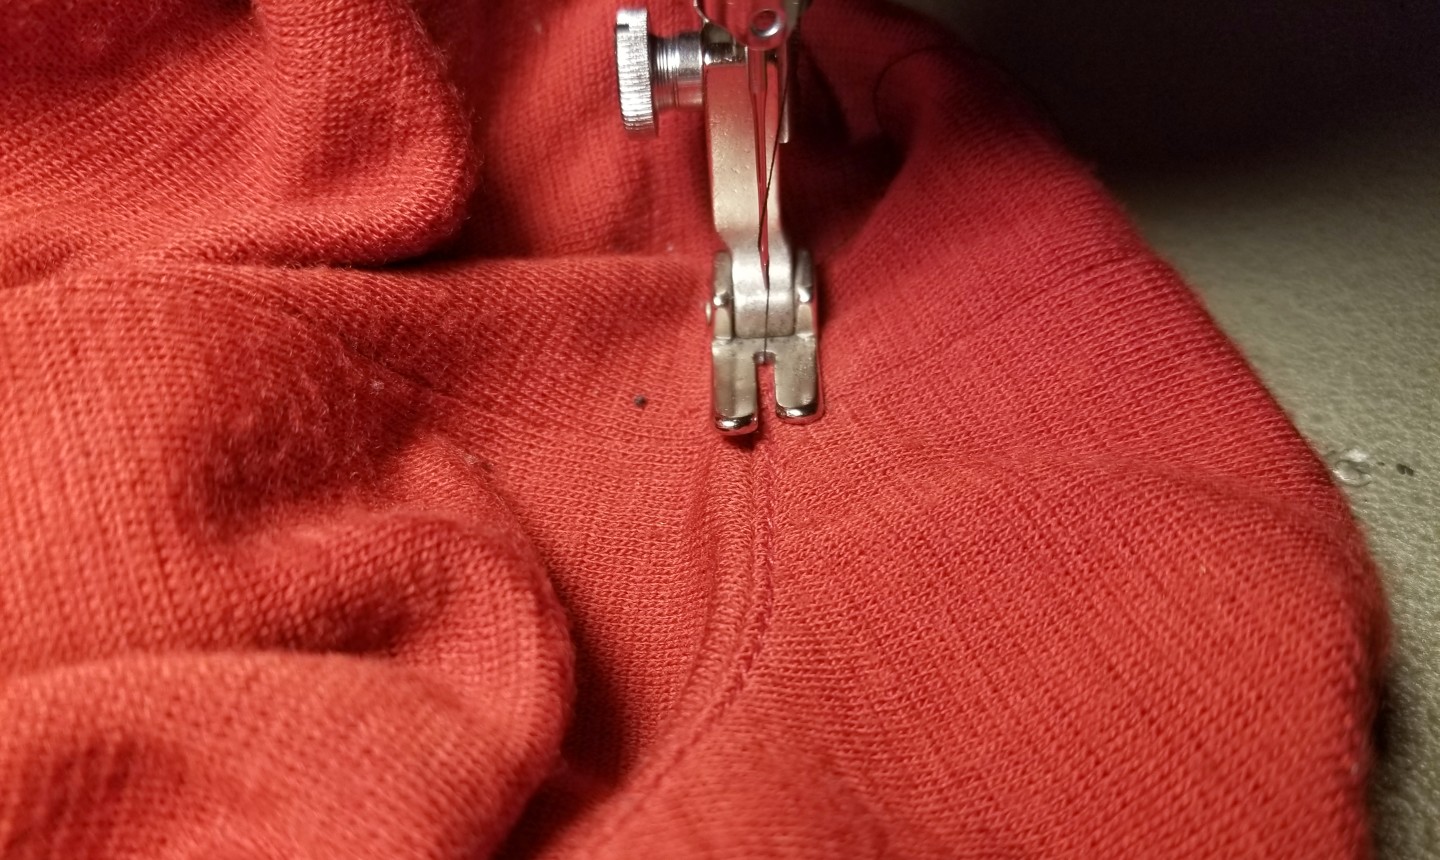
5. Sew the New Strap Length

Line up the new strap length line (the wax mark you made in step 3) with the garment edge. Pin in place and sew. Secure the excess strap — and keep it from popping out — by sewing in place at the second stitching line.
Instructions: How to Shorten Spaghetti Straps With Lining
1-3. Pin, Mark and Measure
Follow steps 1-3 above, marking in the same way you would for a garment without a lining.
4. Undo the Understitching
Understitching is the seam line you’ll see just on the lining side of a garment, below the top edge. It keeps all the seam allowances secured, preventing the lining from rolling out.
With your seam ripper, undo this understitching where the back strap connects to the garment, about an inch on either side of the strap.
5. Find an Entry Point
Turn the garment inside out. Look for a way to get in between the lining and outside fabric — on most dresses (and some tops), the hems will be free of each other, allowing you to get in from the bottom.
If everything is stitched closed, use a seam ripper to open a side seam on the lining only. Note: if the lining was topstitched closed, the stitches will be visible on the outside (instead of the inside) and you can open the seam there.
6. Make the New Strap Length
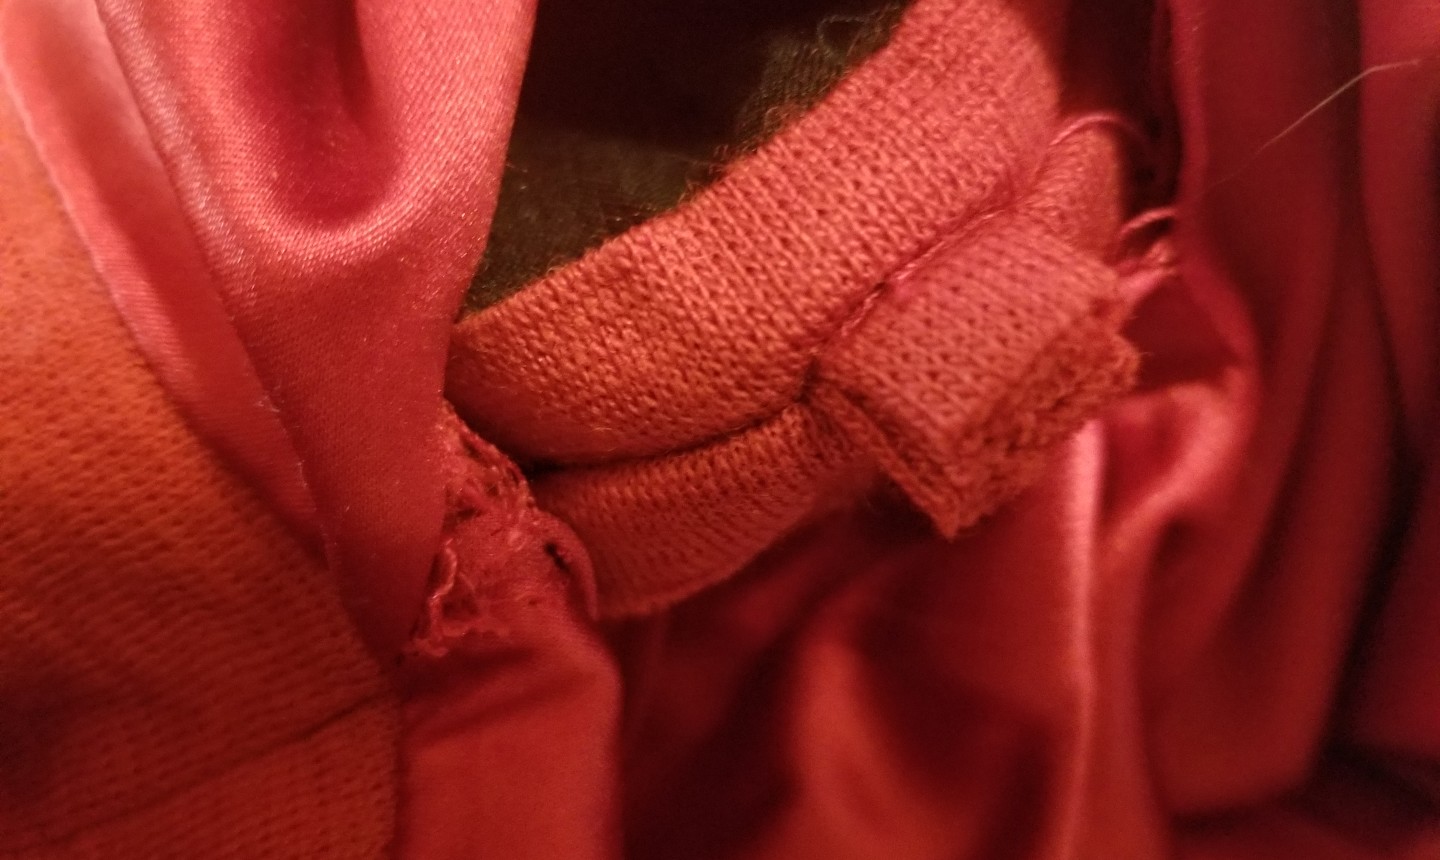
Pull the garment through the opening, so it’s inside out and you can see the seams and the strap ends. Undo the stitches holding the strap at the top edge.
Pull the strap through, making sure not to twist it, and line up the mark you made in step 3 with the top edge. Pin in place and sew. Secure the excess strap — and keep it from popping out — by sewing in place at the second stitching line.
7. Re-Sew the Understitching and Lining
Turn the garment right side out. Re-sew the understitching through the seam allowances and lining, not the outside fabric.
If you went in through a side seam, you won’t be able to flatten the garment to re-sew the understitching. Instead, reach in with your hand to find the seam allowances and the lining, bunching up the fabric if you need to. Pull it through and under your machine presser foot; lower the foot. Don’t start sewing until you’ve checked to make sure you only have the seam allowances and lining, not the outside layer. Sew a few stitches at a time, continuously checking that you haven’t accidentally grabbed your outside fabric.
Topstitch closed the opening you made in the lining.
Instructions: How to Make Adjustable Spaghetti Straps
Note: this will only work for a strap you want to shorten more than a couple of inches. If you want to shorten a strap by less than an inch, it can’t be adjustable, as it needs to be long enough for the strap to fold onto itself when threading through the slider. Same goes with making a strap longer — it can’t be adjustable, as there won’t be enough strap available to manipulate.
1. Detach the Straps
Purchase two strap slide adjusters or remove them from a bra you no longer wear. (You should be able to simply remove the row of stitches holding the strap around the slider.) You’ll also need a small piece of elastic.
Detach the straps from the back of the garment. If your garment doesn’t have a lining, follow step 4 of the first tutorial. If it does, follow steps 4-6 of the second tutorial.
2. Insert the Strap Adjuster
The strap adjuster will have two parts: a ring and a rectangle slide piece. With the strap right side up, insert at the back of the rectangle (starting underneath), over the middle prong, then under the last prong. Loop the strap through the ring, then pull through and back over the middle rectangle prong. Topstitch the end in place.
3. Sew on the Elastic
Loop a small piece of elastic through the ring. (You can use any color you want.) Double check that your strap isn’t twisted, then topstitch the elastic to the garment where your strap was previously attached.
Photos by Vanessa Nirodes
Good
Thank you for such detailed instructions. I have a very small cord strap that needs adjustment about 3 inches shorter for my granddaughter. There are sequins on the dress and I don’t know how to tack the cord down in the back of the back of the dress. Please help!
Thanks