
Wire soldering with a flame can seem terrifying. But we promise, it’s really not as scary as you think! Using a micro torch (the kind chefs use to flambé your, er, flambé), it’s fast, simple, and with just a few precautions, quite safe and easy to do at home.
Follow along with this step-by-step tutorial to learn how to solder wire with just a few supplies!
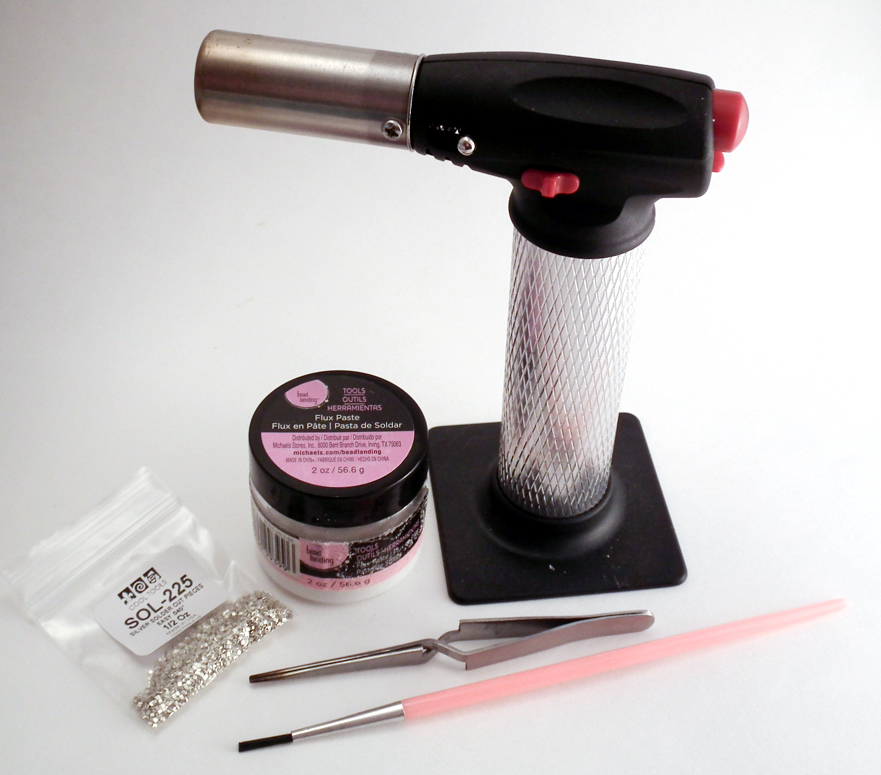
How to Solder Wire – the materials you’ll need to get it done!
How to solder wire
Let’s talk a bit about the materials and tools you’re going to need…
- First, you need a torch. I like this little self-igniting butane torch — I don’t have to worry about creating a spark, just push down the safety, press a button, and voila, a flame!
- You’ll also need some steel tweezers, a metal file, a bit of flux and a brush, and some solder. You can buy sheet solder and use tin snips to cut off bits, or purchase pre-cut squares like I did.
- In addition, you’ll need a safe surface to solder on (not pictured) such as a fire brick in a metal pan, or a soldering square. You want to make sure your flame isn’t going to end up pointed at anything flammable, so give yourself lots of room, wherever you set up. And keep your fire extinguisher handy!
- Finally, you’ll need a metal pot filled with water, and a method to pickle (clean) the final project. I like to use salt + vinegar in a 1:1 ratio, in a small little $10 slow-cooker, left on low when I’m soldering.
Step 1:
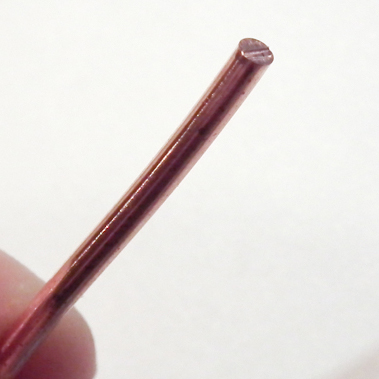
Cut your wire.
Here I’ve used my ultra-flush cutters to snip the ends of my 12ga copper wire. My cutters are really good but if you look closely, you’ll still see a wee little ridge down the center of the wire leftover from the snips. If you haven’t invested in ultra-flush cutters then your ridge will be even more prominent.
This ridge is a problem because — and this is very important — solder does not jump gaps. So we need to use a small, flat metal file to remove this ridge. Use short strokes, in one direction (away from you) to slowly take off the material until it’s flat and perpendicular to the length of the wire. Do this on both ends you wish to solder.
Step 2:
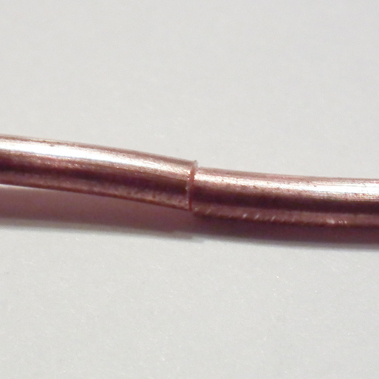
Place your ends together.
Here, I’m soldering one piece’s two ends to each other in order to create an eventual circle. You do NOT need to make the circle perfectly now, in fact, it’s easier not to. Wire this thick is too heavy to make perfect — yet! Just bend the ends together in such a way that they are pushed against each other. I find pushing them past each other and then pulling them back lets the wire create enough spring and tension to hold the ends flush and tight.
As shown above, make sure the edges are aligned perfectly. To be sure, hold the join up to the light — if you can see light through it, it’s not perfect yet.

Step 3:
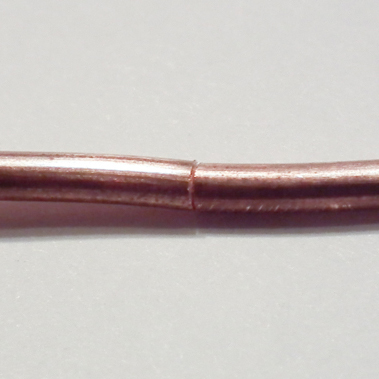
Paint the joint with some flux. Solder will flow to where the flux is so make sure you get all the way around it.
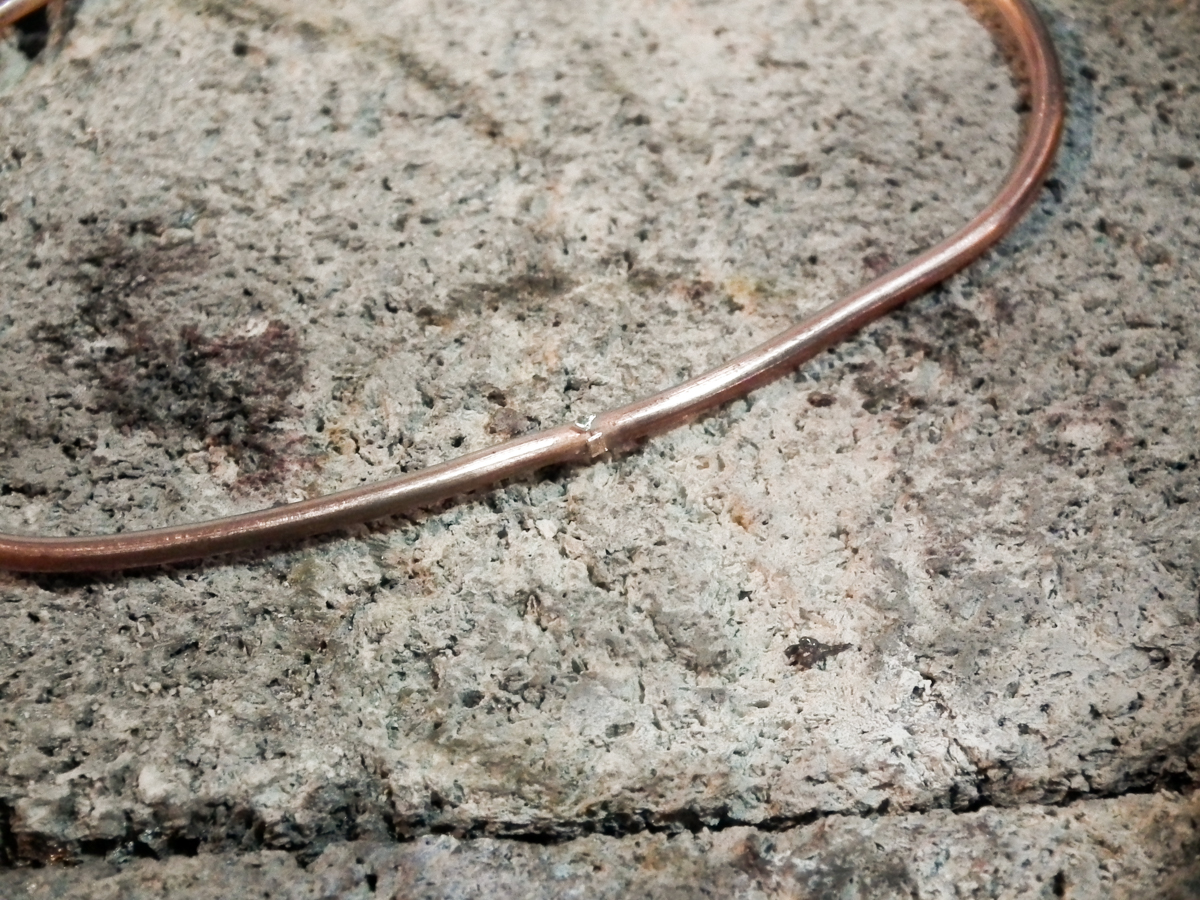
Using your flux brush, pick up one or small two pieces of solder (you don’t need much) and place them on the join. They should stick to the flux.
Step 4:
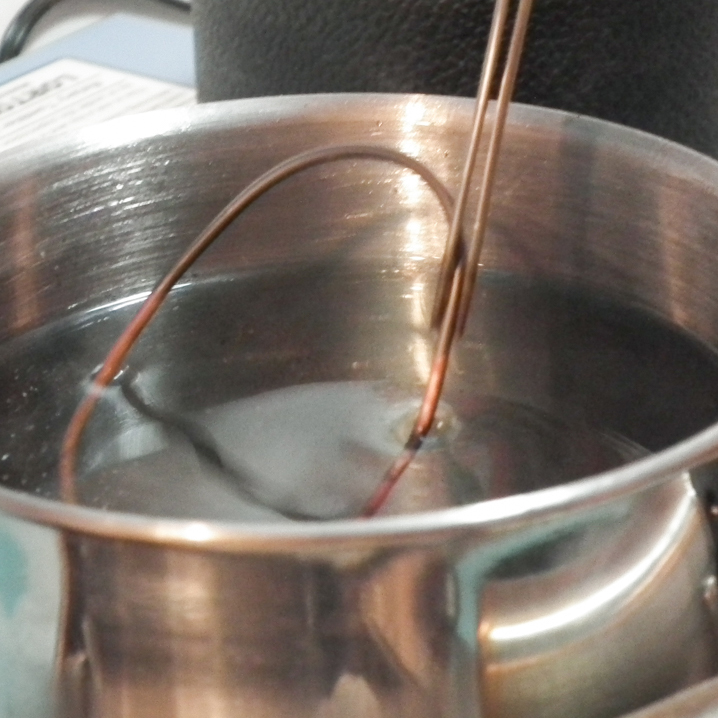
Start your torch up according to its directions. Make the flame is blue and an inch or so long. Begin heating the whole wire, not just the solder join. Run your flame back and forth, around and around the wire, focusing on the join briefly at each pass.

The color of the wire will start changing. When you see it start to flash with your torch movements, the solder is about to go! Keep the torch constantly moving and suddenly – SLURP! — the solder will flash silver, melt and flow into the join.
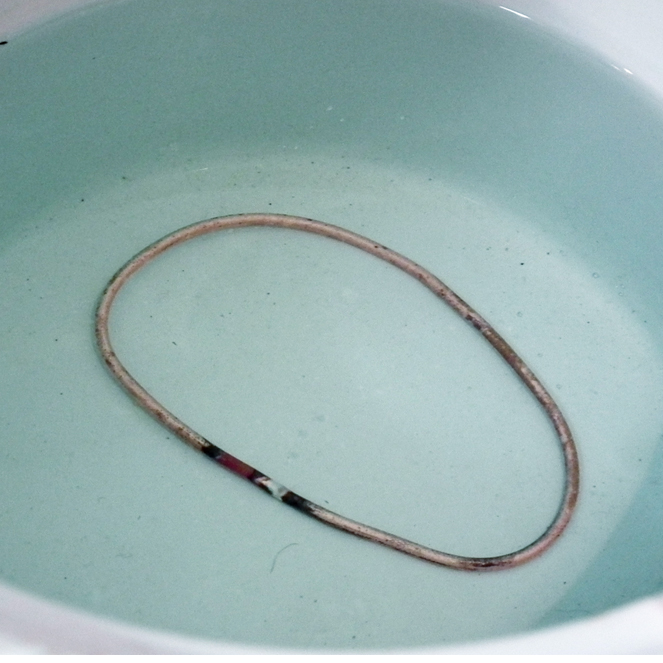
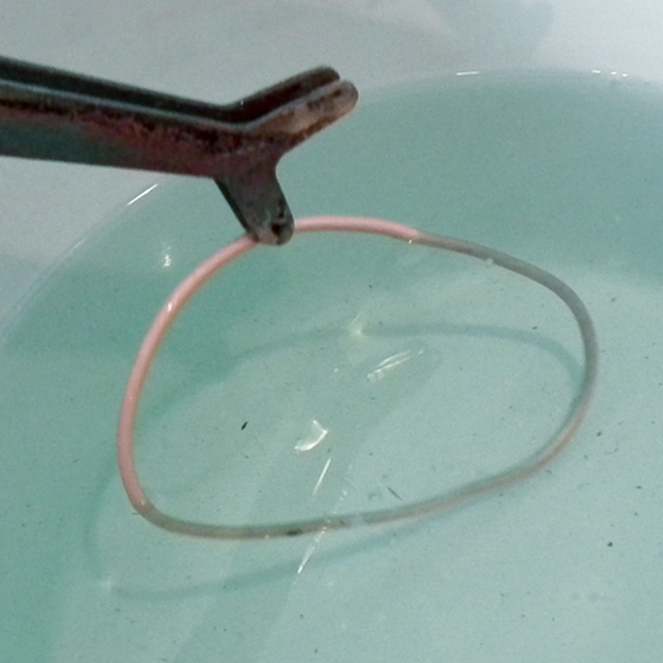
Step 5:
Quickly, pick up the finished piece with steel tweezers and quench it in some cool water nearby. The schoop-hiisssss noise it makes is really oddly satisfying.
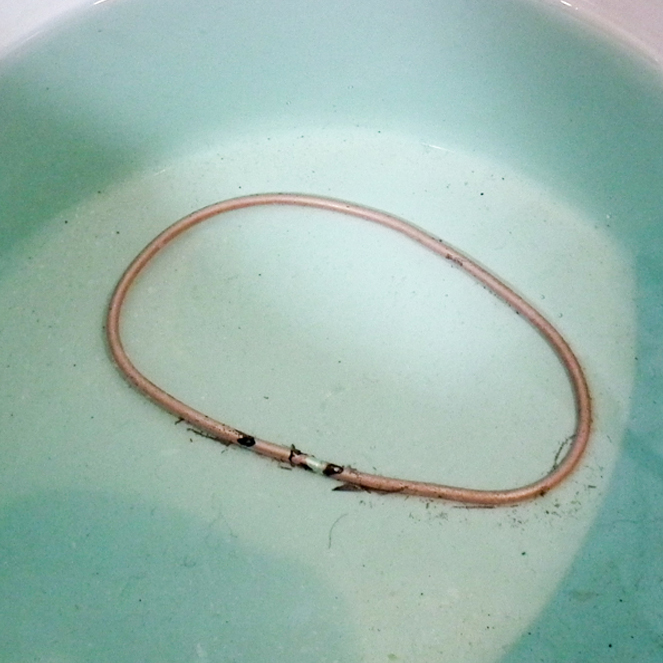
Step 6:
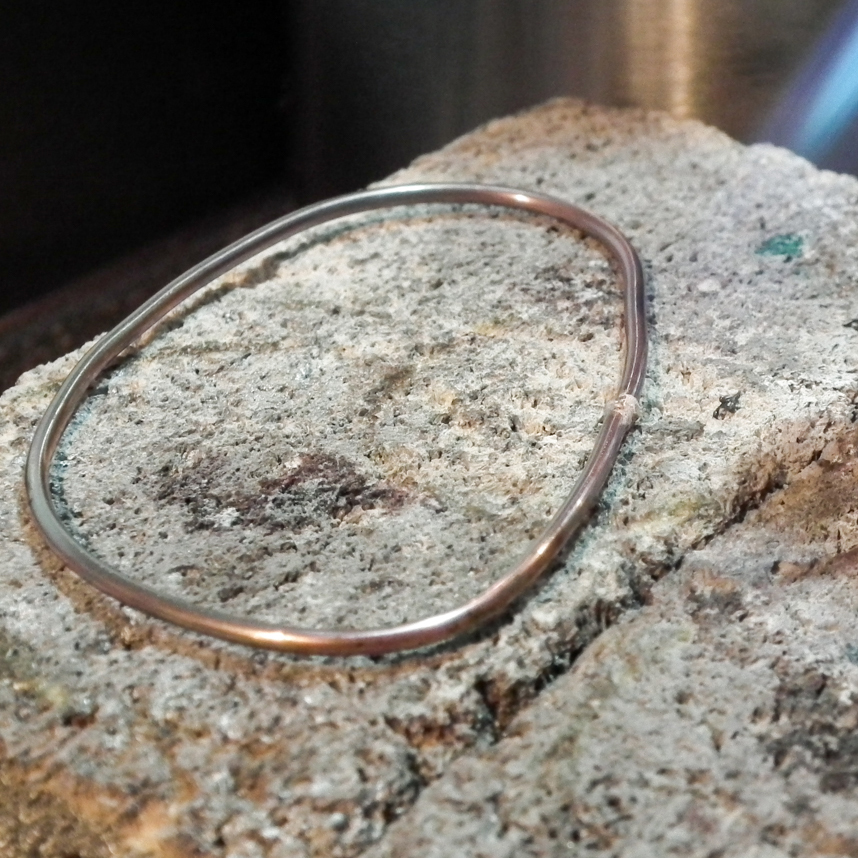
It only takes a second to cool off, so fish the piece back out of the water and drop it into your pickle pot. The pickle will work at the firescale (that black and red stuff) and clean the wire off.
Step 7:
Using copper tweezers (NEVER put steel into your pickle pot), remove the pickled piece, rinse it, and wipe off any remaining firescale.
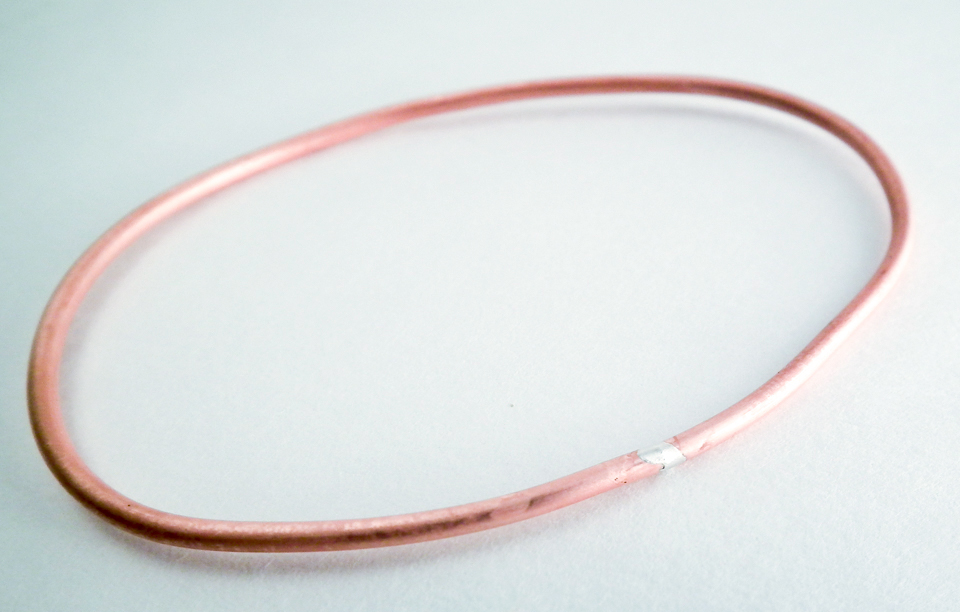
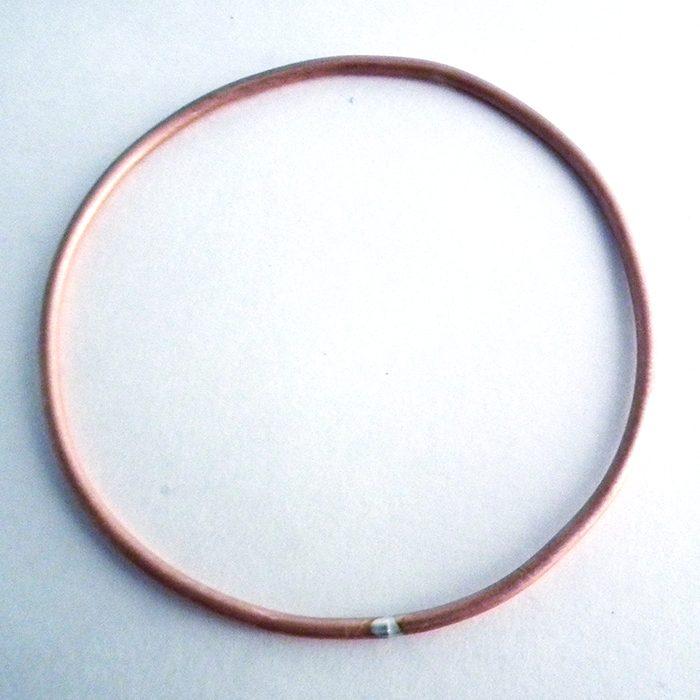
Step 8:
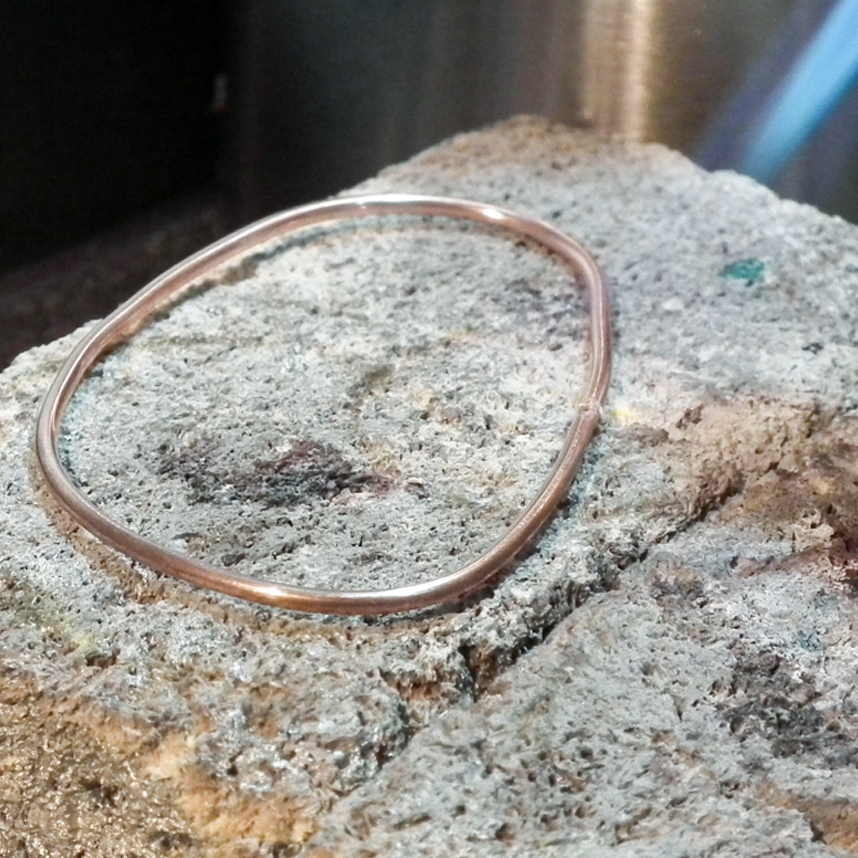
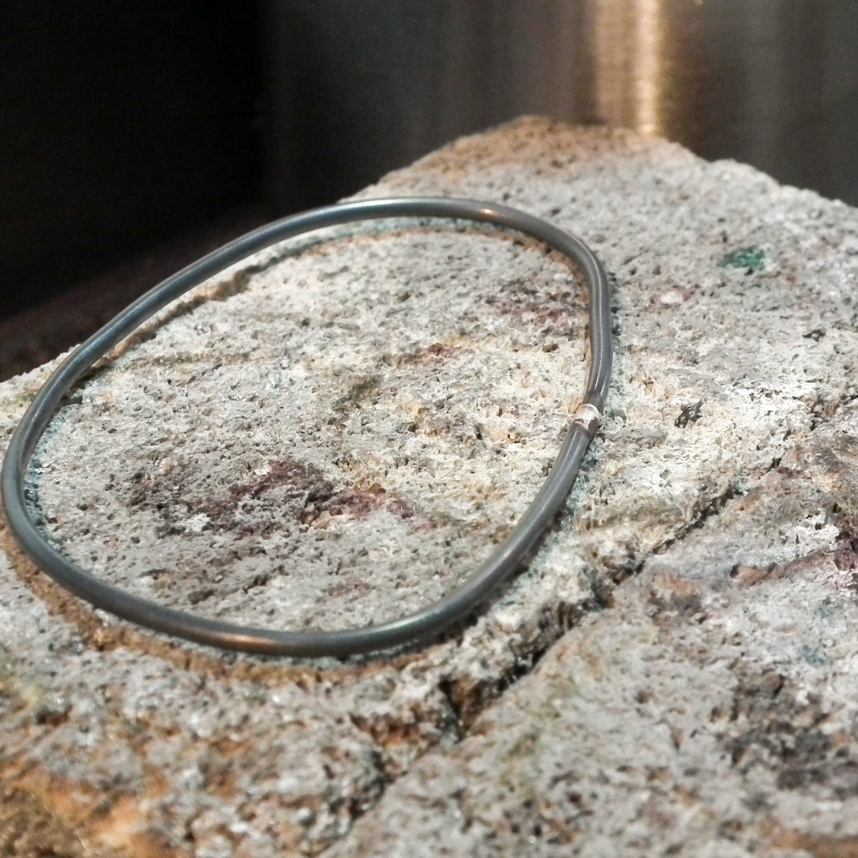
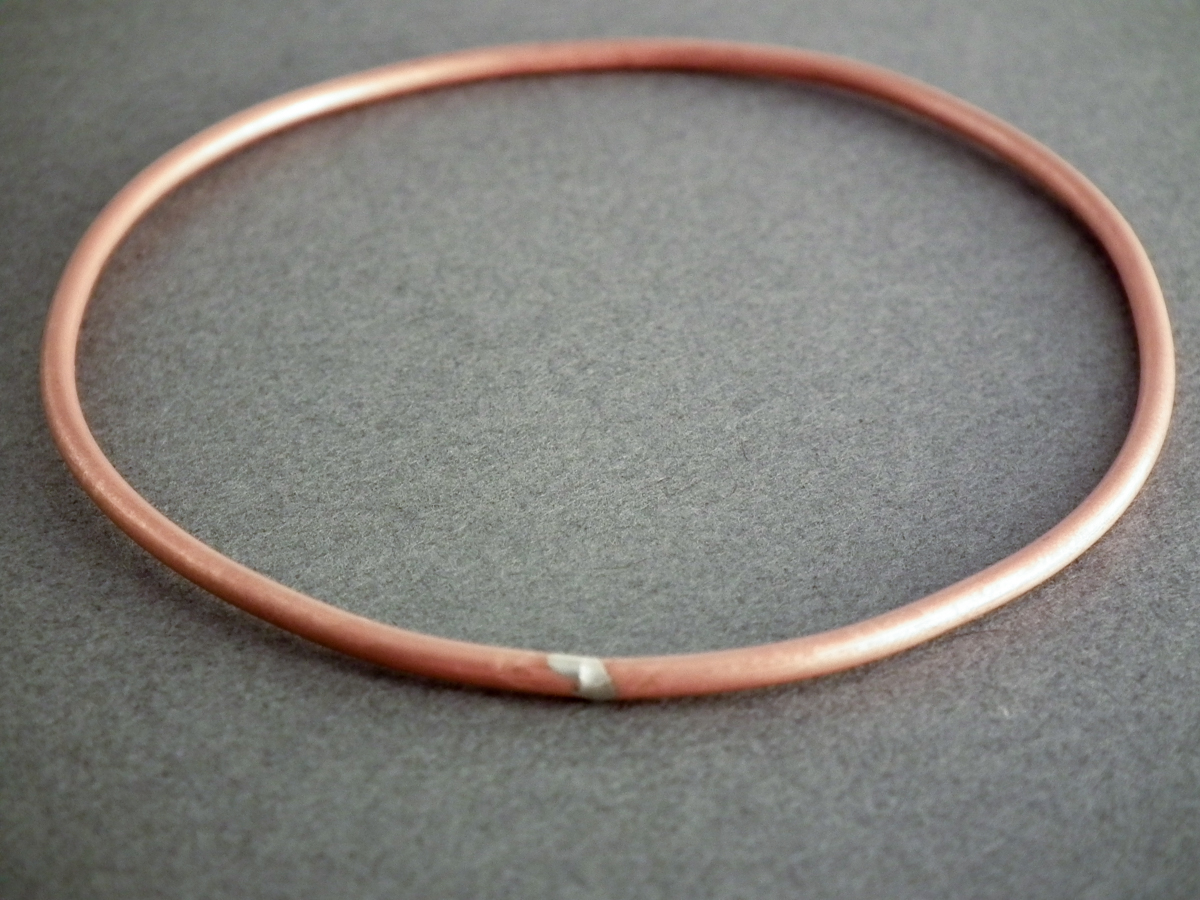
Now, here’s the hidden joy to flame soldering: remember how hard my 12ga wire was to shape? Well, that color change you observed in the flame meant the wire was becoming annealed, which is to say softened up a bit. You can now easily shape this using your hands into a perfect circle.
And that’s it! You can file off the excess solder, or use copper solder, if you don’t like the silver. I usually antique my wire and mix my metals anyway so I sort of like the way it looks here. There’s also a great paste solder demonstrated by Kate Richbourg in her online classes, and she covers ALL the basics in her FREE Craftsy mini-class Micro Torch Basics. If this has whetted your appetite, head over there and sign up to see it in action!
All photos via Gayle Bird
Share tips, start a discussion or ask one of our experts or other students a question.
No Responses to “Don't Fear Fire! How to Solder Wire With Just a Few Basic Supplies”