
Cutting up small pieces of fabrics, like fat quarters and fat eighths, is relatively easy. Cutting into yardage, on the other hand, is considerably more intimidating for the new quilter or sewer. Learn how to square up yardage, creating a straight edge. This preparatory technique is the foundation for accurate patchwork cutting.
Getting started
Don’t prewash
It’s easiest to cut unwashed fabric. Fabric fresh off the bolt has factory finishes that help the threads of the fabric lay as intended. Once washed, the threads may shift, distorting the print slightly. Prewashed fabric is generally more fluid and requires more skill to handle. If you’re new to rotary cutting, do not prewash your fabrics for quilt and home decor projects.
Press
Always, always, always press fabrics before cutting. Do not press out the bolt fold, as this is useful when cutting into yardage. Add starch while pressing if dealing with a troublesome shifty fabric, such as linen. Quilting cottons are easiest!
How to square up fabric yardage
Step 1: Match the selvedges
Images via Stitched in Color
Each cut of yardage has four sides: two selvedges and two cut edges. The selvedge is a tightly woven clean edge produced in the fabric factory. Often designer fabrics are printed with the name of the fabric designer and collection along the selvedge.
On the bolt, fabric is folded with selvedges matched together. The fold down the center of your yardage is the bolt fold. Ideally, when the fabric is folded along the bolt fold, the selvedges are matched and parallel to each other. Check that this is so. If not, if the bolt fold is made so that the selvedges are not parallel, do press out the bolt fold and refold with selvedges matched and parallel.
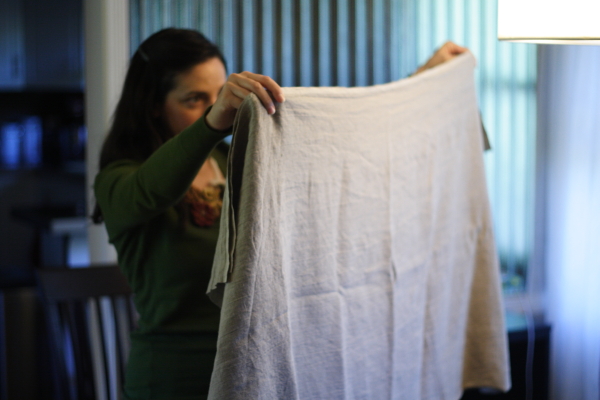
Step 2: Shift and slide
Hold your yardage in the air with the selvedges neatly matched (as you see above). Keeping the selvedges aligned, shift the fabric as necessary so that there are no pull lines and the fabric hangs flat. This shifting is similar to how sliding doors move on a track.
Depending on how straight the fabric store cut your fabric, you may need to shift just a little or a lot. If working with a large length of fabric, such as a 2-yard cut, you might need help for this step.
Step 3: Place the fabric on a cutting mat
Lay your flat, folded yardage on your largest cutting mat, being careful to keep the selvedges together. The bolt fold should be oriented horizontally. If you are right handed, the right cut edges of the yardage should lie over your cutting mat.
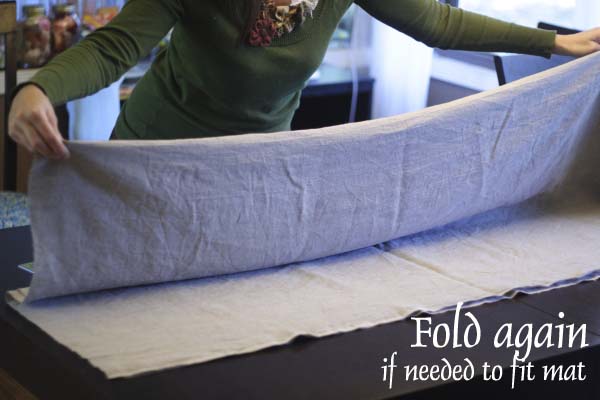
If the entire length of the right cut edge does not fit on your cutting mat, fold the fabric again to make it fit. Be very careful when you fold! Every fold introduces an opportunity for error. Try to keep the fabric that remains on the mat very still and match up the first fold to the selvedges carefully.
Step 4: Align fabric
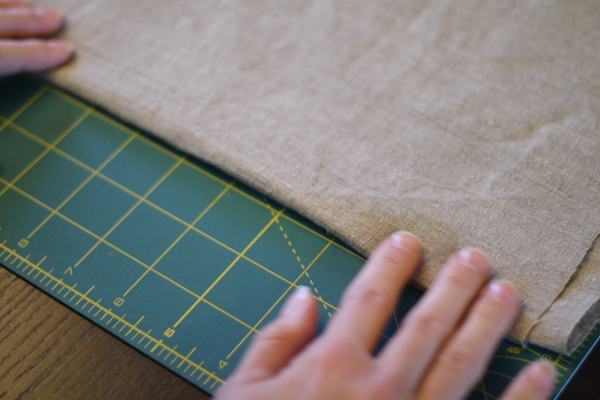
You’re almost ready to cut! First you’ll move the folded fabric carefully so that it’s sitting straight on your cutting mat. Align the bottom folded edge with a horizontal line on the cutting mat. Try to disturb the fabric as little as possible. It usually works best to pull the fabric down toward a horizontal line, instead of moving the fabric upward.
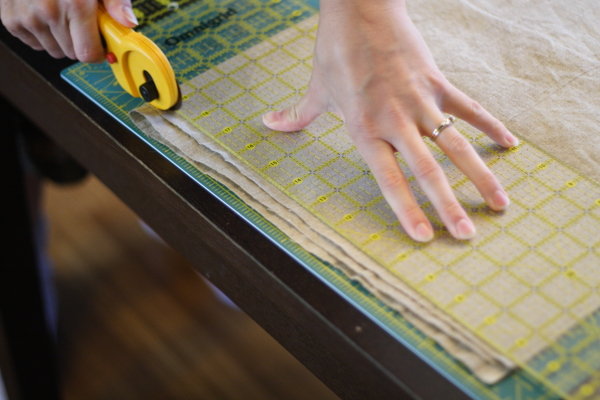
Step 5: Cut
Your folded yardage should be laying on your cutting mat with the bottom fold aligned to a horizontal mat line and the right cut edges (or left if you are left handed) of the yardage entirely on the mat. Place a quilting ruler along the cut edges, matching the ruler to a vertical mat line. Trim off whatever fabric is necessary to make an even, freshly cut edge.
Now that your yardage is squared up, you are ready to make any width-of-fabric cuts needed. Cut strips across the width of fabric, then segment in the shapes you require.
Editor’s Note: This post was originally published in October 2015 and was updated in December 2017.
Share tips, start a discussion or ask one of our experts or other students a question.
No Responses to “A Smart Method for Squaring Up Fabric Yardage”