
Whether you are photographing your quilt to sell, to share on your blog or to show off to friends, it pays to take a great photograph. Considering the number of hours spent selecting fabric, assembling a quilt top and finishing it, don’t you think your quilt deserves to be seen in the best list?
Much of the magic comes in when you take the time to properly “stage” your quilt, which means choosing a background and props to set the scene of your photo shoot. Oftentimes, it’s easier to toss the quilt on the living room floor and take a quick photo with your phone’s camera. But a thoughtful photograph that takes background, props, lighting and composition into account will make your quilt look that much better!
Here are examples of stunning quilt photography + tips you can use to celebrate the beauty and complexity of your finished projects!
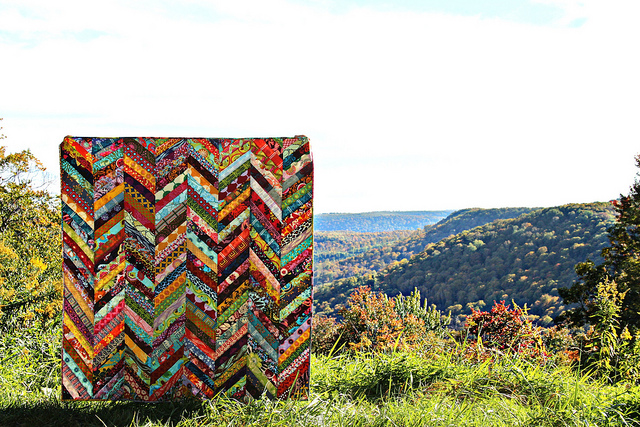
Photo via Maureen Cracknell Handmade
Tip #1: Have quilt, will travel
If you need some inspiration for photographing your quilts, hurry on over to Maureen Cracknell Handmade, winner of the Craftsy Blogger Award for Best Quilt Photography. Her Autumn Herringbone Quilt looks spectacular against a backdrop of Pennsylvania’s fall foliage. When Maureen travels, even if it’s just a 15-minute drive away, she often takes photos of her quilts in natural environments. The next time you hop in the car to go to the park, the lake or the mountains, toss a quilt in the car and see if inspiration strikes.
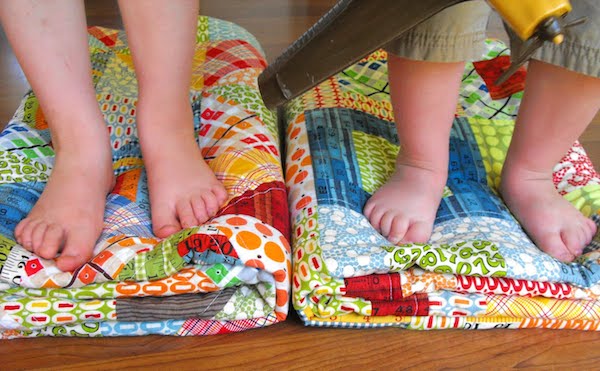
Photo via Fussy Cut
Tip #2: Add a human element
If you believe that quilts are meant to be snuggled and loved, it’s okay to show that personality in the way you stage your quilt photography! Angela’s Little Boy Quilts look absolutely darling with tiny feet on top. A photo can be so much more than just an image of a finished project. Like this photo, it can evoke emotions and tell a story. Considering photographing your quilt with the recipient to add a human element to your images.
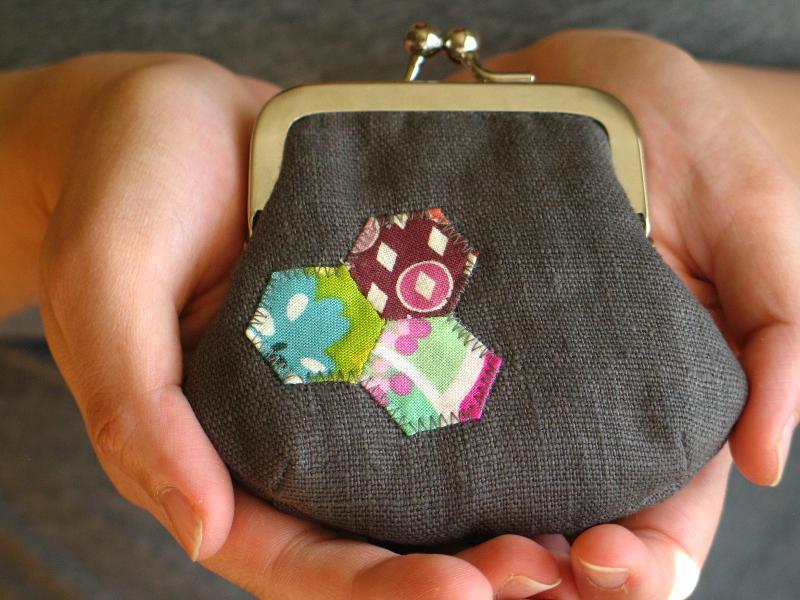
Photo via Craftsy member bitterpurl
Tip #3: Show the proportion.
A small quilted project looks great when you use props or even a person in the photograph to show the proportion. In the case of this Chubby Coin Purse, the model’s hands cupping the purse show off the tiny size of the hand-stitched hexagons. This also makes the coin purse stand out against an otherwise grey background.
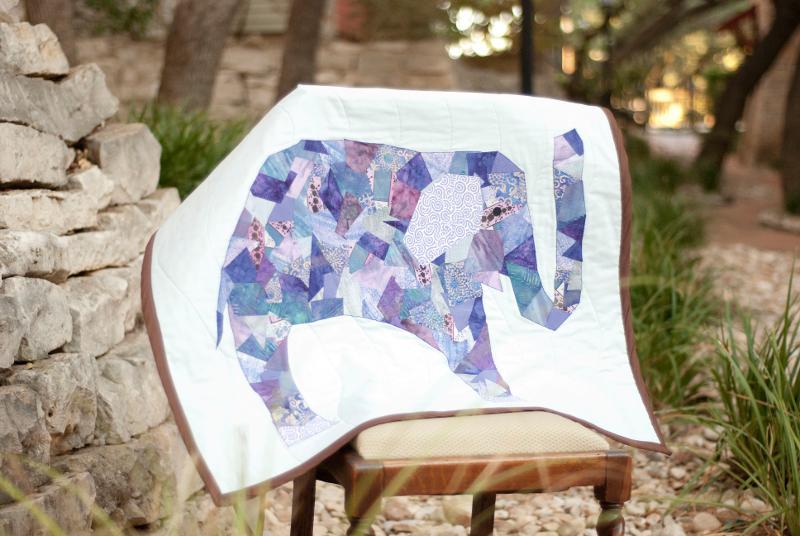
Photo via Craftsy member BottleTree
Tip #4: Get outside!
Unless you have a lot of fancy photography equipment in your home, you’ll likely get a better photograph by staging your photo in the great outdoors. If it’s sunny, look for a spot in the shade. Overcast days are great for getting photos of your quilted projects, as you can see in this gorgeous Sweet Elephant Quilt. The natural stone and grass create a nice “habitat” for the elephant. If the thought of laying your crisp, white quilt on dirty gravel is just too much, bring a chair outside or set up a clothes line to keep it clean.
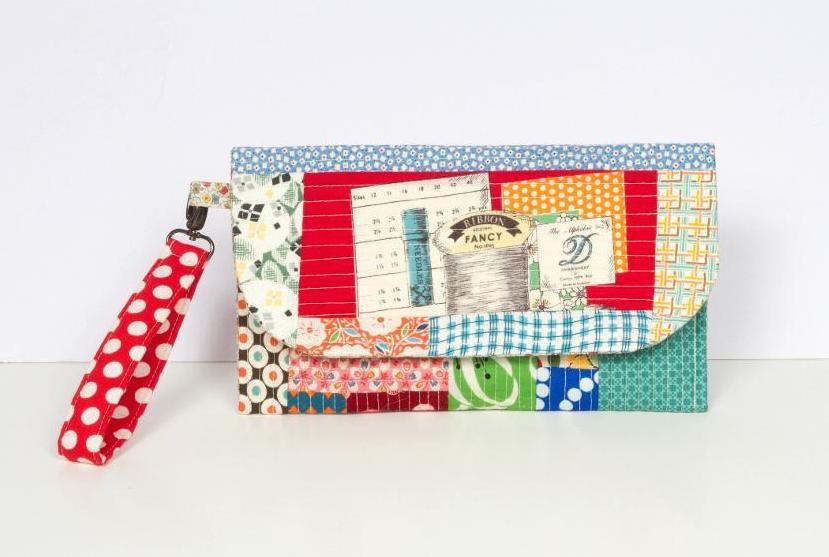
Photo via Craftsy instructor Tara Rebman
Tip #5: Make a light box.
Notice how the scrappy fabrics on this Patchwork Clutch really pop against a white background? If your house doesn’t have any bright, white places to photograph your quilt, you can create an easy DIY light box for photography with a cardboard box, a box cutter and some white paper or fabric.
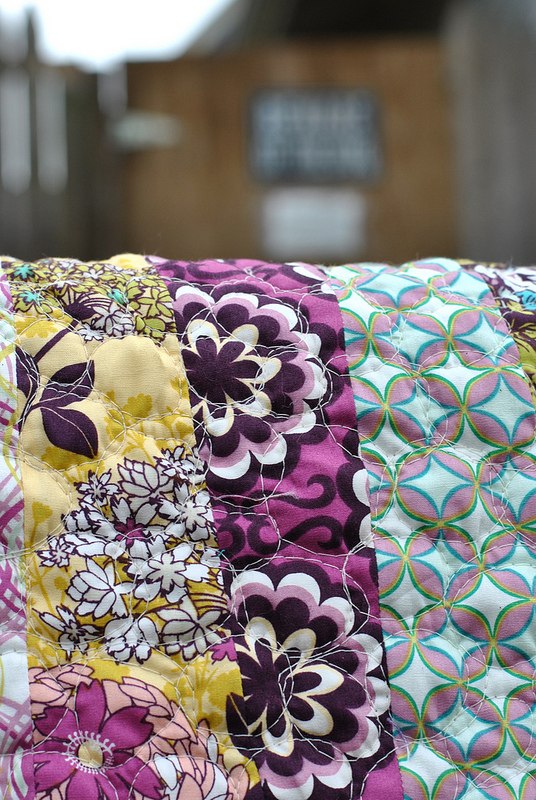
Photo via Lindsay Sews
Tip #6: Get up close
If you’ve already photographed the full quilt, don’t forget to move in close for a detail shot of the fabrics and quilting. This photo of my Cherry Pie Quilt was taken over a fence in an alley. I used a 50mm prime lens to show the foreground in great detail with a blurred background.
Once you’ve learned how to properly stage your quilts for a photograph, make sure to check out how to photograph your quilt for additional tips that will get you stunning results.
Thank you so much!
Would love to see the quilting on a large quilt. How do you photograph the entire quilt so you can see the quilting? Are there special lights?