

Here’s the thing: you don’t need to be a whiz with a paint brush to create beautifully patterned cakes. All you actually need are stencils. They turn smears of buttercream into gorgeous, crisp patterns and create tasty works of art. Once you get the technique down, you can use it with any stencil to make a wide variety of desserts, whether you prefer an all-over pattern or just a few accents.
How to Choose the Right Stencil
There are a lot of stencils to choose from. Keep these tips in mind before adding one to your cart.
1. Be Flexible
Flexibility is key when using stencils on buttercream. Look for ones that are thin and bendy, so they’ll easily form to the cake’s curves.
2. Go Reusable
Choose reusable stencils made from plastic or thin foam. You’ll be cleaning the stencil frequently and subjecting it to a lot of butter, so paper and cardboard stencils are out.
3. Start Slow
Pick the stencil that best matches your skill level. If you’re just starting out, choose one with a large opening and minimal details. As you grow more confident with your cake decorating abilities, you can reach for more intricate stencils.
4. Skip Multi-Step Stencils
Choosing a stencil with multiple layers is just asking for trouble, especially when you’re using buttercream. It’s not impossible, but it requires you to chill your cake between each layer and opens up the room for error.
5. Trim the Corners
It’s best to trim off any hard corners that could poke at the buttercream. So don’t use stencils you’re afraid to customize.
Stenciled Buttercream Cake
Level: Easy
What You Need
Good to Know: Your cake needs to be chilled solid before you begin stenciling. Soft buttercream will smear easily, and if your cake isn’t chilled all the way through it may dent with all the steadying and spreading as you work.
Instructions
1. Prep for Piping
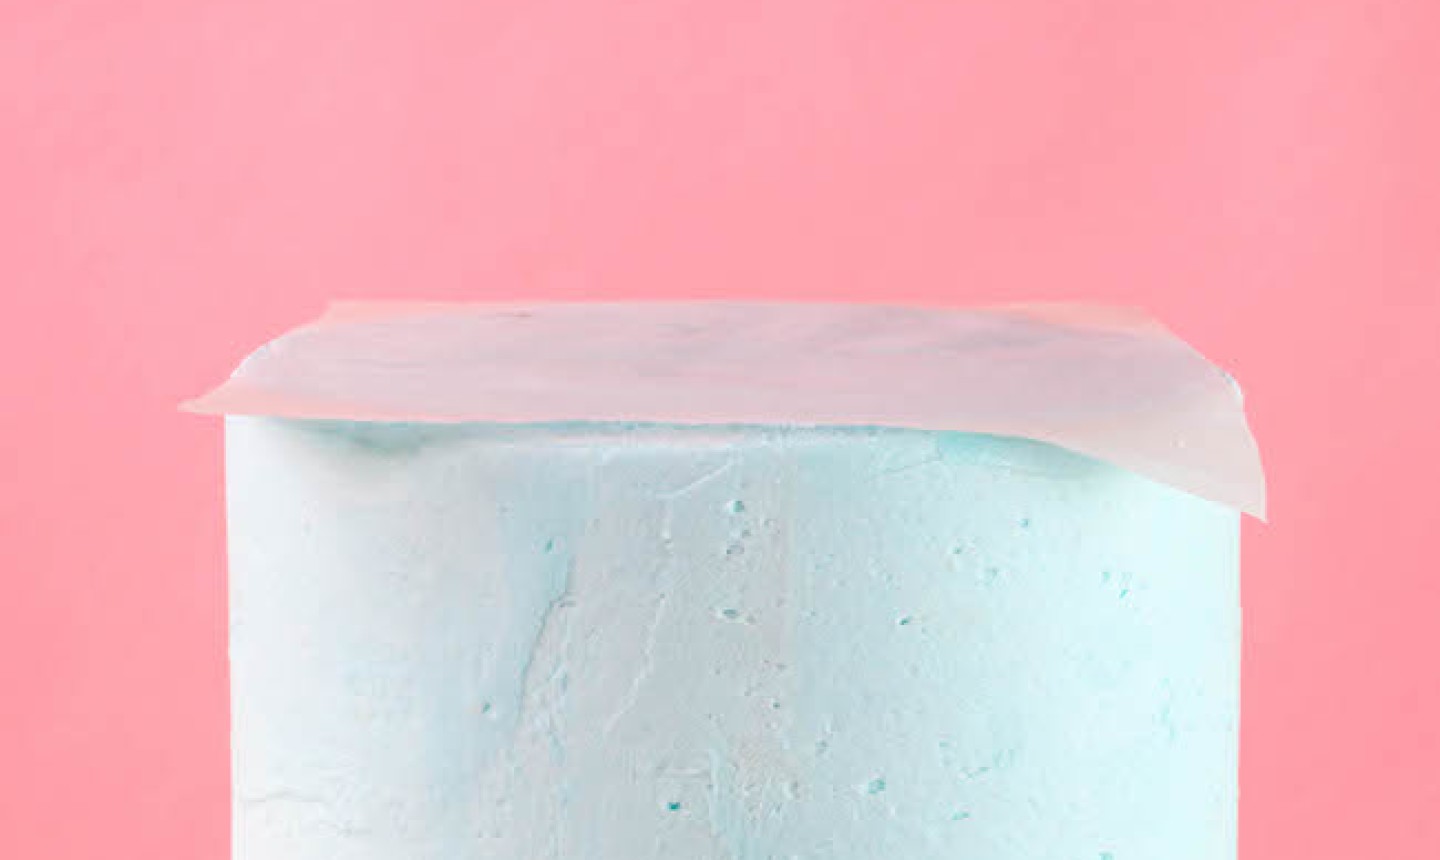
Cut a piece of parchment paper and grease one side with a light coat of shortening. Lay the paper shortening-side down on top of the cake. This gives you a place to steady the cake and rest your hand as you work while protecting the buttercream.
Lightly grease the side of the stencil that will touch the cake, using a paper towel to rub the shortening on. Use enough to make the stencil slick, but not so much that you can see the shortening.
Pro Tip: If you plan on creating a pattern with your stencil or are working with a small cake, trim away the hard edges of the stencil before you grease.
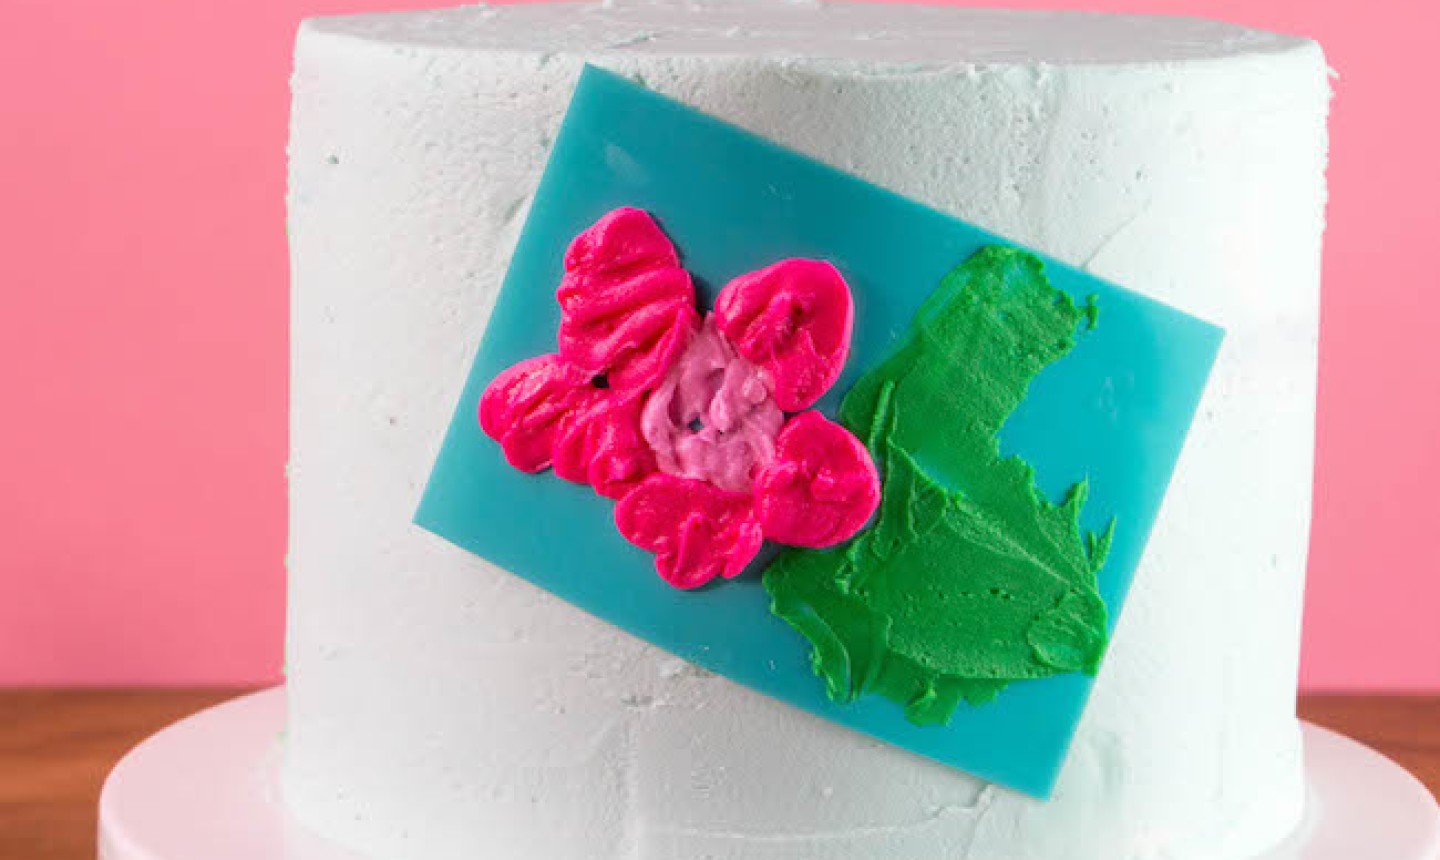
2. Begin Stenciling

Hold the stencil, greased-side down, up to the cake. Pipe the first color onto the stencil and use an offset spatula to spread it across the opening.
Spread the buttercream from the middle of the opening out toward the edges. Lift the spatula away from the stencil to prevent the buttercream from running over the edge onto the cake. Once the color is added, give a final swipe over the area to level the buttercream.
Pro Tip: Piping allows you to be more precise. When you just smear buttercream over a stencil, you run the risk of pushing the color underneath your stencil, which can cause it to move and smudge (and totally ruin your design).
3. Create a Two-Toned Effect
Pipe two shades of color over the openings of the stencil.
Pro Tip: To color your buttercream in different shades of the same color and achieve an ombré effect , create your base color (the lightest you’ll use). Then separate some of this color into another bowl and add more food coloring to darken it.
Carefully spread the buttercream across the stencil to smooth and blend the colors. We started with the light pink buttercream and spread toward the darker shade on the edges of the petals.
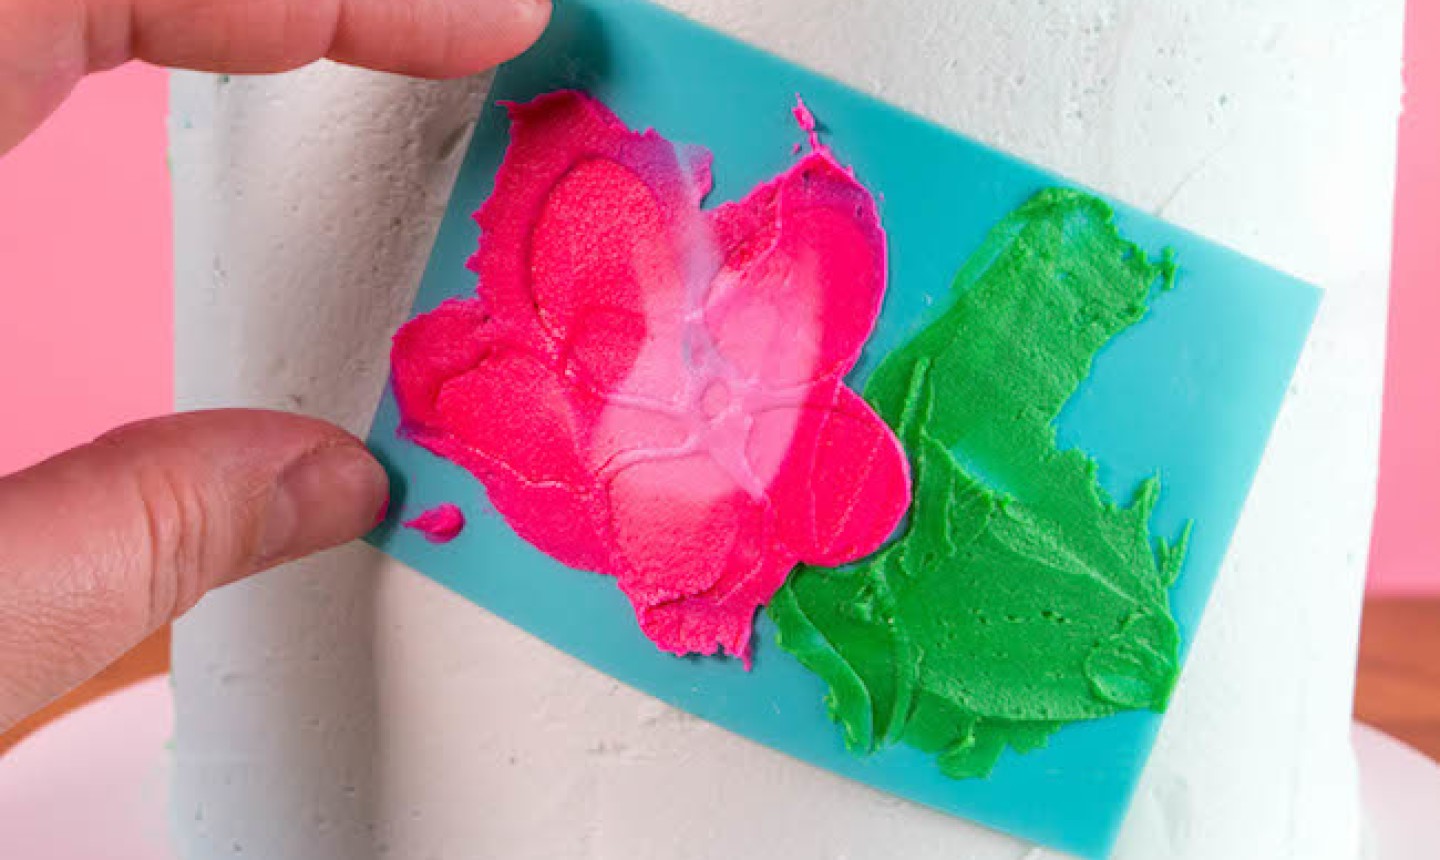
4. Remove the Stencil
The moment of truth! Carefully lift one edge of the stencil from the cake and peel it away in a smooth motion.
If any buttercream has escaped the edges of the stencil, gently remove it using a paintbrush or the tip of a knife. If your cake has softened, place it back in the fridge until it’s solid again. (Buttercream smears will be easier to scrape away when the cake is firm.)
Wipe your stencil clean, then move on to your next design.
5. Repeat
Keep working around your cake, making sure to clean your stencil between every use.
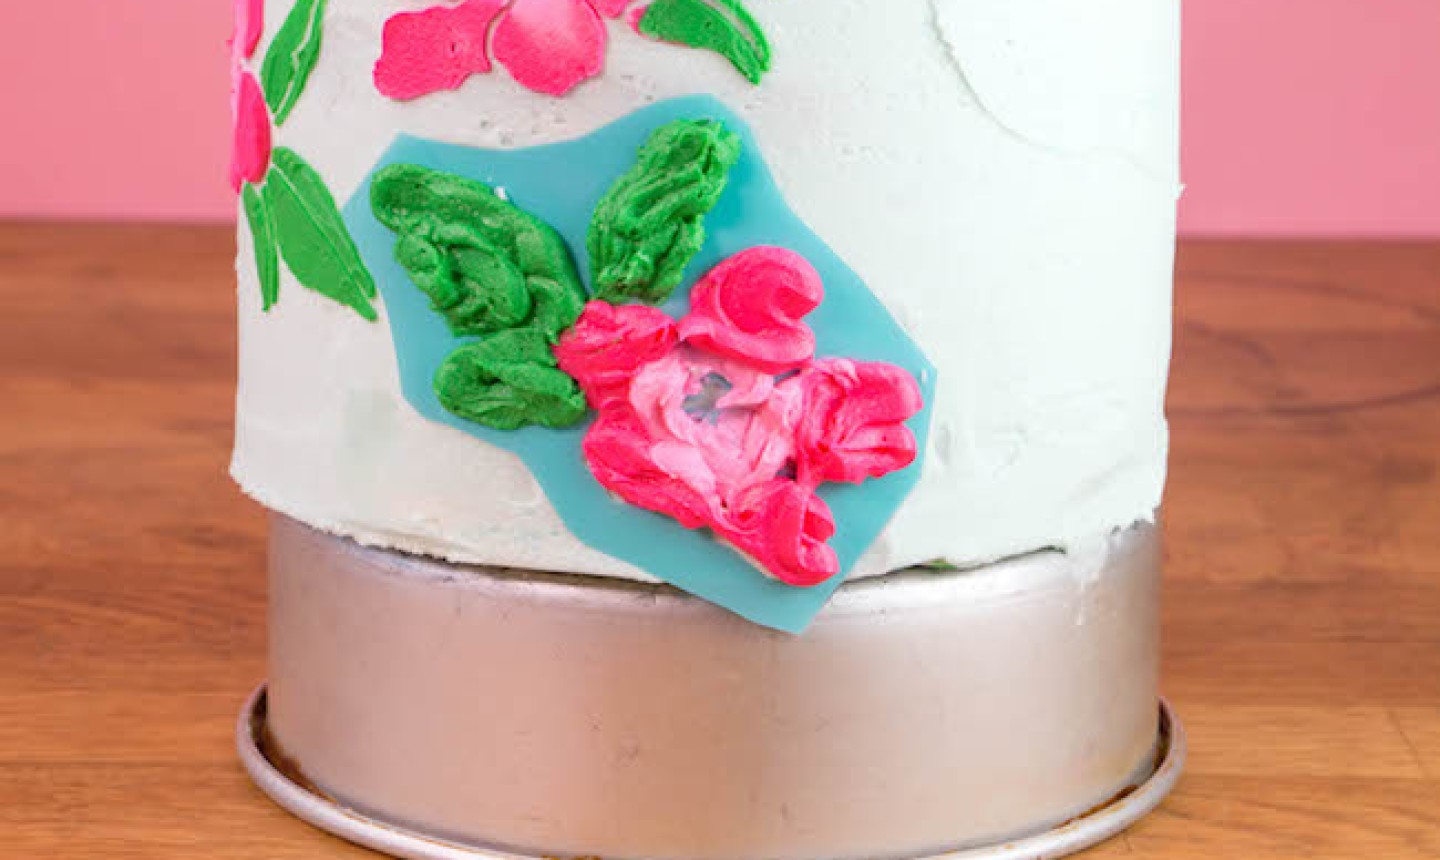
To create a pattern that flows over the edges of your cake, set it on a pan of the same size and use your stencil normally. The design will flow off the cake and onto the pan, but it’s an easy clean-up. Or, if you don’t plan on using your stencil again, you can cut away the portion that will fall off the cake.
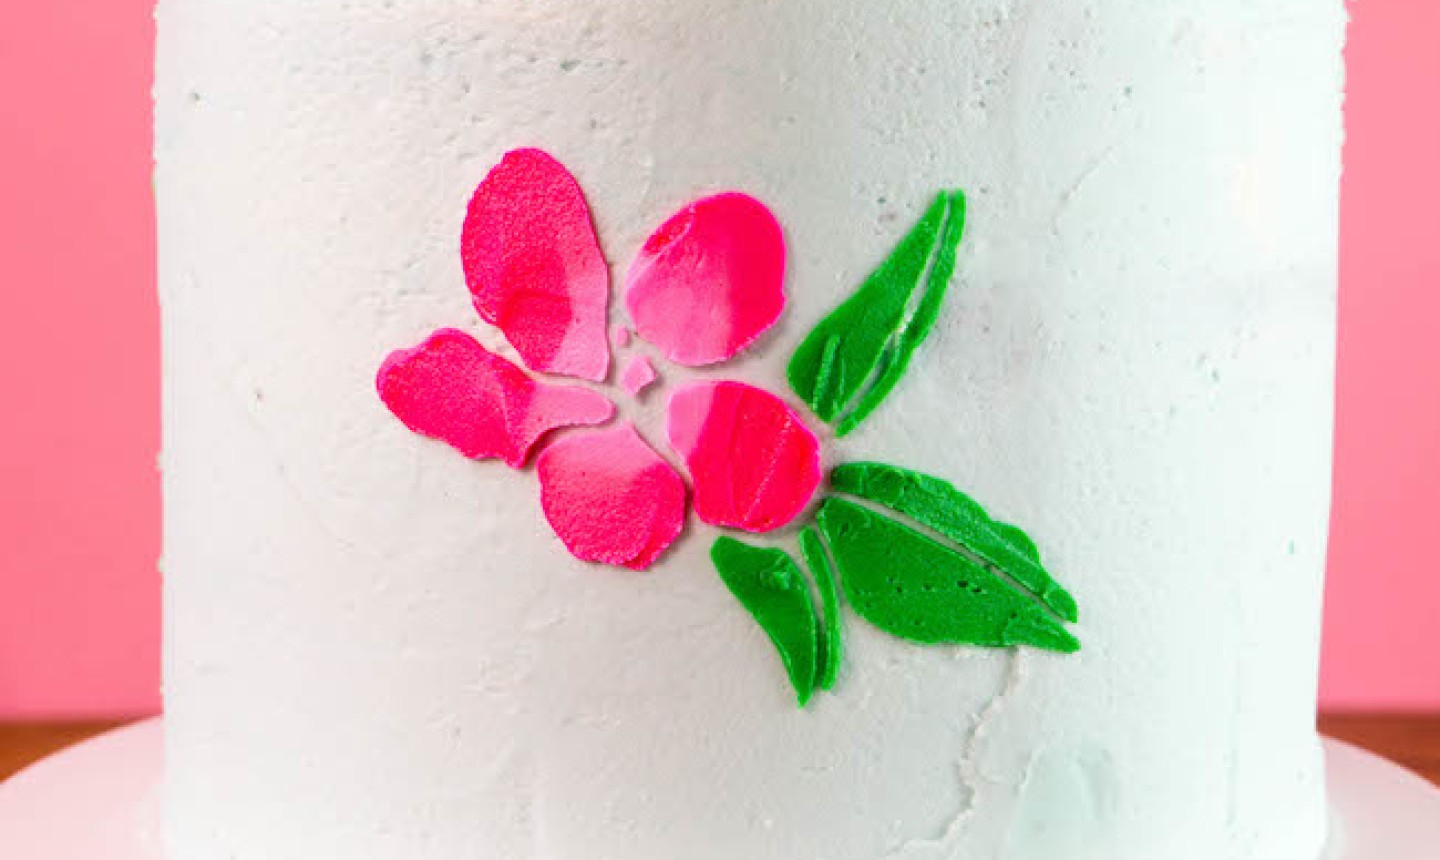
6. Add the Final Details
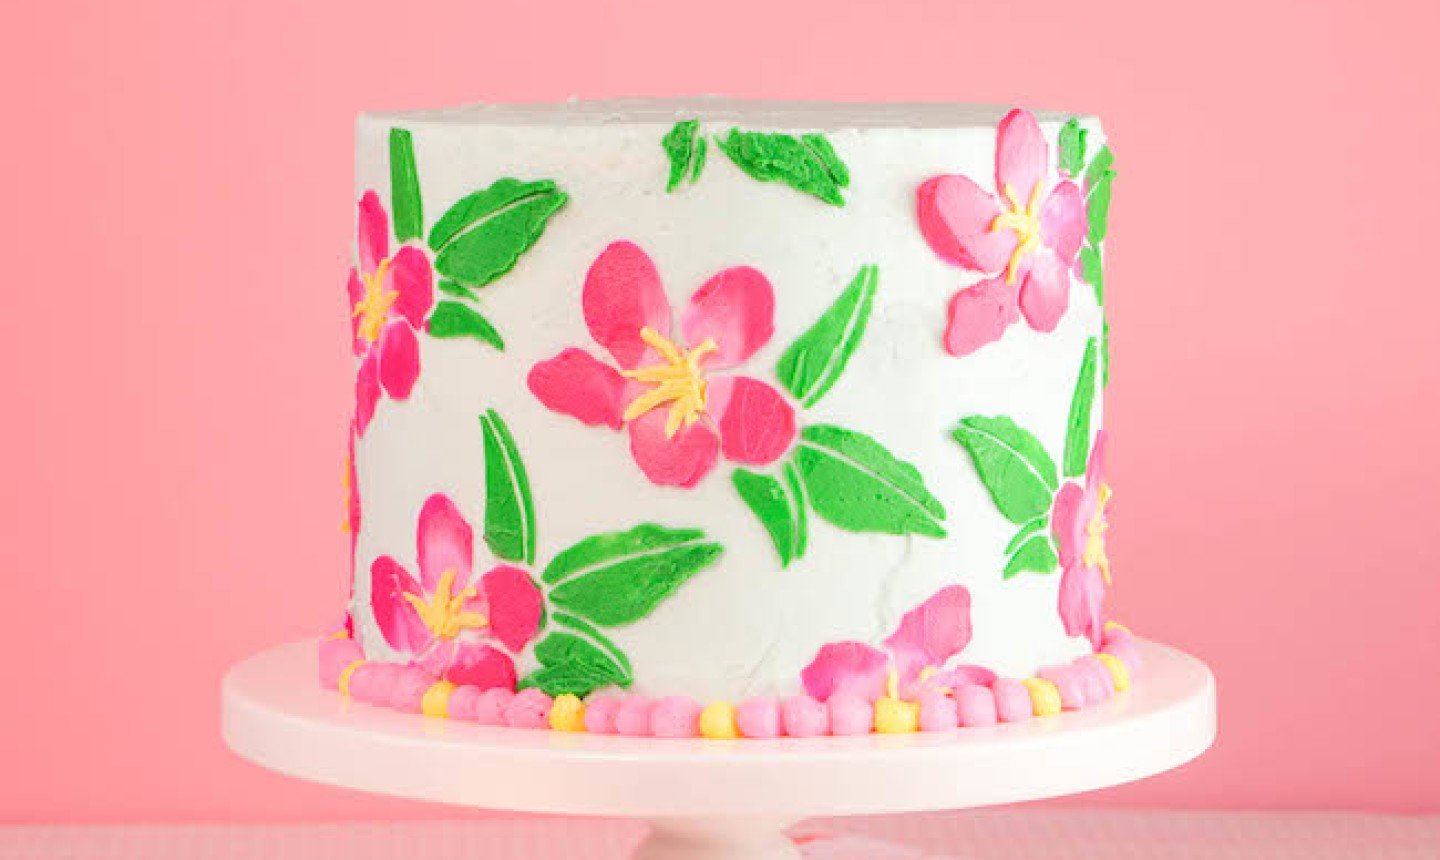
Give the pattern more dimension by piping any final details, like the center of the flowers and a pearl border around the base. This is also a good opportunity to cover any little mistakes made during stenciling.
Your cake (or should we say masterpiece?) is done!
I like the flower stencil you use in the photo. Can you tell me where you bought it?
I tried stencilling for the 1st time,followed all d instructions, my cake was chilled well,buttercream was soft enough and applied and scraped off too..but when I pulled out d stencil after scrapping buttercream too came out with it ,and was not stuck on the cake .tried many times but still d same results. What would have went wrong ?