
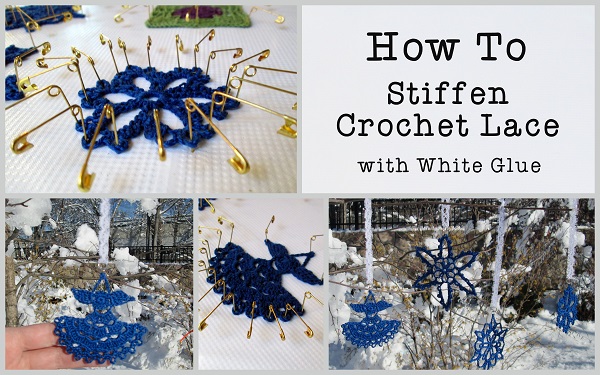
Turn your crochet lace into a cherished heirloom! Protect your fine threadwork and make your stitches stand out when you block and stiffen your project. It’s easy and you don’t need any fancy tools or chemicals to transform your work into a beautiful keepsake.
Technique and product options
There are several different techniques and products available to stiffen your crochet work. The oldest method uses sugar. That’s right! Yummy, sweet, white sugar. I have read that it works well, but there are drawbacks. The process can be sticky and messy. The finished projects do not fair well near water. You need to take special care when storing your pieces because if stored in the wrong environment, they may attract pests. (Yuck!)
Then there are the commercial products that you can buy at your local department store. You can find spray and liquid starch with the laundry supplies, or there is fabric stiffener that you find in the craft department. These are designed to be safe for most fabrics, but testing a small sample is always a good idea. If you try one of these be sure to follow all of the manufacturers instructions for the best results.
My favorite technique, and the one I am going to show you today, uses all purpose white craft glue. I am a big fan of using things that I have on hand, and there are always a few bottles of glue at our house! This method works great and chances are you everything you need to get started.
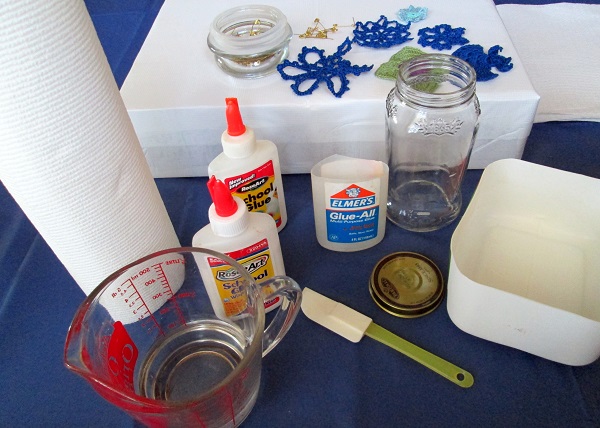
Materials
- All purpose white craft glue (your favorite brand will do just fine)
- Water
- Magic marker
- Jar with tight fitting lid (a mason jar or a pickle or jam jar)
- Shallow bowl or container (I cut the bottom off a 64 oz plastic orange juice bottle)
- Spoon or spatula
- Liquid measuring cup
- Paper towels
- Blocking board (Don’t have one? Here’s how to make your own blocking board)
- Rust proof safety pins or blocking pins
- Items you are going to stiffen
Directions
1. Gather your materials. You may want to cover your work area — just in case.
Photos via Crochet Nirvana
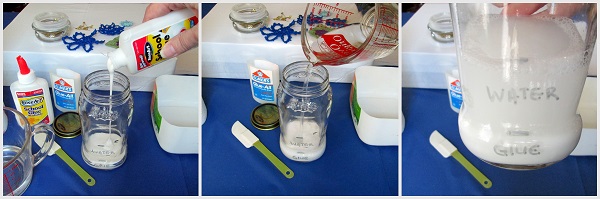
2. Make your stiffening solution. A little goes a long way, but you need to make sure that you have enough to really cover and saturate the items.
The basic recipe is: one part glue to two parts water.
- Measure 1/4 cup water and pour it in the jar. Using the marker, mark where the water line is.
- Dump the water out.
- Fill the jar with glue to the line (1/4 cup).
- Add 1/2 cup water to the jar.
- Close the lid and shake until well blended. It takes a bit so keep on shaking!
Note: This works well for small, open items (like the snowflakes). If your items are heavier and denser a thicker solution (one part glue to one part water) may be in order.
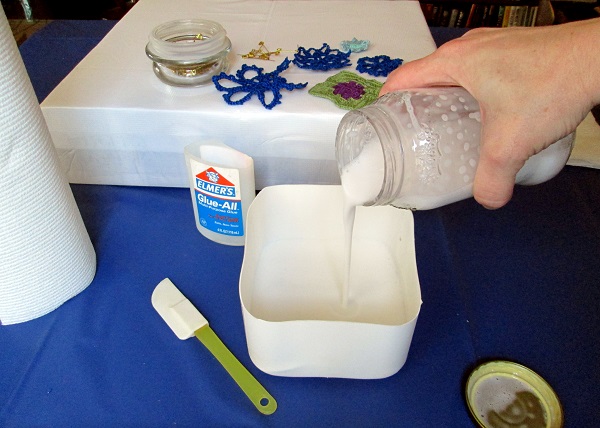
3. Pour the solution in the shallow bowl or container.
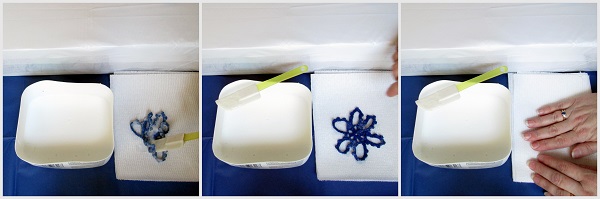
4. Lay out a few paper towels for blotting.
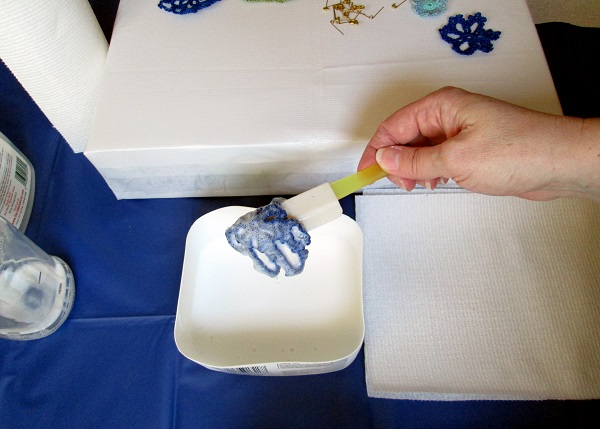
5. Put the item in the solution. Flip it over and make sure that it is fully submerged and thoroughly saturated.
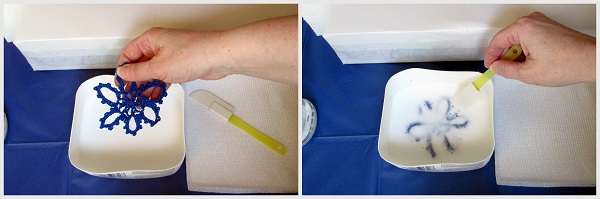
6. Lift the item with the spoon or spatula and let the excess solution run off.
7. Lay out the item on paper towels, straighten and blot gently.
8. Transfer to the blocking board. (If you are using your “good” board you may want to cover it with a
layer or two of plastic wrap or wax paper.)
9. Stretch the item out to the desired shape and secure using rust proof safety pins or blocking pins. It works best if you go from top to bottom and side to side to ensure straight even lines. When blocking I’m a firm believer in using plenty of pins – more is better!
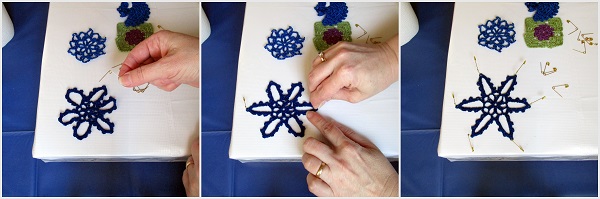
Remember whatever shape you pin your item into is what it will look like when it is dry – so make sure everything is exactly where you want it!!
10. Now repeat with all your pieces. When you are finished, set your blocking board in a safe place and let your work dry. Overnight is best.
If your pieces are not as stiff as you want or need them to be, go ahead and re-dip them. The second coat should give you the definition you are looking for. To add shine, lightly spray the dried finished pieces with a semi or high gloss spray sealer.
Clean up and storage
When you are finished, pour the solution back in the jar and close it tightly. Store it in a cool, dry place indefinitely. The glue and water will separate, when you are ready to use it again shake well and you are good to go! I’ve used a glue solution that was more than two years old and it worked fine!
All of your tools and the work area can be cleaned with hot, soapy water.
Once everything is dry, your crochet handiwork is ready. To display my snowflake and angel ornaments I added a jump ring and a lace loop to each for easy hanging.
The glue should remain stiff and stable for years to come making it perfect for your crochet lace doilies, decorations and ornaments that are destine to become cherished family heirlooms!
Share tips, start a discussion or ask one of our experts or other students a question.
No Responses to “Creating Heirlooms: How To Stiffen Crochet Lace With White Glue”