
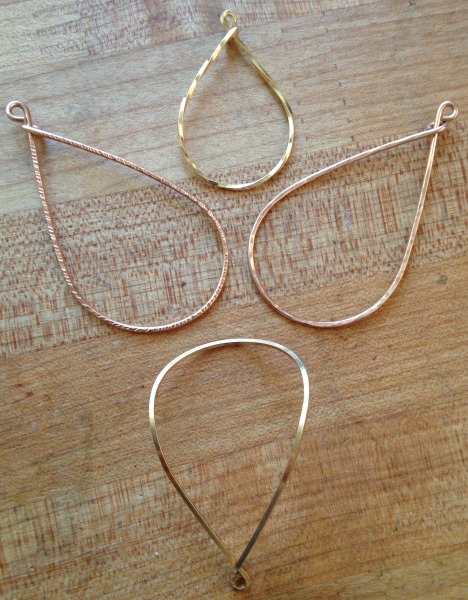
In my last post, I covered how to make a wire-wrapped hoops, an everyday classic and jewelry wardrobe must-have. In this post, I’ll show you how to texture metal four different ways so you can give those hoops even more personality.
Texturing metal requires some access to tools, but take a look around your space and let your brain run wild. In addition to the list below, there are certainly hundreds of other ways to make your hoops truly one of a kind. Think things like cement or chicken wire for texture and embroidery floss or colored craft wire for design details. All which can give you really unique accents and textures.
Hammered textures
Let’s get started with hammered textures, the following are just two of many. Once you start researching textured hammers, you’ll pull up a ton, but these are two of my standby favorites.
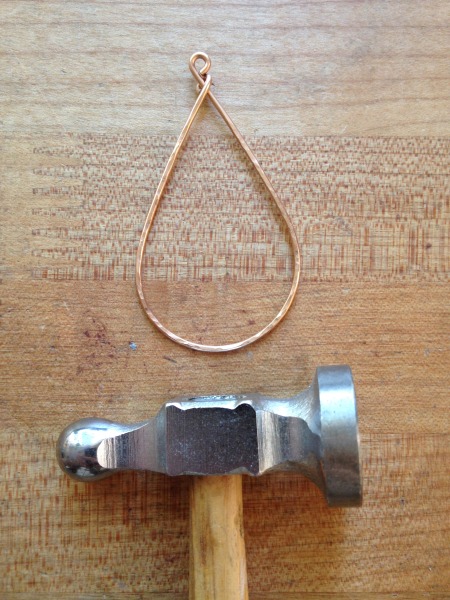
First up, a good old-fashioned chasing hammer. If you get hooked into jewelry making and end up delving deeper into techniques, this is a tool you’ll want to own. It’ll help you when flattening metal, setting stones and is a great all-around hammer.
For a basic hammered look, we’ll use the rounded end. Simply lay your piece on a small anvil or bench block and get that arm moving. You can vary the size of the marks that you leave by increasing or decreasing the amount of strength you put into each hammer blow. Below, the trusty tool and an example of what the finished textured hoop will look like.
Lined texture
Next up, a lined textured done using a Fretz sharp texturing raising hammer.
Side note: The price of a Fretz hammer often relates to its awesomeness. These are very well respected and an incredible joy to work with. Not only do they feel good in your hands, they do a wonderful job. Say nothing of the vast variety of textures they have. Hands down, this hammer is one of the top 5 tools in my shop. I get excited when it’s time to use mine.
Again, the technique is pretty simple here. Keeping your piece on top of an anvil or bench block will help you achieve the best results. For this texture I kept the hammer oriented in generally the same direction, but you can get some really neat looks when you alternate hammer blows or even cross them to make X’s.

Twist it up!
Below are two of the ways to get a twisted look. It may sound silly, but first make sure that you have a wire that will show this shape. Personally, I like to use square wire, but rectangular and half round can also create some neat shapes. If you want a shape with twists that are farther apart, doing it all by hand can give you a lot more control.
In this case, I’d put one end of the wire into a small vise while grasping the other end with a pair of flat-nosed pliers. Keep tension on your wire as you twist either clockwise or counterclockwise.
One little item of note is that when you finish, your wire will likely be a little spring-loaded and you might end up loosing a few turns. Take that into account as you finish.
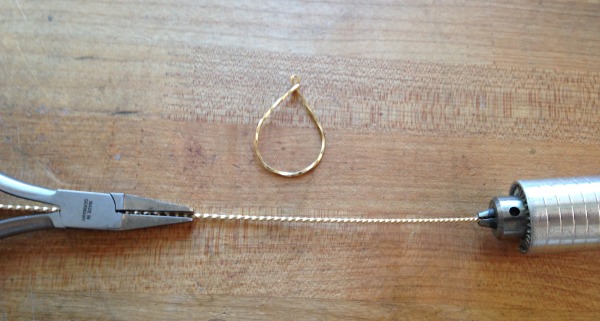
Secondly, with the help of a flex shaft, it’ll take you all of about 30 seconds and you’ll get some nice tight twists. Put one end into your flex shaft and lock into place. Keep a firm hold of the other end with your flat pliers and gently depress your foot pedal. This will be done before you know it , so beware how quickly you start your flex shaft!
Bent wire
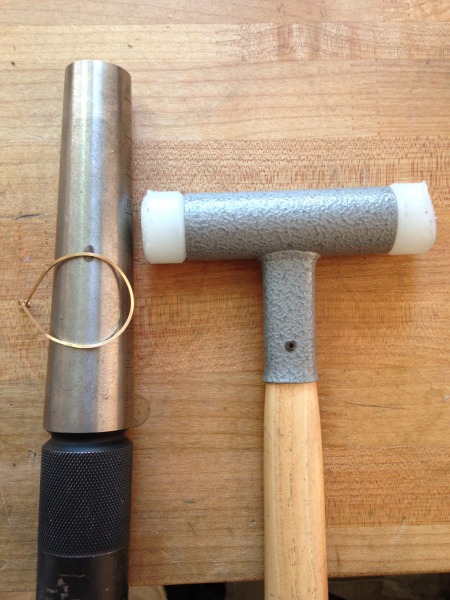
Finally, give your hoops a little dimension by bending them across an anvil, piece of pipe,or baseball bat. Tired of the “same old hoop?” Get more depth and interest with this technique. Plus, it’s amazing how easily this will transform a boring old hoop to a modern take on a classic shaped piece.
Simply use your nylon hammer to gently shape your hoop over whatever object you have handy. Remember to make note of where you formed your piece so you’ll get two that look the same. Or, don’t! Two different shapes in the same pair can be interesting too!
Don’t forget to leave a comment below and share with us what kinds of things that you found in your space. More ideas from everyone means more inspiration to share! In the words of Maya Angelou “You can’t use up creativity. The more you use the more you have. ” Let’s get sharing!
Share tips, start a discussion or ask one of our experts or other students a question.
No Responses to “How to Texture Metal to Add a Whole New Dimension to Your Metalwork”