
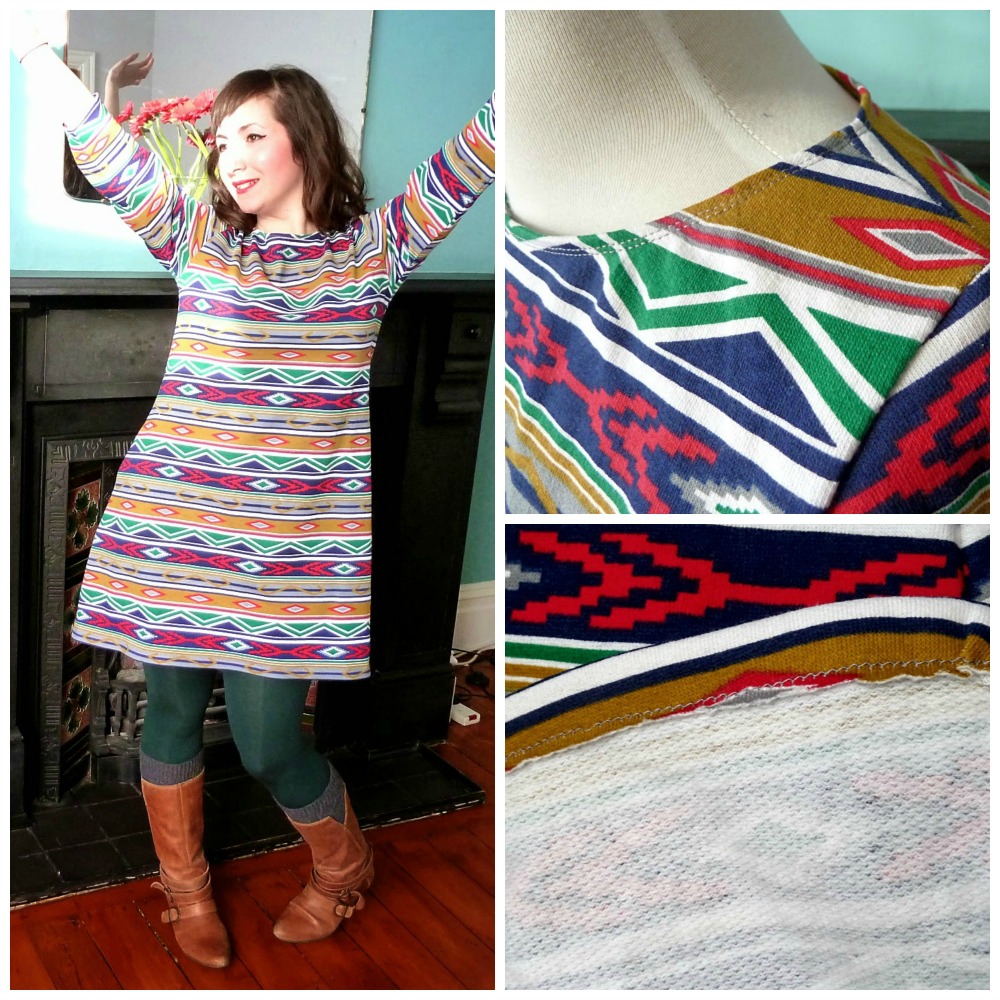
Sewing with knits can be incredibly satisfying, but knowing how to thread a double needle and then use it properly can make the difference between your garments looking obviously handmade and professionally finished. In this post, I’ll walk you through achieving a double needle hem, so that you feel more confident in embracing the recent explosion of knit sewing patterns out there.
What is a double needle and why use one?
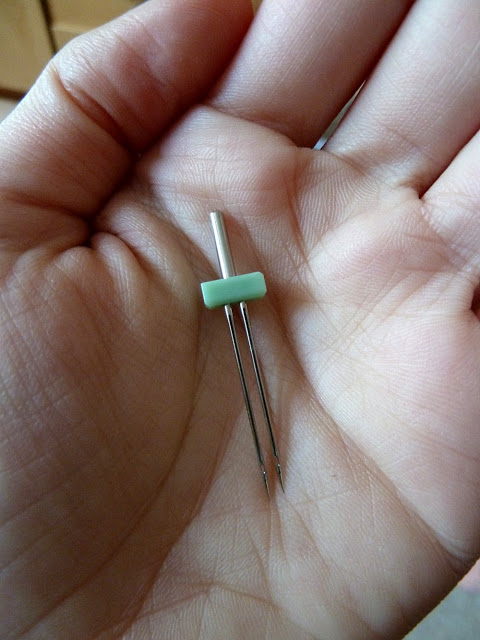
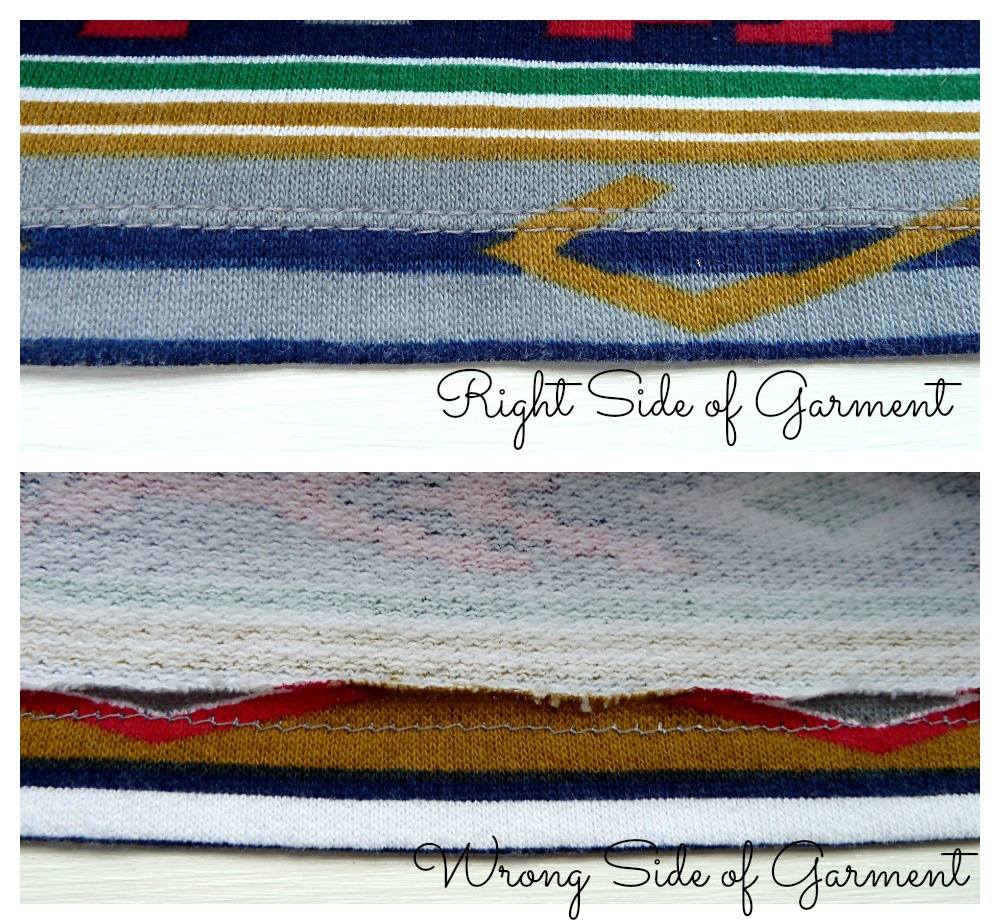
Also known as a twin needle, a double needle is two needles attached to a single shank. One is slightly shorter than the other to allow the bobbin to catch the thread from both needles. It can help achieve professional looking topstitching by imitating the neat row of double stitching commonly seen on the hems, sleeves and necklines of shop-bought knit garments. Most machines can work with a double needle, but do consult your manual first for specific threading instructions.
Choosing the right double needle for your machine
Double needles come in different sizes just like regular needles — they have two numbers to highlight the distance between the needles and the needle size. For example, a 4/90 double needle has a distance of 4 mm between the needles, which are size 90.
If your manual doesn’t specify a preferred size for your machine, make sure that the distance between your needles is no wider than the widest zigzag setting on your machine, to avoid damaging the throat plate and bobbin case. To establish this, you can run a piece of paper through your machine (with no thread in) on the widest zigzag and a short stitch length. Then, just measure the width of the zigzag or take the paper with you when you go needle shopping.
Want to learn more of the sewing techniques that can elevate your garments from drab to fab? Check out the Craftsy sewing class Sew Smarter: 30 Professional Techniques and get started sewing your most sophisticated garments yet!
[/box]
How to thread a double needle
Step 1:
Replace your regular needle with your double needle — this is done in exactly the same way you normally change needles.
Step 2:
Thread the left needle as you would thread a regular needle, using your regular upper thread.
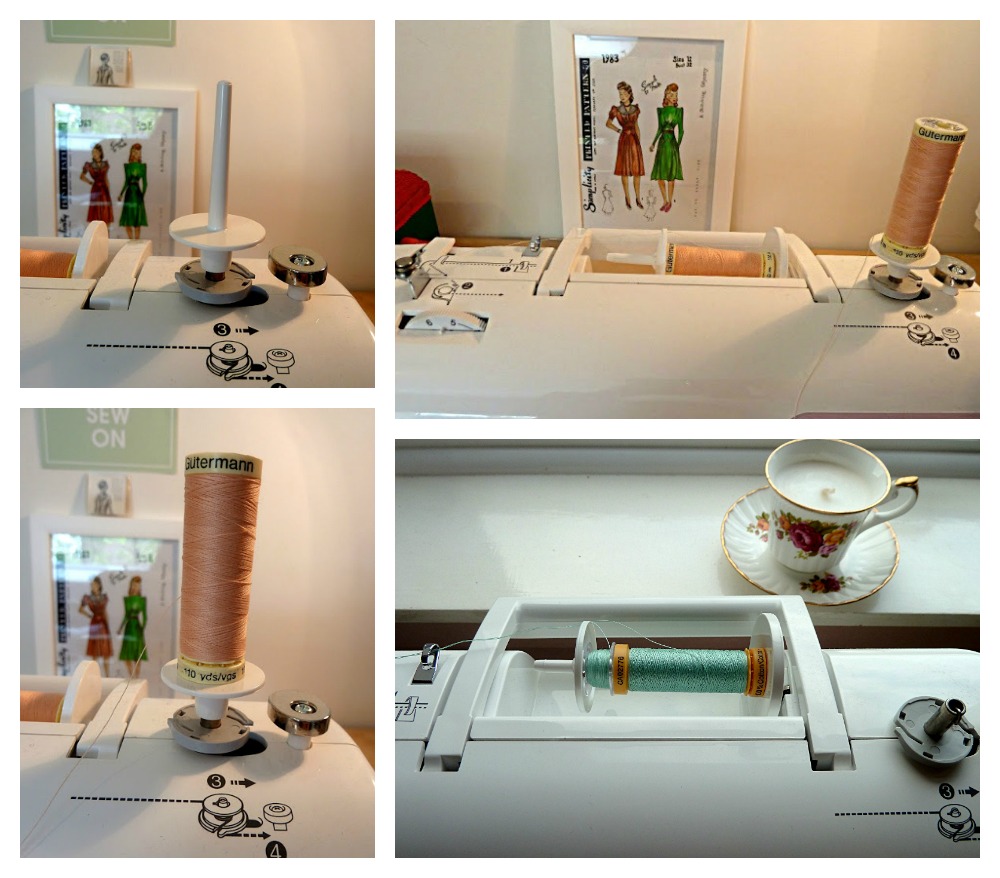
Step 3:
Place your extra spool pin onto the bobbin winder shaft and top with your second spool of thread or bobbin. If your machine doesn’t come with an extra spool pin and you have an overlocker, you can just drag that close and use one of its spools instead. Or, you can even place both spools where you would place your single spool of thread.
Step 4:
Thread the right needle using your extra spool of thread. Again, thread it in the same way you would a normal needle, but don’t pass the thread through the needle bar thread guide this time.
Alternatively you can grab both thread ends, thread them through your machine as if it was one thread, separate them at the end and thread each end through a needle.
Step 5:
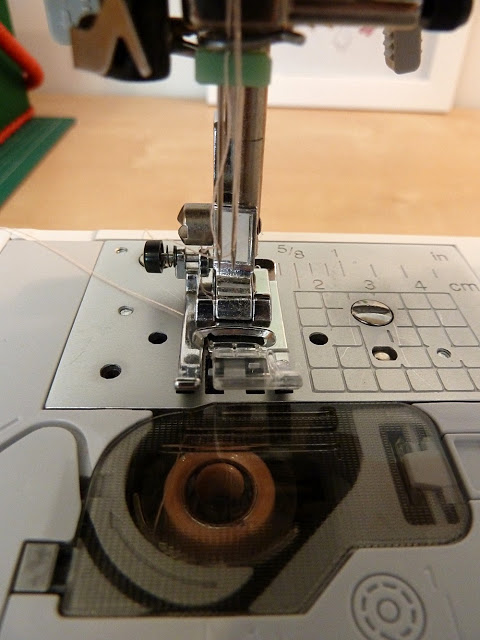
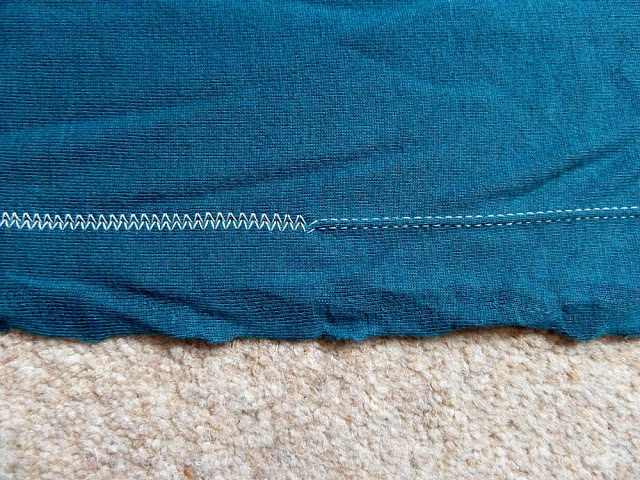
With the right side of your fabric facing up, go ahead and start sewing. My machine is happy with both a zigzag and a straight stitch whilst using a double needle, but be aware that with some you’ll only be able to use a straight stitch, yet with others you may also be able to use a range of decorative stitches too.
I used a regular stitch length and tension for medium weight jerseys, but different weights and types of knit fabric may require tension and presser foot adjustments, so always make sure you experiment with scraps of your fabric first until you’re happy.
Have tried several times on a this piece of stretchy fabric (workout clothes) and when my machine auto reversed at the beginning, the material gets stuck in the feed dogs. I also tried on a piece leftover from a quilt & had the same problem. Very well could be operator error but I’m not sure what I’m doing wrong.