
Making a good dovetail joint largely comes down to accurate sawing. That requires fully focusing the mind and the body, as well as attending to the fine points of technique that I’ll discuss here.
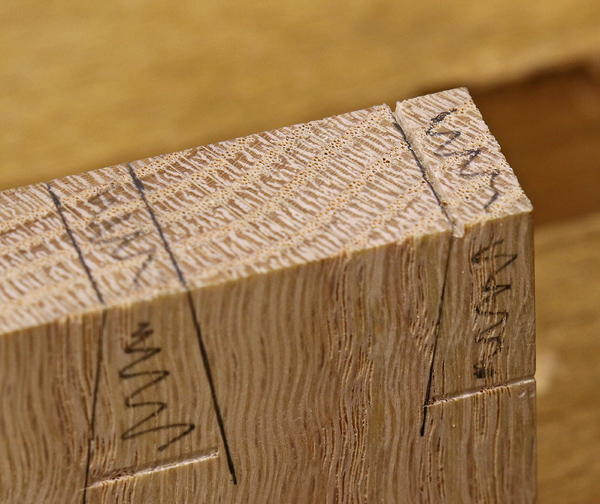
Those carefully made layout lines for the tails await the saw’s teeth, so let’s get started.
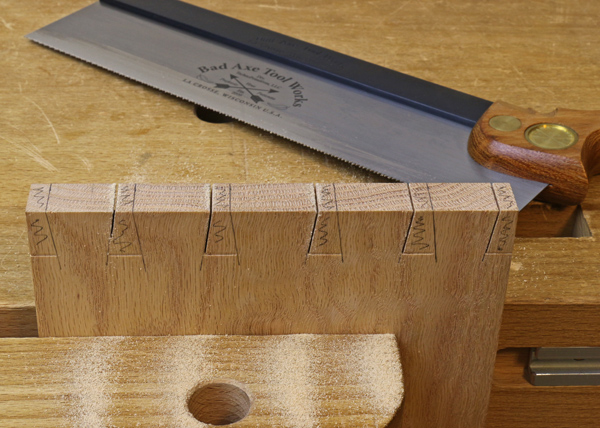
How to use a dovetail saw
1. Get focused
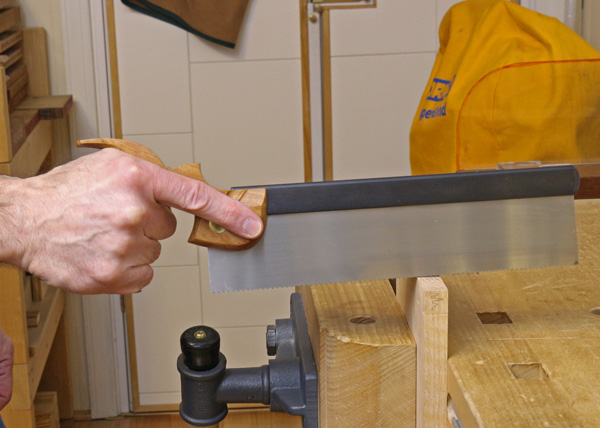
I suggest some warm up cuts to awaken your muscle memory. Pick up your good quality, sharp, rip-tooth dovetail saw, Western or Japanese, and cut to mock layout lines made on scrap wood. Grip the handle with three fingers and thumb, and extend the index finger forward. When you feel focused yet at ease, you are ready to saw the real project pieces.
The goal in this sawing is to split the layout line with the saw kerf in the waste wood. Your mentality in sawing should be “go for it.” Don’t timidly avoid the line, leaving excess wood that you hope to clean up later. That habit will delay the development of sawing skills, and the excessive tinkering is really not likely to produce better fitting joints.
2. Well begun is half done
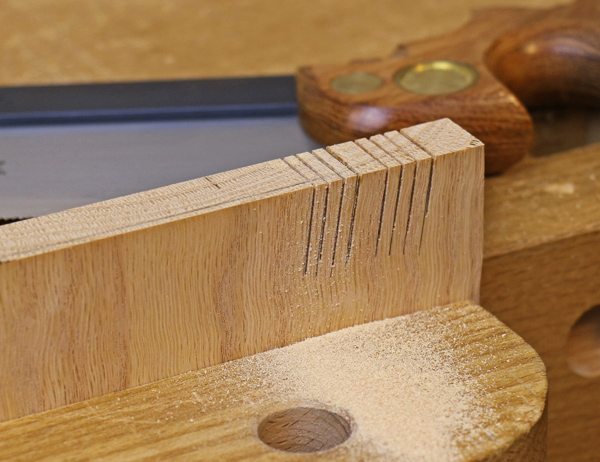
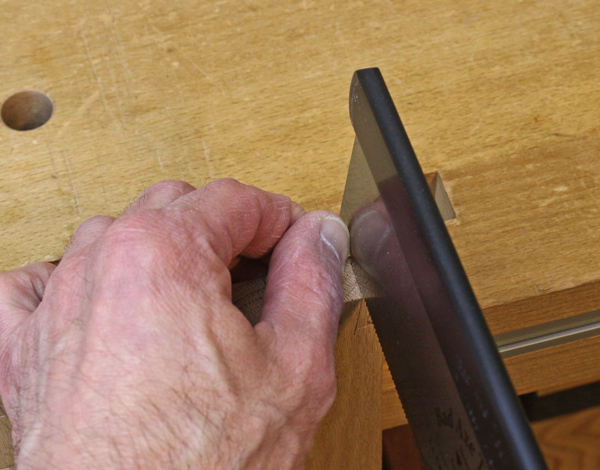
When using a Western saw, start the cut on the far side of the wood at a very low angle. Use your braced thumb, placed against the saw plate above the tooth line, as a guide. If using a Japanese saw, which cuts on the pull stroke, start the cut on the near side of the wood. Tilt the saw so it is approximately parallel with the sloped layout line on the face of the work piece.
As the teeth begin to establish a kerf, gradually “lay down the tooth line” along the layout line. The kerf on the end grain must be established square to the wood. While you focus on the layout line, simultaneously use your peripheral vision to be aware of the saw’s perpendicular orientation to the width of the work piece.
Be cognizant of which are the outside and inside faces of the wood, and be sure to avoid making the kerf even the slightest bit greater than 90° to the outside face to prevent a visible gap on the outside of the joint. In other words, you shoot for perfection but are aware of the consequences of errors in different directions. I call this “one-sided tolerance.”
3. Progress the cut
When the end grain kerf is established, then attend to following the sloped layout line. Realize that it is not a problem if you deviate a bit from that line, as long as the cut is straight. This is because, later in the process, the pins will be marked out directly from the tails, canceling the effect of such a deviation in sawing the tails.
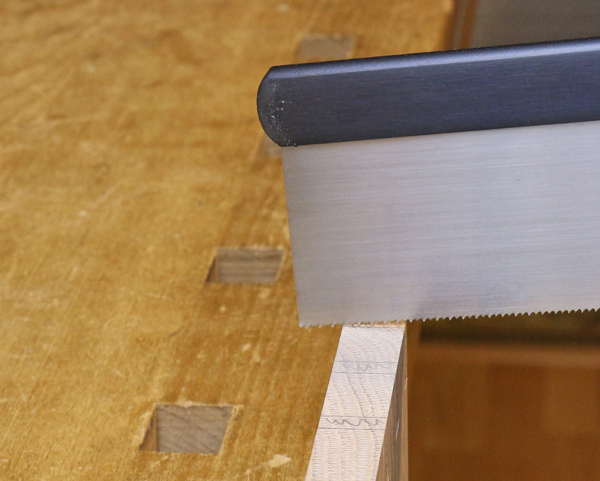
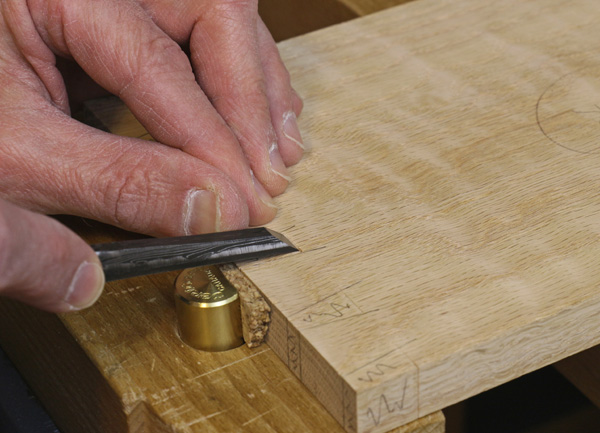
The saw cut must be stopped at the baseline on both faces of the wood. Notice that I have enhanced the visibility of the baseline by chiseling a minute “V” cut from the waste wood into the knifed baseline. This will later facilitate chopping out the waste. Some woodworkers prefer to end the penciled layout line just at the baseline as a cue to stopping the saw cut.
In any case, one must retain in muscle memory the horizontal level position of the tooth line. Practice that by gripping your saw and simply setting the tooth line on the workbench top. Note that the tooth line is not necessarily parallel to the saw back — it is not in most dovetail saws.
Being right handed, I prefer to saw with the layout line on the left side of the saw plate (waste wood on the right) where I can see the line with both eyes and thus benefit from stereoscopic vision. When the line is on the right side of the saw, the saw plate usually blocks my left eye’s line of sight to the layout line. Sawing with the preferential view does involve laying out lines on both faces of the work piece, and reversing it in the vise. Because both are more work, I don’t always use that method, but I did want to point it out as an option.
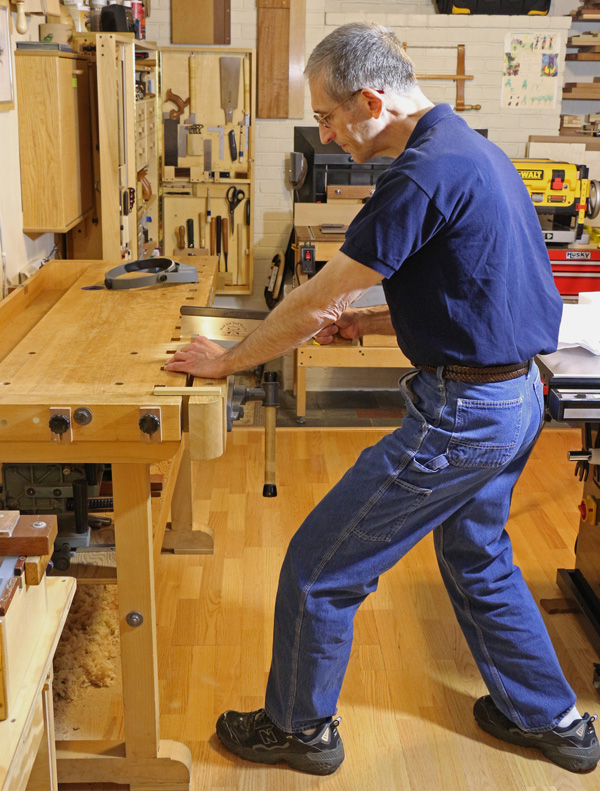
4. Engage the whole body
Now let’s consider the important issue of body mechanics, which is the foundation of accurate sawing. The core muscles — gluteals, hips, and abdominals — should be consciously engaged without being wooden. The peripheral appendages work accurately only when supported by a firm core.
Overall body balance is established by a forward extension of the leg opposite the dominant hand that holds the saw. Do not support yourself by leaning on the saw; it has another job to do — to cut accurately. Your whole body should be independently balanced at every stage of the saw stroke.
The saw is moved rhythmically back and forth in line with the shoulder. Adjust your body position to remove any tendency for the saw to move side-to-side in an arc.
Remember, sawing well is a task for the whole body and whole mind.
In the next installment of this dovetail joinery series, we’ll cover chopping the tails.
Share tips, start a discussion or ask one of our experts or other students a question.
No Responses to “How to Saw Dovetails -- Accurately!”