
A plow plane is one of the lesser known woodworking tools, which is a shame, because it is one of the most useful tools a woodworker can have. Using a plow plane is a great way to make joints that will help your woodworking projects come together.
In this post, we’ll show you how a plow plane works, and how you can use it to make grooves and rabbets for your woodworking project.
All about plow planes

Plow planes (or plough planes, as they are sometimes referred to), come in different sizes and styles. There are wooden and metal plow planes. Although metal plow planes can be bought as new tools today, a used plow plane can easily be put to use.
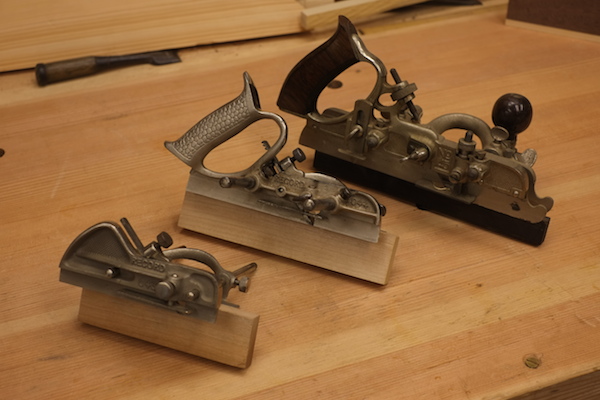
In the photo above, you can see three of the more famous plow planes. The smallest one on the left is the Record 043, which is good for cutting narrower grooves about 1/4” wide. The next plane is the Record 044, which has a wider variety of blades and is a bit more versatile. The largest one is the Stanley 45. The Stanley 45 comes with cutters of various shapes besides a straight cutter, which gives this plane more versatility, and so it is often referred to as a combination plane. Some woodworkers think that the added versatility of the Stanley 45 gives it a complexity that makes the plane more difficult to use. It is also heavier, which adds to the difficulty in using it.
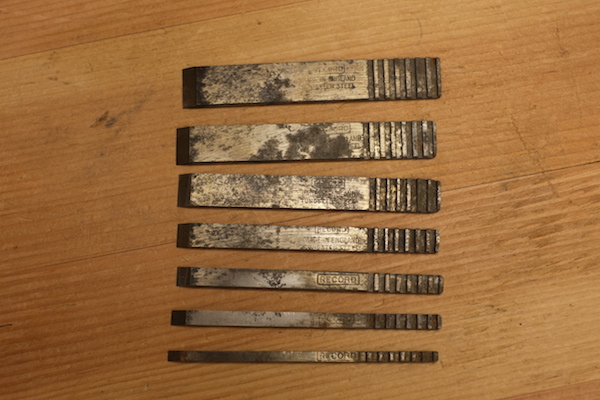
Despite the actual model, all plow planes have similar parts and characteristics. A plow plane will have cutters of various widths that allow the plane to make grooves of various sizes.
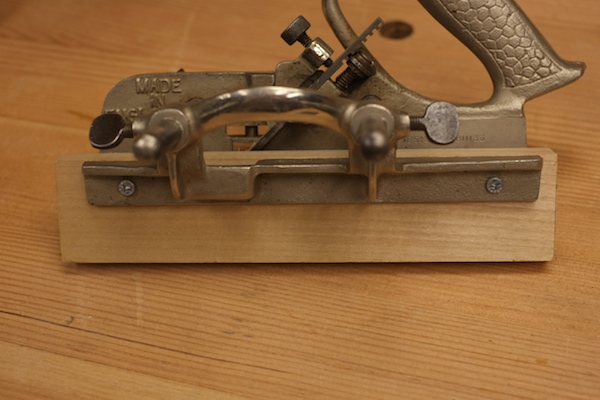
There is a fence that rides on rods that helps determine where the groove will be relative to the edge of a board. Often, you’ll find a plow plane with just the metal fence. Feel free to add a bigger piece of wood, using the holes in the metal fence for screws to hold the wood in place. This will create a longer fence, as seen in this picture, making the plow plane more stable in use.
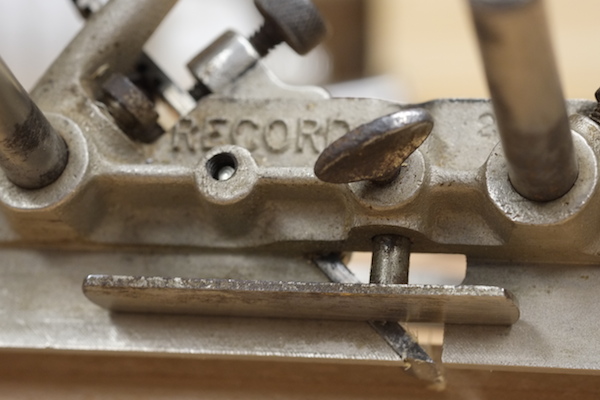
And there is a depth stop. This can move up and down, and controls how deep the groove will be.
How to use a plow plane
To use the plow plane, first pick the appropriate cutter for the task at hand. In this example, we’ll be cutting a 3/8” wide groove, so we pick the cutter that matches and install it into the plane. Make sure that the cutter is sharp, and the bevel of the cutter is facing down. The edge of the cutter should be positioned slightly below the central body of the plane.
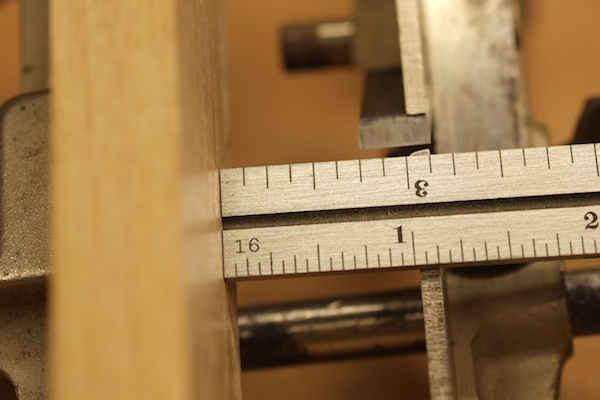
Next, use the moveable fence to locate the cutter at the desired position on the board for cutting the groove. This groove will be positioned 3/4” from the edge of the board.
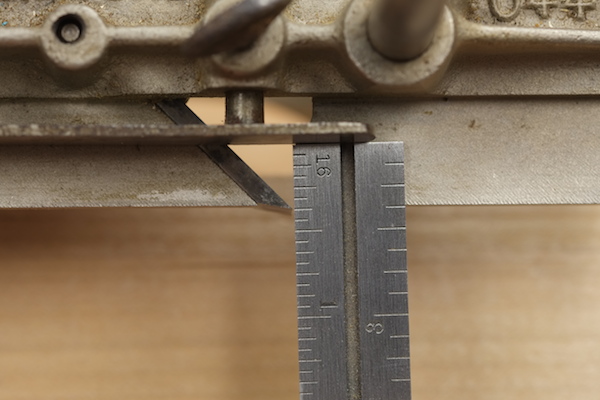
Finally, adjust the depth stop for the depth of the groove. Here, we’re looking to cut a groove that is 3/8” deep.
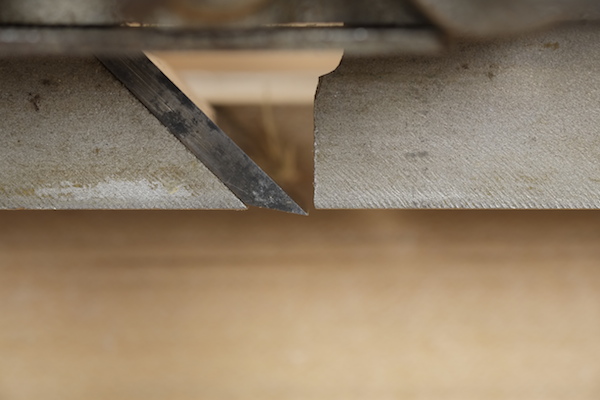
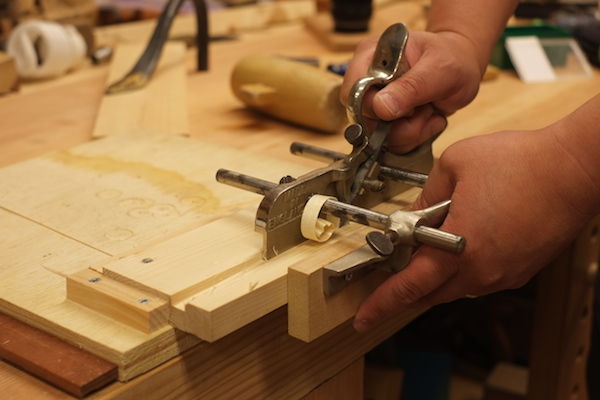
Now you are ready to cut the groove. The basic technique is to start at the far end of the groove and work your way back along the board. Take your time at this step, making sure that your left hand is putting enough pressure on the fence to keep the plane in line. Your right hand pushes the plane forward to make the cut. In this photo, the groove is deeper at the front of the board than it is in the back.
Once you’ve reached the end of the board, you can take full length passes. Since the groove is established, the plane will ride along the groove, and this part will go relatively quickly. At some point, the depth stop will prevent the plane from cutting any more wood and your groove will be finished.
Below is the end result. Another board that is the same thickness as the width of the groove can be inserted to form a strong joint.
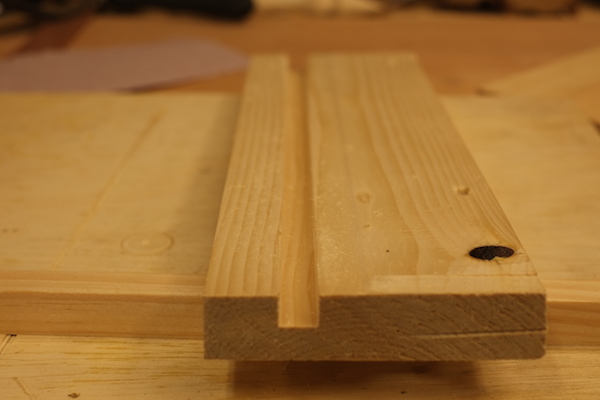
If you move the groove to the corner of the board, you’ll have a rabbet, which is another joint that you can make with a plow plane.
Did you know Craftsy now offers online woodworking classes?
Check out our newest class, Doors for Cabinetry & Fine Furniture, taught by furniture maker Robert Spiece. You’ll learn how to make perfectly built and fitted doors that instantly elevate your cabinetry and fine furniture projects.
Or, try out Robert’s completely FREE mini-class Flawless Finishing for expert advice on how to bring out the character and texture of any woodworking project!
i am an amateur woodworker