
One of the biggest differences between regular garment sewing and couture sewing is underlining. Underlining is what gives couture garments their superior overall appearance and elevates any homemade article of clothing to a designer-grade product. But, what exactly is underlining? Why do you need it, and how do you use it?
What Is Underlining?
Underlining serves many functions in a garment, but generally it supports the fashion fabric and improves the overall look of your piece. It adds body to the fabric in a subtle but luxurious way, enhancing the drape. It also helps stabilize loosely woven fabrics, strengthens delicate fabrics and reduces the transparency of sheer fabrics. Basically, garments that are underlined will wear better, last longer and wrinkles less as it protects the outer, more fashionable fabric from excessive wear and tear.
Just remember: underlining is not the same as lining or interfacing. In fact, they’re quite different. Interfacing is used to add stability and structure to select parts of a garment, while lining is nothing more than a way to conceal the underbelly of a garment that hangs separate from it.
Sewing Underlining
Underlining is cut from the same pattern pieces as the garment fabric. The two are then sewn to one another so the layers act as one piece. Once every fashion fabric and underlining pattern piece is joined together, the normal construction sequence begins.
Underlining also facilitates marking, sewing and finishing. Construction markings are done on the underlining fabric instead of the fashion fabric, which prevents over-handling the garment fabric. Because of this, the markings can be made more visible, aiding in the overall construction and fit of a garment.
When sewing, the underlining acts as the medium to hold stitching that otherwise would be secured to the fashion fabric or be evident on the garment’s right side. Since underlining is, in essence, “fused” to each pattern piece, hems and facings can be secured to the underlining and not the fashion fabric, so no signs of stitching appear on the right side of the garment.
The Best Fabrics for Underlining
In general, underlining fabrics should be lighter in weight and as soft (or softer) than the garment fabric. However, the choice of underlining is dictated by the amount of support, type of structure and desired drape. A tightly woven fabric is best to prevent any stretching and to preserve the structure and shape of the garment.
Choose a color that works with the fashion fabric. If the fabric is too dark or too light, it will show through. To know whether your selection is right, drape the selected fabric and the fashion fabric together over your hand. See how they relate to one another, making sure the underlining does not overwhelm the garment fabric and achieves the drape and look you want.
The most typical fabrics used for underlining include cotton batiste, silk organza and light-to-medium-weight cotton broadcloth, but a wide variety of other fabrics can be used for this couture technique. Fabrics as simple or inexpensive as muslin or even lightweight fusible interfacing can be used as underlining. It all depends on your specific project and fashion fabric.
How to Use Underlining
Level: Intermediate
What You Need
Instructions
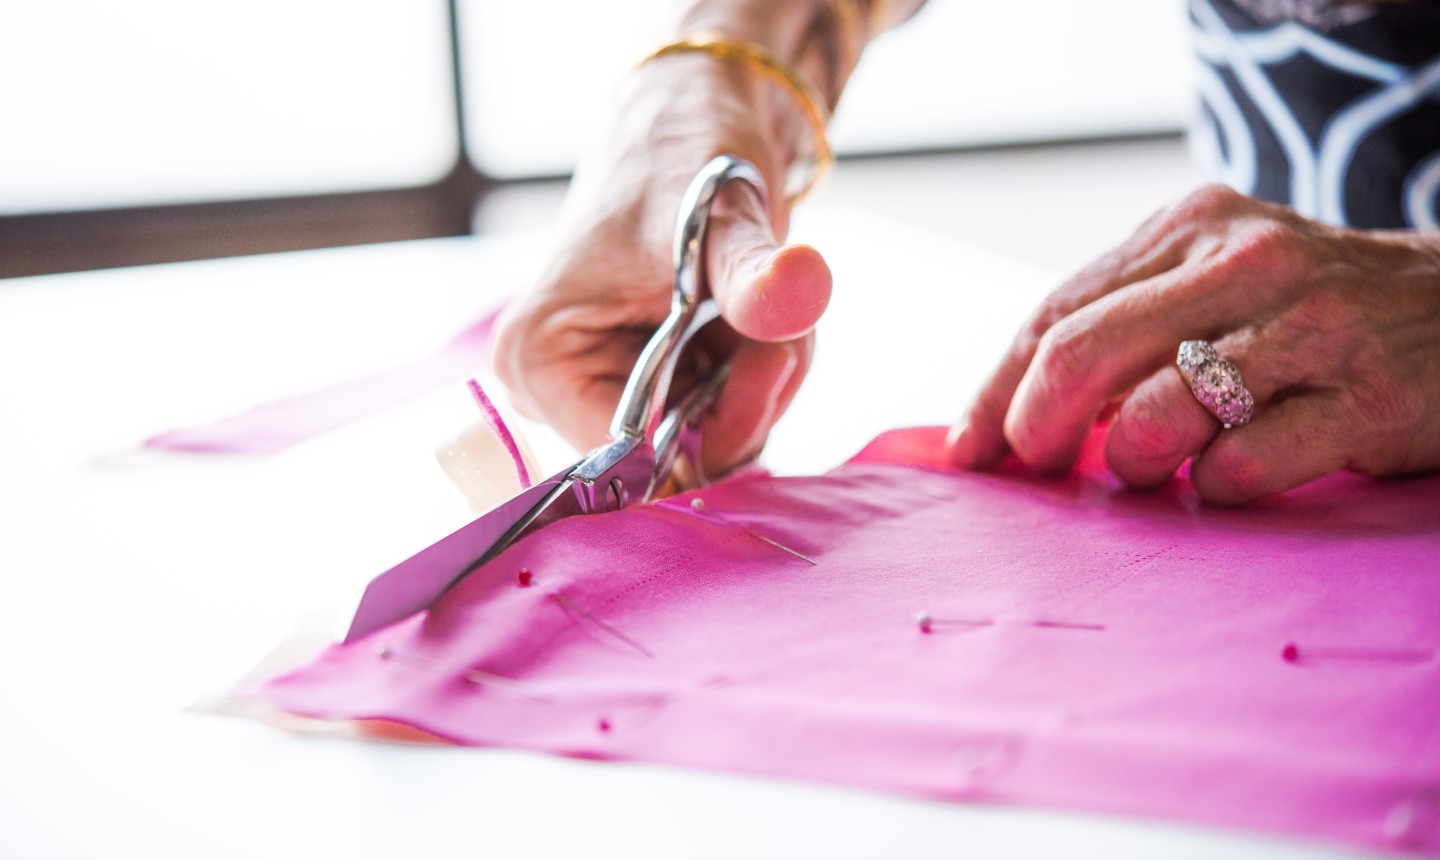
1. Cut out your fashion fabric pattern pieces in the usual manner. Don’t transfer any markings to the fashion fabric.
2. Cut the same pieces out of the underlining fabric.
3. Transfer all necessary markings onto the underlining.
4. Join each underlining piece to the wrong side of each fashion fabric pattern piece, so the transferred markings are visible. Make sure all edges are aligned.
5. Pin the two pieces together securely down the middle of the piece, along the grainline.
6. Hand-baste the two together down along the grainline using long basting stitches to secure the underlining to the fashion fabric. (These will be removed later.) Remove the pins.
7. Hand-baste the underlining to the fashion fabric within the seam allowances all around each piece.
Now begin the normal garment construction! At the end of your project, you’ll have a garment that will look high-end.
Hi There, I have a question and hoping you could advise me please: I am making a tailored jacket and underlining all the pieces, does one still need to interface the usual pieces one would like facings, collar etc as well? Thanks, Joanne