
If you cross a red warp with a blue weft what color cloth do you get? If the weft were a blue-green what difference would it make?
Weavers are continually asking themselves questions like this, because the way we see the color of a woven cloth comes about through optical blending. The colors of warp and weft are not mixed together like paints on a palette or dyes in a dyebath, but maintain their separate hues even in the finished cloth. However, in a woven structure we are typically presented with tiny spots of warp next to tiny spots of weft and – as in a pointillist painting – we perceive not the individual colors but an optical blend.
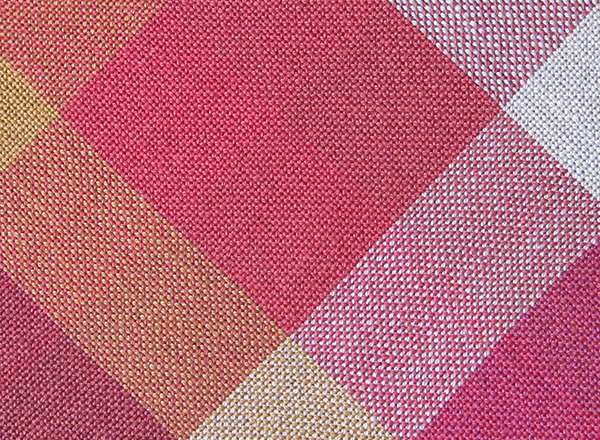
A great way to explore optical blending in weaving is to weave a color gamp, or sampler. The classic color gamp is woven in all the colors of the rainbow, typically using highly saturated jewel tones as you might see in the color wheel. However, this is by no means the only option. Other possibilities include:
- All pastel shades
- Shades of a single color
- A segment of the color wheel, ex. from blue-green to violet
- Neutrals
If you dye your own yarns then a color gamp project can be an excellent way to explore the palette you are creating and to generate new ideas. And finally, of course, you can always get started with whatever colors you happen to have.
Step 1: Choose your yarn.
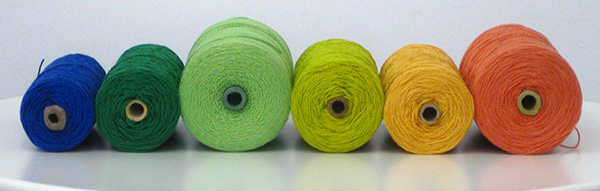
The intention of a color gamp project is to explore color and interlacement, so to keep the focus on those variables it is advisable to stick to a single yarn. The yarn I have used for this example is a 6/2 cotton. I considered using a segment of the color wheel from orange to blue like this:
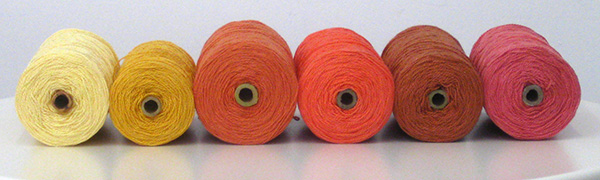
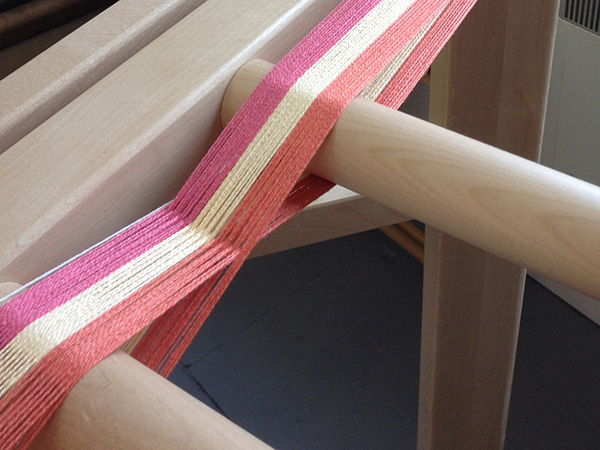
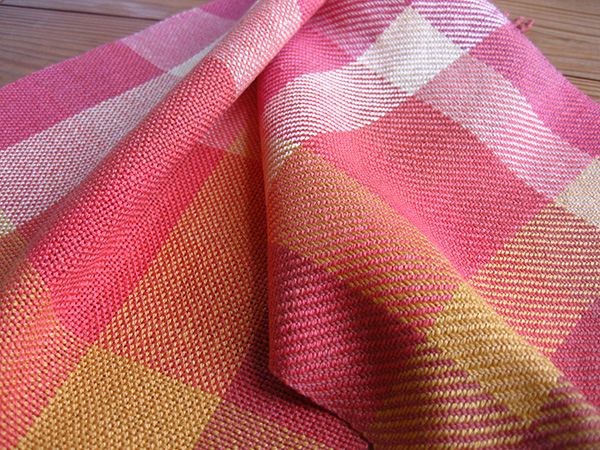
But I decided, in the end, to work with these shades of pink, orange and gold:
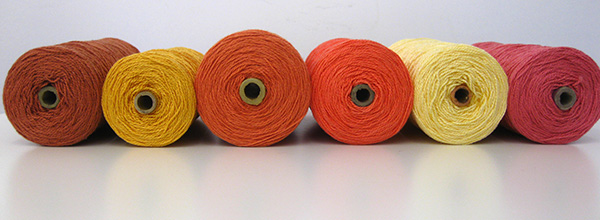
I limited myself to six different colors as I wanted to have a good two-inch stripe of each in the warp. You can use as many colors as the width of your loom will permit, but you should aim to have at least an inch of each color in the finished cloth or you will not have enough to do justice to the visual effects. You will need enough of each color to weave a weft stripe of the same width as the warp stripe.
Whatever your color choice, there is no need to stick to a graduated sequence. In fact, you may find it visually appealing to mix up the colors so that the values are more balanced. I decided to separate my two light gold yarns and put them into the middle of the cloth rather than at the edge.
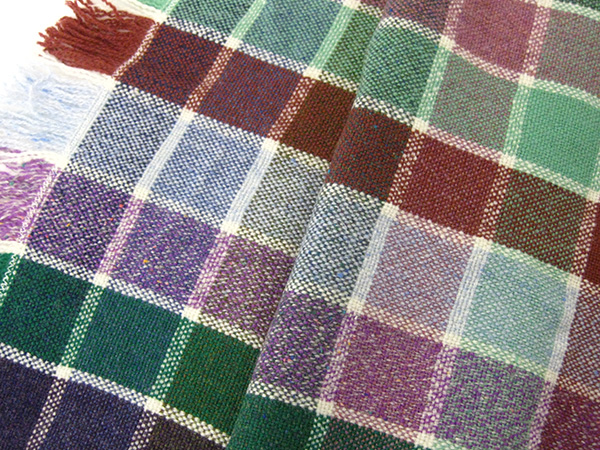
Finally, you can choose to place your colors side by side or to break them up with a narrow stripe: black or white is a good choice for this. In this Shetland wool gamp I used four ends of white in between the color stripes in both warp and weft.
Step 2: Choose your structure.
The principle of the color gamp is that you weave the complete set of colors using a single structure, but this can be twill, satin, huck: anything you wish to explore. The simplest place to start is with plain weave, so that is what I have chosen. My yarn calls for a sett of 16 epi for plain weave, so for my two-inch stripes I needed to wind 32 ends of each color. If you want to weave, for example, both plain weave and twill on the same warp, then you can either choose a sett somewhere between the perfect sett for each structure, or you can cut off and resley to create two separate pieces.
Step 3: Wind your warp and dress the loom.
I wound my warp in two bouts of three colors each to keep it to a manageable width when beaming.
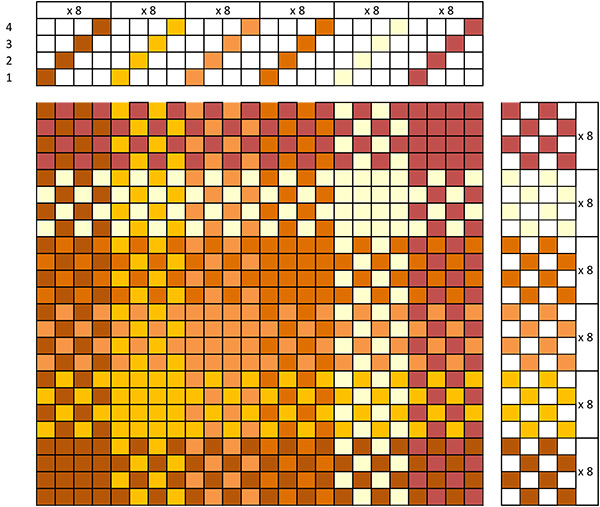
Then I threaded it in a straight draw on four shafts. To achieve 16 epi I sleyed 1/1/2 in a 12-dent reed.

Step 4: Weave!
The classic gamp is woven with the weft colors in the same order as the warp colors. I chose to weave mine starting with the rightmost warp color and ending with the leftmost.
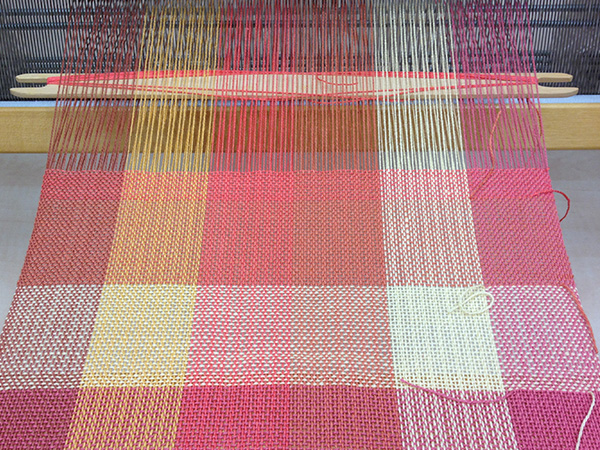
You can weave squares or rectangles, depending on how long you want the finished piece to be. And you don’t need to stop when you have woven all your warp colors: you can repeat them or even reverse them for a longer symmetrical piece.
I cut off my plain weave piece and resleyed at 20 epi to weave a second gamp in 2/2 twill. You might also try a 1/3 or 3/1 twill on the same threading. It would be interesting to try a broken twill as well.
Step 5: Finish and enjoy.
Depending on the size of piece you have made, you may have anything from a table mat to a blanket! Whatever you decide to do with your color gamp, you will have an excellent study of optical blending which you can refer to in the future.
For even more weaving fun be sure to check out the online Craftsy class Floor Loom Weaving to learn efficient ways to warp and weave, get troubleshooting tips and gain drafting design skills.
Share tips, start a discussion or ask one of our experts or other students a question.
No Responses to “The Secret to Weaving More Colorful, Beautiful Projects”