
One underrated but important part of creating good selvedges and workable cloth? Winding your weft packages well. While the process isn’t difficult, there are a few tips and tricks to make your wefts easier to work with. Follow along as I wind bobbins, pirns and stick shuttles.
Winding bobbins
Plastic bobbins are frequently used to wind weft.
Do not tie the yarn to the bobbin. It will inevitably run out in the middle of a pick which means you will have to reach into the shed to fish the shuttle out. Instead, simply overlap the yarn until it catches its own tail.
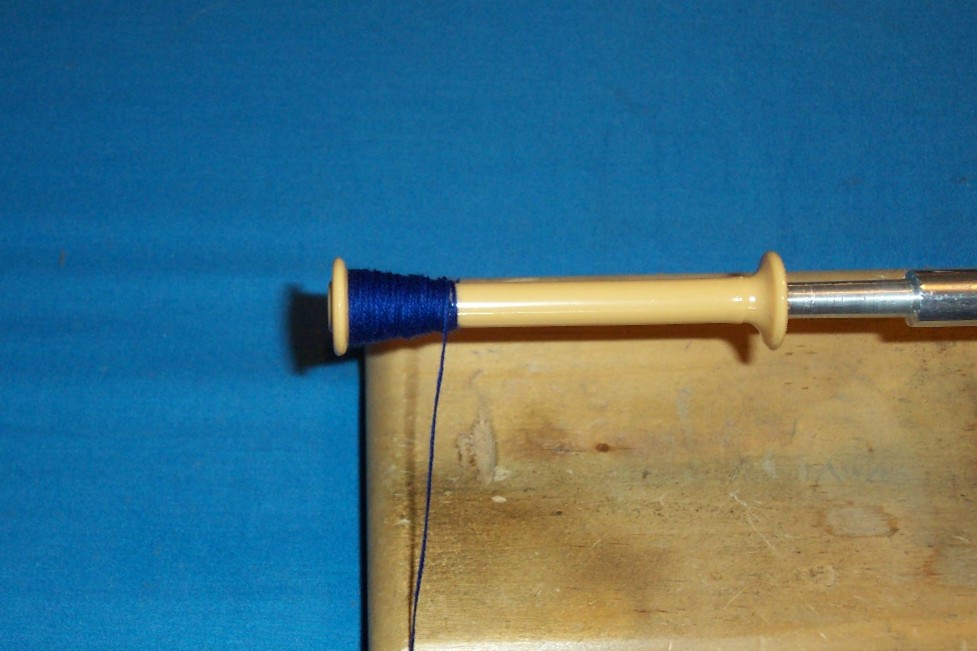
Starting to wind the bobbin, overlap the yarn onto itself
Wind with the building surface on the top of the bobbins. By doing this, you will more easily see how well the yarn is building, rather than having the leading edge on the bottom of the bobbin, in shadows. Wind with enough tension to keep the bobbin firm, which will prevent the upper layers from cutting down into the lower layers, which would prevent a smooth feed off.
Hold the yarn close to the bobbin for better control of where the yarn is building. I prefer to hold within one to two inches of the bobbin.
Build up a “hill” against the flange of the bobbin, then run the yarn across to the other end and build another “hill” against that flange. Then, build up the valley (with no mountain ranges!) in between the two ends.
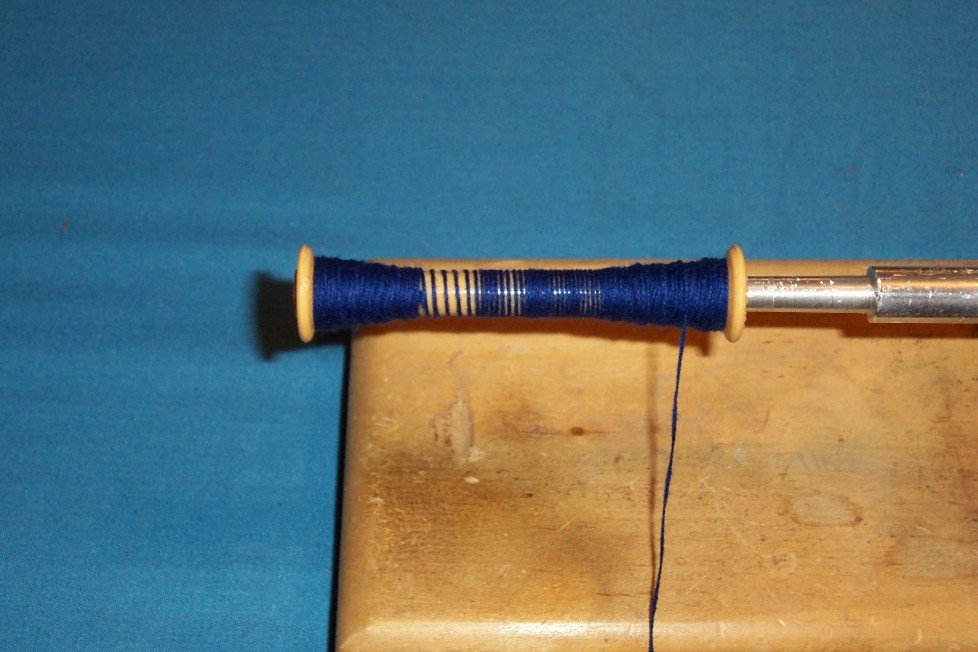
Keep the yarn away from the top edge of the flange to make sure loops of weft do not come off the bobbin and wrap around the spindle of the shuttle.
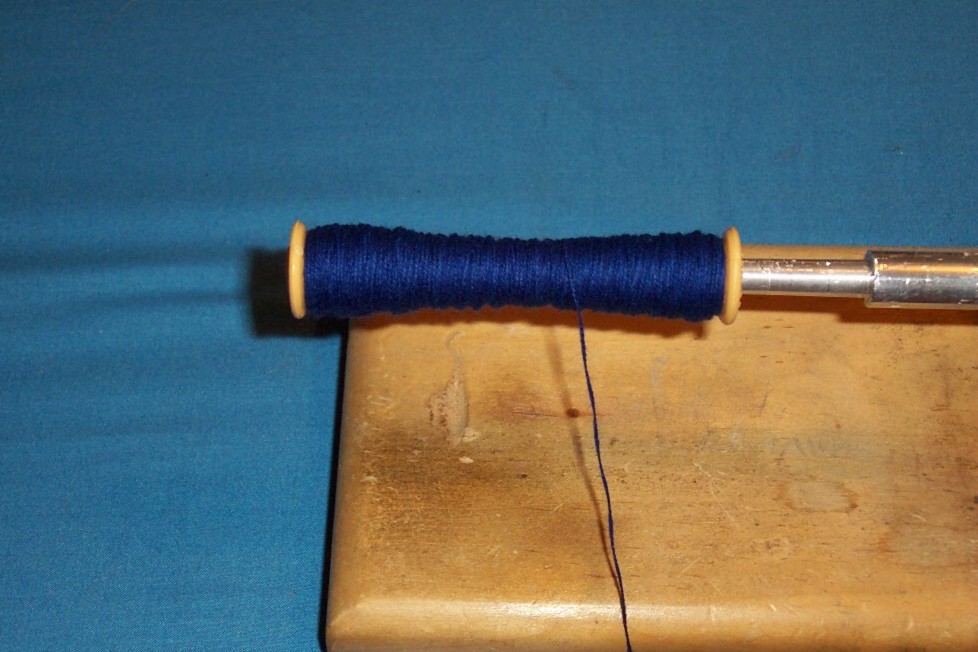 Build the weft into a small cigar shape. For dense yarns, keep the level of the yarn no higher than the flanges so that the extra weight of the yarn doesn’t pull hard against the selvedge threads as you throw the shuttle.
Winding pirns
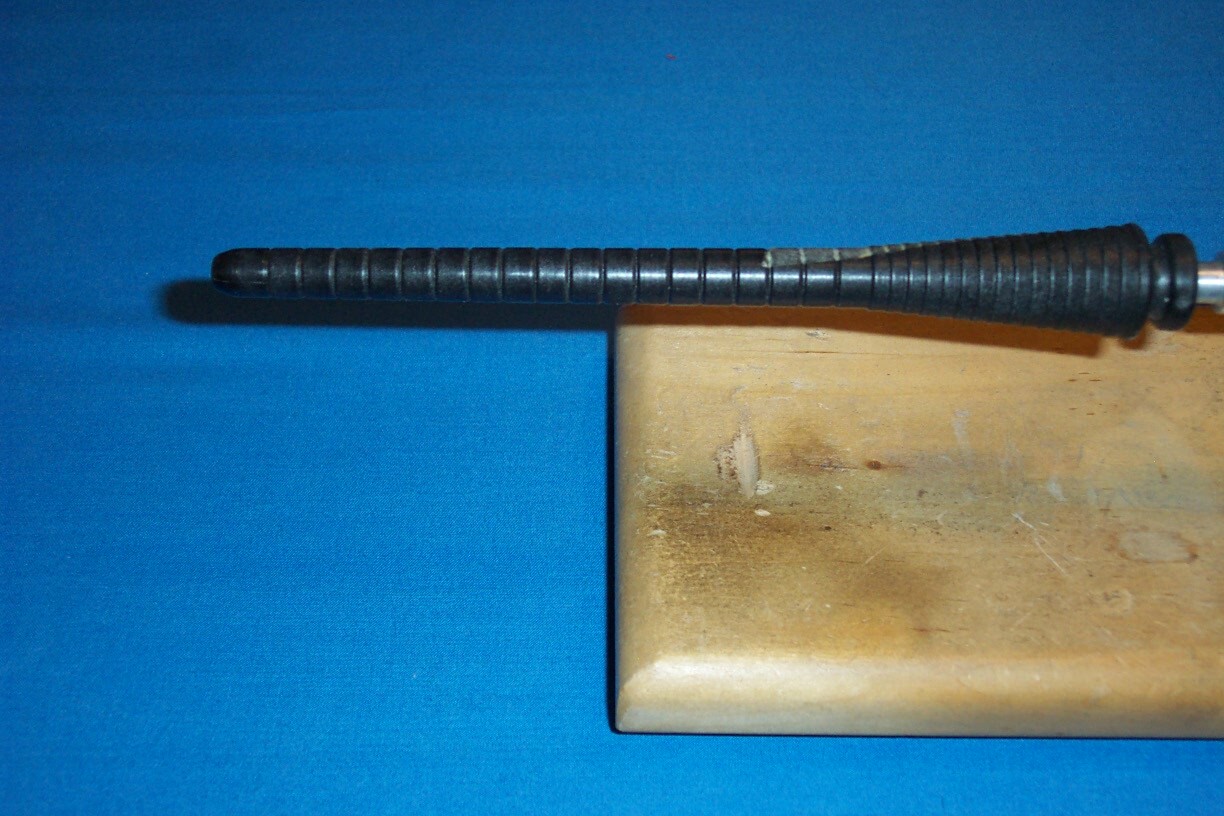
End feed (or delivery) shuttles require the use of a pirn. This is a type of bobbin with the flange only at one end, usually with a built-in slope at the butt of the pirn. If the pirn doesn’t have the built-in slope, you will have to create one, much as with bobbins.
Do not tie the yarn to the pirn. Overlap the yarn until it catches its own tail
In short, reciprocal movements, continue the slope of the butt as you build the weft toward the tip of the pirn. Wind with sufficient tension to build a firm package. This will help prevent upper layers from cutting down into lower layers and causing the shuttle to jerk to a halt or the yarn to slough off in big clumps.
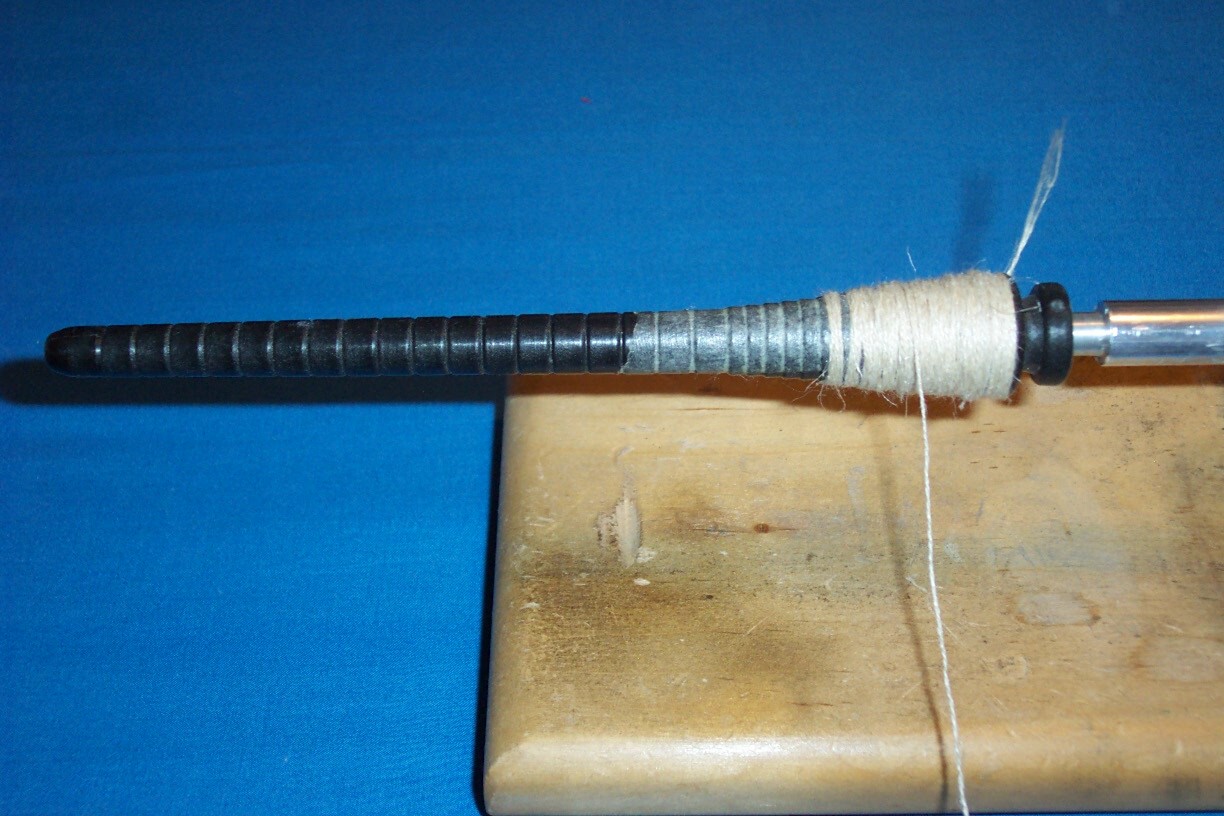
Stop winding the yarn about ¼ to ½ inch from the tip. The yarn will feed off the tip of the pirn. Build the yarn package as smoothly as possible without bumps so that the yarn doesn’t slough off the pirn in big clumps.

Winding stick shuttles
The stick shuttles made by Leclerc are my preference. They are beveled along one edge, which can then be used as a beater.
Make a slip knot in the yarn. Place the slip knot over one end along the spine of the shuttle (the edge opposite the bevel).
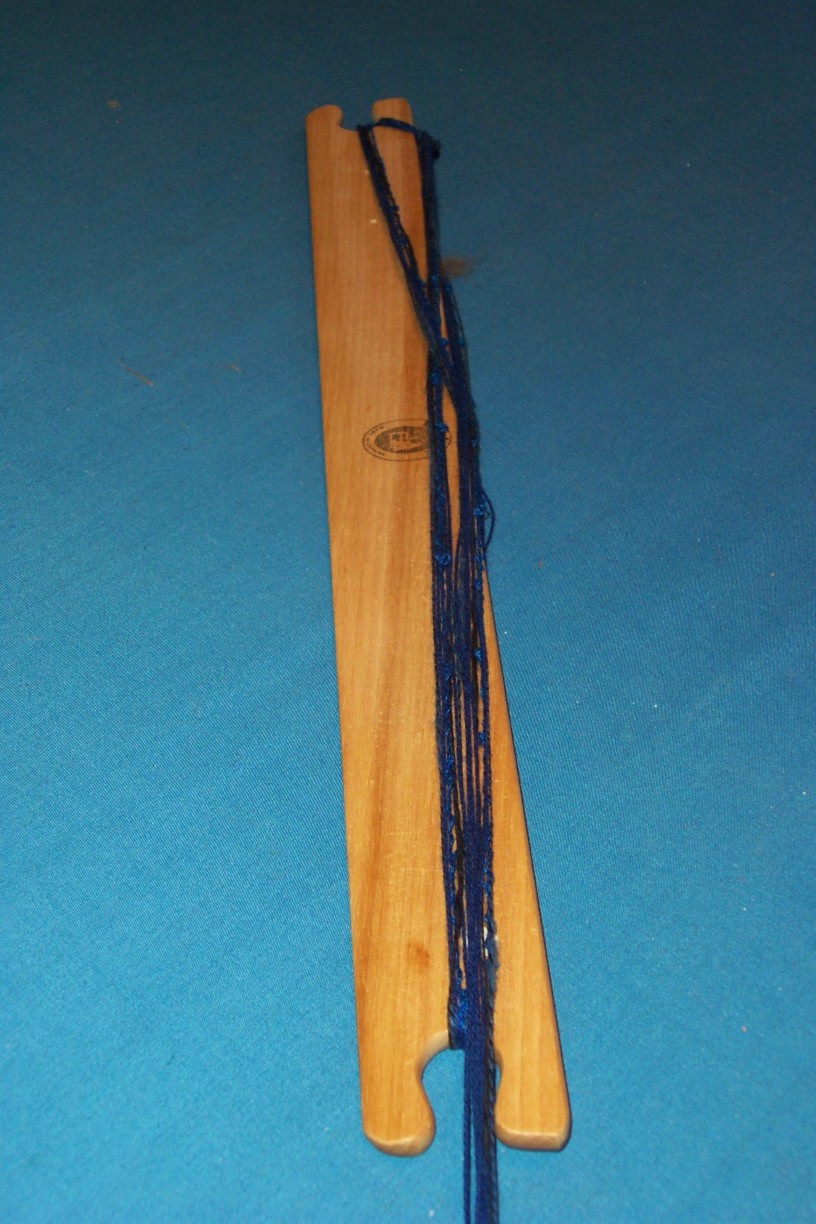
Using a figure-eight motion, wind the yarn only on the spine of the shuttle. This will build a yarn package that is mostly on the surface of the shuttle with mostly wood on the back.

This kind of package makes the shuttle less abrasive on the warp yarns because there will be much less drag of yarn rubbing against yarn.

It also builds a yarn package that more closely matches the shape of the shed. This wedge shape makes it easier to push the loaded shuttle through the shed.
Share tips, start a discussion or ask one of our experts or other students a question.
No Responses to “How to Wind a Bobbin, Pirn and Stick Shuttle: FREE Tutorial”