
One of the really nice things about machine embroidery is making items “in the hoop” (ITH). These items include personal effects (eyeglass cases, tissue cases, purses), children’s crafts (crayon rolls, bibs, door hangers), and many household pieces (potholders, towel toppers, coasters). The advantages are that you always get a consistent product and one that’s quick to make. This is a great way to create gifts, bazaar crafts, and things for yourself. And there are some simple tips that will help you make these in-the-hoop projects come out just the way you want them.
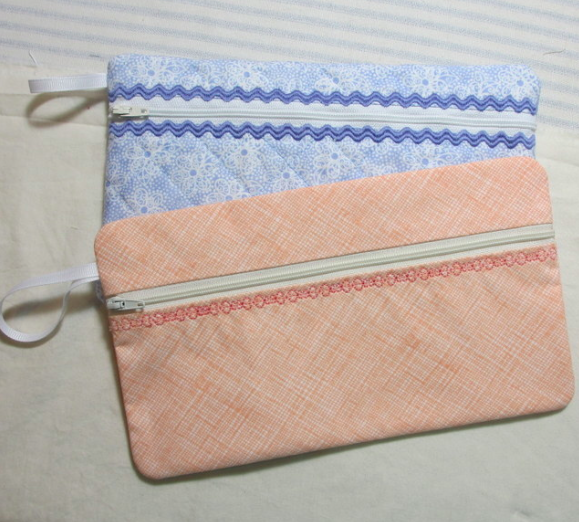
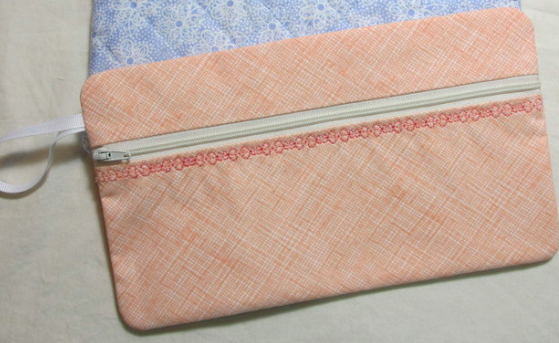
This week I decided to make some ITH zipper bags. The embroidery sets I chose came by referral from embroidery articles and discussion forum suggestions. I love both of these zipper bags and for different reasons. The first project is a 6” x 10” zipper bag by Zippy Designz. This is a quilted bag embellished with stitched rick rack. The second project is a 6” x 10” quilted zipper bag by Threads n Scissors and has all the seams enclosed within the lining. If you haven’t made an ITH project, the steps for making a zipper bag are given below. After that, there are tips that came to mind as I worked on this project.
Tips for In the Hoop Projects:
When working on projects like this, my years of sewing experience speak to the process. This knowledge is something that experienced stitchers often take for granted and is knowledge that is the crucial factor for a project that looks spectacular. I thought I would share some of the things that I did a bit differently than standard machine embroidery as I worked on these projects.
Thread for machine embroidery:
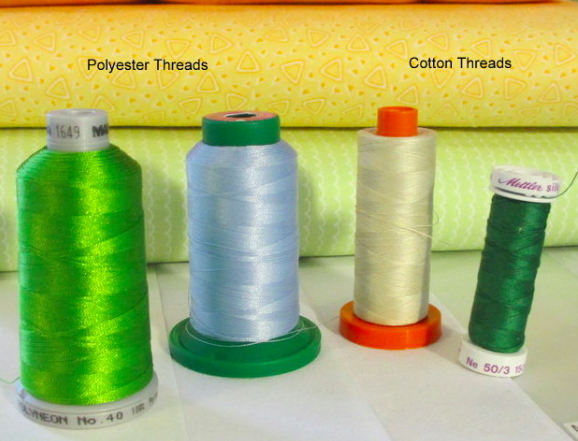
For a lot of embroidery designs, we use a high luster rayon or polyester thread. But we all know that in sewing, different threads work better for different projects. Thus, when constructing an in the hoop project, it makes sense to me to use a sewing thread that is cotton or a cotton wrapped polyester. My thread of choice for sewing is generally 50 wt 100% cotton Aurifil or Mettler and thus, that is what I used for this project.
Thread Tension:
The tension on my embroidery machine is automatically set at 2.8. This loosens the upper thread tension so that the bobbin thread does not show in the decorative stitches. However, for sewing and machine quilting, I want the tension to be balanced between the upper and lower threads. So, for projects done in the hoop that involve sewing seams or quilting, I change the tension to 5 so that I have a balanced stitch.
Stabilizer for in-the-hoop embroidery:
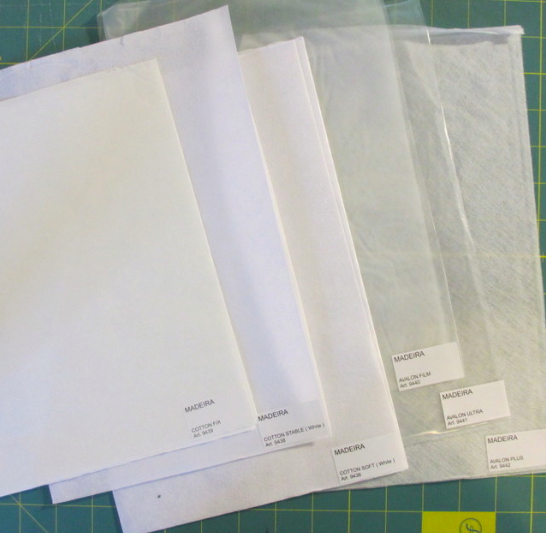
You’ll want to be sure to use stabilizer for your embroidery projects. Most projects call for tearaway stabilizer. And this is where I change things up a bit. I like tearaway stabilizer, but sometimes a washaway stabilizer may work better. And other times I prefer to use unbleached muslin that has been pressed and starched as my stabilizer.
My preference for a project that should be soft like a zipper bag or a project that is quilted, is to use a very soft tearaway stabilizer, unbleached muslin, or a paperlike washaway stabilizer. The muslin should be a high quality and have a thread count of 200, rather than a muslin with a looser weave. The stabilizer will end up staying inside the project, so it is important to use something that works with the purpose of the project. Tearaway stabilizers that are left within a project tend to soften with washing and use. If you hold tearaway stabilizer under running water, you will see that it falls apart. This is good for a project that you’d like to be soft.
My preference for a project that stands alone with satin stitches on the outer edge such as Christmas ornaments, coasters, or door hangers, is a washaway stabilizer. Often these projects call for a tearaway, but my experience is that there is always a little bit of the tearaway that can be seen around the edge of the object, even after the project has been wet and dried again. And if you want a very stiff project, after the object is finished, wet it without rinsing all of the washaway stabilizer out and you will see that the stabilizer actually melts and “starches” the ornaments.
Fabrics:
Another thing that can make these in the hoop projects easier to make is to purchase a
Steps for Making an ITH Zipper Bag:
1. The basics of a zipper bag are fairly standard. The first step is to hoop tearaway stabilizer and stitch placement stitches which will show the outline of the bag and the placement line for the zipper. The zipper is secured with stitches and then the front pieces are stitched. These pieces may be quilted, may have a stitched embroidery design or appliqué, or may be plain. The front lining is attached to the back side of the stabilizer during this step.
2. The next step attaches the back of the bag to the front. For quilted bags, the back of the bag is quilted in a separate hooping before the hooping that makes the actual bag.
3. The final step releases the bag from the hoop, removes excess stabilizer, trims and turns the bag right side out.
These are just some of my tips—do you have some great tips to share for in the hoop projects that you enjoy doing? What are your favorite ITH projects?
In case you missed it, you might enjoy embellishing with continuous borders with machine embroidery and the online Bluprint class Free-Motion Machine Embroidery.
Share tips, start a discussion or ask one of our experts or other students a question.
No Responses to “Tips for Successful In the Hoop Projects”