
Whether fusible or sewn in, knit or woven, interfacing does its work inside shirts, jackets and other garments. Interfacing gives structure to a fabric and supports the stitching, and it’s essential behind buttonholes and buttons. But have you considered using even more interfacing than the pattern calls for?
Read on for 6 places to use extra interfacing give your garments a top-notch finish.
The standard location for interfacing in a garment is on the garment facings, as shown above. Interfacing allows you to change the feel of a fabric, and achieve a crisp edge when seamed or pressed, and it can be used in many places beyond the facing.
1. Zippers
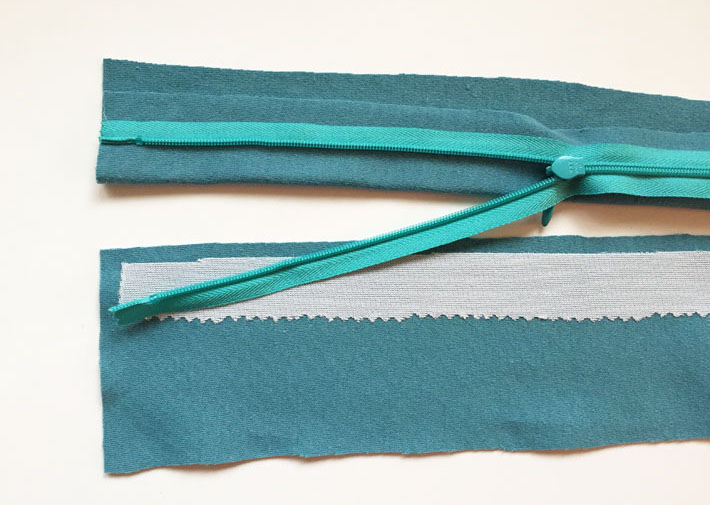
Add a narrow strip of lightweight fusible interfacing to the seam allowance where you plan to insert a zipper. This is particularly helpful with knits and delicate fabrics that need a little help to support the zipper tape evenly and smoothly.
Use a thin fusible and cut the garment side edge with pinking shears, which eliminates any line that can show through the fabric. For a very sheer or lightweight fabric, you can also use strips of silk organza.
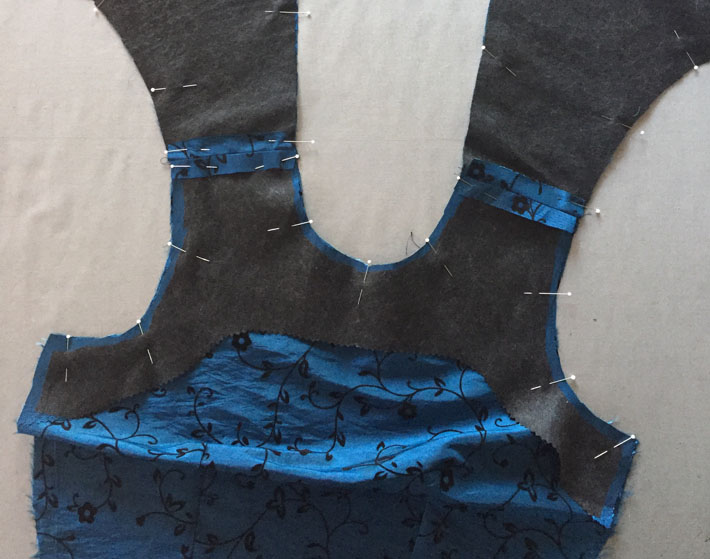
2. Corners and insets
Sometimes a sewing pattern has a corner that’s slashed and spread to create an angle. Many vintage patterns have godets or underarm insets that use this technique. The pattern usually tells you to staystitch the angle and then clip to the inside corner. A small square of fusible interfacing applied before staystitching and clipping will reinforce the fabric and prevent unraveling.
3. Knit hems
Some knits can be tricky to hem, especially if you’re using a regular sewing machine. Even with adjustments in stitch length or stitch type the result can have ripples.
The solution: Apply a strip of fusible knit interfacing along the hem edge (making sure it covers the fold) and then up past where you will be stitching. On this ITY (interlock twist yarn) knit I used the lightning stitch for a stretchable hem and eliminated the ripples that were present on the section with no interfacing.
4. Outwear hems
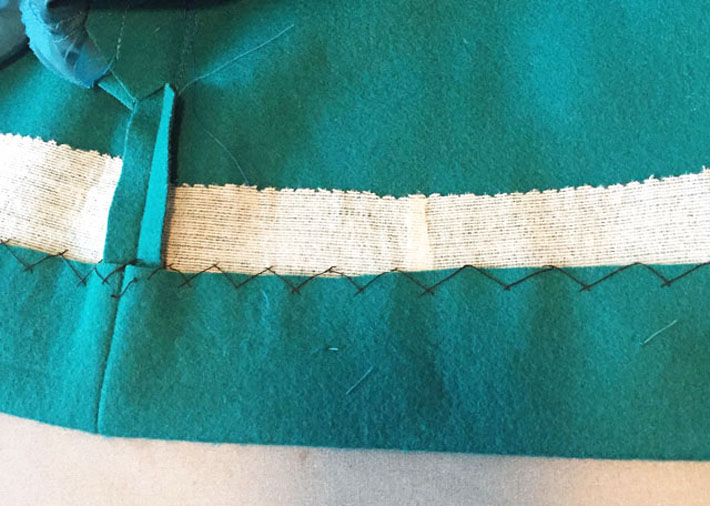
For coats or jackets, fuse a strip of fusible weft interfacing along the hem edge, covering the fold edge and continuing at least ½” above your hem allowance. Cut the edge with a pinking shears to avoid show-through on the right side of the garment. Now you can catch-stitch your hem without a stitch showing on the outside, as your stitches will be in the interfacing and not the garment fabric
The interfacing also gives the hem a slightly softer fold and hides the hem when the item is pressed. This works particularly well on wools but can also be used on other fabrics. Do a test to see what interfacing works best with your fabric.
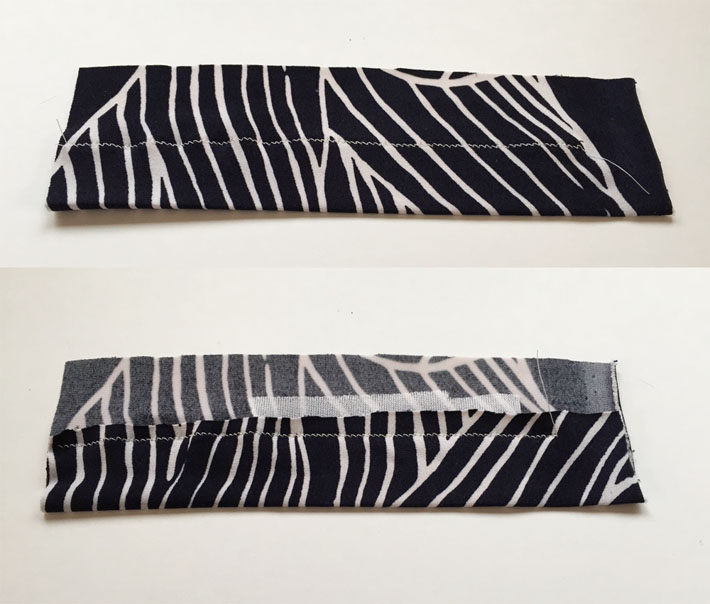
5. Sleeve cuffs
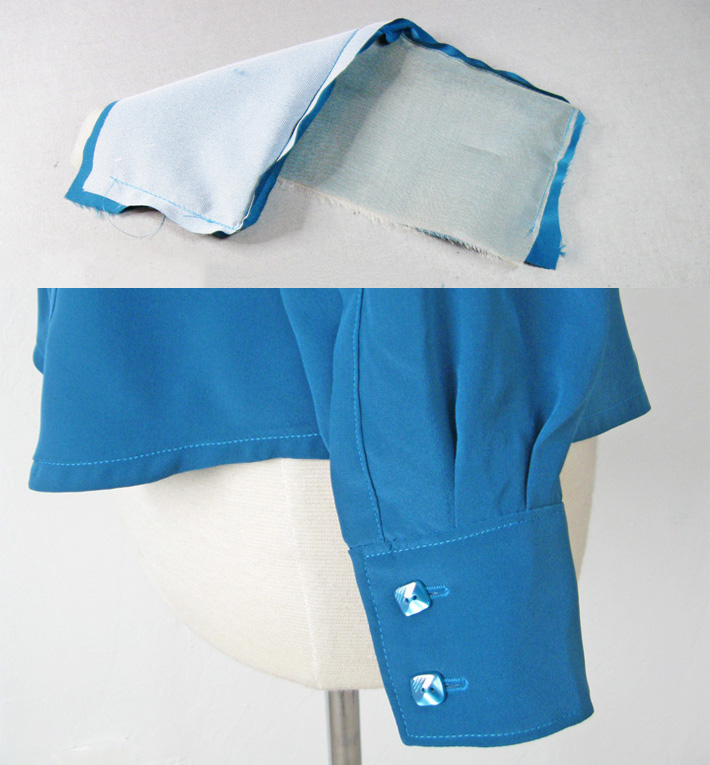
Some sewing patterns instruct you to add interfacing to half of a pattern piece, such as on shirt cuffs. But if you want a crisp cuff or one that holds its shape and you’re working with a soft fabric, one layer of interfacing is not quite enough.
Here’s a time when you can make your own assessment: You can put interfacing on both sides of the cuff, you can apply a double layer, or even use two different types of interfacing as shown here. One side has a fusible polyester and the other side has silk organza. Do a test on scraps and see what gives you the result you want for your fabric.
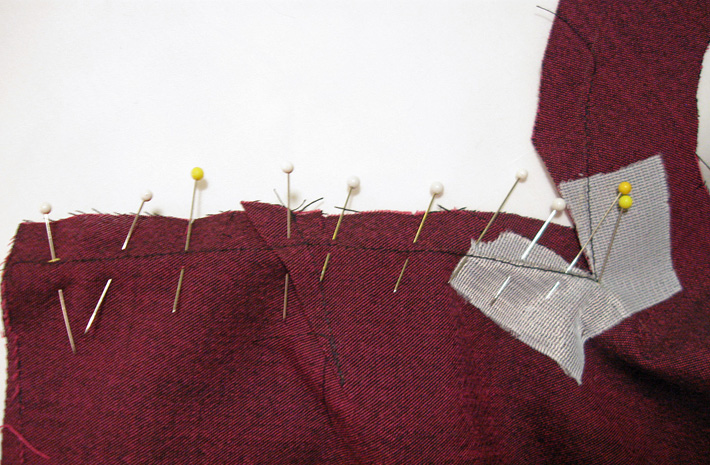
6. Collars
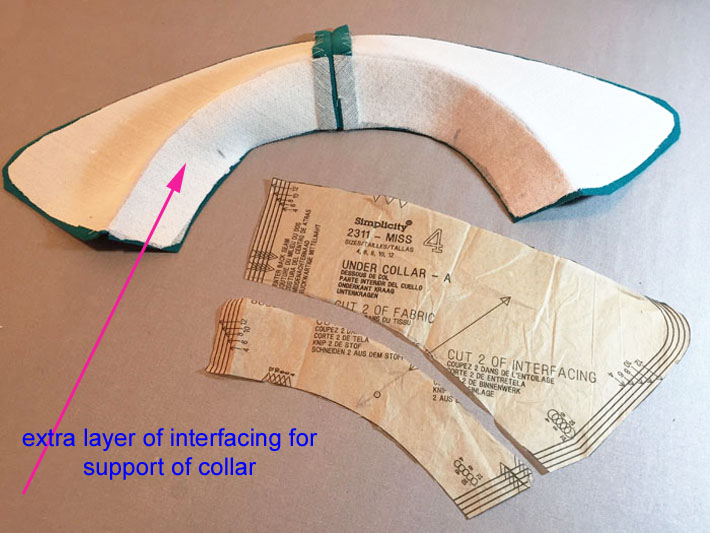
Fusible interfacing can be ideal for modern tailoring, and you can achieve a nicely rolled-under collar by applying a double layer of interfacing.
Cut woven weft interfacing on the bias (along with the collar) and apply the interfacing over the collar. Then, add another piece just for the collar stand portion of the under collar. This second layer supports the under collar so it folds at the right place. Once you apply the facings, fold and pin onto a tailor’s ham and steam to set the collar.
Share tips, start a discussion or ask one of our experts or other students a question.
No Responses to “6 Spots to Use Extra Interfacing for a Top-Notch Finish”