
“The lathe is the cheap part” — that’s usually the intro line I offer folks who ask how much it costs to get into woodturning. Tools and accessories like chucks can be very expensive. The good news is that there are also many ways to save a few dollars by making much of what you use yourself. Jam chucks, also known as jamb chucks, are a perfect example of project-specific tools that in most cases you could not even buy if you wanted to. Basically, there’s nothing that you can’t turn with a faceplate and assorted jam chucks. Manufactured chucks simple make things faster.
Special offer!
.
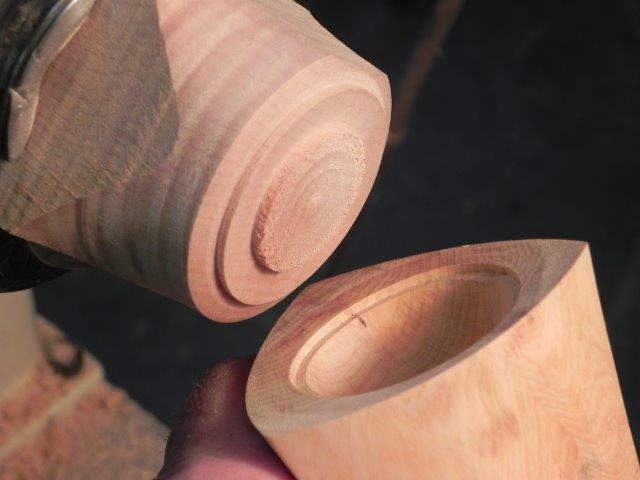
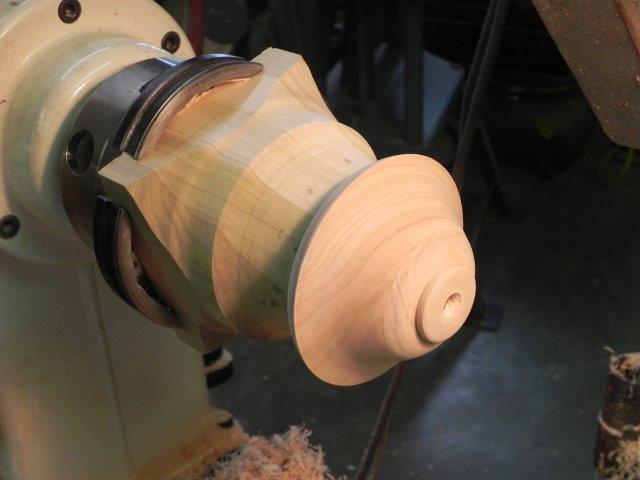
This ring box is ready to mount using only the small lid recess.
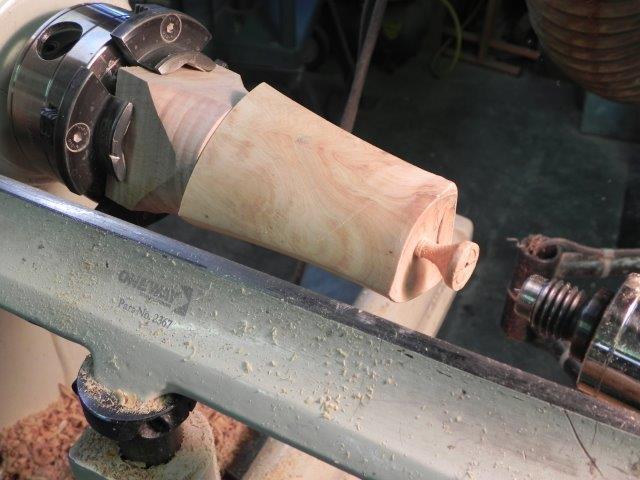
The piece holds on its own to complete the final cut. Note the tail stock was used for most of the operation.
What is a jam chuck?
A jam chuck is any contrivance you can think of that is made to hold your workpiece in your lathe in a specific way so that you can make the needed cuts.
I can’t swear to it, but I assume the term “jam” comes from the fact that most often you “jam” the work onto/into the chuck so that it is held by tension or compression (and usually a little help from Mr. Tail Stock).
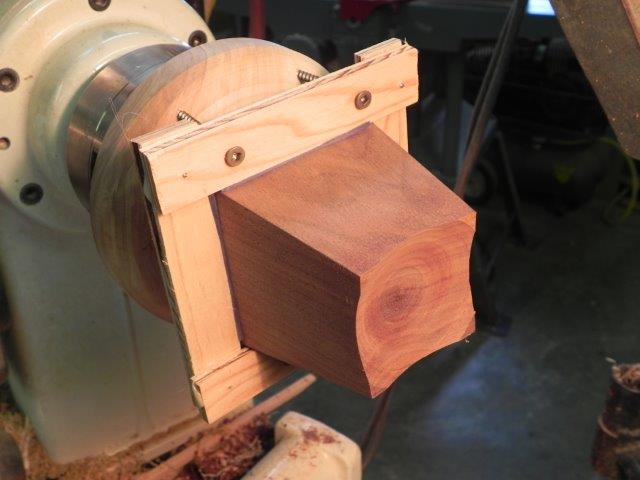
Typically they are very simple with a groove, hole or tenon turned to accept the piece. Sometimes, as in the example below, they can be quite elaborate with cradles, clamping frames, screws and glue used to hold the piece at some odd angle. The most common example would be a jam chuck used to hold a bowl to finish-turn the foot, so you can see it is an oft-used and helpful tool.
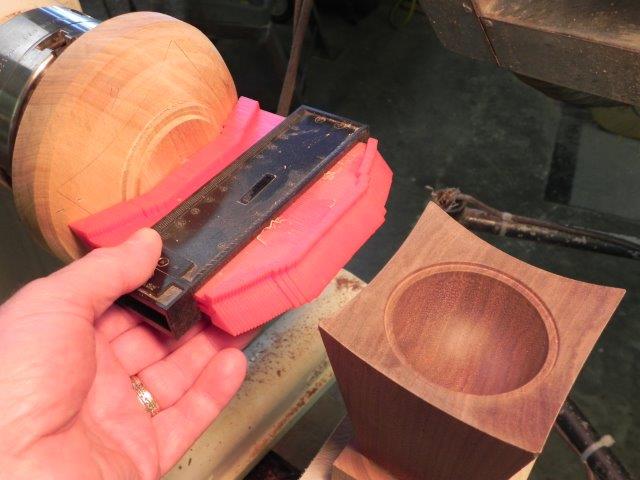
Sometimes the setup can be a bit complex, but makes for a good fit.
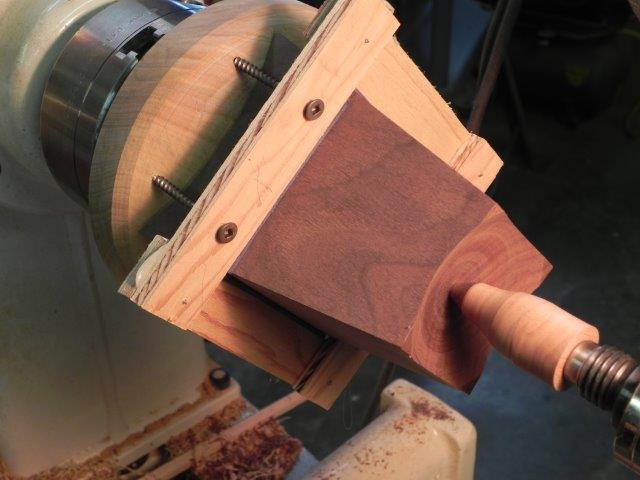
Complete with custom clamp and supported by the tail stock. Note the hot glue used for rapid construction of the clamp.
Tail stock removed for final cut. The elaborate clamp wasn’t totally necessary since the small nub could have been carved away with little difficulty.
Advantages of using a jam chuck
The cool thing about using a jam chuck is that it typically leaves no tool marks on the piece, and if it does, they are easily sanded away.
An extra advantage of using a jam chuck is that it holds the work completely centered (or not, if that is your intention), which is not always the case with a manufactured chuck due to machining quality and inconsistencies in the wood. It’s not unusual that the diameters of a piece must be concentric, so in that case, a jam chuck is essential.
Personally, I take pride in creating a piece that causes folks to wonder how the piece was made. Jam chucks usually play a large role in that and take little effort to produce.
The most common jam chuck is a simple disk held on your lathe with a groove turned to fit the rim of a bowl. Ideally you want the chuck to hold the bowl on the outside diameter (OD), keeping the bowl in compression. Bowls with a rim that flares outward are ideal for this.
How to use a jam chuck
Bowls with a rim that curves back inward are another matter because the same method would force the rim outward. Wood isn’t strong in tension, so can crack, break or let go while turning, so forcing a bowl with a re-curved rim onto a plug that fits the inside diameter (ID) has other considerations.
When holding a piece by the OD, it can be held well enough to complete the foot with no help from the tail stock. When holding by the ID a fit that will not break the bowl won’t hold it well enough to work independent of the tail stock. A jam chuck can still be utilized by keeping the tail stock in place to the bitter end, simply requiring that a small nub in the center be carved away after turning. This method works in any case where the groove doesn’t hold the work tight enough to hold on its own.
Fitting the groove to the bowl is a bit of a trick but by rough-turning the groove then refining it with a tapered cut, the proper diameter is easily marked with the bowl itself. Prudent cutting and/or scraping with a sharp tool at that point will yield the diameter that you need.
With practice, you will be able to determine what is “just right” and what is not. Often a slightly loose fit can be improved with a water spray on the chuck and/or bowl, causing the wood to expand, but be aware that it can dry out while you are turning. A good method to tighten things up is to use a paper towel or masking tape to “expand” the bowl’s diameter. I’ve never been able to find that “wood stretcher” my dad told me to use.
Sometimes, the fit is so tight that you can damage the piece when removing it. If I’m thinking ahead, I will drill a hole through the jam chuck so that I can blow it off with air pressure from the compressor. Sometimes even that won’t work, so the easiest way of all is to cut away at the jam chuck with a parting tool or bowl gouge to weaken its grip until you can pry the piece out with ease. Take care to support the piece with your hand or the tail stock while doing this.
A small notch on the side of this jam chuck allowed a burst of air to release the turning.
Additional notes to keep in mind
All that being said, as tightly as it may be held, it’s a good idea to support the work in a jam chuck with the tail stock up to the point where you have to remove it to get at the last little bit. Also, any cuts should be light and directed toward the headstock as much as possible so that forces from the tool tend to push the piece onto the jam chuck. Lateral cuts can be made, but make sure they are light, and if at all possible, applying bevel pressure in the direction of the head stock.
Not all jam chucks have to be huge.
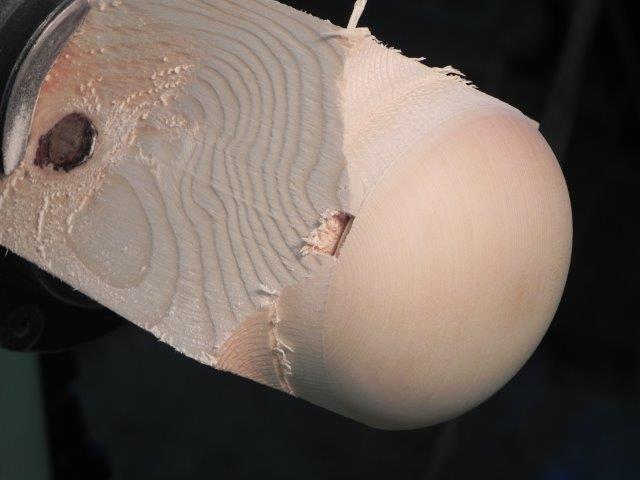
A plug or tenon on a waste piece is another way to hold multiple pieces. I turn round-bottomed tee light candle holders that all use the same diameter hole created with a Forstner bit. I have a tapered tenon turned on a piece that I clamp in my chuck to turn the round bottom of the candle holder. In this case, the piece has enough bulk to resist the outward thrust of the tapered tenon. It’s seen service for a few years now and still does it’s job very well. Price: free.
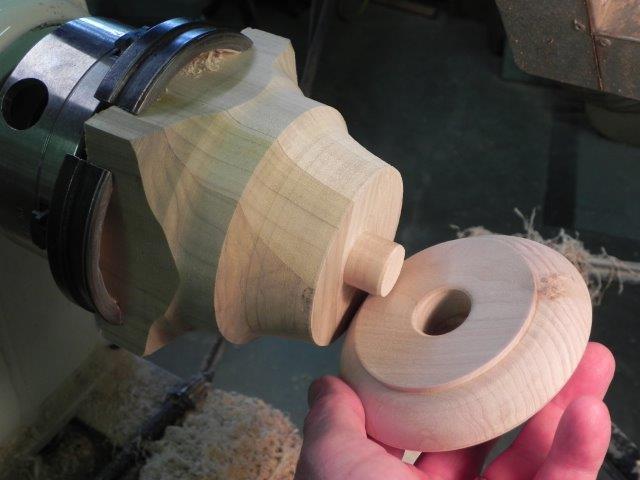
A tenon used to mount pieces drilled for a candlestick holder.
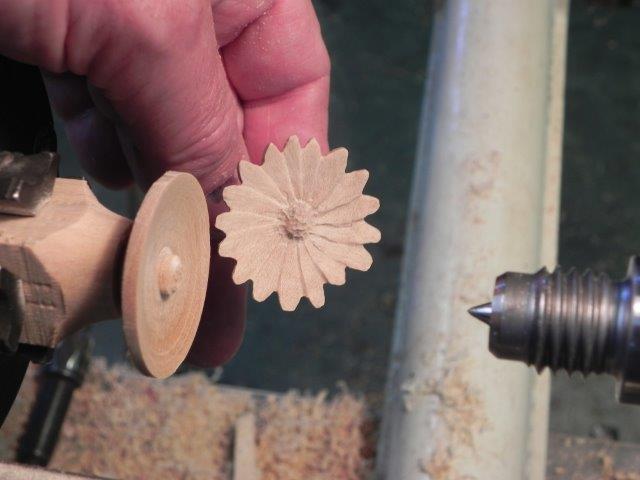
Completed candle holder.

Multiple pieces made on the same chuck.
Your options are literally endless, limited only by the number of pieces you turn, your imagination — and the amount of scrap wood you have laying around. Work-holding is often the biggest limitation to design. Don’t let the lack of a tool that may not even be available for sale limit your creativity.
Now available!
Online woodworking classes from Craftsy! Browse our growing selection today, including our two NEW woodturning classes: Woodturning Essentials: The Segmented Vessel with Jim Rodgers and Multi-Axis Woodturning: Creating a Vessel with Michael Roper.
Share tips, start a discussion or ask one of our experts or other students a question.
No Responses to “Cheap Chucks: Jam Chucks Are Purpose-Built Chucks You Make Yourself”