
Are you a fan of the wrap and turn short row shaping? Short rows can add smooth, even curves to anything from a sleeve to a bust, but wrap and turn isn’t always the best option. The solution? A Japanese knitting tutorial that might forever change the way you shape those short rows.
This knitting tutorial will help you create short rows that are a little less noticeable, especially if you’re working in a loose gauge. We’re going dig into why Japanese knitting is so helpful, plus take you step-by-step through the entire process, so you can master this technique!

Photo via Craftsy instructor Joan McGowan-Michael
Why learn the Japanese method?
The standard wrap and turn works well for most short row shaping, but even the most professional knitter can still leave a loop at the back that sticks out a little. In the knitted sweater pictured above, Craftsy instructor Joan McGowan-Michael used short rows shaping to add curves to the bust, and she hid her wrap and turn in the side panels. But sometimes there’s no place to hide that yarn, and that’s when the Japanese short rows come in handy.
The Japanese short rows solve that problem with a much neater finish. According to Craftsy instructor Carol Feller, you’ll especially notice that difference when you’re working with a finer yarn that has a looser gauge. The looser gauge means you can see through to the back, right where those loose loops are hanging out. The pesky loops of the wrap and turn method is actually what made Carol decide to try the Japanese short row method!
That said, Carol also points out that the Japanese knitting technique does take a little longer than a wrap and turn method, since you’re pausing to add and remove stitch markers. With practice and a few experiments, you’ll learn when the Japanese method comes in handy and when it’s faster to just stick with wrap and turn.
How to make Japanese short rows
Ready to learn one of the Japanese knitting techniques that will forever change your short rows? Let’s do it!
What you’ll need
Japanese knitting techniques like this don’t require anything too fancy. Grab some locking stitch markers or safety pins, along with your regular knitting needles and yarn, and you’ll be all set. Some knitters prefer the locking stitch markers over the safety pins because yarn tends to get caught in the pins, snagging it. But, if you don’t have any locking stitch markers on hand, a safety pin will do.
You may also want to consider yarn weight and gauge when choosing a marker. Some stitch markers, especially the locking kind, can be a bit large, sometimes making a loop that is too big for a finer yarn and thinner needles. In that case, safety pins might be the better option.
Directions:
1. Knit up to the turning point of the row.
2. Turn your work to the wrong side, keeping the yarn in the back.
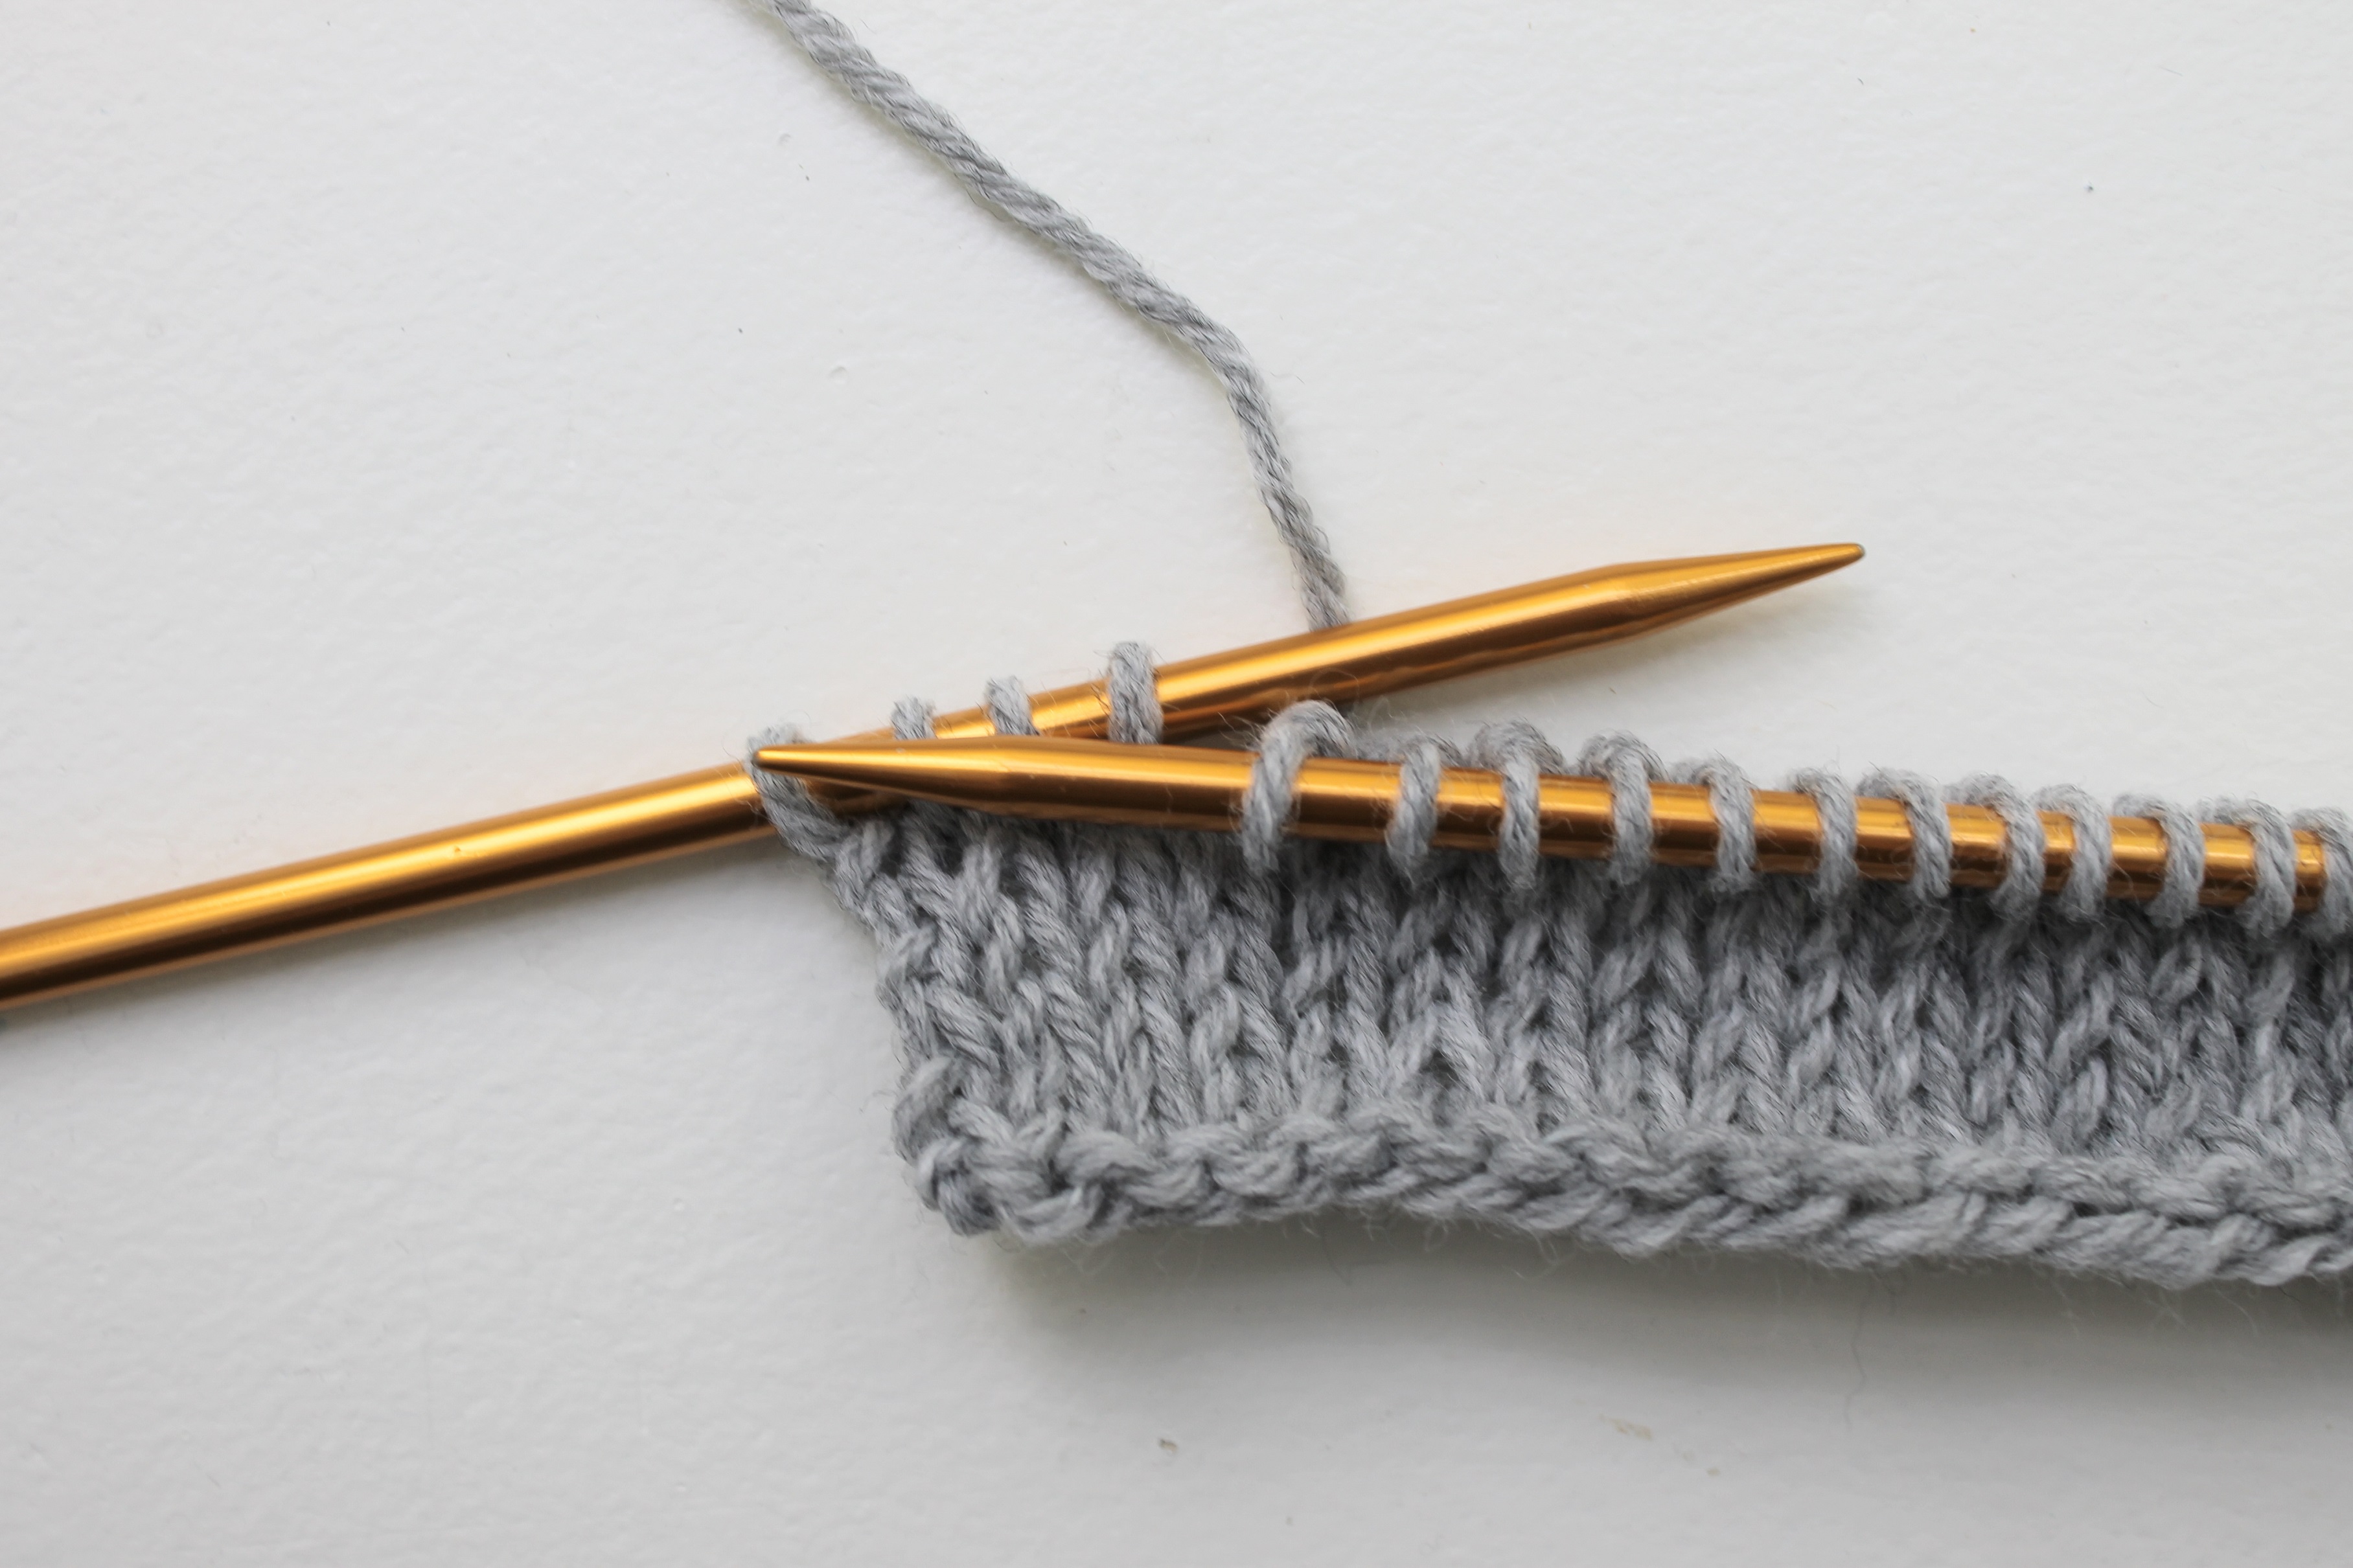
3. Slip the next stitch on the left needle purlwise, taking it over to the right needle.
4. Attach the stitch marker or safety pin to the working yarn. Note that you’re not attaching the stitch marker to any of the loops. It should be able to slide up and down the working yarn.
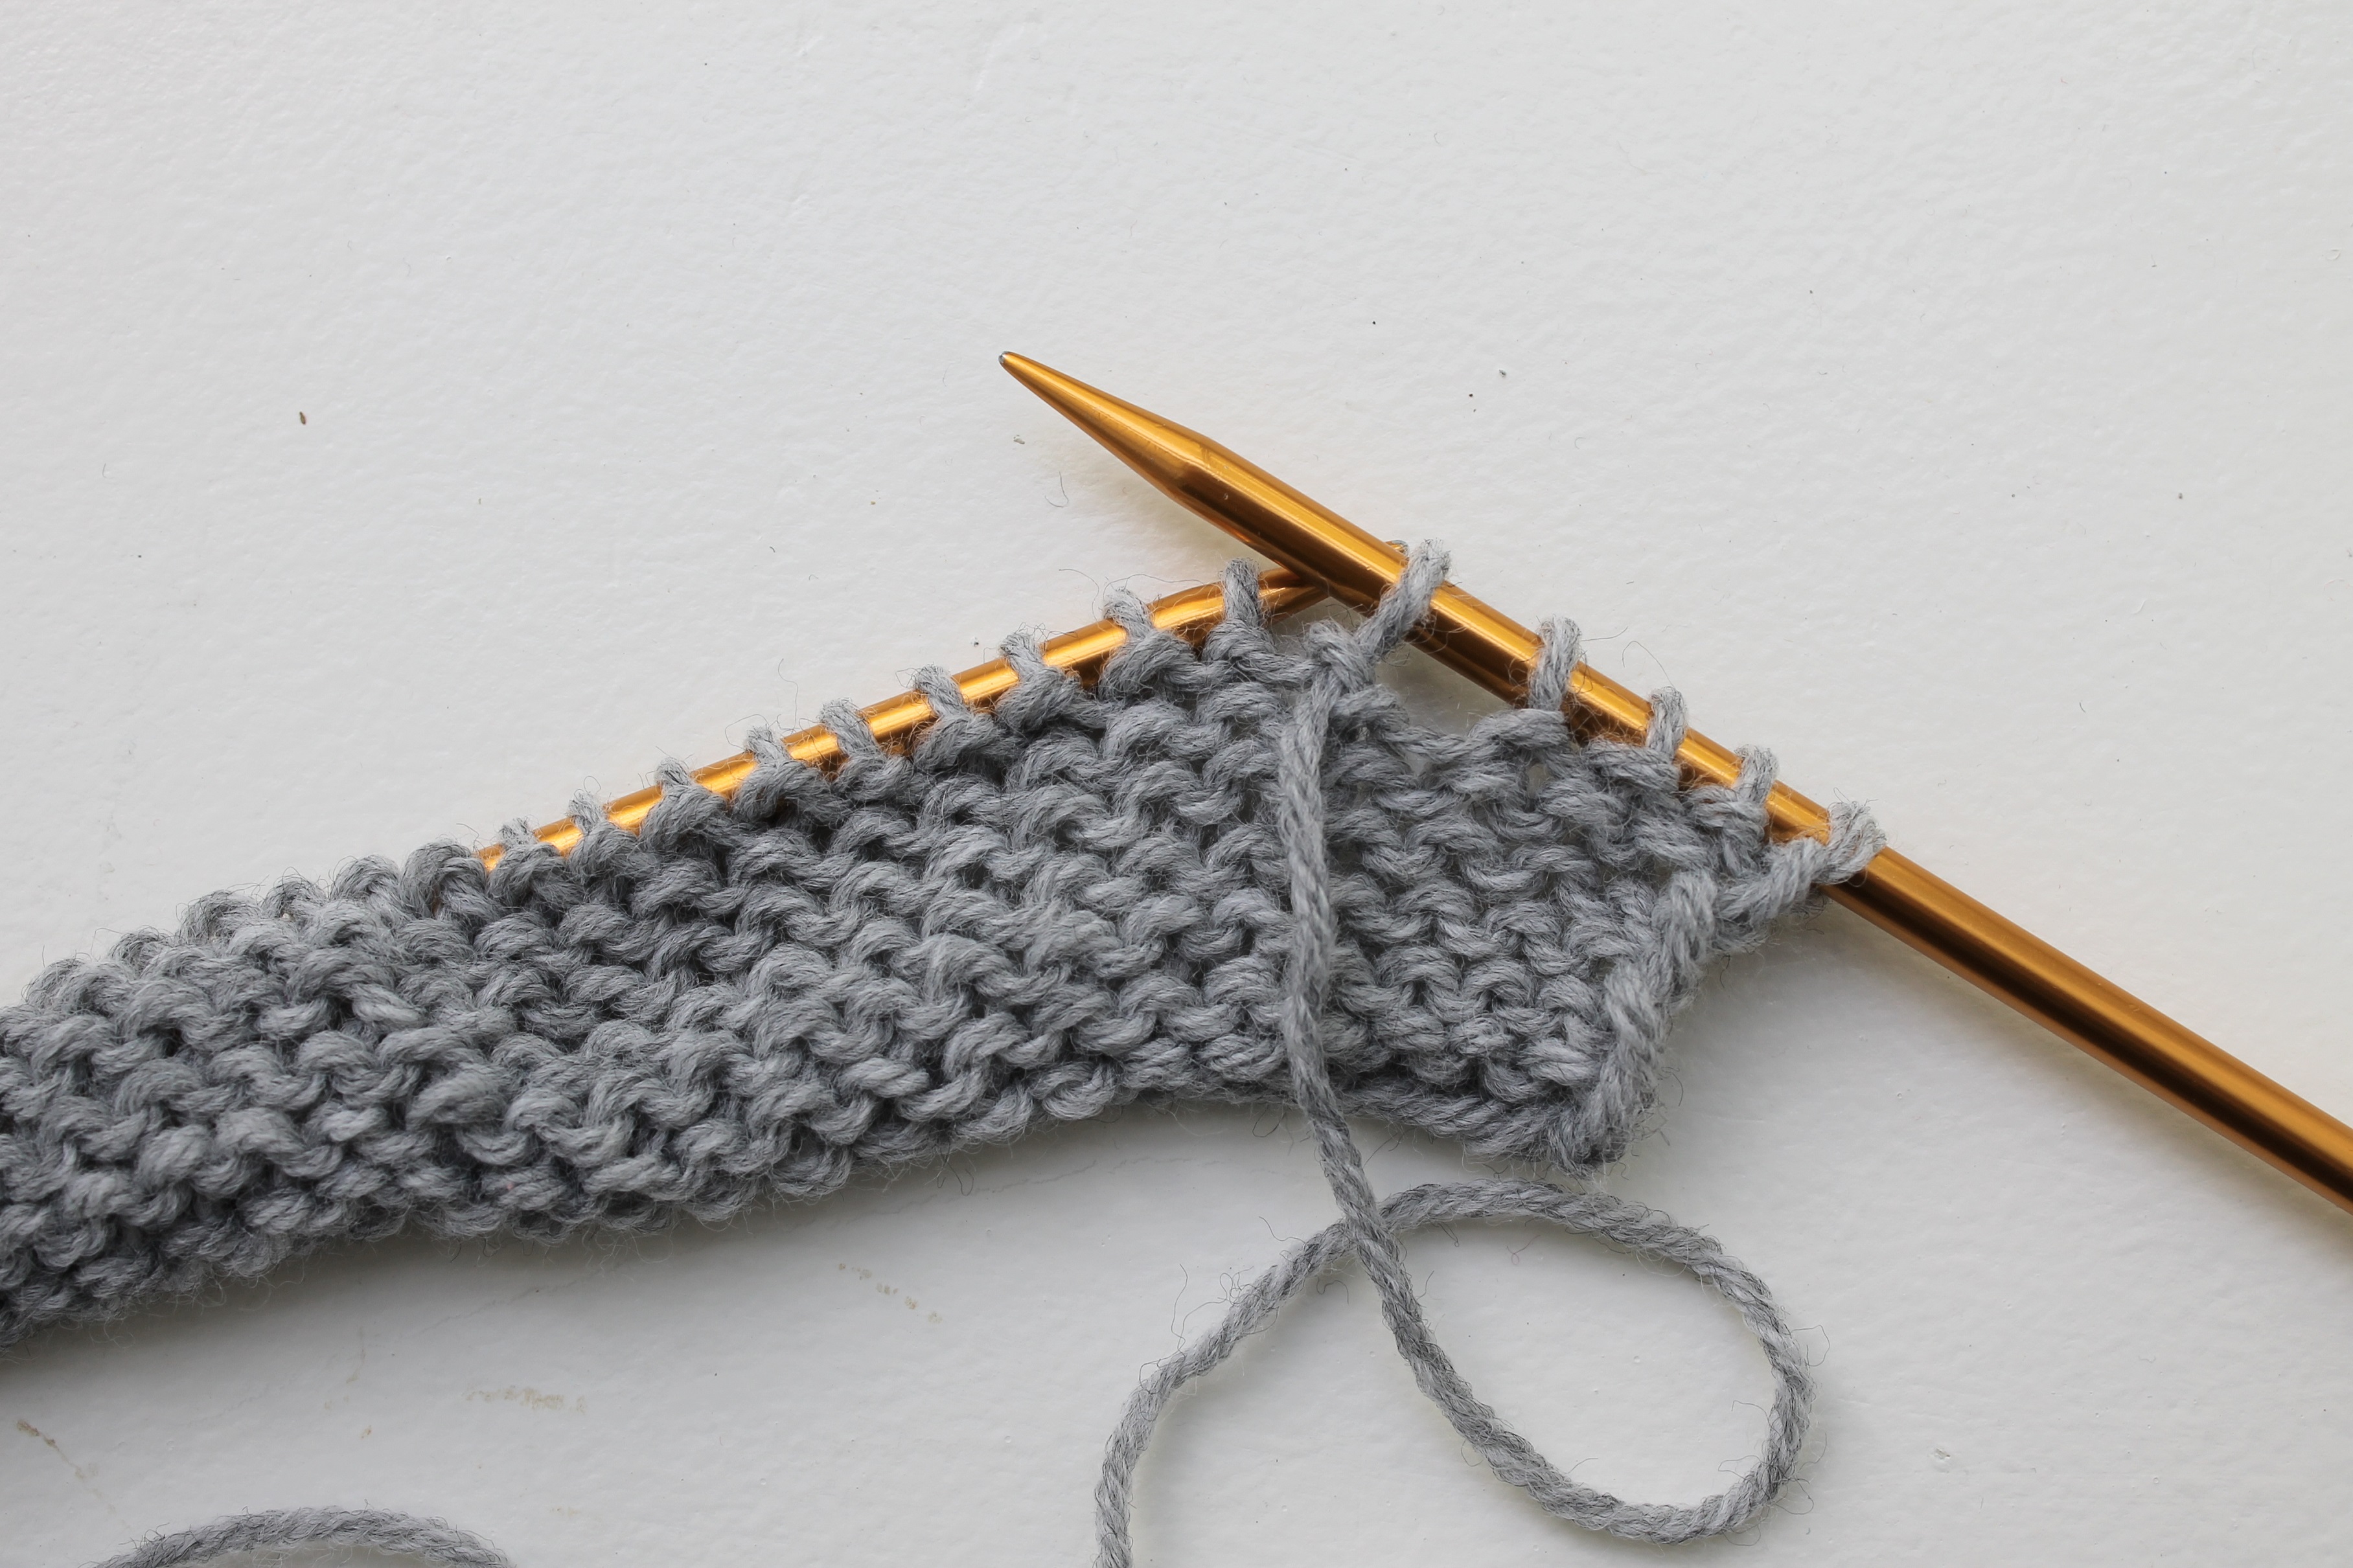
5. Continue purling across until you reach the end of the row.
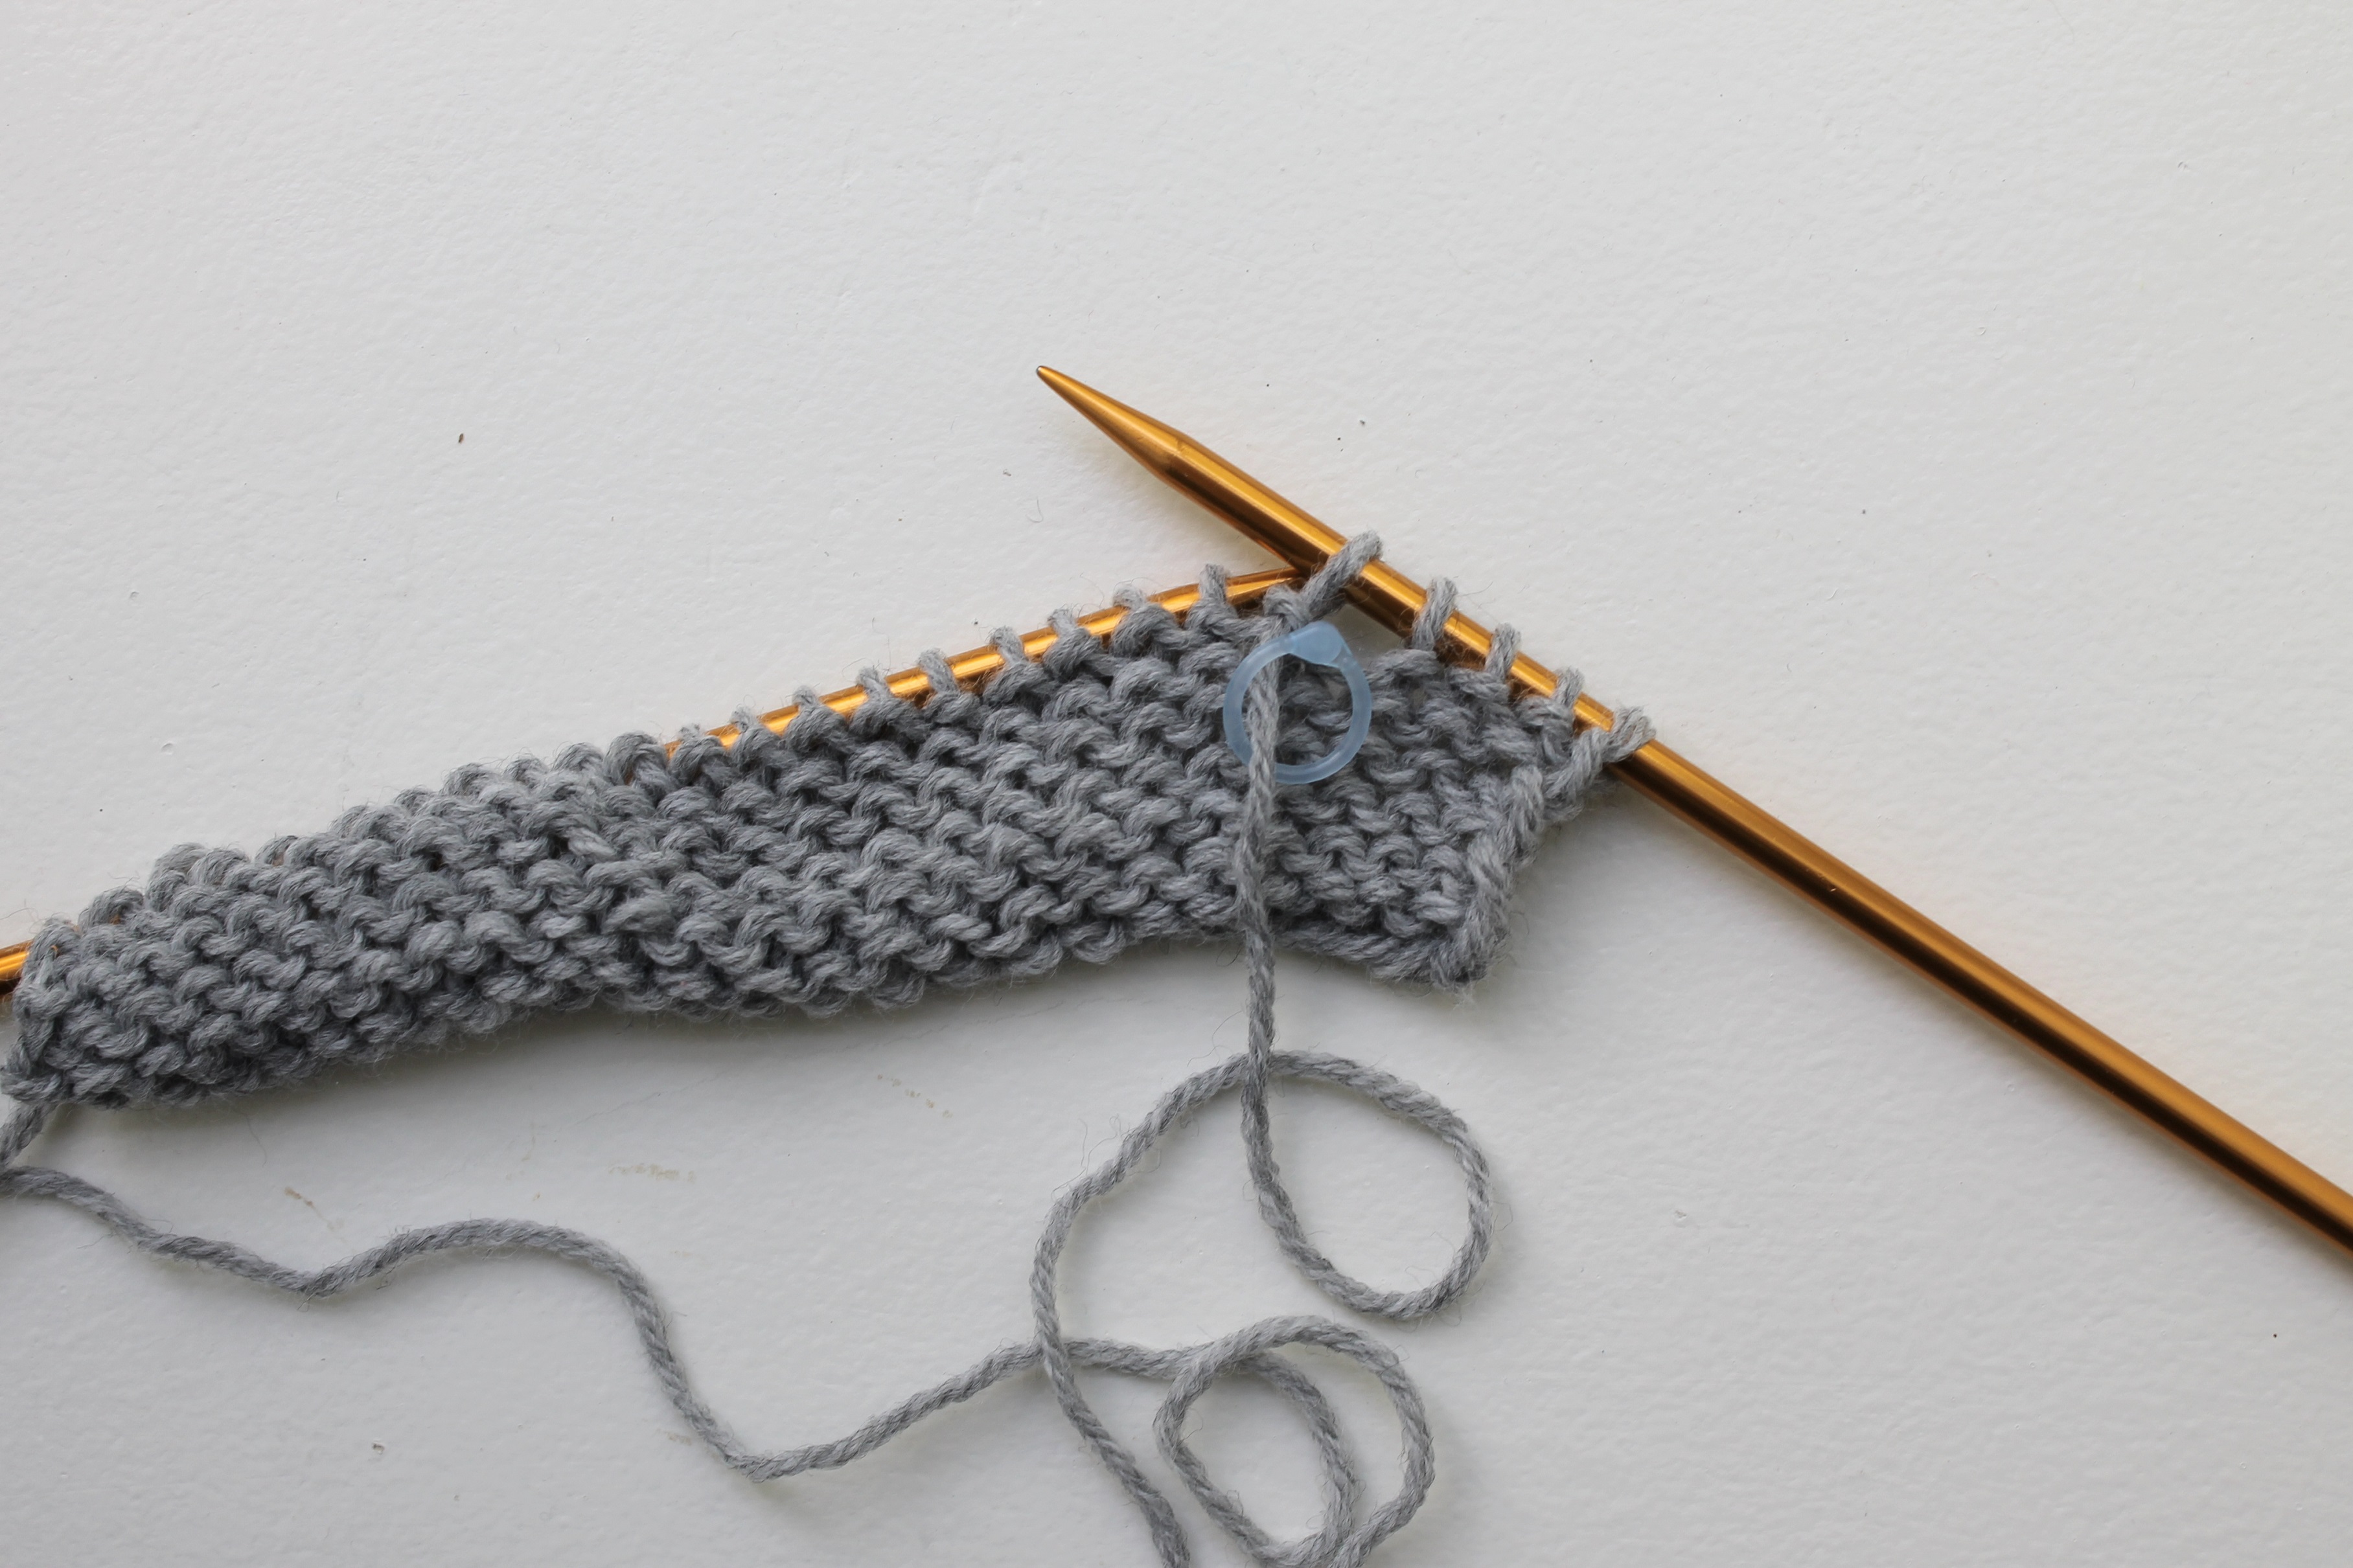
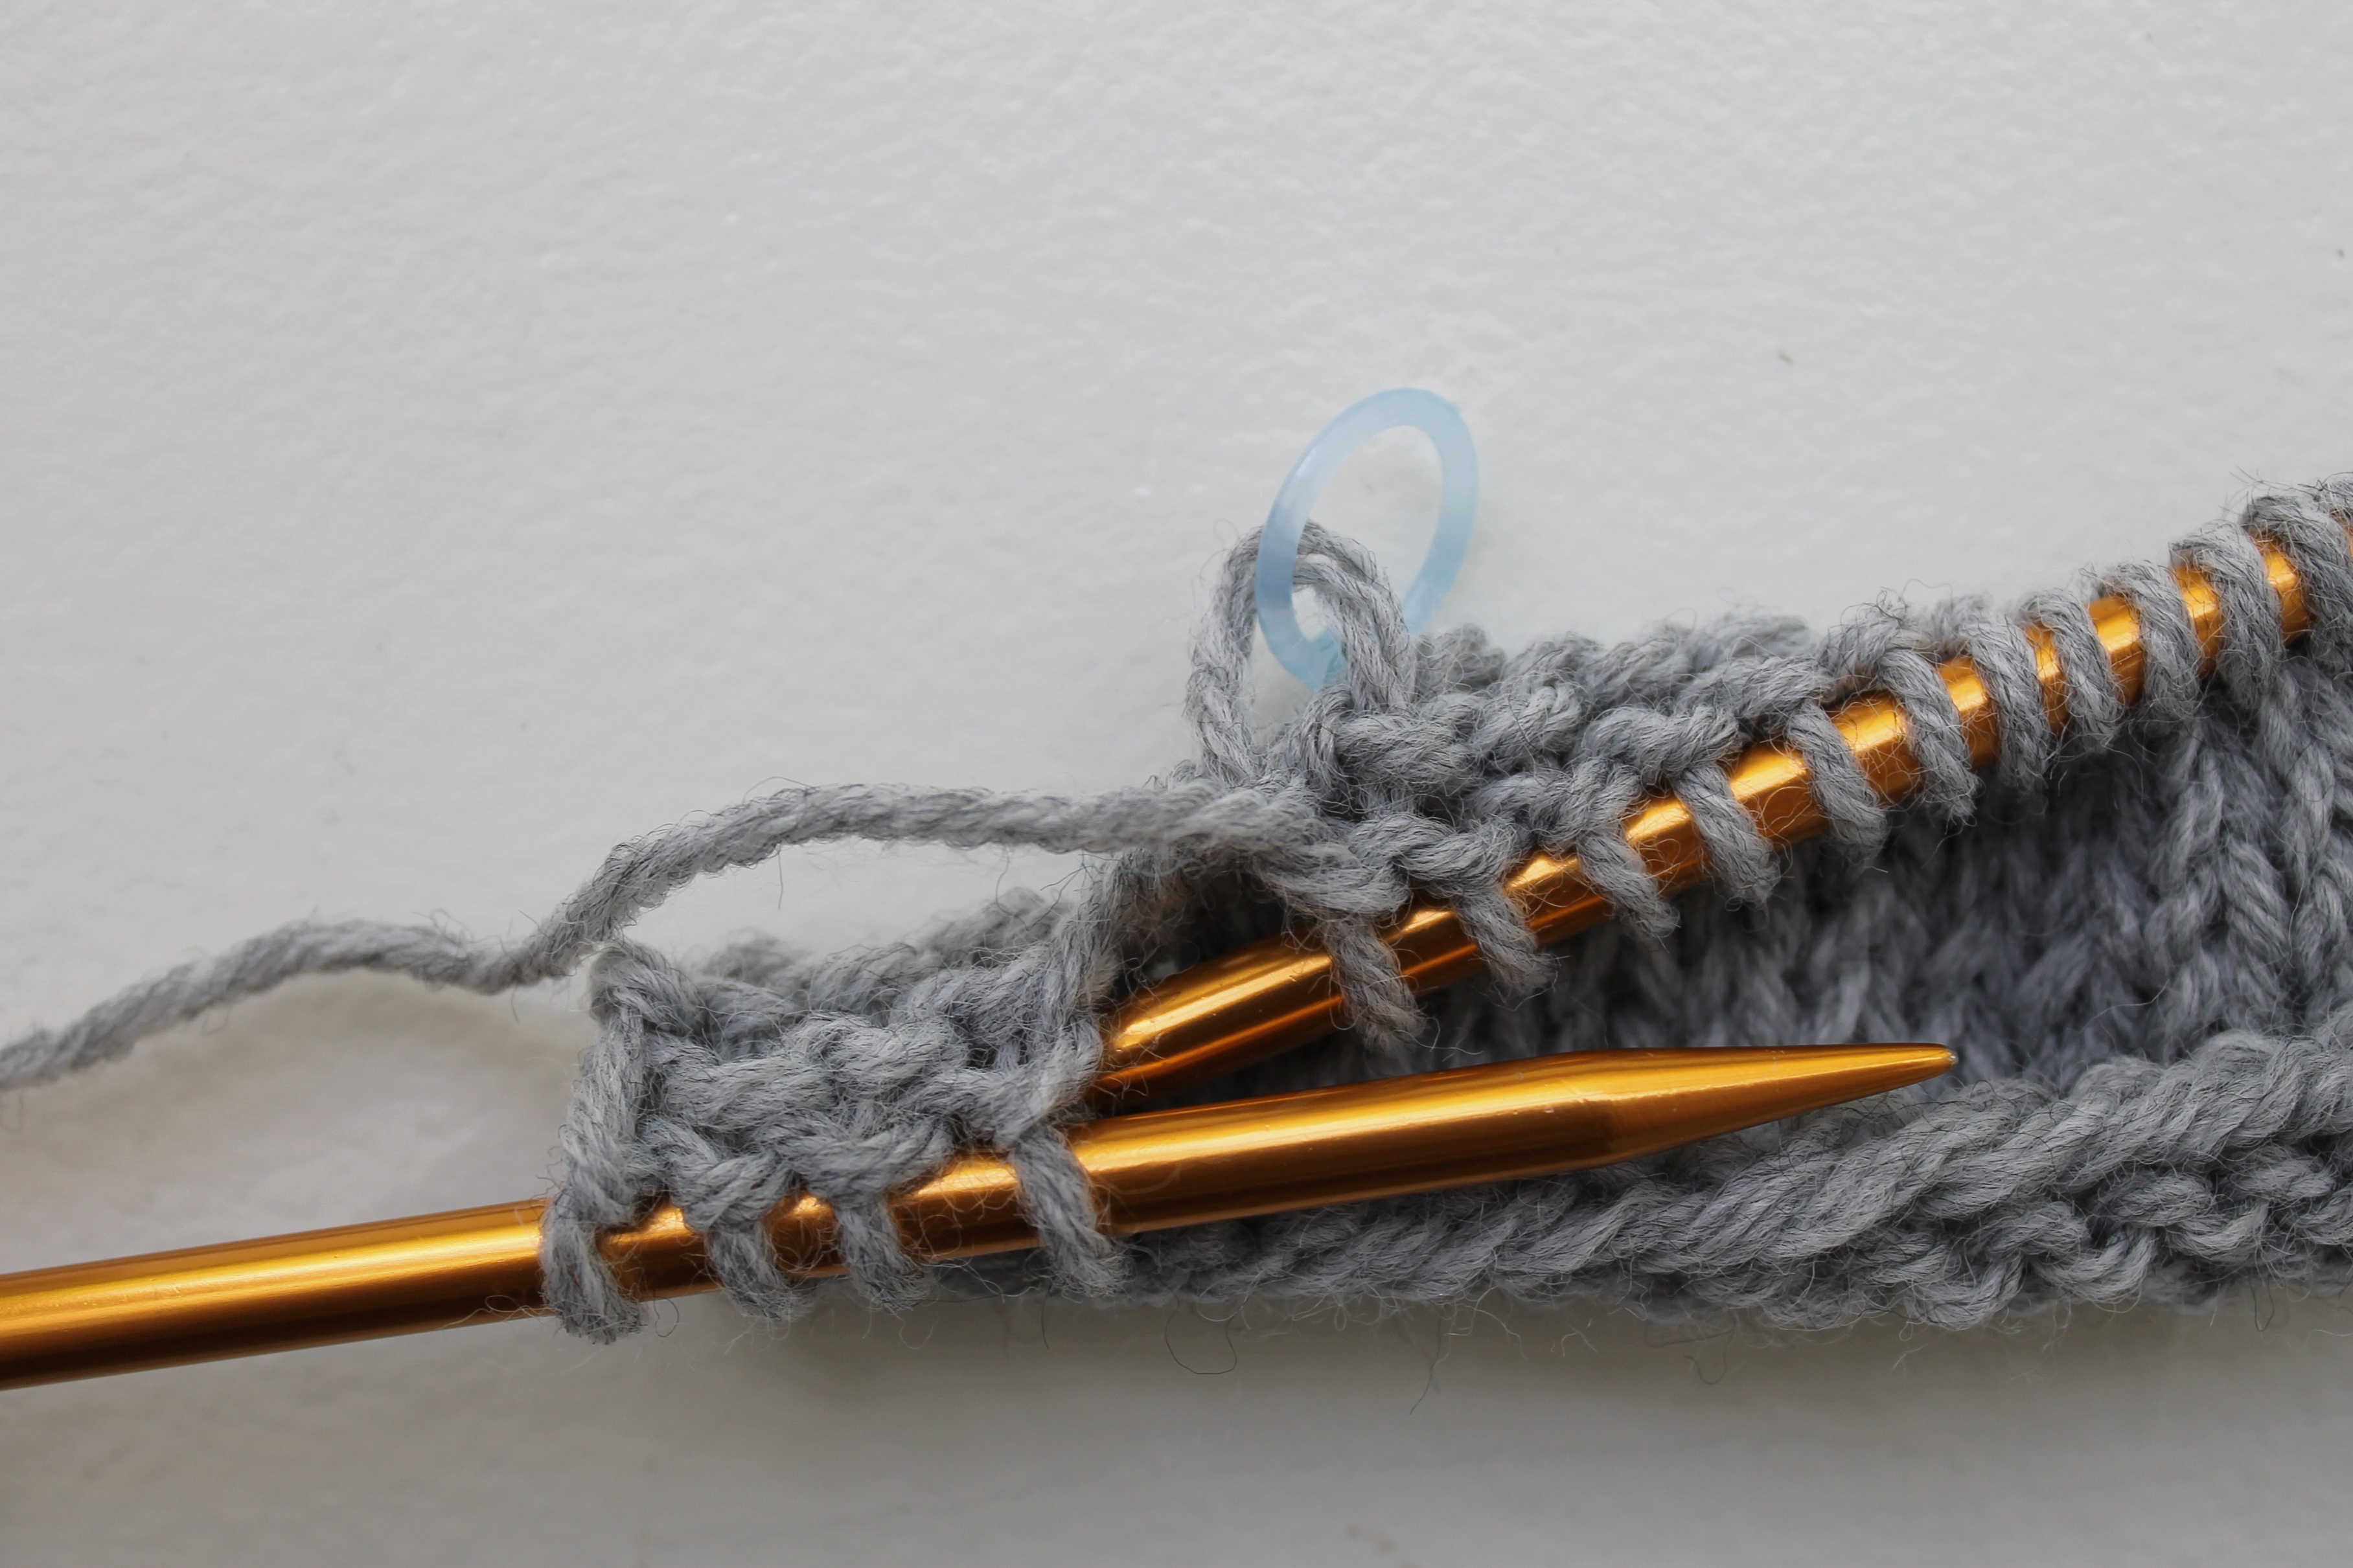
6. Turn your work and knit across the row. When you reach that stitch marker again, there will be a gap in your knitting. Knit until you come to that gap.
You’ll notice that the stitch marker will be attached to the loop at the back of the work on the right needle.
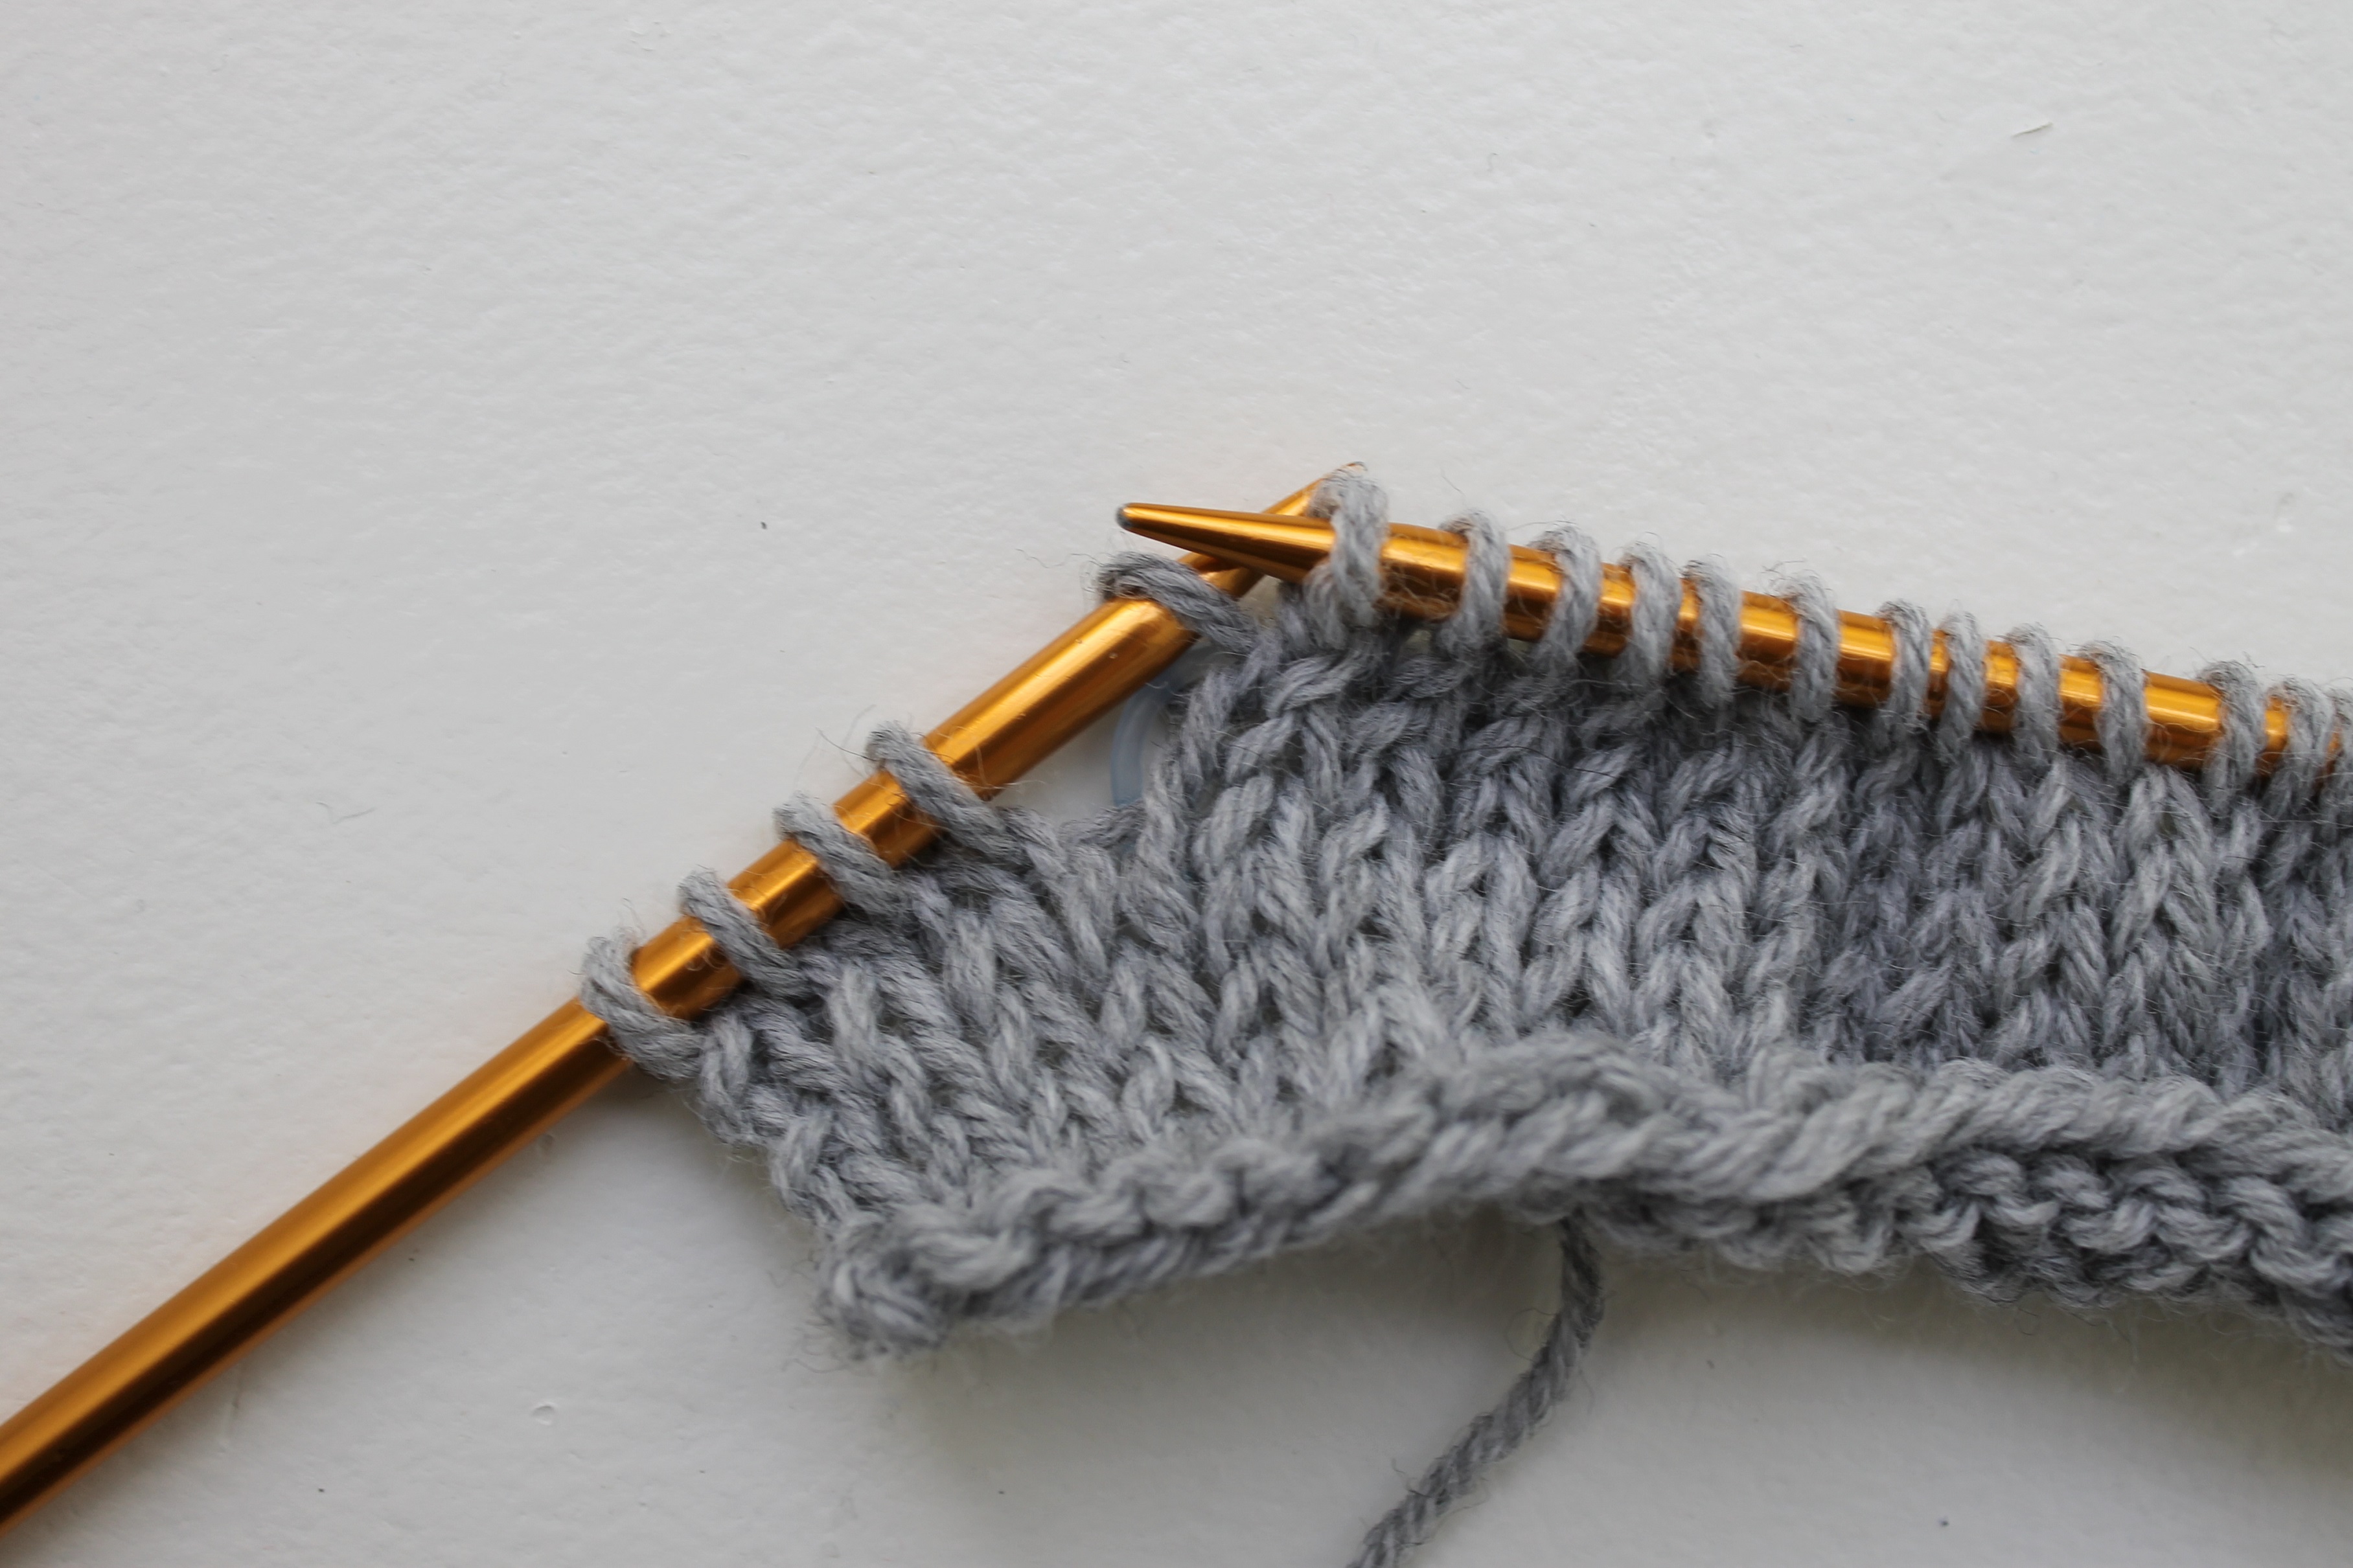
7. Pull the stitch marker up and place the loop onto the left needle. Be sure you mount the stitch on the needle correctly with the right leg in front.
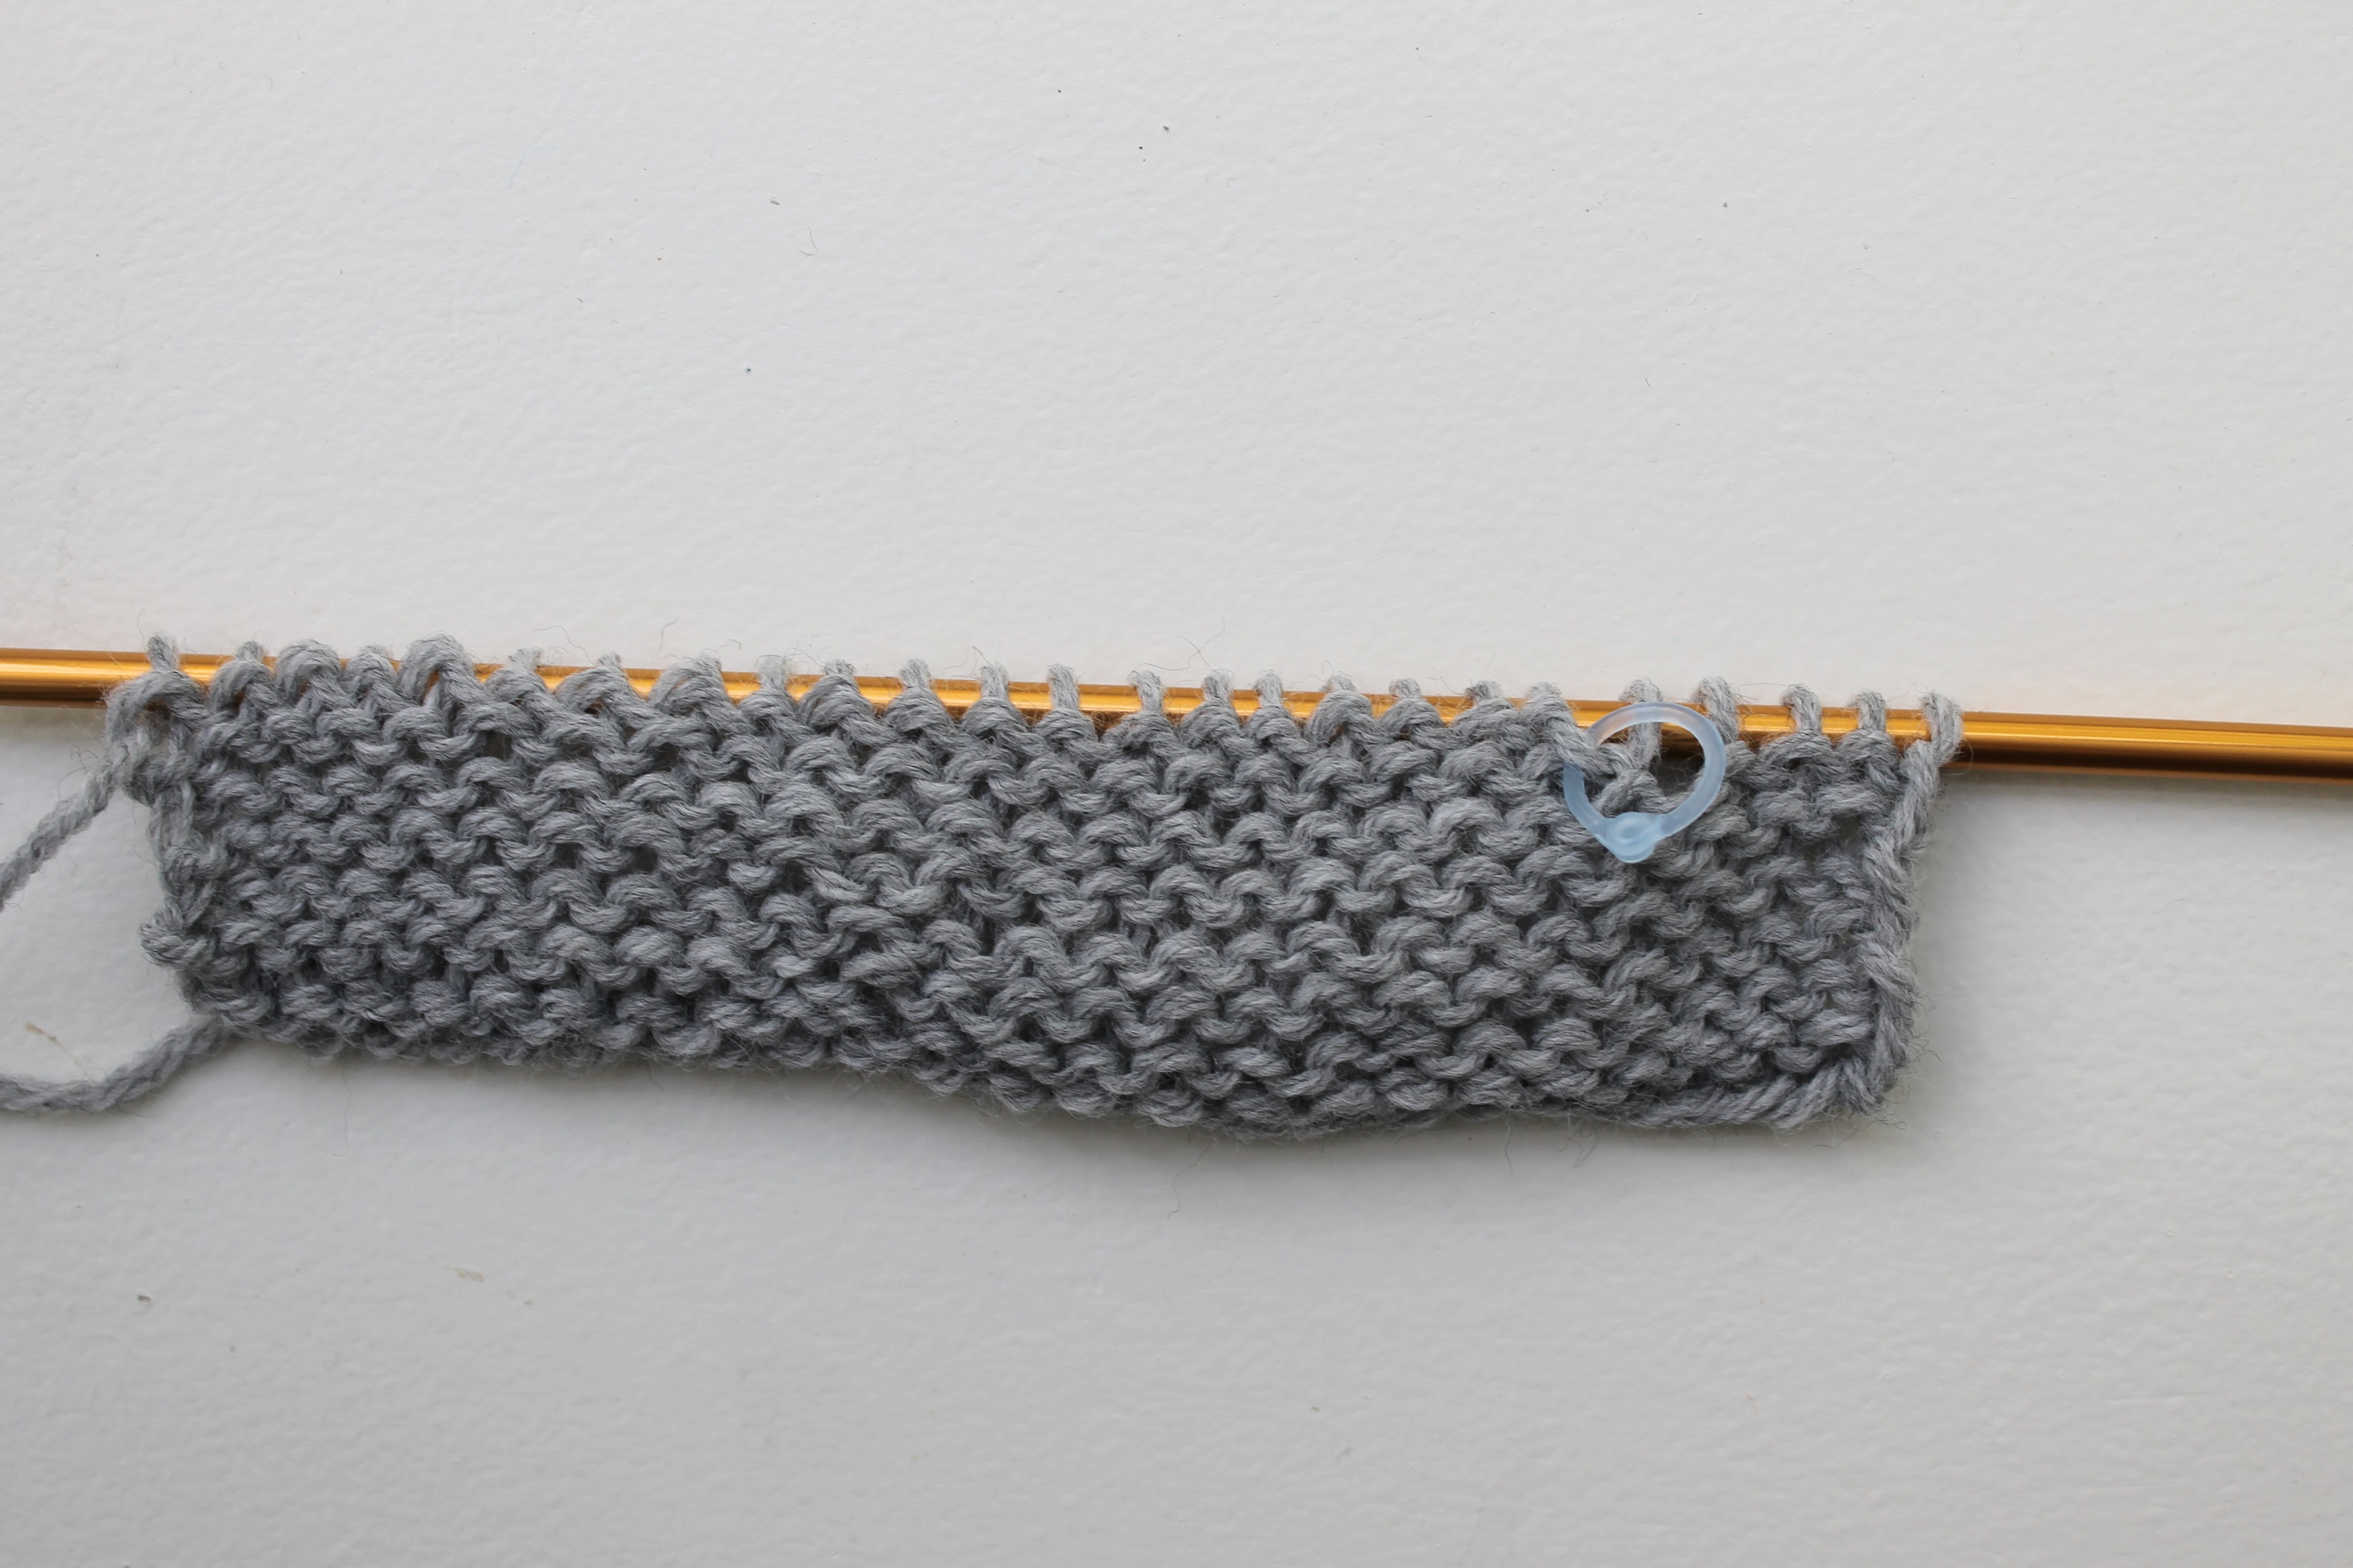
8. Now just knit that loop together with the next stitch on the left needle, as if you’re doing a k2tog.
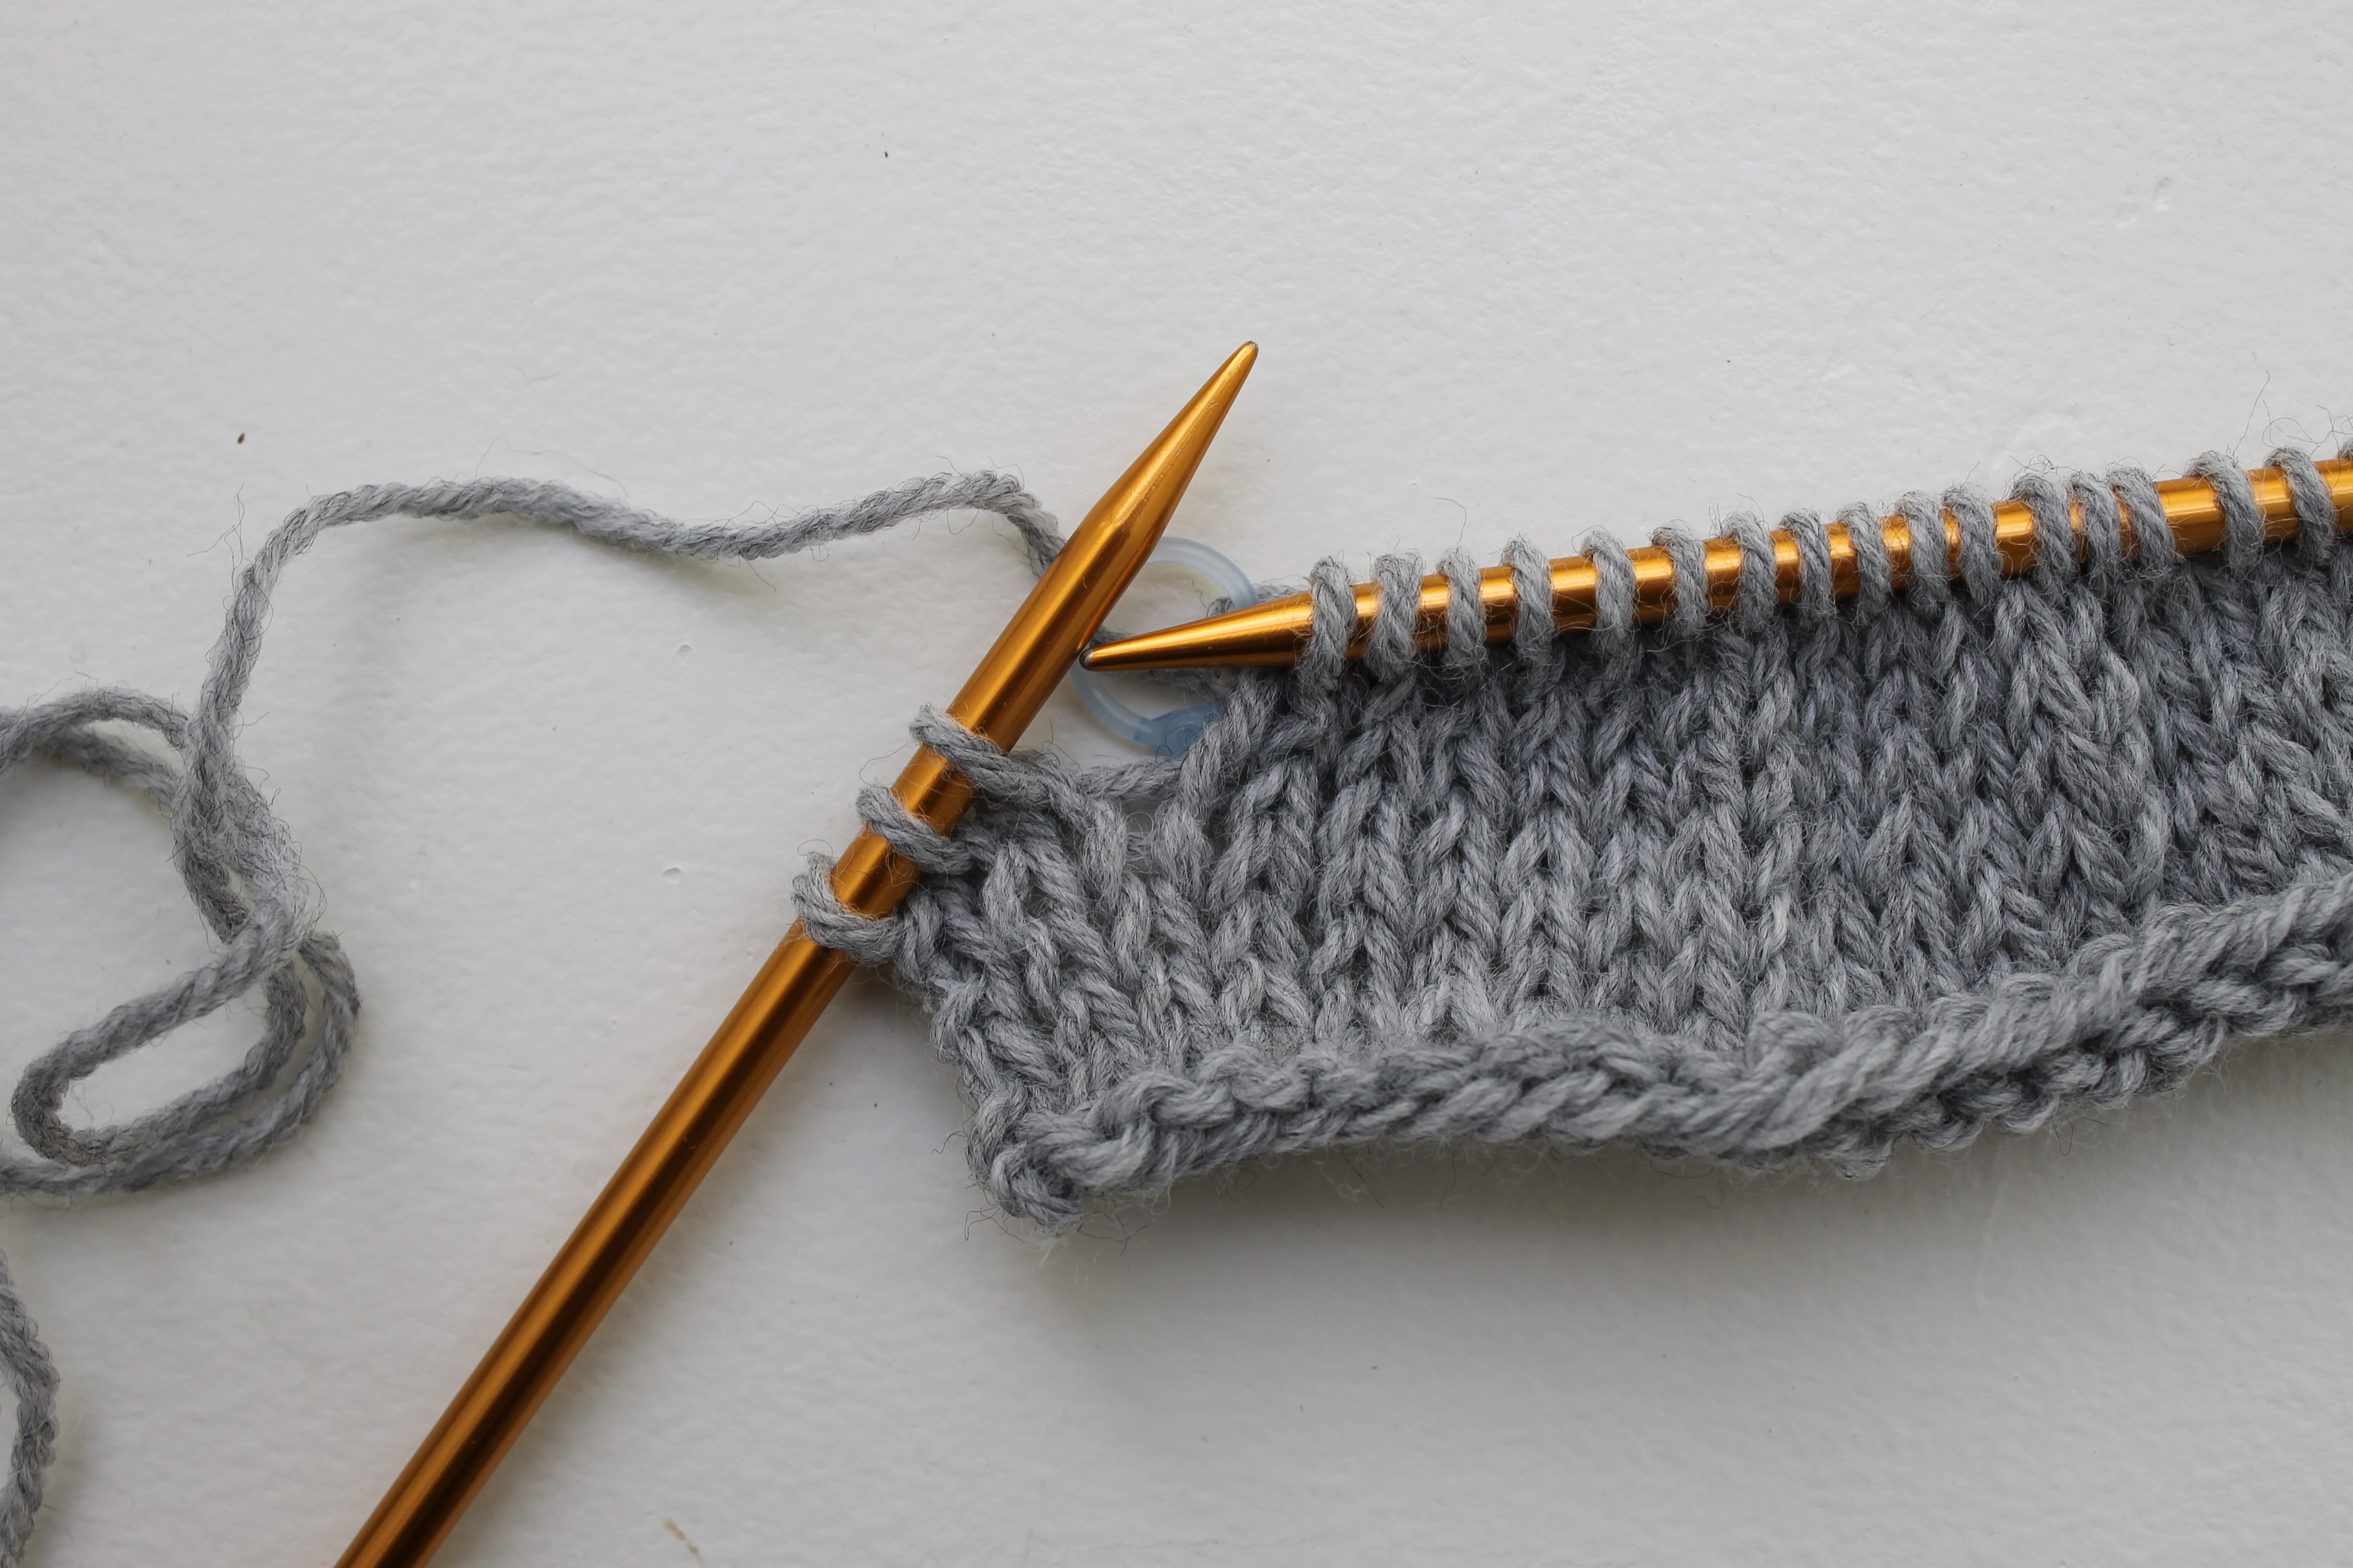
Ta da! That’s all there is to it. There might also be a situation where you’re using more than one stitch marker to shape those rows. In that case, you’d have lots of markers hanging off the back of the work, so you’d have to slowly work your way across and remove them one at a time.
To see the Japanese short row in action and learn about even more types of short rows, check out Carol Feller’s free Craftsy class Short Rows. You’ll learn different methods, including the Japanese short row and the wrap and turn, plus see how short rows can help shape anything from a bust to sleeves and shoulders.
Share tips, start a discussion or ask one of our experts or other students a question.
No Responses to “Make Short Rows Neater With This Japanese Knitting Tutorial”