
Few crocheters enjoy the process of joining crochet motifs — it can take a long time and isn’t much fun. But there’s one technique that makes the process a little less painful: Joining as you go.
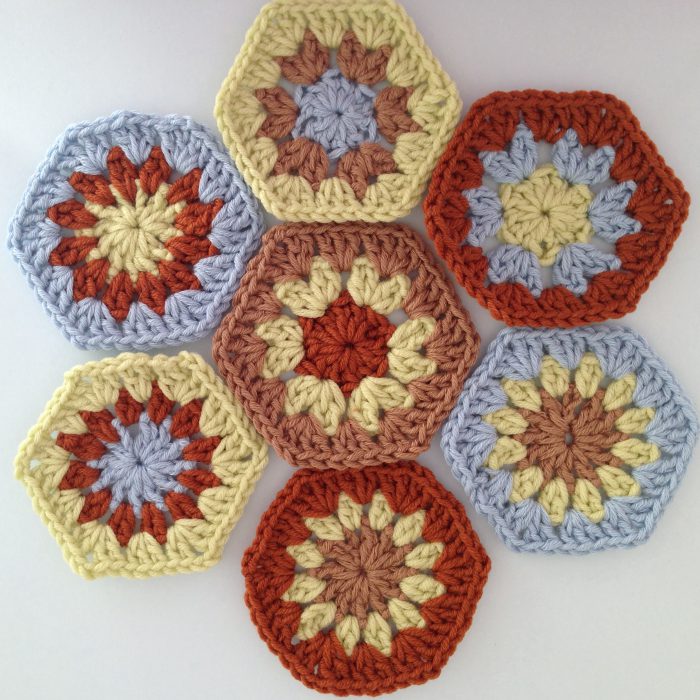
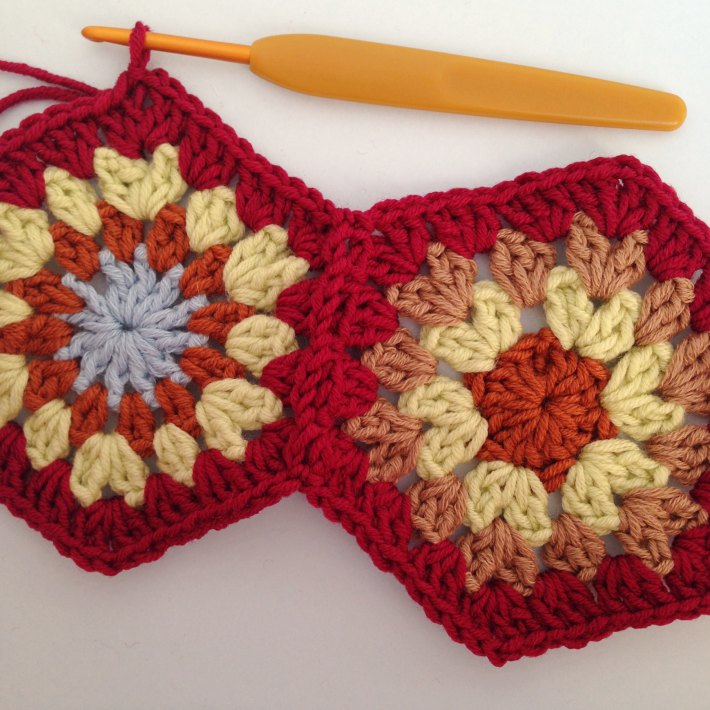
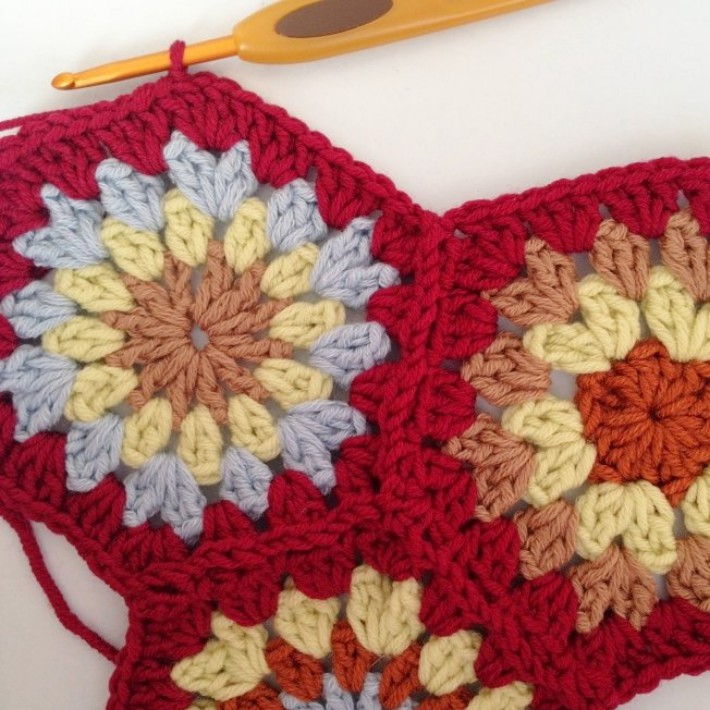
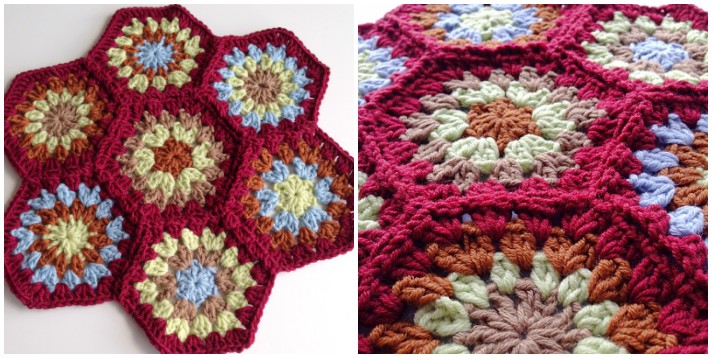
Remember the three free hexagon patterns we featured recently? I made some in these lovely colors to use for a table centerpiece. I joined the hexagons with a rich berry-red yarn using the join as you go crochet method and thought it was the perfect opportunity for a tutorial.
Follow along to learn the join-as-you-go crochet technique. You can use the technique to join together many types of motifs, from hexagons to granny squares.
What you’ll need
- Motifs for joining: I used seven hexagons, all the same size with the same number of double crochet groups in the outer round, using the free hexagon patterns here.
- Yarn: Use the same yarn weight as the motifs. I used DK weight pure wool by Yarn Stories.
- Crochet hook: Choose the size right for your yarn. For me, a size F hook (3.75mm) was perfect.
- Scissors and darning needle
Stitches used
- Chain (ch)
- Slip stitch (sl st)
- Single crochet (sc)
- Double crochet (dc)
Create a joining plan
Before you start, decide the order of your motifs. I made a simple flower design. If you are making a granny square blanket, lay out your design on the carpet or a bed. Once you are happy with your layout, make some notes and take a photograph. You then have a pattern to reference.
Joining the first two motifs
Step 1:
First, crochet a fourth round for your first motif. In my case, this was my central hexagon.
Use a standing dc to start in any corner of the hexagon (or granny square). Dc into the same space.
Continue along the first side, making 3 dc into each space between the dc groups of the previous round. At the next corner, work 2 dc, 1 ch, 2 dc.
Continue to work all around the first motif until it has a complete fourth round. Close with a slip stitch and fasten off the yarn.
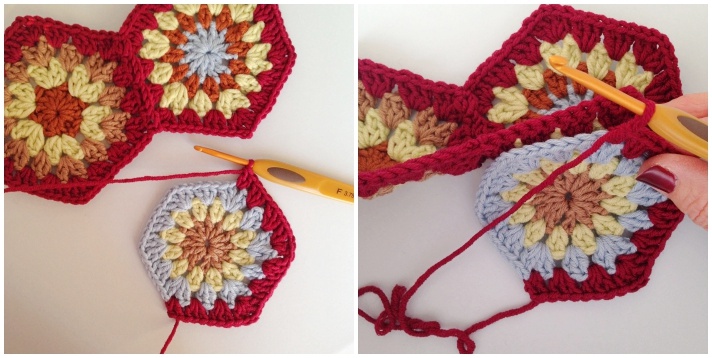
Step 2:
Begin making a fourth round on your second motif in the same way, but stop when you have completed four sides.
Step 3:
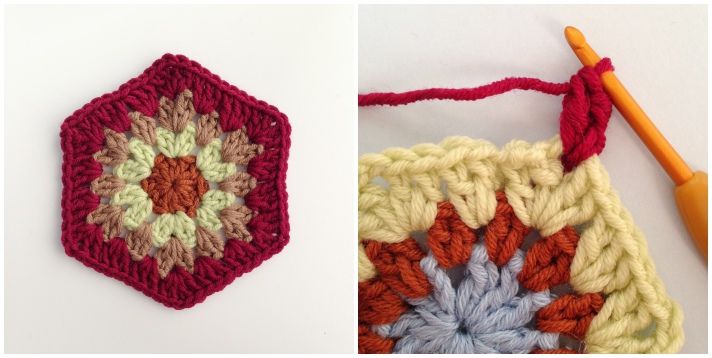
Put the working motif on top of the first motif, with wrong sides together. If you look at the photo lower right, you can see that the hexagons line up except for the last two sides that you yet have to work.

Holding the hexagons together, separate them slightly so that you can see the corner of the first motif (marked with a blue arrow). Insert your hook into this corner space and make a single crochet. This joins the two motifs and replaces the chain you would normally make between the two sets of 2 dc in a corner.
You can see this more easily when you open out the two hexagons and lay them right-side up.
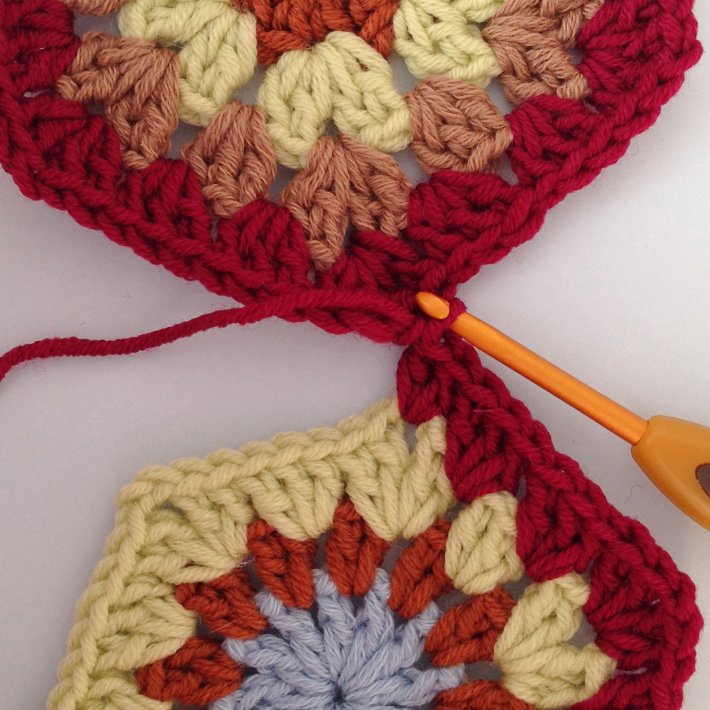
Make 2 dc into the corner of the second motif to complete it.
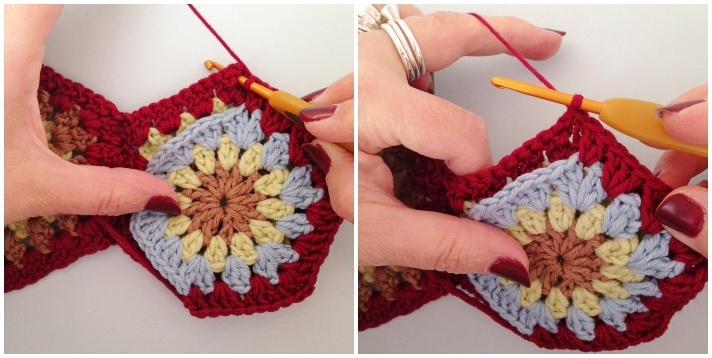
Step 4:
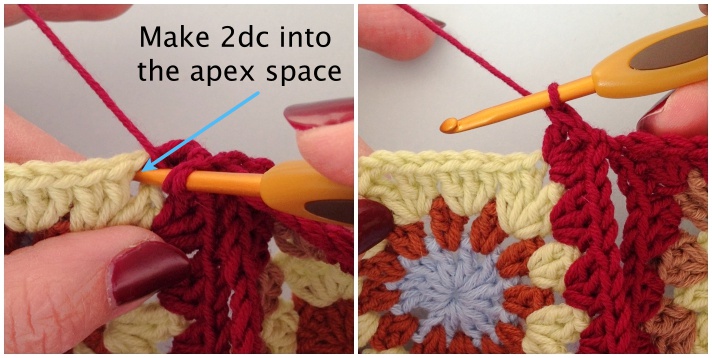
With the motifs together, wrong side to wrong side, make a joining sc in the next space of your first motif.
Once you have completed the sc, make the usual 3 dc into the next space of the working motif.
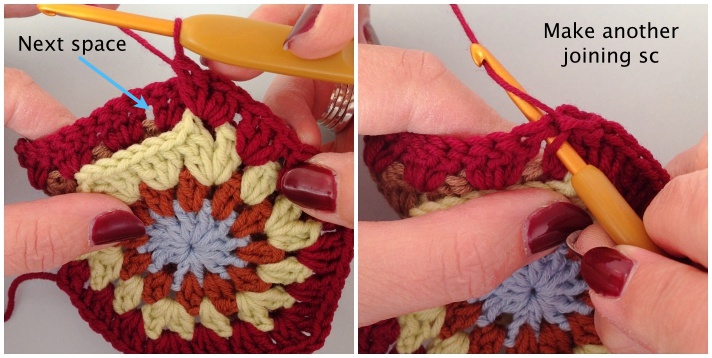
Continue making a joining sc in the first motif and 3 dc into the second motif’s next space until you have completed the first 2 dc of the next corner.
Step 5:
Make a final joining sc into the corner space of your first motif.
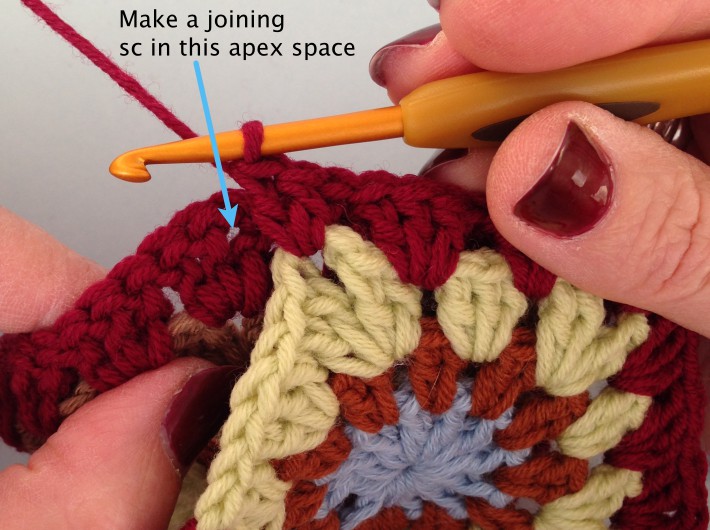
Complete the corner by making 2 dc. Then complete the sixth side without further joining. Close the round with a slip stitch and fasten off your yarn.
Your two motifs should now be joined with a raised seam.
Adding a third motif
To join your next motif, you’ll join along two sides. One side will connect with the first motif and the other side will connect with the second motif.

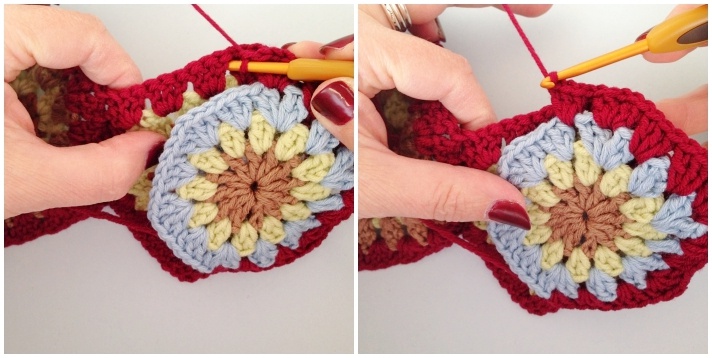
Step 1:
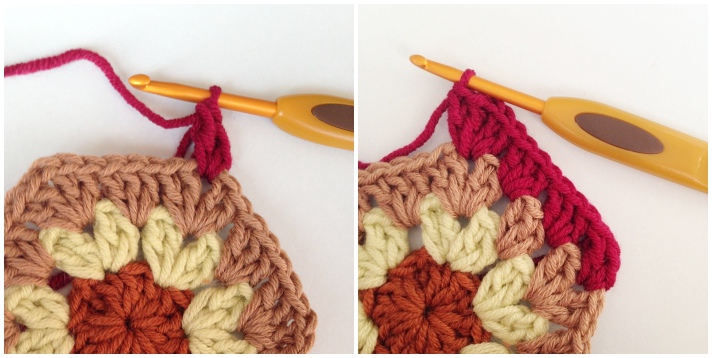
As before, start working the fourth round, but work only three sides. Stop when you have completed the first 2 dc stitches of the fourth corner.
Step 2:
Lay out the two joined motifs and see how the working motif will fit in. Hold the working motif beside the first motif, with wrong sides together.
Make the first joining sc into the corner space of the first motif. The photo below on the left shows the hook being in that space. The photo on the right shows the completed sc.
Make 2 dc into the corner space of the working motif to finish the corner.
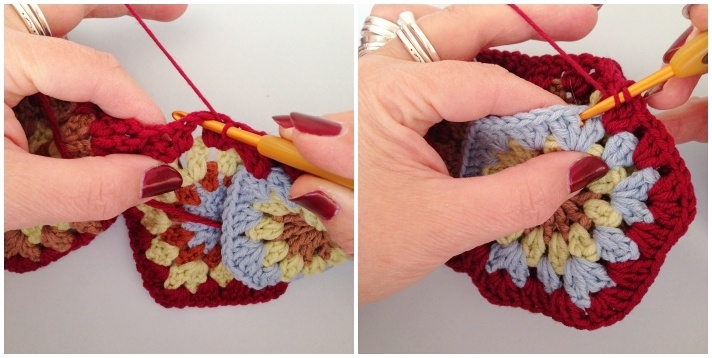
Step 3:
Make a joining sc into the next space of the first motif. Come back to the working hexagon and make 3 dc into the next space. Continue across the side of your motif until you reach the next corner.
When you reach the corner, make 2 dc into the corner of the working motif.
Step 4:
You have now reached the point at which the two already-joined motifs meet.
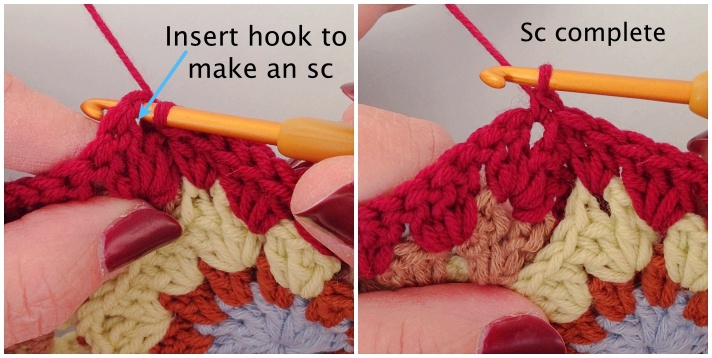
To join in the third motif securely, make two joining sc stitches: one in the corner space each motif. The photo sequence below shows exactly what to do.
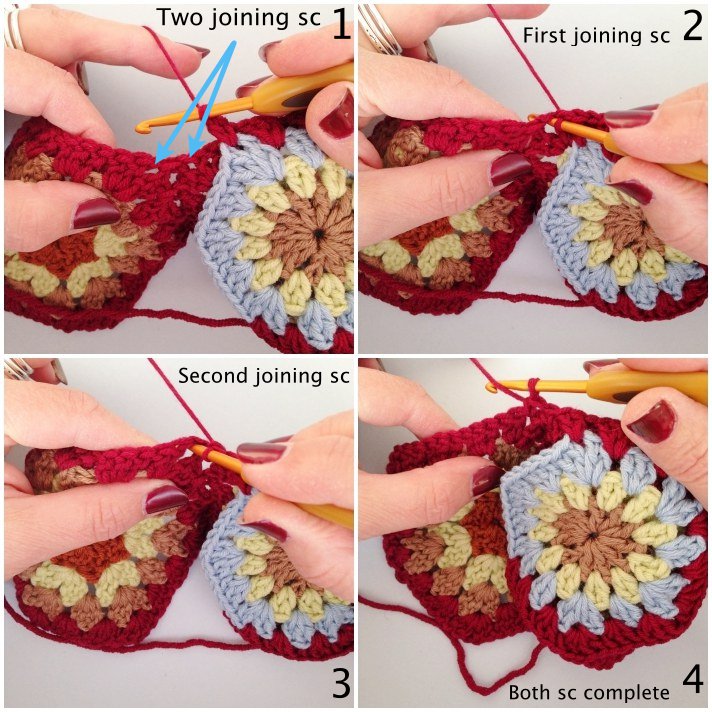
- The blue arrows show the two spaces into which you need to work.
- Complete the first joining sc into the corner of the motif you have been joining to.
- Complete the second sc into corner of the second motif, the one your thrid motif is not yet joined to.
Complete the working motif’s corner by making 2 dc stitches into its corner.
Step 5:
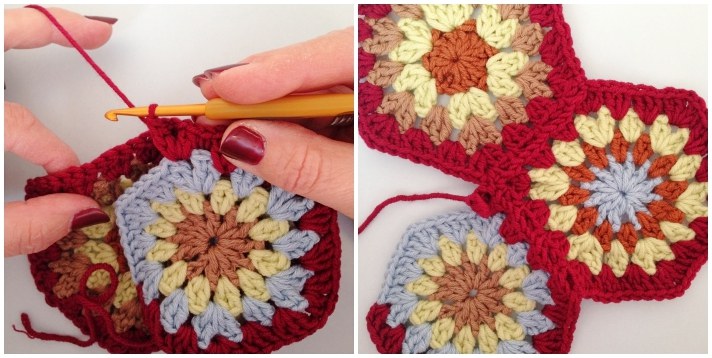
Line up the unfinished motif with the next motif you want to join it to. Make a joining sc into the next space in the finished motif.
Complete the 3 dc into the next space on your working motif. Continue across the side until you reach the next corner.
Made 2 dc into the corner space of the working motif and join the corners with a sc into the corner space of the finished motif. Complete the corner with 2 dc in the working motif.
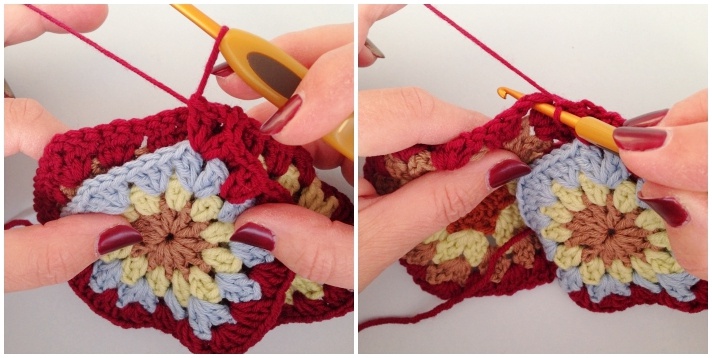
Continue to work the fourth round of your motif and join with a slip stitch to complete the round.
You can now fasten off your yarn. You have three join-as-you-go crochet motifs!
Completing the project
Use the join-as-you-go crochet method to join in the remaining motifs.
Depending on your project, some motifs might need joining on three or more sides. For my project, the final hexagon requires joining on three sides, so I completed only two sides before starting to join.
No matter your project, always work with the wrong side to the wrong side. Working methodically, with a joining sc in each space of the motif you are joining to and dc stitches into motif you are joining in.
Alternatives to the sc join as you go crochet method
I like the texture of using a sc join, but if you want something that lies flatter, you can use a slip stitch instead.
Join as you go crochet for granny squares
Other granny-style motifs can also be joined in this way. To join granny squares follow the same principles:
- Work a complete round on your first square using the yarn you have chosen for joining.
- Starting in the first corner of your second square, start adding your joining round, working along two sides until you reach the third corner. Bring the two squares together, wrong side to wrong side, matching up the spaces and corners.
- Make a joining stitch into the corner space of the first square.
- Come back to the square in front and complete the crochet stitches for the corner.
- Make a joining stitch into the next space of the square behind.
- Come back and complete the first group of stitches on the side of the second square.
- Continue moving from the front square to the back in all the way around.
- Complete the first corner when you reach it and then close the round with a slip stitch.
To join one square to two others, only work one side of the square before starting your join.
When the joining is done…
And here is how my hexagon flower turned out! After completing the join-as-you-go crochet, you can either use this as a basic starting point for a blanket, pillow cover or table runner, or simply add a border, wash and block and use as a table centerpiece.
Share tips, start a discussion or ask one of our experts or other students a question.
No Responses to “Join As You Go Crochet Tutorial”