
With toe-up socks, the cast-on you choose makes a big difference. If you cast on in the round and seamed it at the end, you’d end up with a bulky, uncomfortable seam at the toe. Luckily, there’s one option that creates a neat, seamless toe: Judy’s magic cast-on.
Judy’s magic cast-on, which was designed by Judy Becker, creates a seamless toe right from the start. Once you cast on, you just knit the rest of the sock without worrying about any finishing.
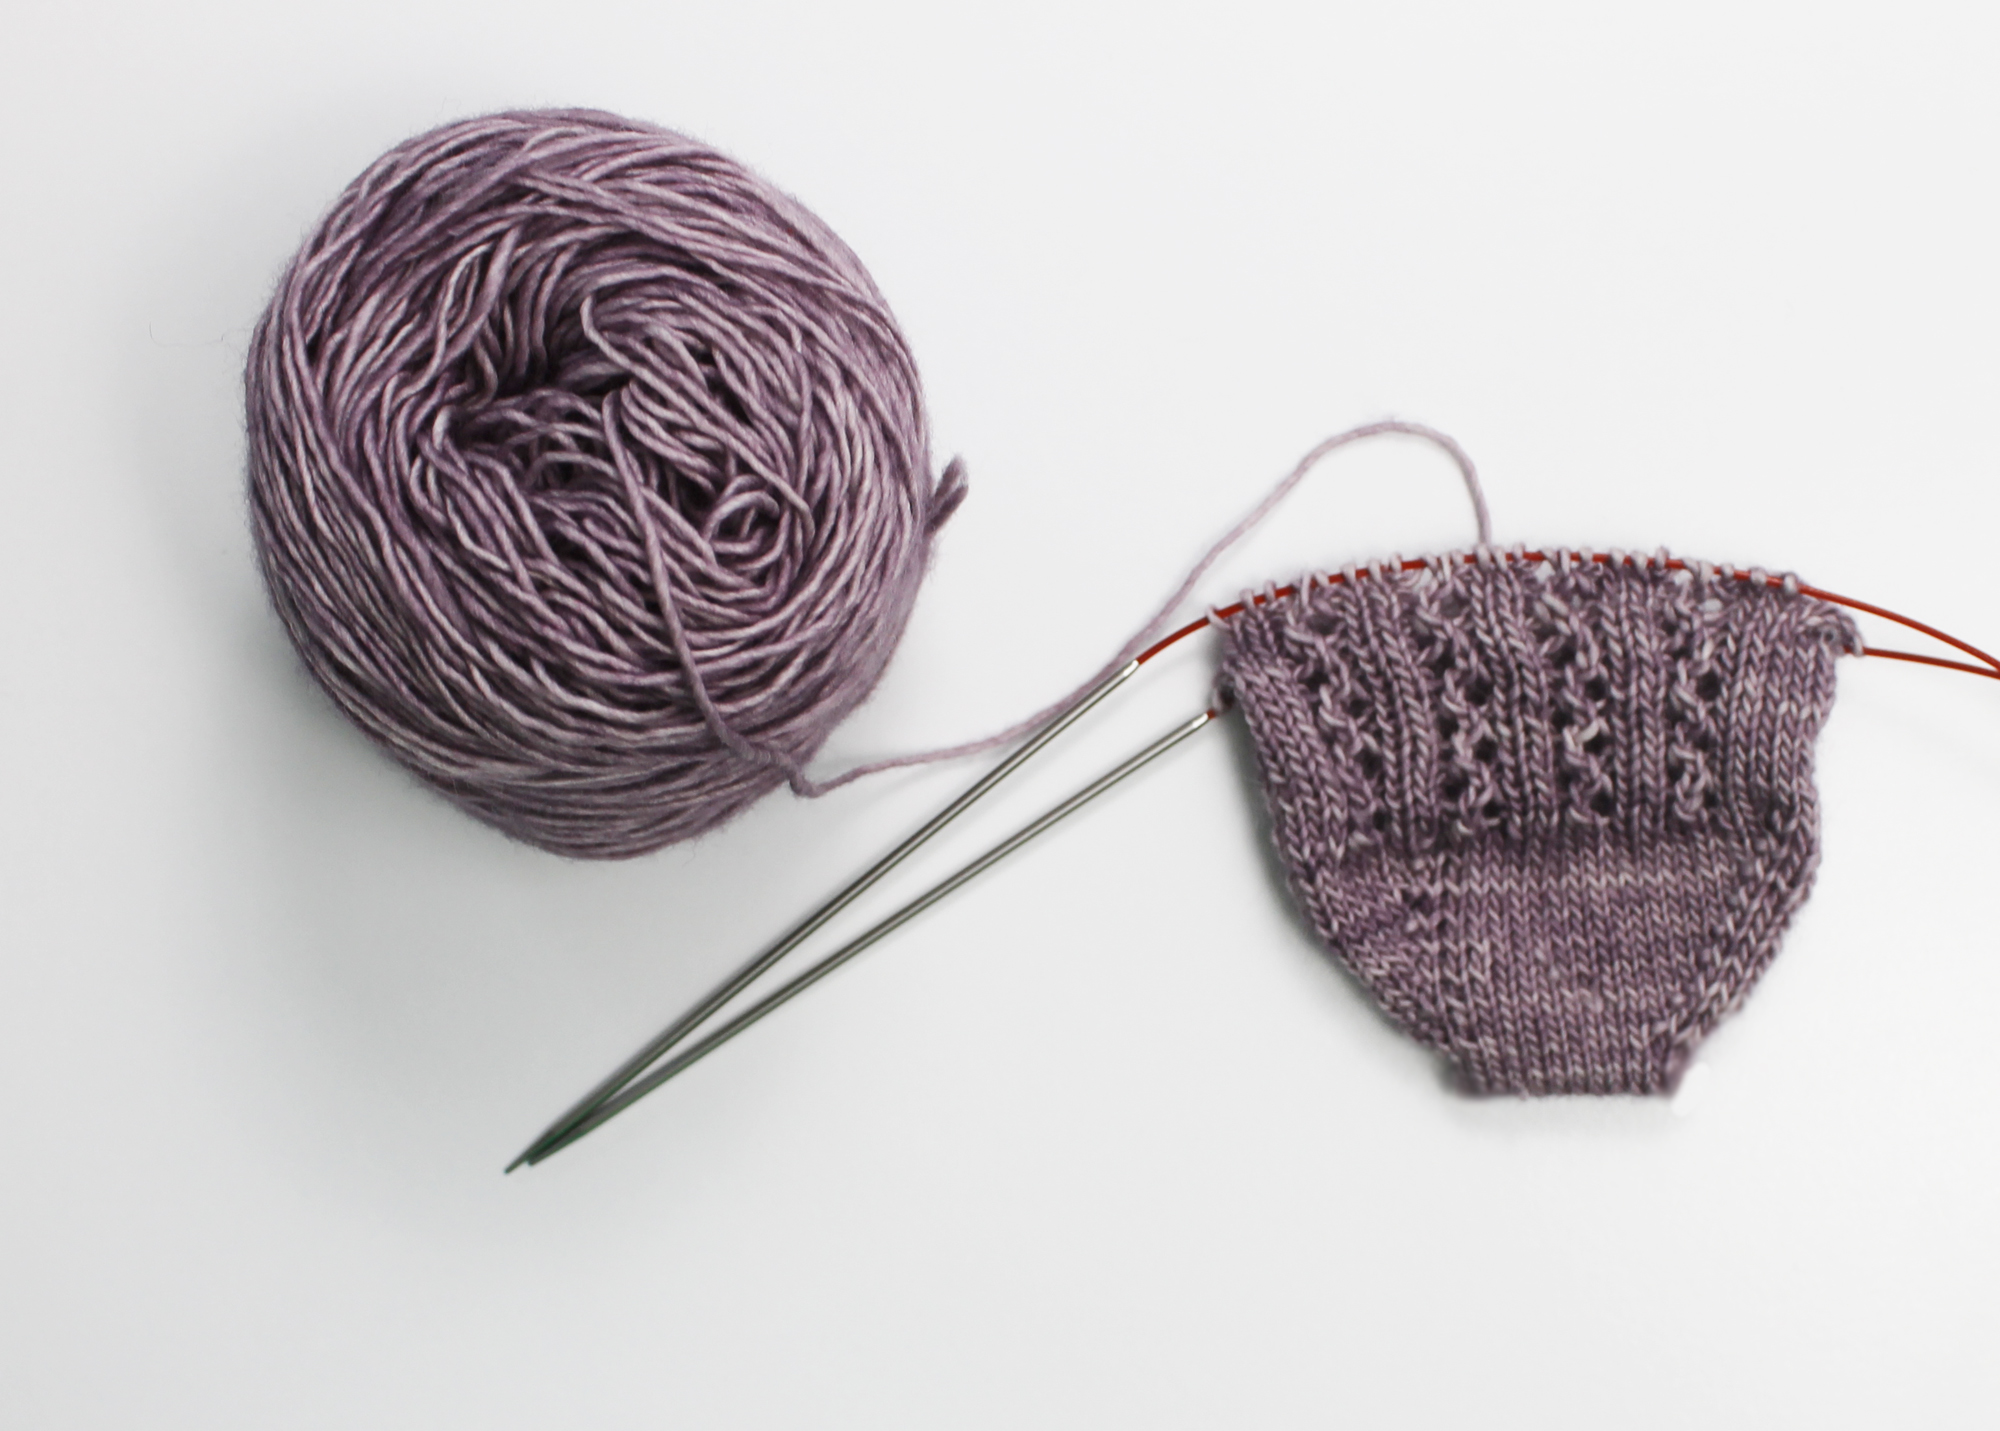
I used Judy’s magic cast on in place of a provisional cast on to start designer reWOLLuzza Knits’s free Double Lace Rib Socks pattern, pictured above. It’s tricky to get the hang of Judy’s magic cast-on at first, but once you figure it out it’s a dream for toe-up socks!
If you’re interested in learning more about toe-up socks, including step-by-step video guidance for Judy’s magic cast-on, we suggest Susan B. Anderson’s My First Toe-Up Socks class. You’ll learn how to cast on as well as work an afterthought heel, plus lots of other tips and tricks for toe-up sock success.
Knitting needles for Judy’s magic cast-on
You have two options when choosing what needles to use:
- 2 circular needles of the same size
- 1 long circular needle (great option if you’re a fan of Magic Loop)
- 5 double-pointed needles
I knit socks using Magic Loop, so for this tutorial I’ll show you the cast on using a long circular needle. The same technique applies no matter what type of needles you’re using.
Judy’s magic cast-on tutorial
For this demo, I’m using MadelineTosh Merino Light in Sugar Plum. (Soooo soft!)
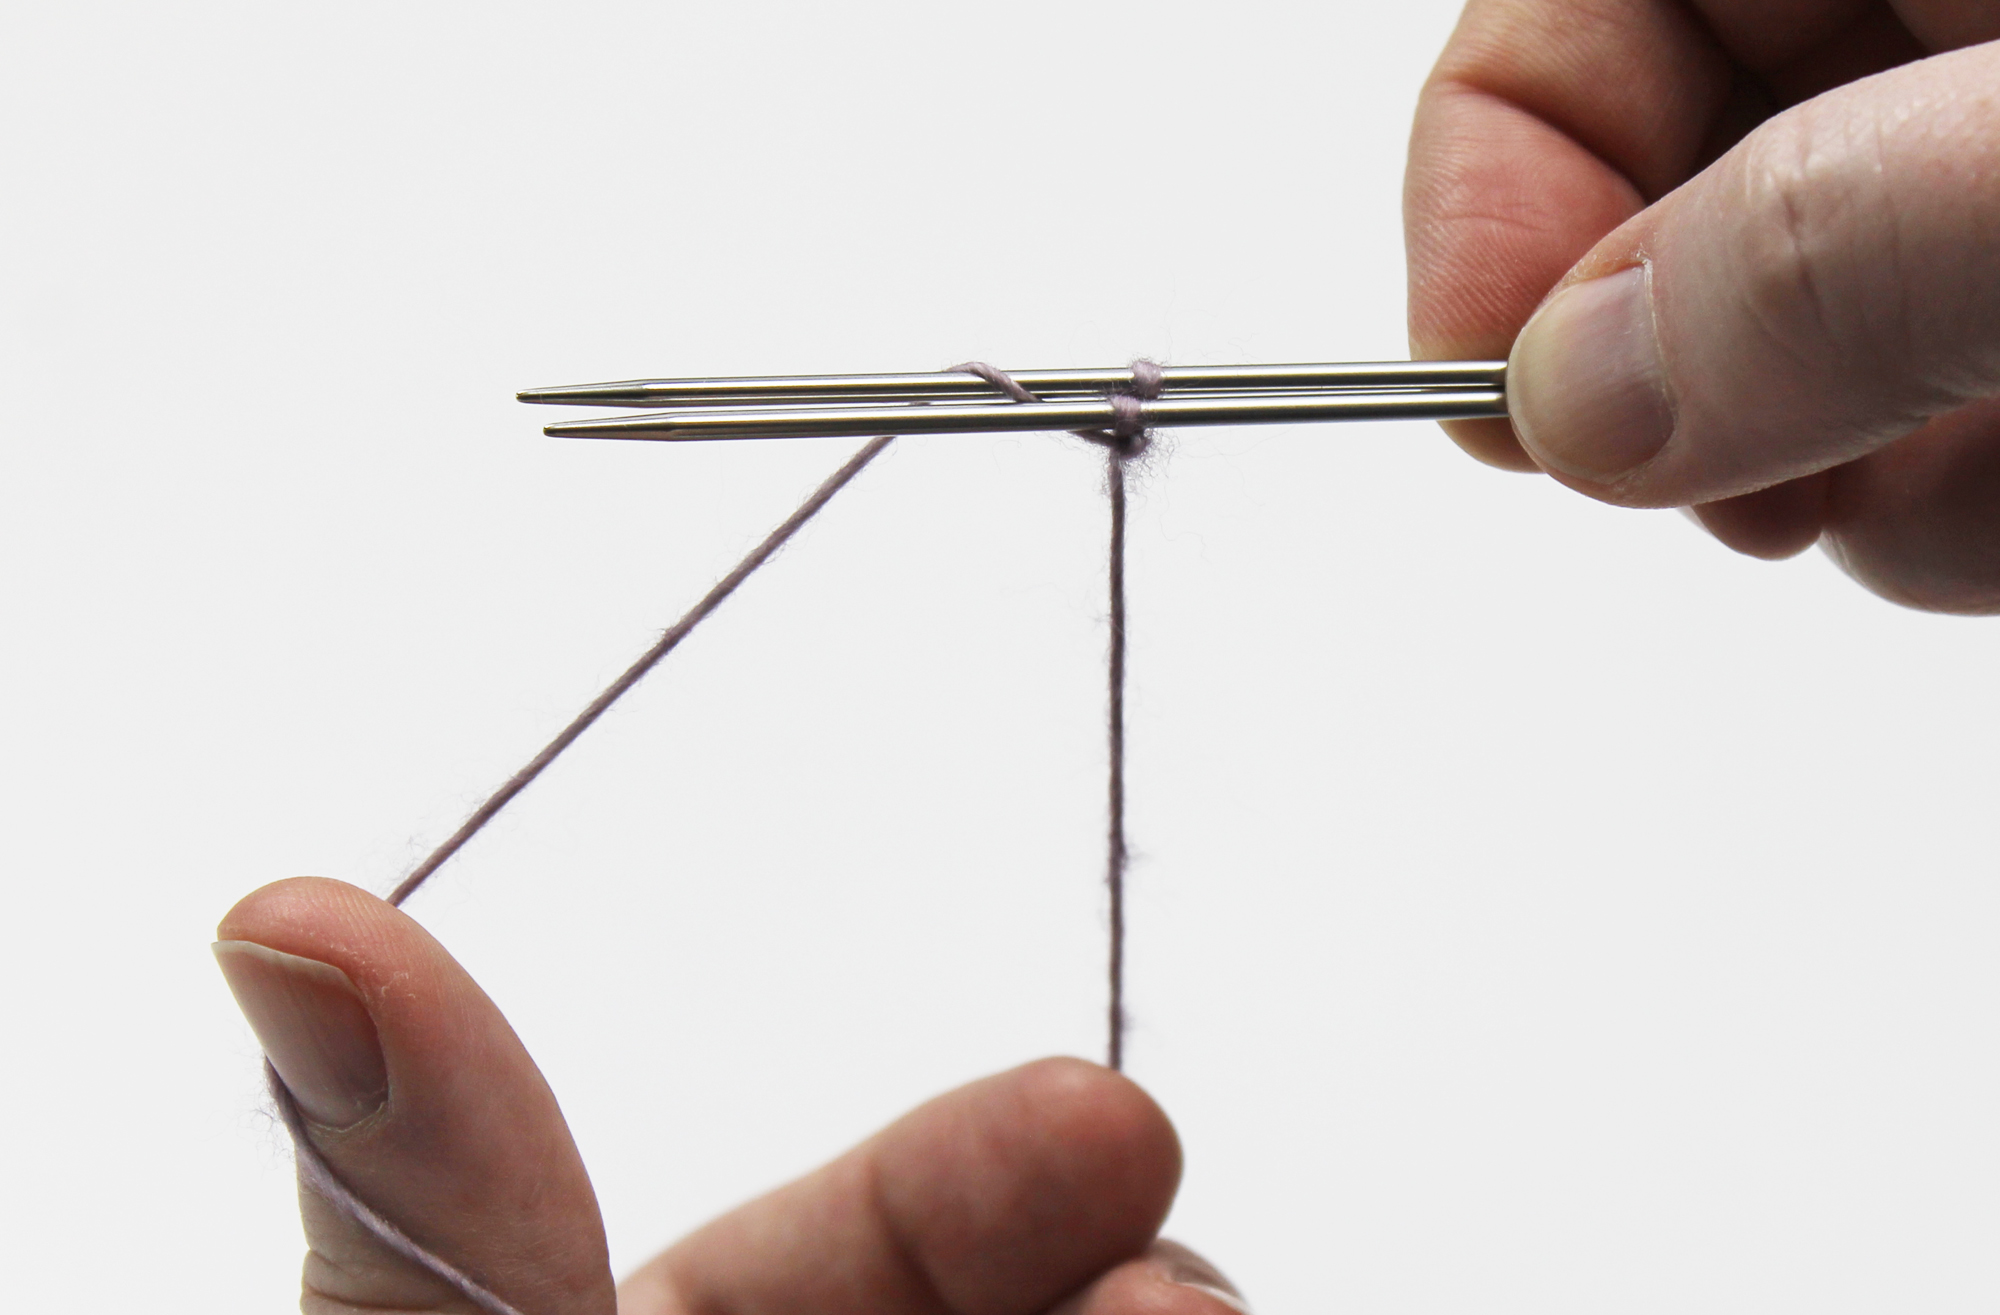
Step 1:
Hold the circular needle with the tips parallel.
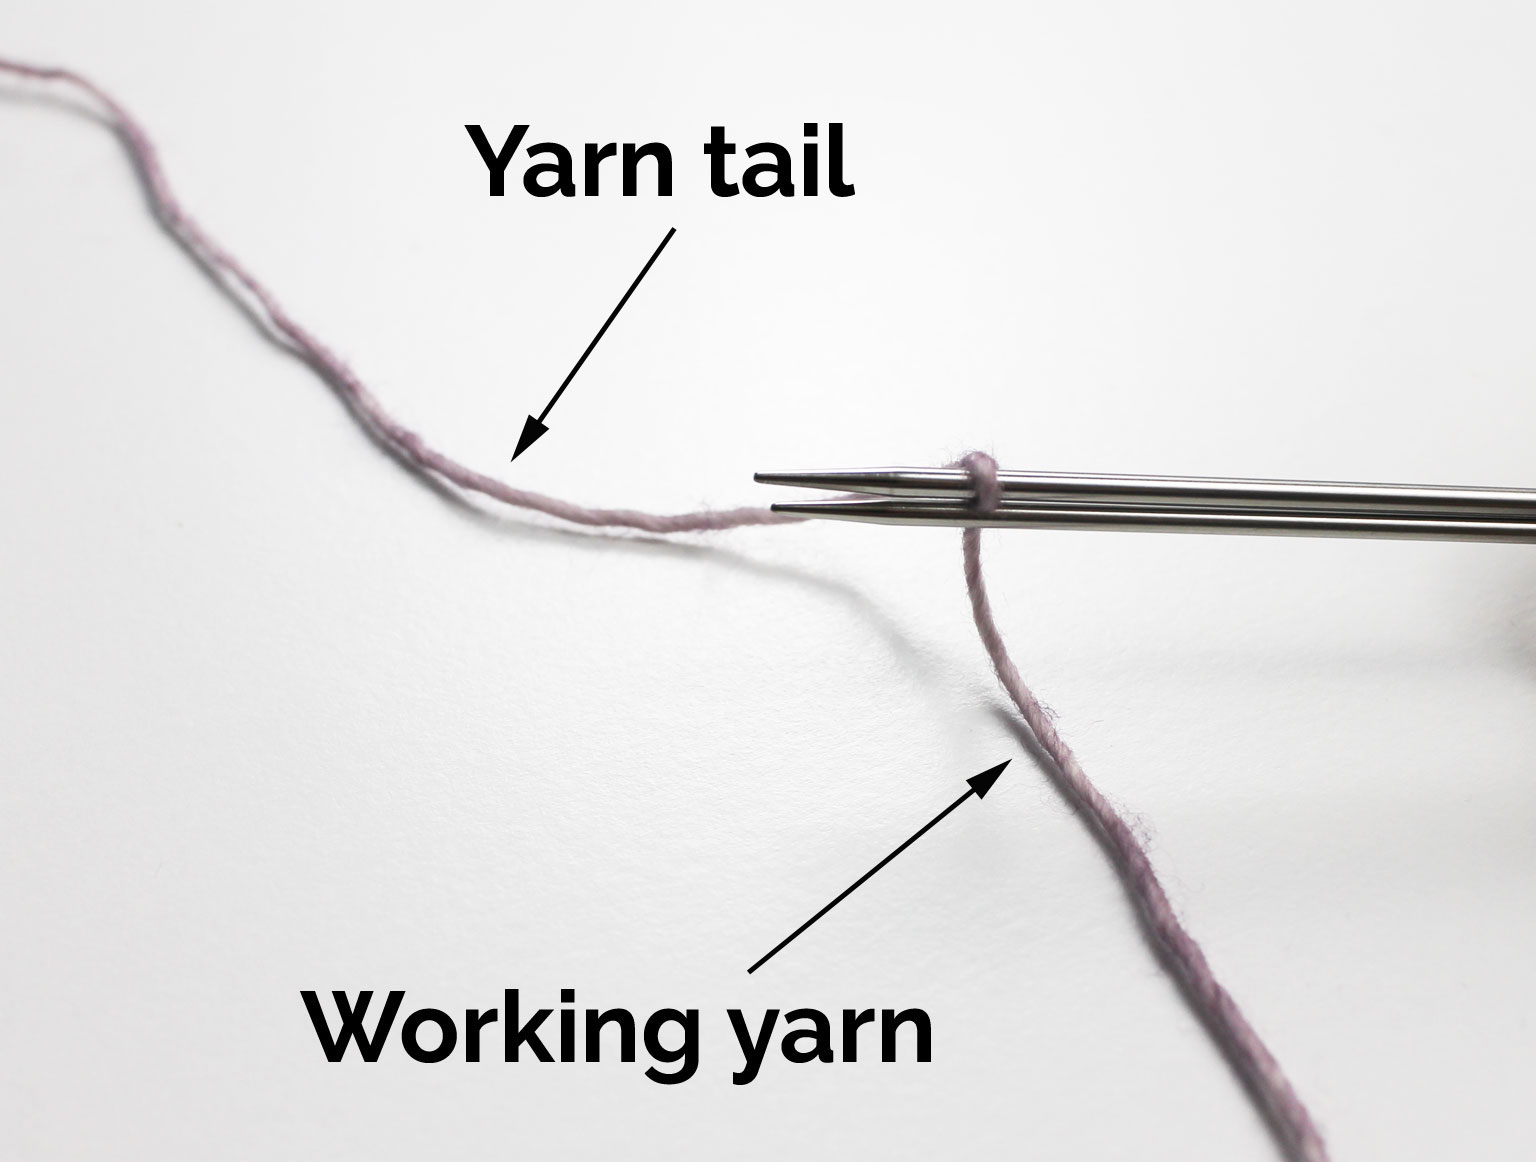
Make a slip knot, leaving a long tail like you would for a long-tail cast-on, and place it on the back needle. This is your first stitch.
Step 2:
Hold both the needle tips in your hand. The needle tip with the slip knot should be on the top.
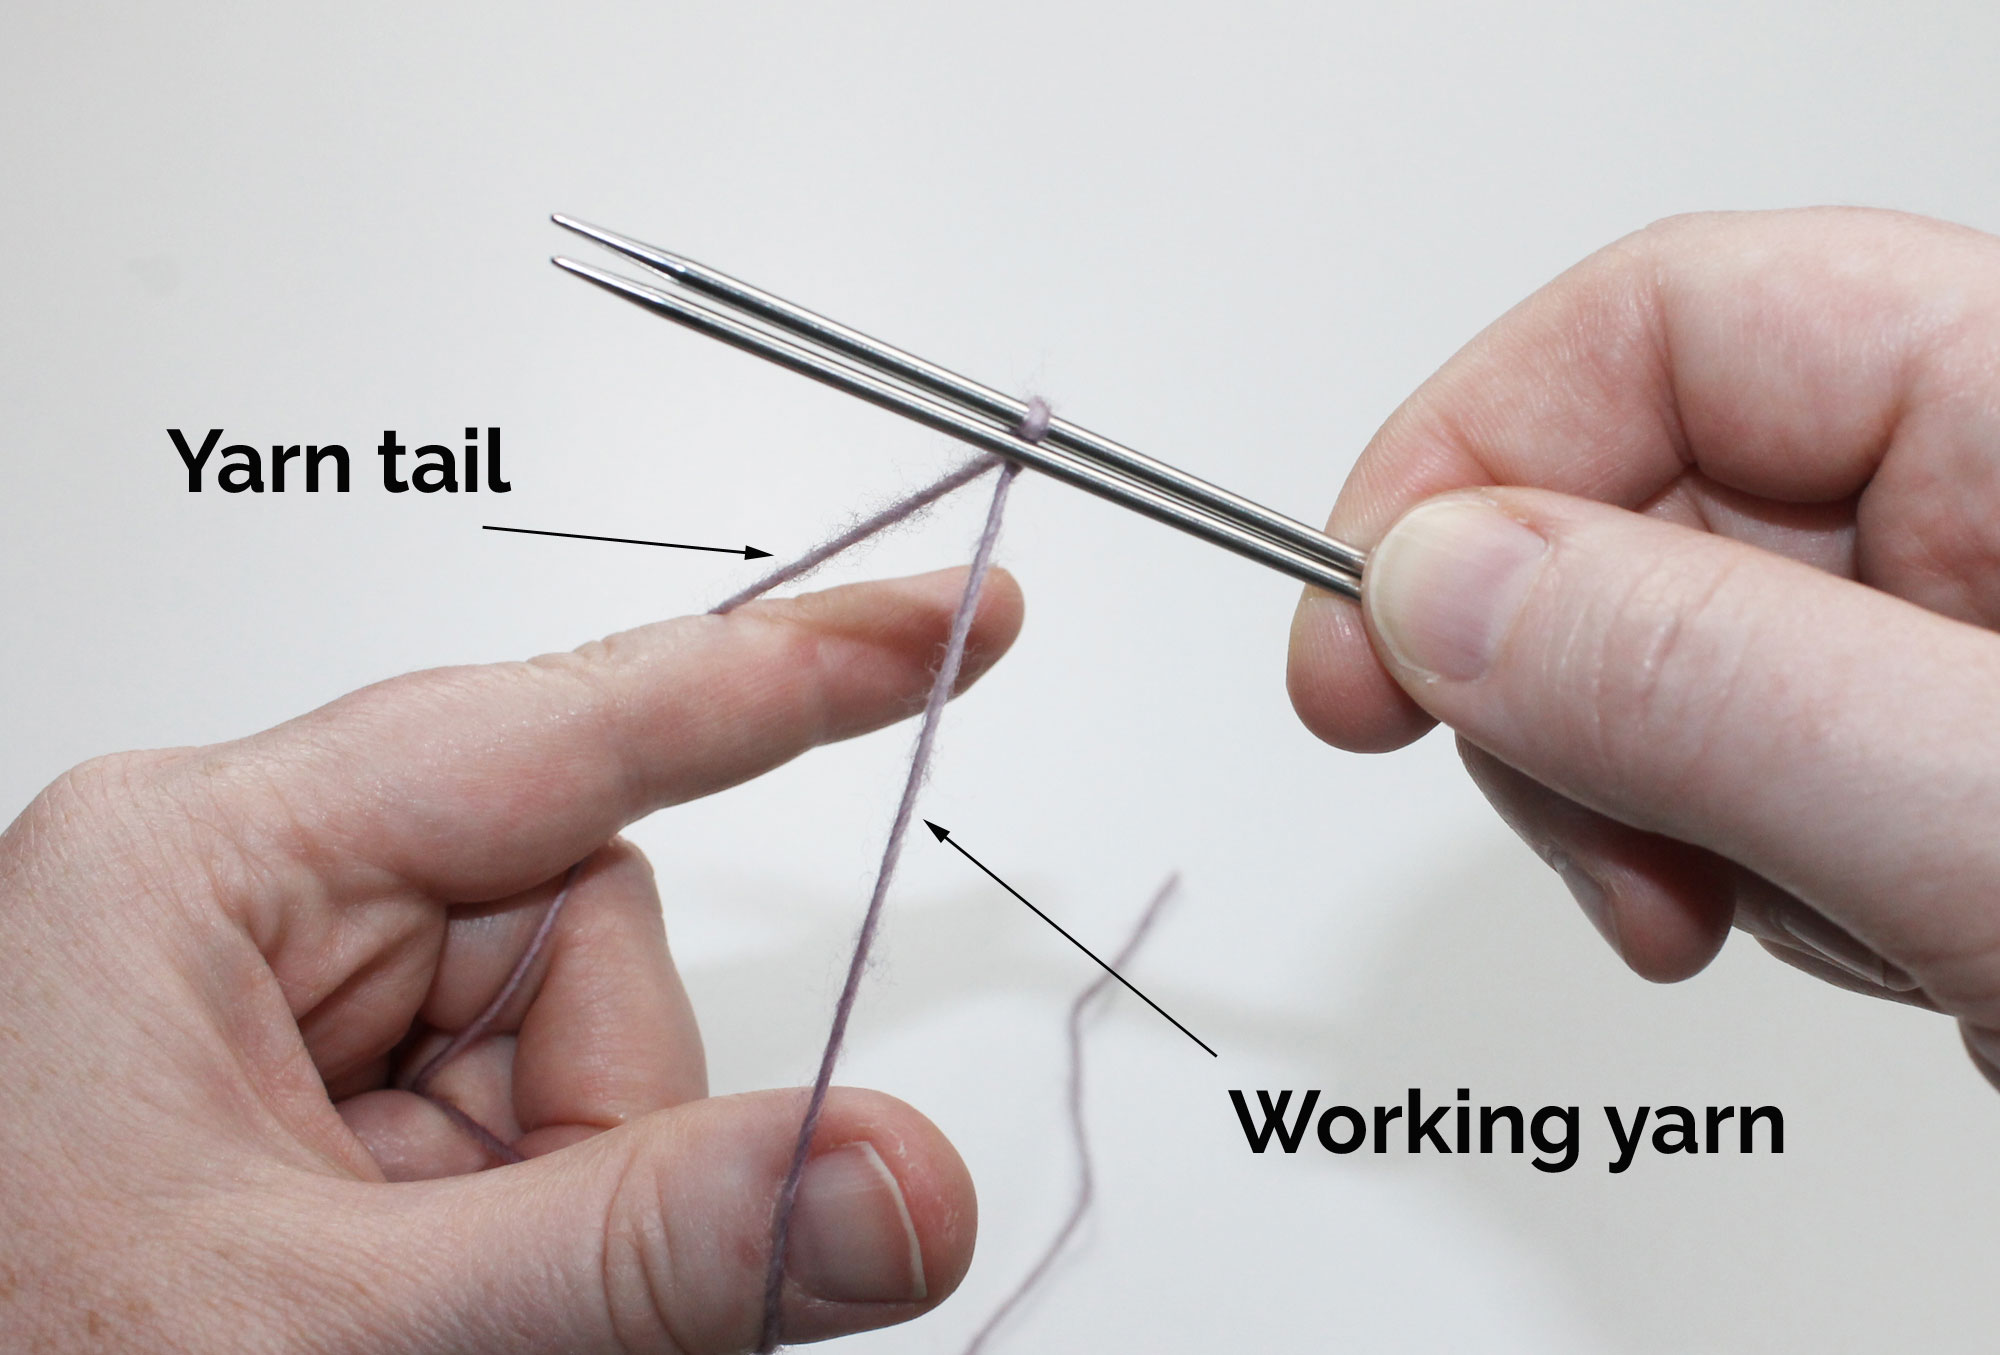
Drape the yarn tail over your index finger. Drape the working yarn over your thumb. (Judy points out that this might feel similar to the slingshot you create when you do a long-tail cast-on, except that your palm is facing down instead of up.)
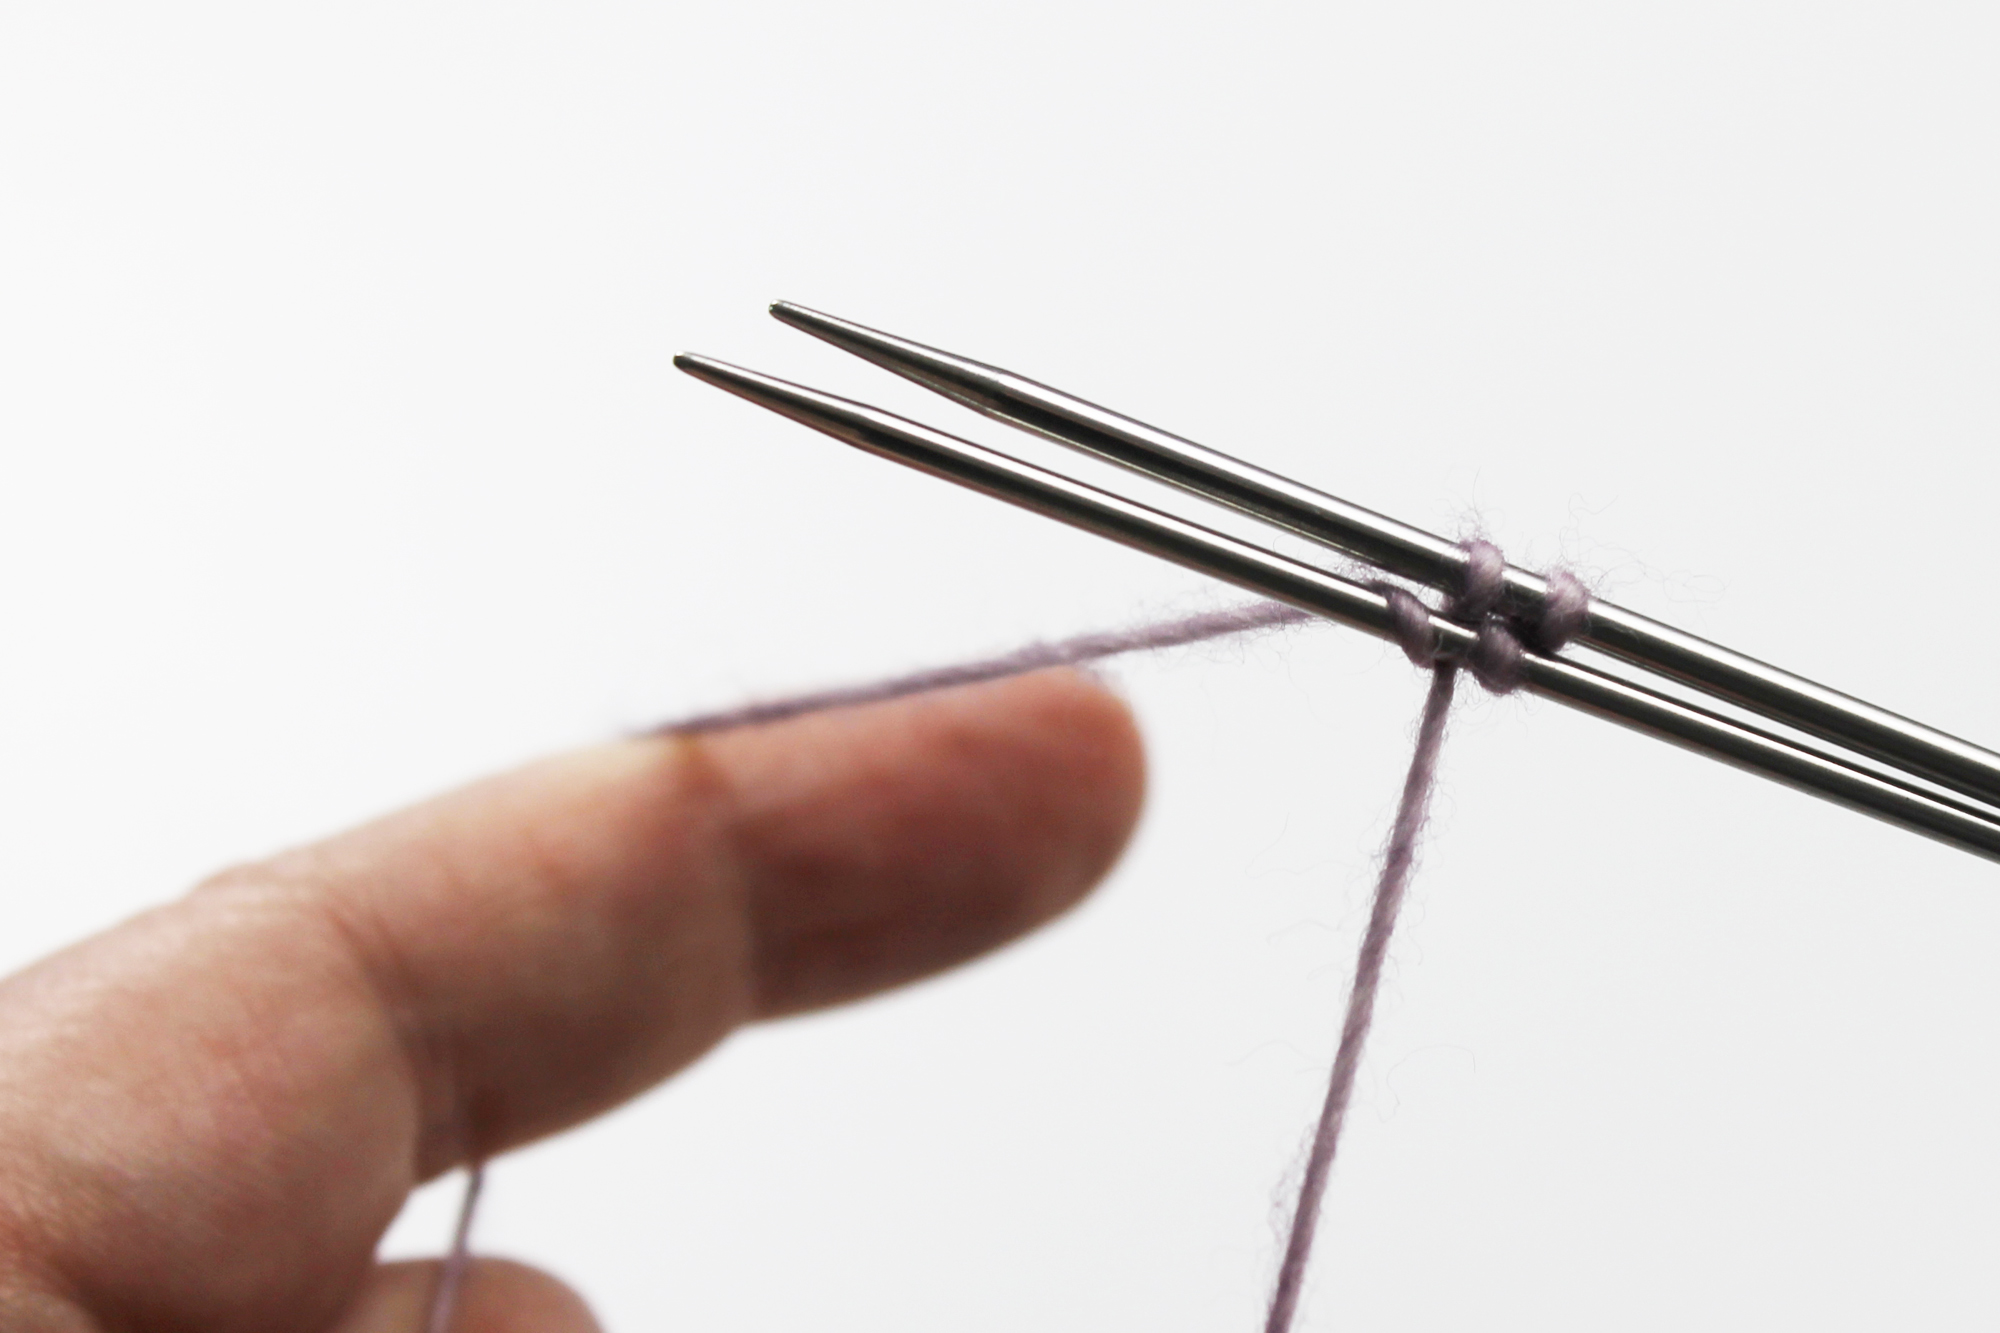
Step 3:
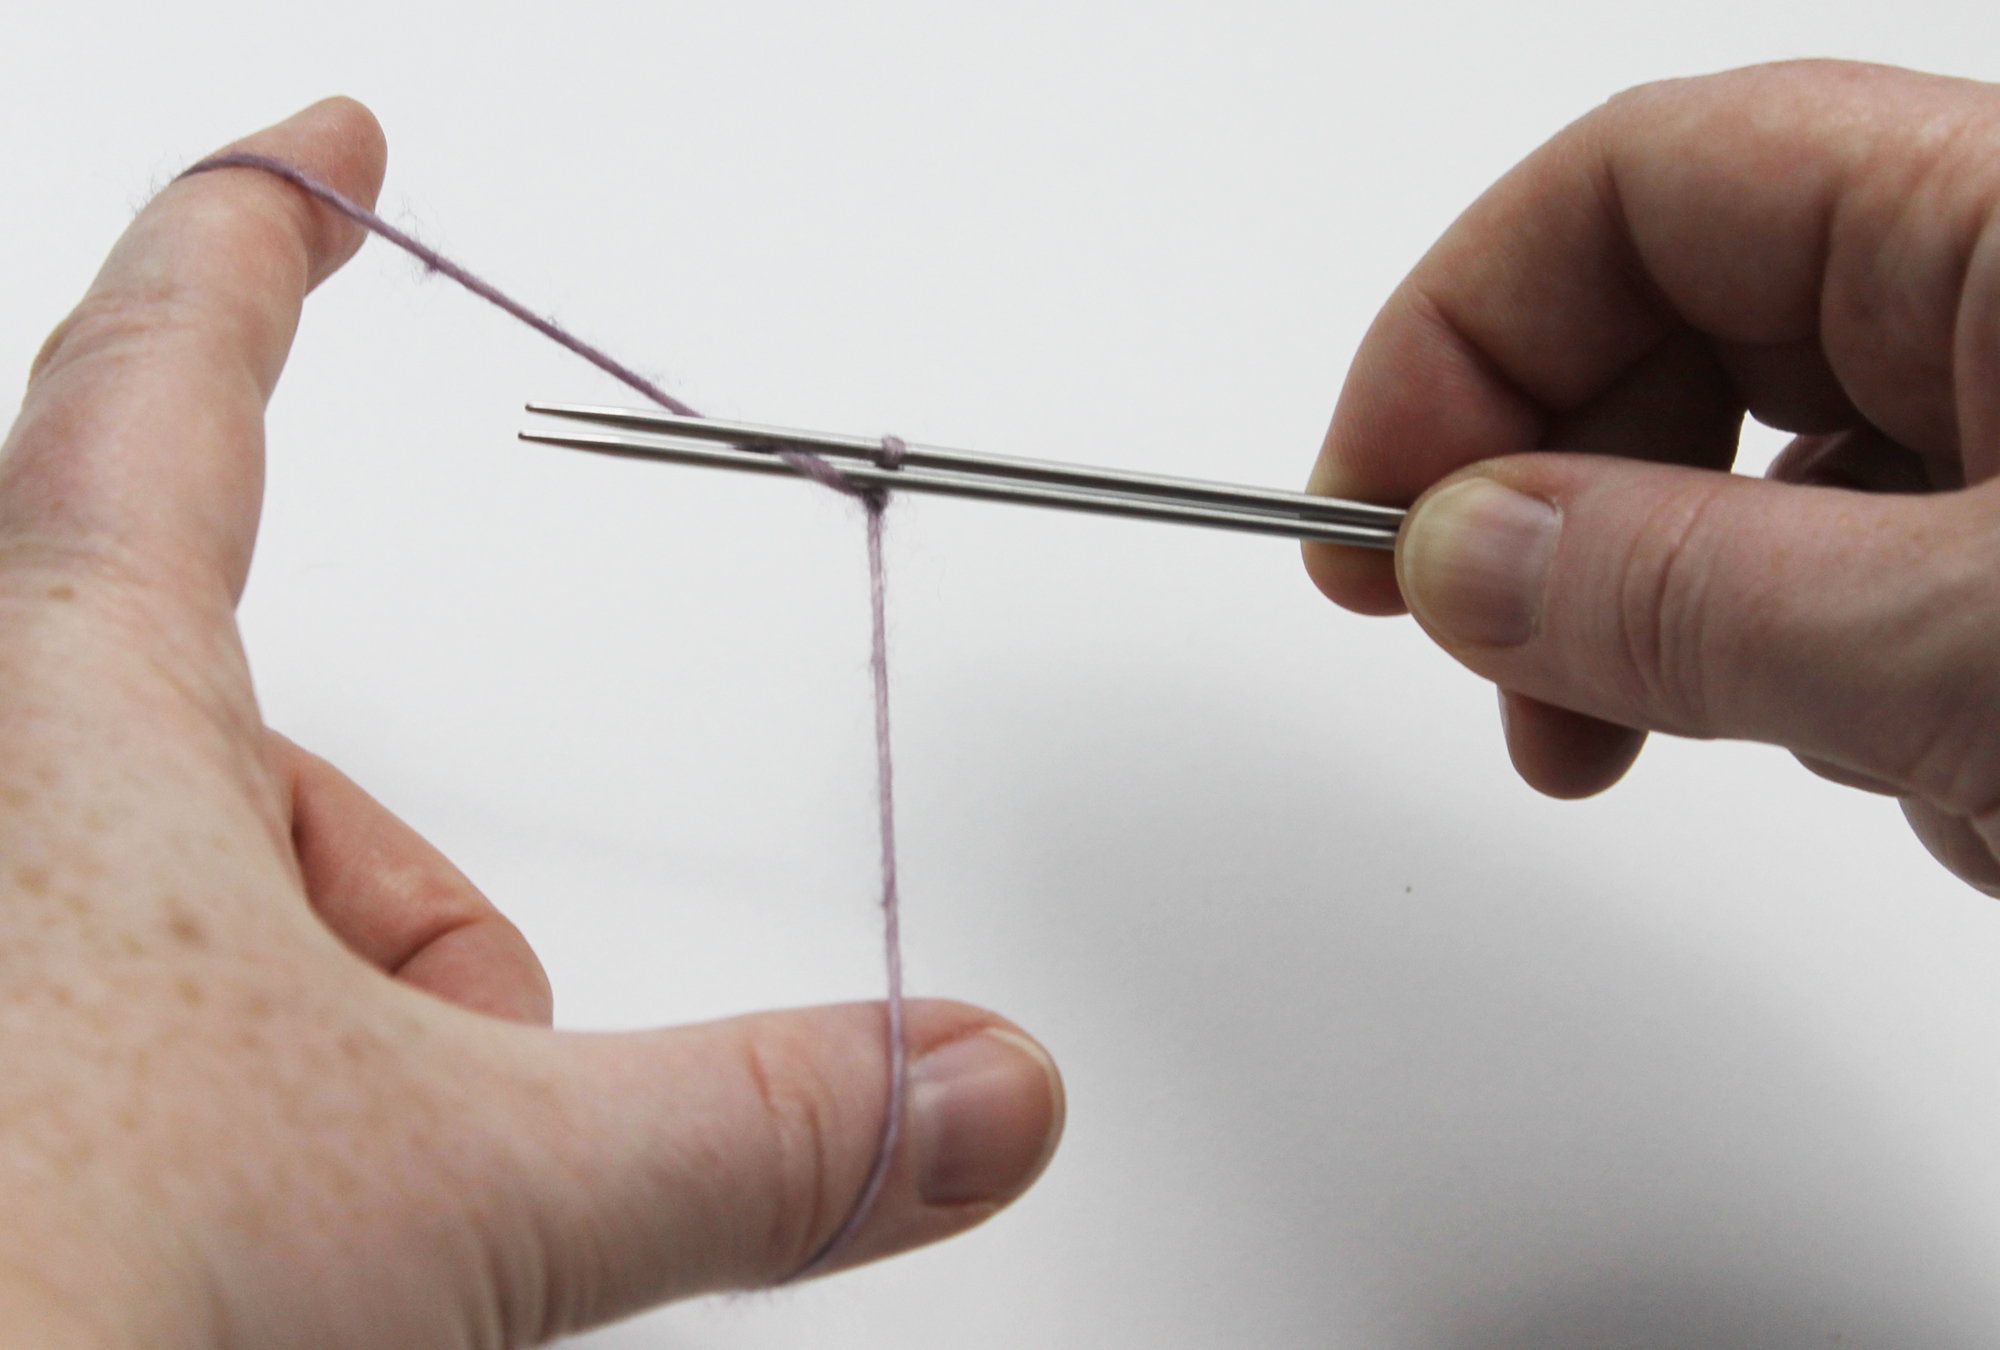
Now we’re going to cast on a stitch to the bottom needle. Bring the yarn on your index finger over the bottom needle, wrapping from front to back around that needle. You’ve created your second stitch.
Pull the stitch to secure it on the needle, but not too tightly. (You’ll see later why this is so important!)
Step 4:
Now we’ll cast another stitch onto the top needle. Bring the yarn from your thumb over the top needle from front to back.
Tip: You may find it easiest to rotate your wrist in order to control the yarn and place it where it needs to go on the needle.
Pull this stitch to secure it on the needle, once again not too tightly.
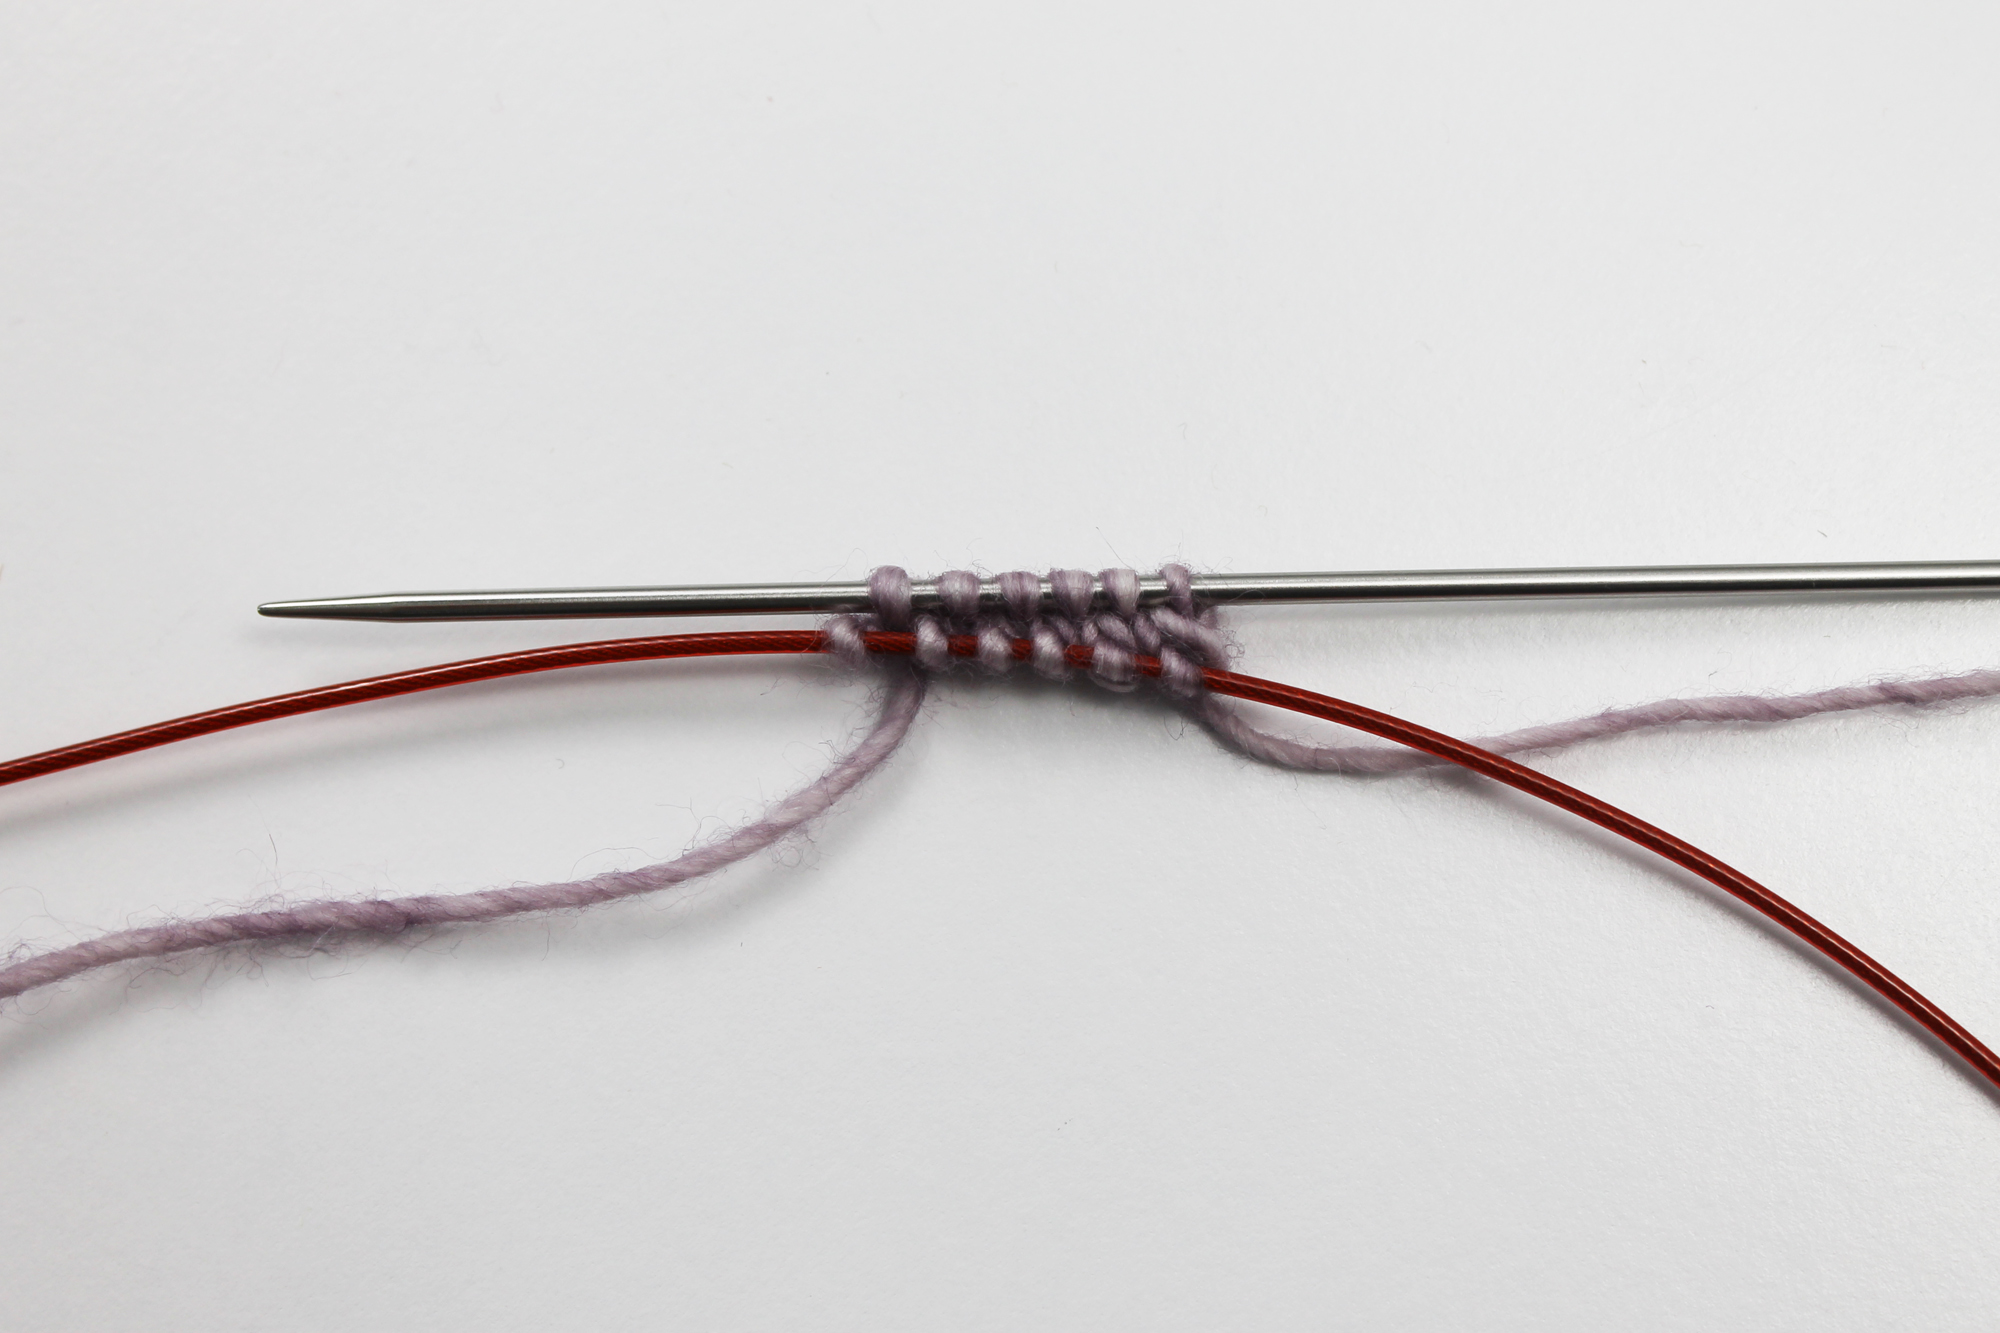
Step 5:
Repeat steps 3 and 4 to cast on the number of stitches needed, alternating between the bottom and top needles.
Notice that the yarn wrapped around your index finger always wraps around the bottom needle, while the yarn wrapped around your thumb always wraps around the top needle.
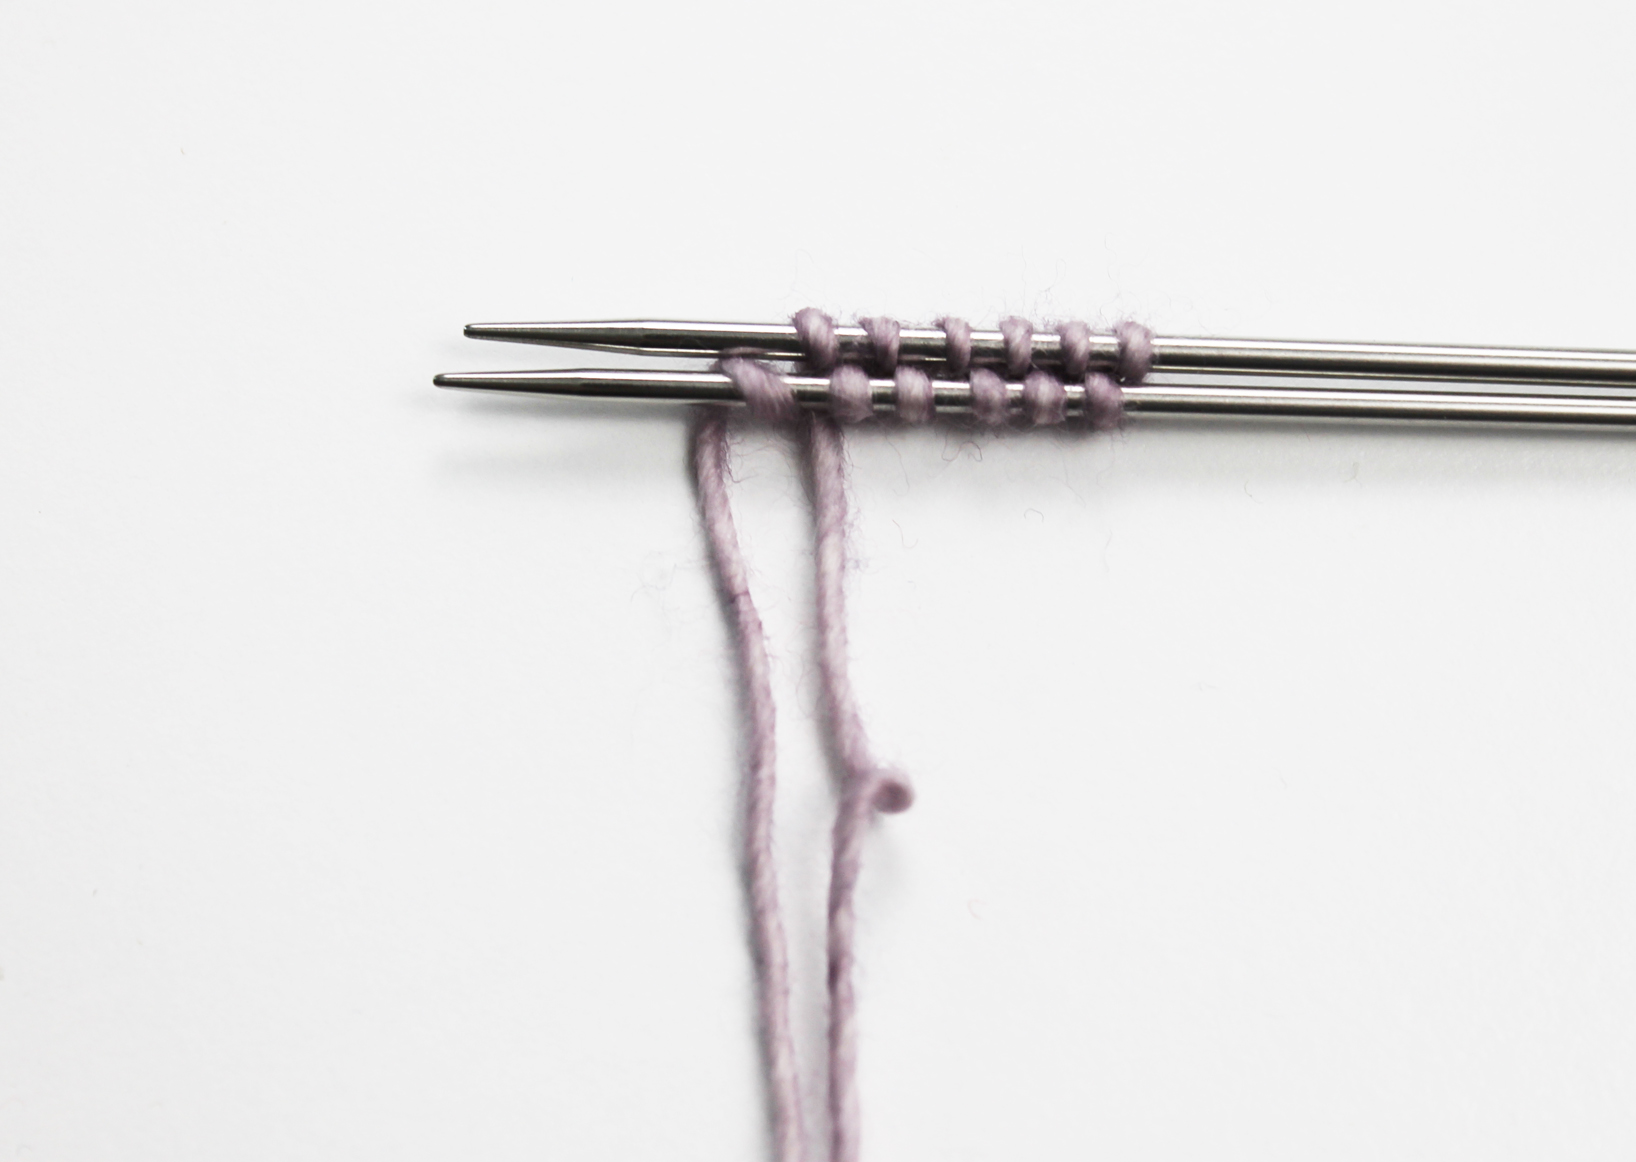
Now we have 12 stitches: 6 stitches on each needle. You’re ready to begin knitting!
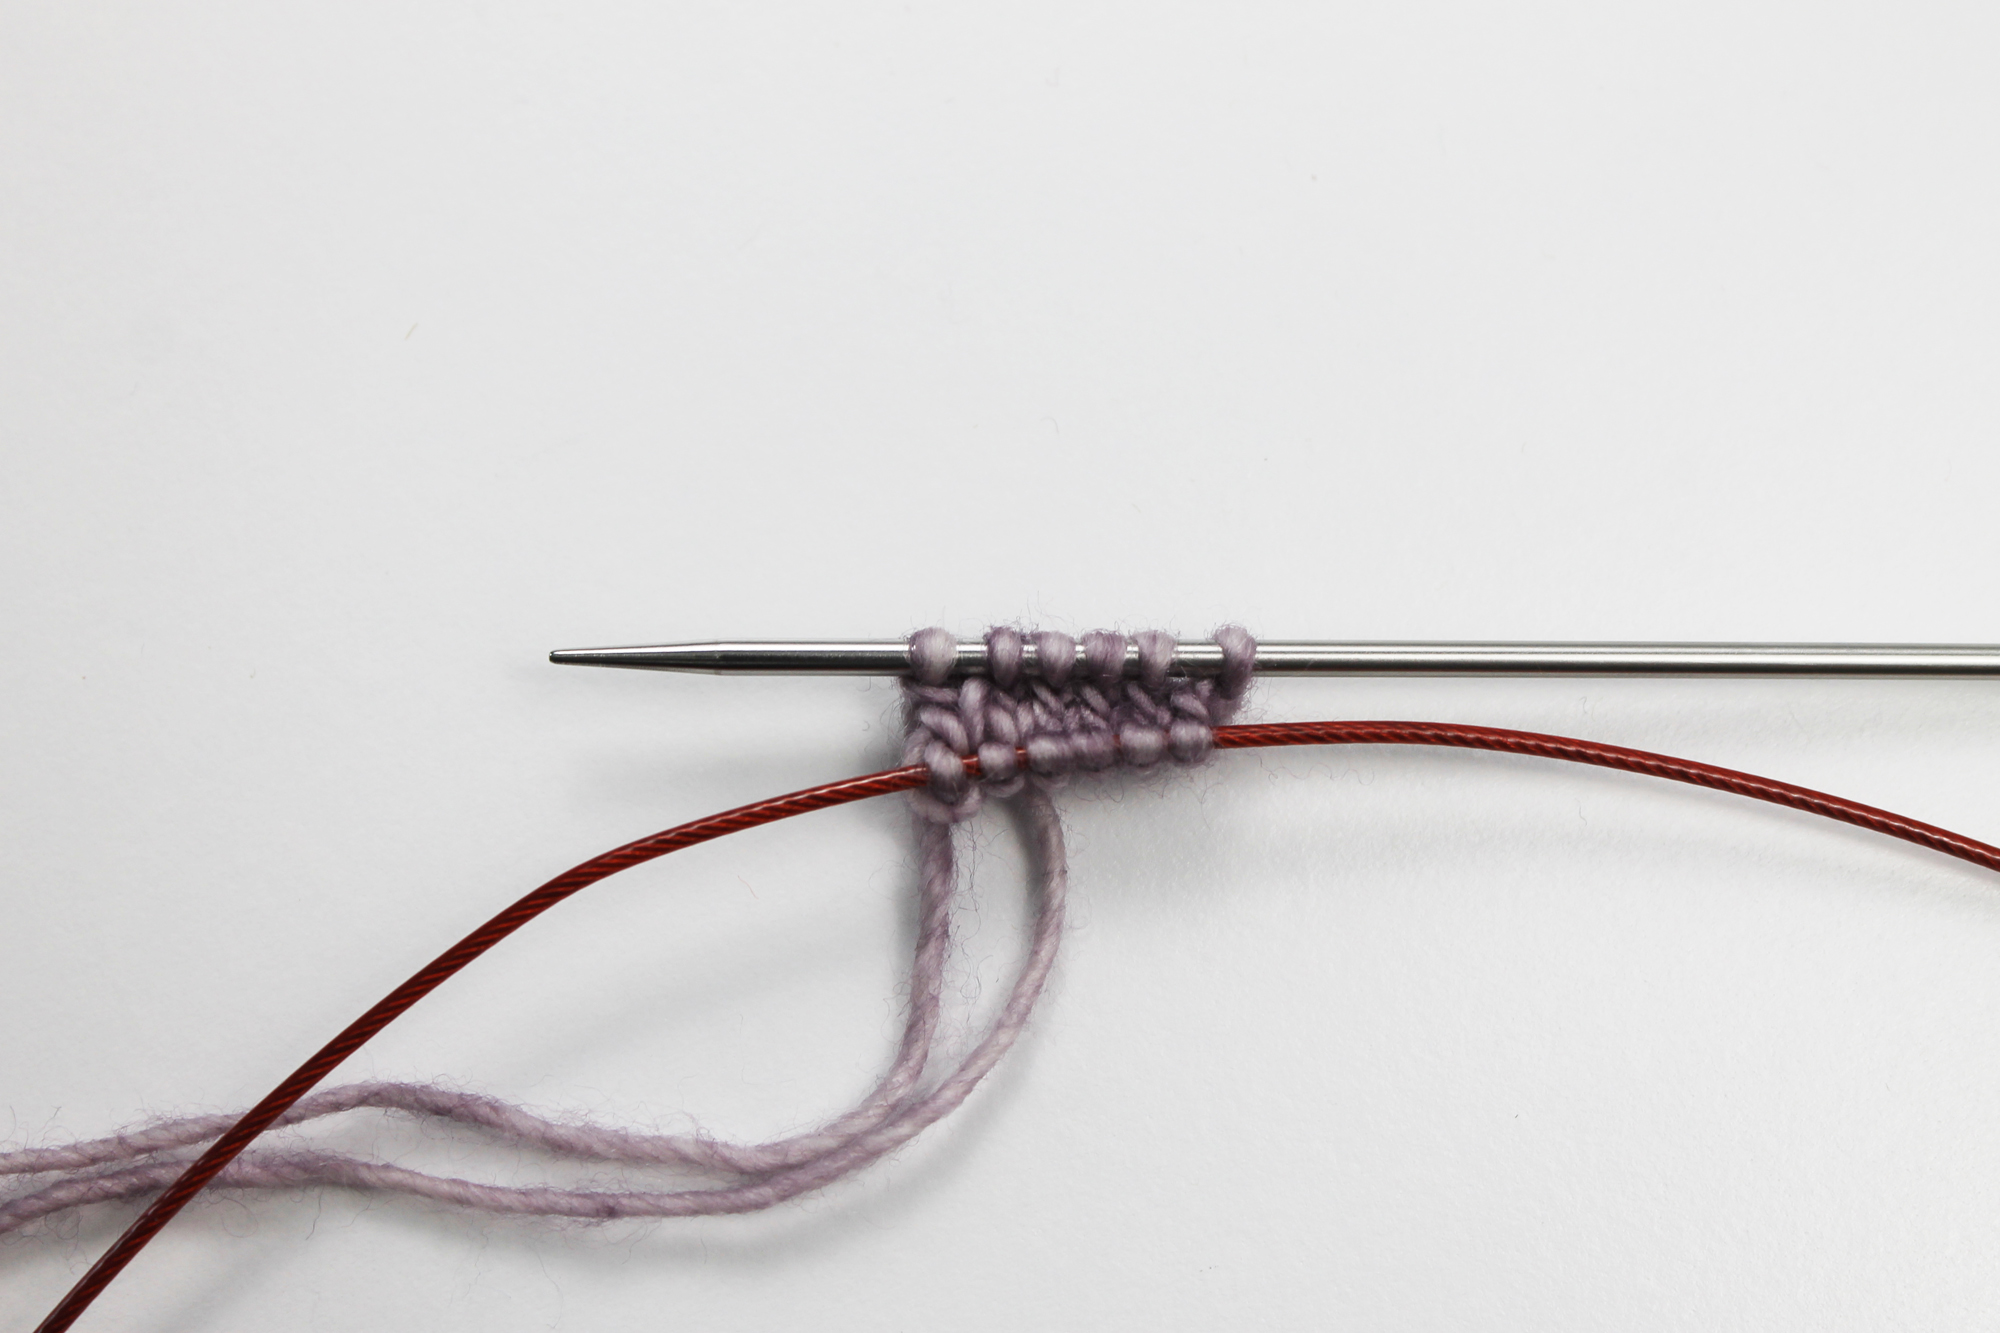
Step 6:
Rotate the needles so that the needle with the slip knot is farthest away from you. Pull the bottom needle to the right until the stitches are on the cord rather than on the needle itself. This gives you a little breathing room as you’re working the stitches on the other needle.
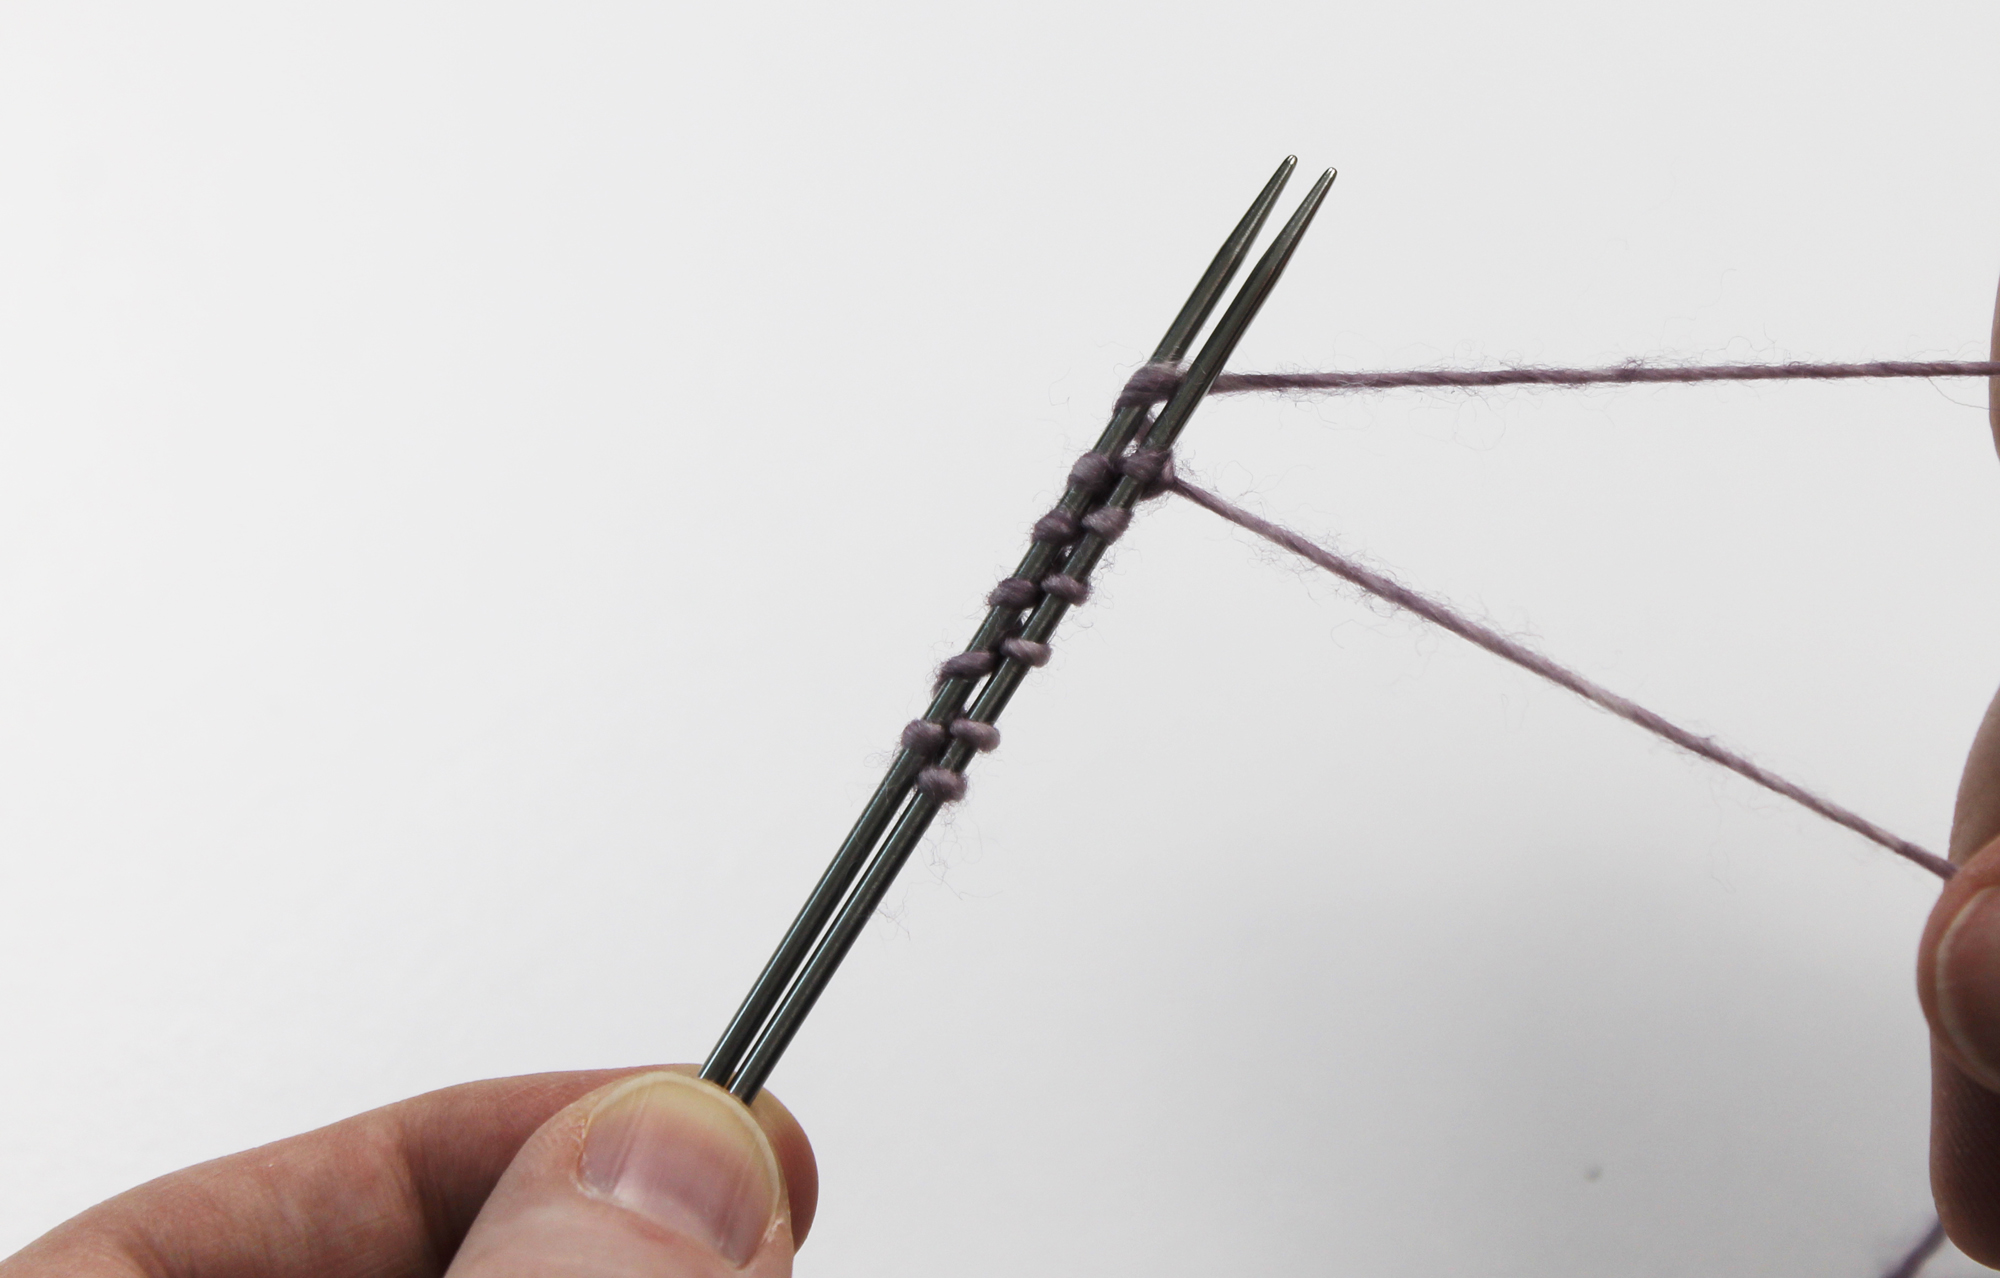
Make sure the yarn tail is between the working yarn and the needle. This will secure it when you begin knitting.
Grab the working yarn and knit a row of stitches across the top needle. If your stitches are too tight and you can’t seem to nudge that needle in there, that means you pulled the stitches too tightly when you were casting on.
Step 7:
Rotate your needles so that the bottom needle is now on top. Pull the now-bottom needle to the right so that the stitches sit on the cord, and pull the now-top needle to the left so that you can knit from it.
Notice that the loops on this needle are not sitting on the needle the right way. For this round only, knit through the back loop of each stitch across the now-top needle. That’s Round 1!
Continue to knit around. You’ll notice that knitting the stitches gets easier and easier as you progress, since you’re moving farther away from the middle of the toe and the stitches aren’t super close together.
Be sure to follow your pattern’s instructions now, increasing when the pattern requires it.
Share tips, start a discussion or ask one of our experts or other students a question.
No Responses to “Get Perfect Toe-Up Sock Toes With Judy's Magic Cast-On”