
Knitting entrelac sounds and looks complicated. But, once you learn the basics, it’s really quite simple! With a little practice, you can whip up complex-looking projects with ease, especially with ombré yarns or different colors!
Check out this tutorial for knitting entrelac in the round!
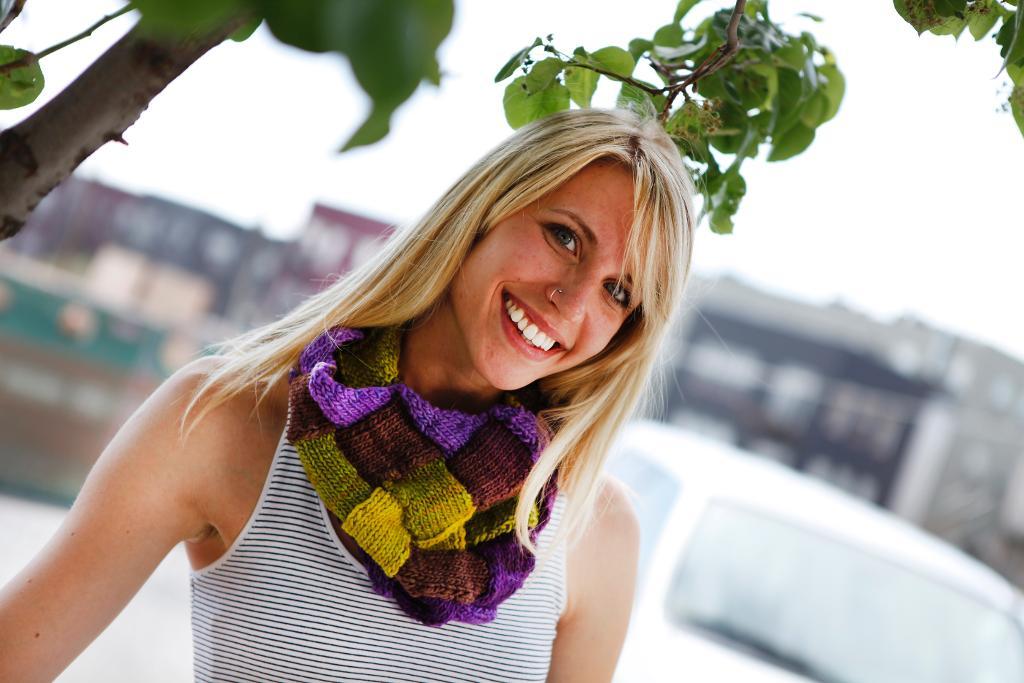
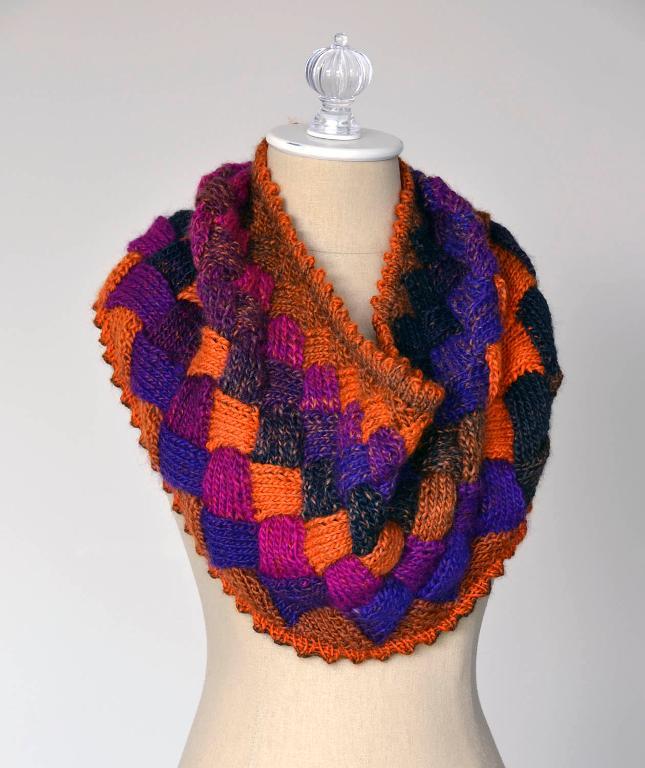
Entrelac Neck Warmer via Craftsy instructor Gwen Bortner
Ready to delve further into the world of entrelac? Check out Craftsy’s Entrelac Knitting with Gwen Bortner! Learn new knitting techniques, as you work through three different projects — including the neck warmer pictured above!
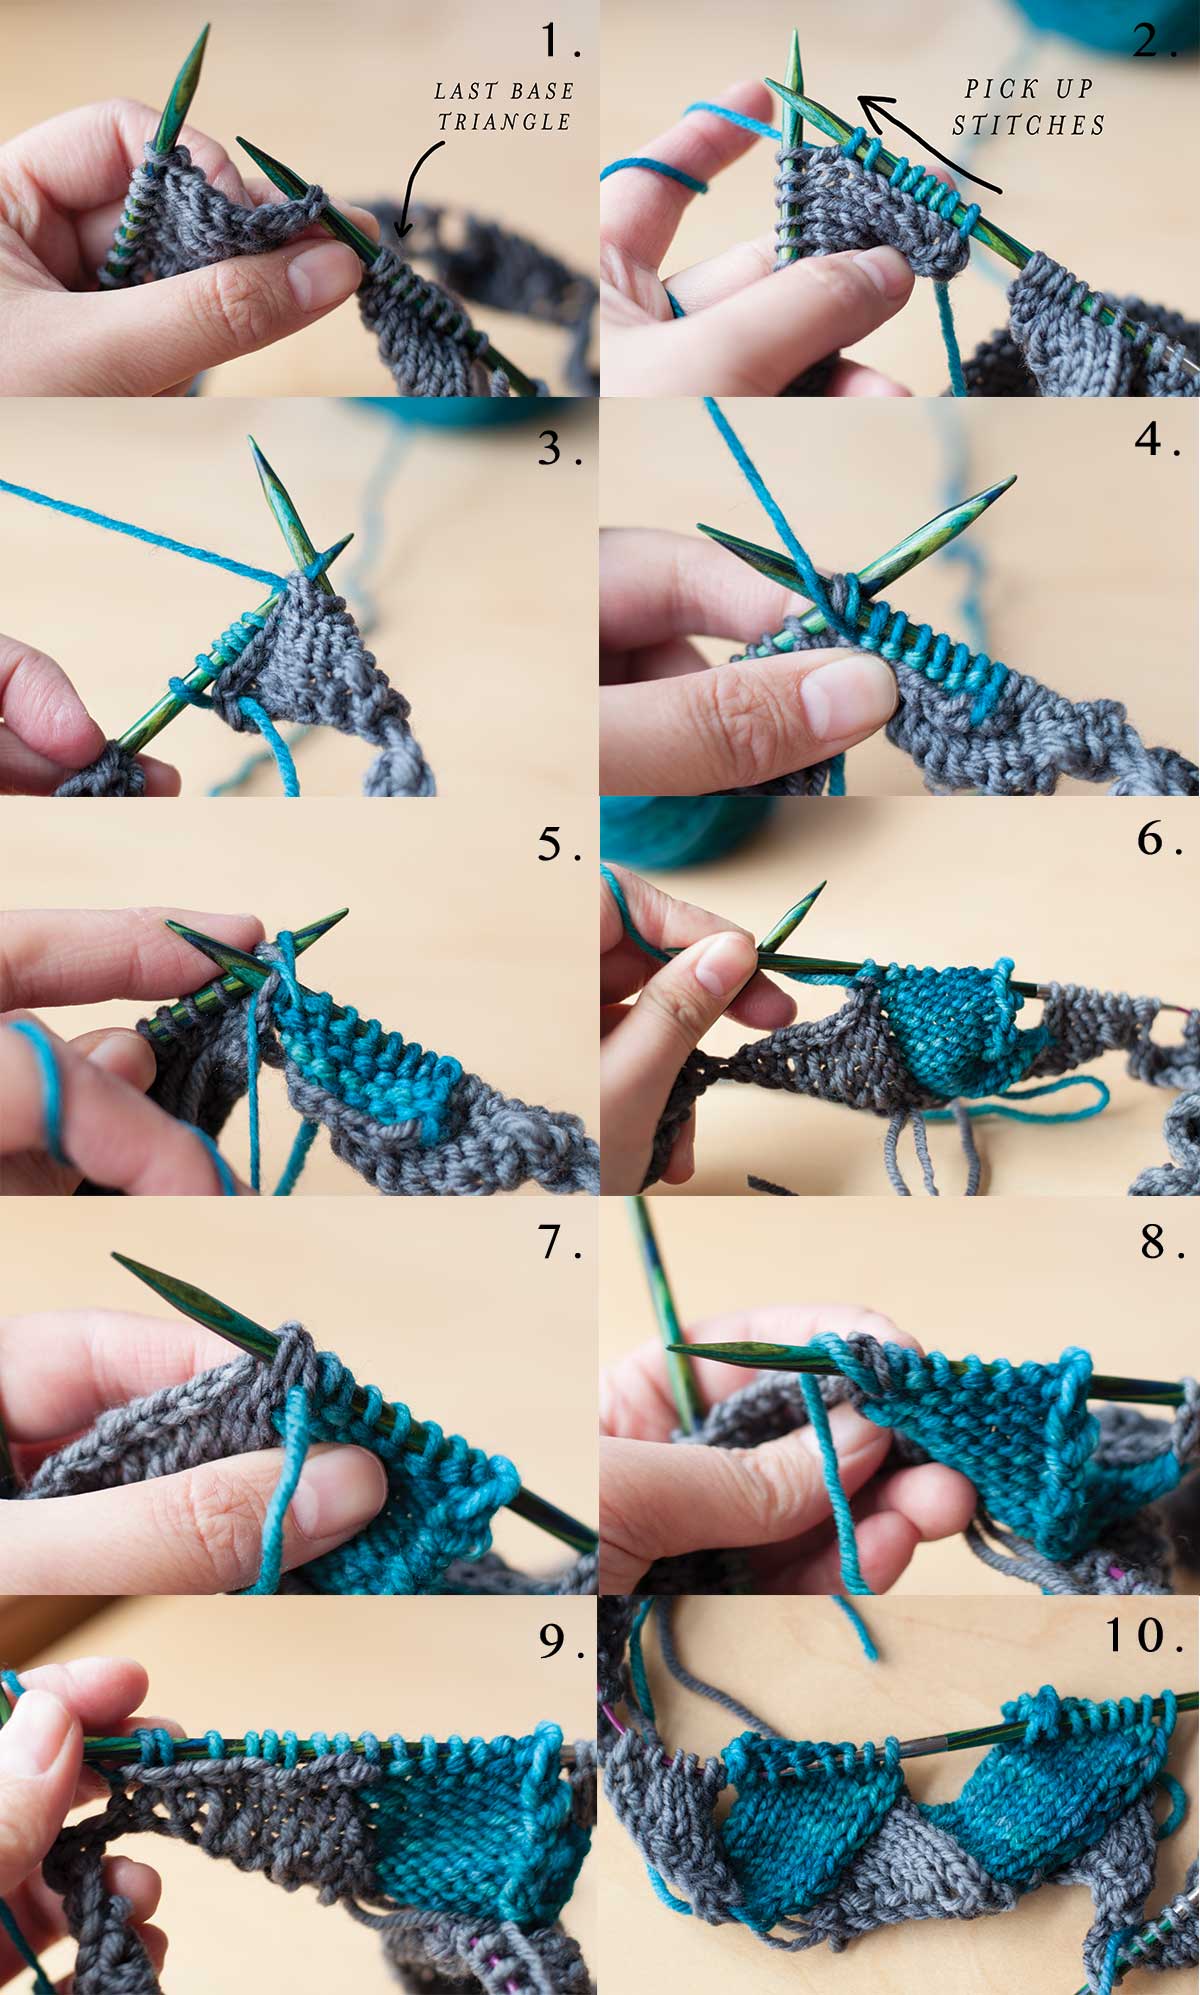
Base triangles

All photos via Laura Chau
The base triangles are worked back and forth on one block at a time. Note that the work won’t be joined into the round until all the base triangles have been completed! Cast on the required number of stitches. Here, I’m making 8 stitch blocks, so my cast on is a multiple of 8: 96 sts.
- Row 1 (RS): Knit 2, turn work so the WS is facing you (1).
- Row 2 (WS): Purl 2, turn (2).
- Row 3: Knit 3, turn (3).
- Row 4: Purl 3, turn.
- Continue working back and forth, knitting one more stitch each RS row than the previous one, until you have 8 stitches on your right needle. Do not turn after knitting 8 (photo 4).
You’ve finished one base triangle! Now without turning the work, repeat the base triangle pattern from Row 1: knit the next 2 stitches on the left needle and continue making little triangles all the way across your cast on row.
Right-leaning rectangles
Here’s where the work will be joined in the round. If you want to change colors, do it now! As you can see, I’m using blue for the right-leaning rectangles.
- With the last base triangle worked on the right needle, insert your right needle tip into the edge of the first base triangle (1), pick up and knit 8 stitches along the edge of it (2), and turn.
- *Slip 1 stitch purlwise with yarn in the front (3), purl 6, then p2tog the last blue stitch with the next grey stitch (from the last base triangle, photos 4 and 5). Now the work is joined!
- Turn and slip 1 stitch purlwise with the yarn in the back, knit 7.
- Turn and repeat from * until you have used up all the grey stitches from the base triangle (6), do not turn after the last p2tog.
- Now you’ll need to pick up stitches for the next block, slightly differently. Insert the right needle tip through the edge of the next base edge from RS to WS (7), wrap the yarn around the needle as if you were purling (8), and bring this new loop through the edge towards the right side of the work. Repeat until you have 8 picked up and purled stitches (9).
- Turn, slip 1 stitch purlwise with the yarn in the back, knit 7.
- Turn and repeat from * until you have used up all the grey stitches from the next base triangle (10).
- Continue in this manner all the way around! Looking good!
Left-leaning rectangles
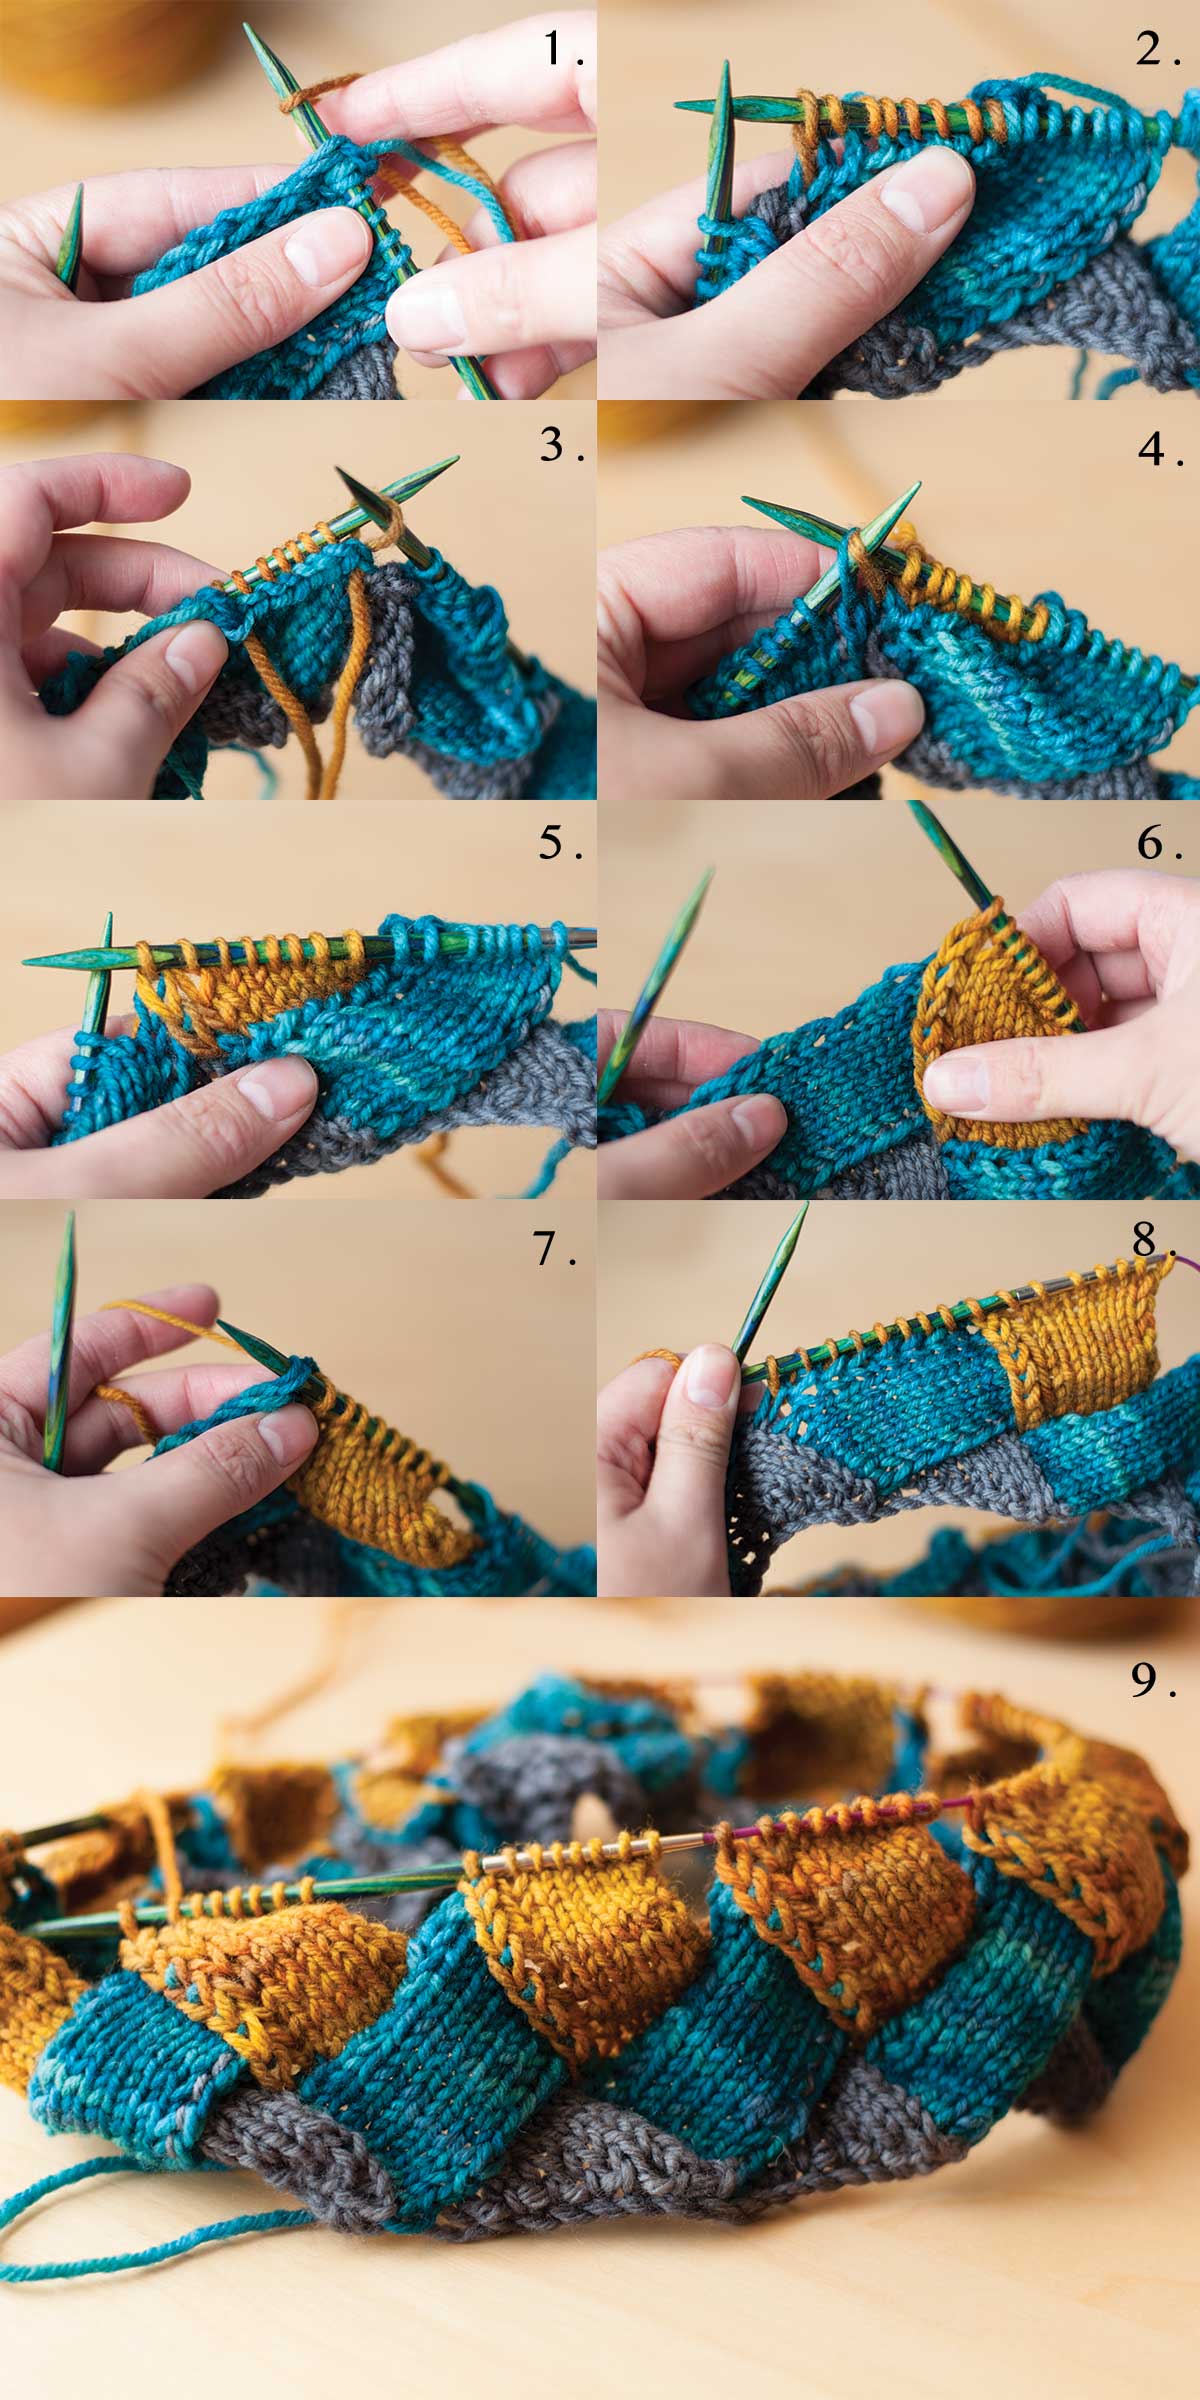
Once you’ve worked all your right-leaning rectangles, it’s time to go back in the other direction with left-leaning ones! Knit across the 8 stitches of the last right-leaning rectangle worked, then cut the yarn and join a new color if you’d like to. Here I’m using a lovely gold.
- Insert the right needle tip under both legs of the slipped stitch just to the left of the last right-leaning rectangle, wrap your yarn around the back needle (1) and bring the new loop through to pick up and knit. Continue picking up and knitting stitches along this edge until you have 8 (2). Turn.
- * Slip 1 stitch purlwise with yarn in front (3), purl 7, turn.
- Slip 1 stitch purlwise with yarn in back, knit 6, ssk last gold stitch with a blue stitch from the right-leaning rectangle (4), turn.
- Repeat from * until you have used up all the blue stitches from the right-leaning rectangle (5 and 6). Do not turn after the last ssk.
- Pick up and knit 8 stitches along the next right-leaning rectangle edge (7 and 8) and repeat from *.
- It’s really shaping up now (9)!
Continue working alternating tiers of right- and left-leaning rectangles to build the fabric. If you’re knitting a cowl or something else with a straight top edge, you’ll work more triangles at the top to finish off. If you’re knitting a hat, you’ll have to decrease at some point — the pattern will direct you where to decrease!
Try your hand at knitting entrelac in the round with these patterns!
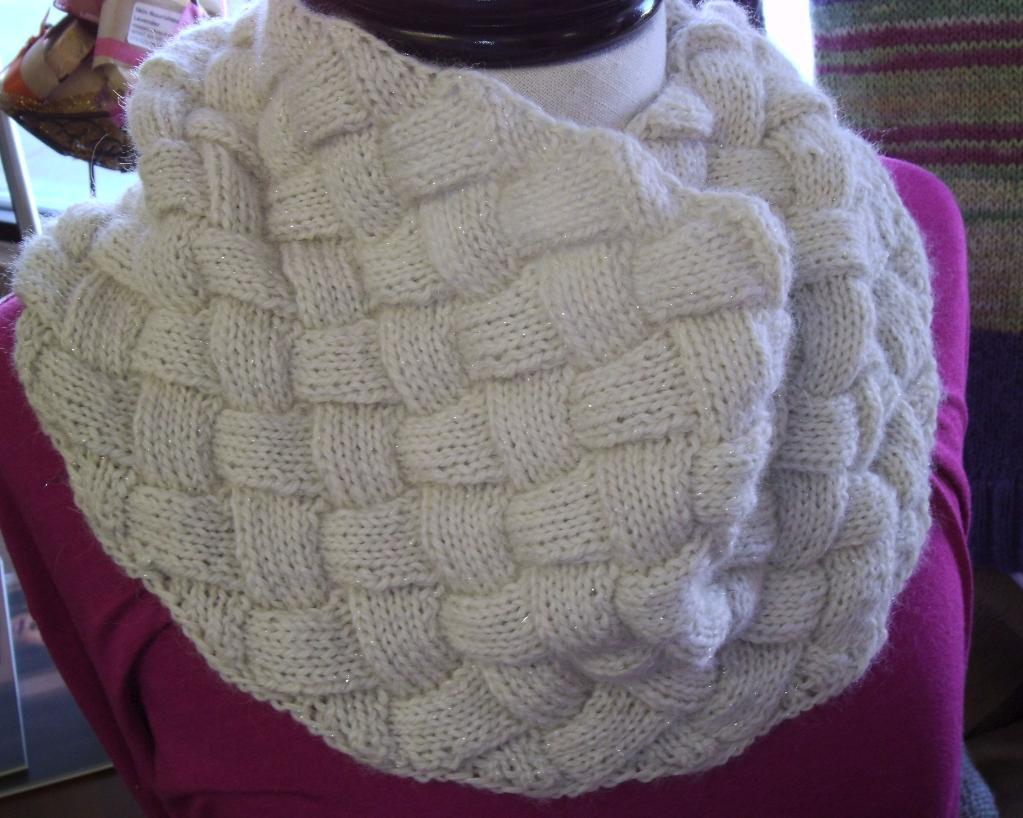
Free Entrelac Made Easy pattern via Craftsy member Gressman Originals
1. Entrelac Made Easy
To get the hang of entrelac knitting without worrying about color changes or countless yarn tails to weave in, go with this simple-as-possible cowl. The texture speaks for itself! Or, if you want a pattern that’s a little more challenging, this pattern is also available in a two-color version.
2. Entrelac Cowl
If you’re a fan of bright, bold colors, start your entrelac adventure with this vibrant cowl. These jewel tones are stunning, but it would be equally gorgeous in an array of neutrals.
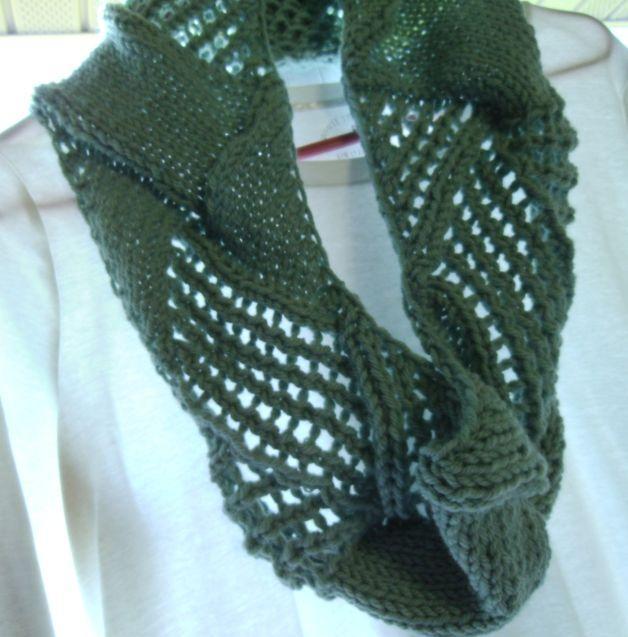
3. Chunky Entrelac With Lace
This in-the-round pattern makes entrelac even more interesting — we didn’t think that was possible! Parts of the pattern include a lace stitch, which you don’t see often in entrelac. With openwork and bulky yarn, this pattern will work up in no time.

4. Huckleberry Hat
Enough cowls — how about a hat instead? A small but rewarding project like a beanie gives you just enough time to conquer the technique without feeling like you’ll never finish.

5. Entrelac Basket
If you can look beyond the adorable baby in the photo above, you’ll see just how stunning this basket is. Knit in the round with a different neutral colorway for each round, this would make a great decorative storage bin for your home.
I’m a left-hand knitter. Are there instructions for me?
Love Knitting