
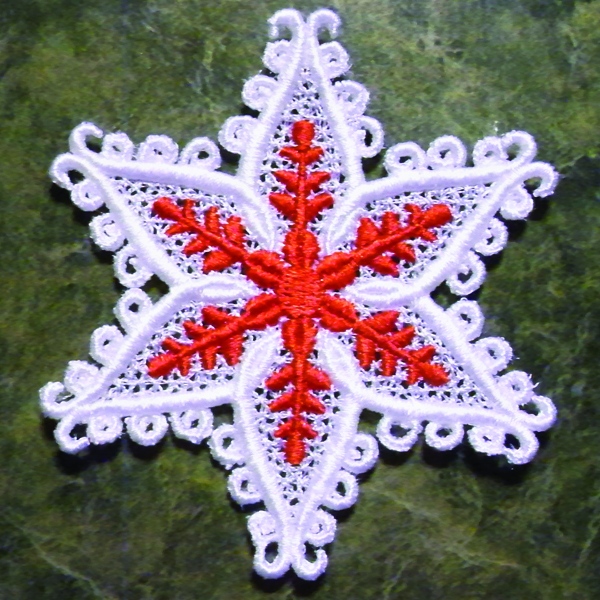
Lace machine embroidery designs look totally intricate, but they couldn’t be easier to make. After all, your machine does all the work. We’ll show you how to stitch a freestanding lace star to make a holiday ornament that looks gorgeous. Let’s get started!
Good to Know: Only designs that are digitized as freestanding lace (FSL) will stitch out as true, stand alone lace. Instead of highly skilled and time consuming handwork created by crochet, bobbins, needles or tatting, machine embroidered lace is created by connecting layers of thread stitches to each other.
Free-Standing Lace Christmas Ornament
Level: Easy
What You Need
Instructions
1. Hoop Heavy Stabilizer
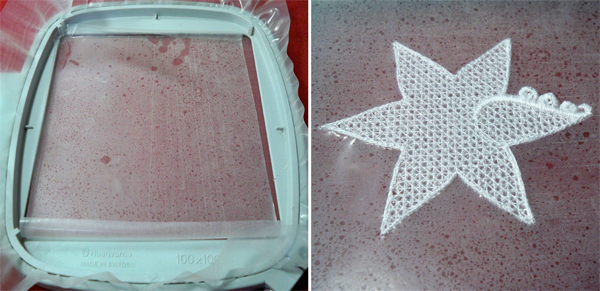
Hoop up your water-soluable stabilizer. Because this pattern has a high stitch count, add another stabilizer to the front and back. On both of the extra stabilizers, clip the water-soluble slightly so it’s smaller than the inside hoop size. Mist it with water and finger press it to the hooped stabilizer. Let the stabilizers firm up before starting to stitch.
2. Pull the Bobbin Thread
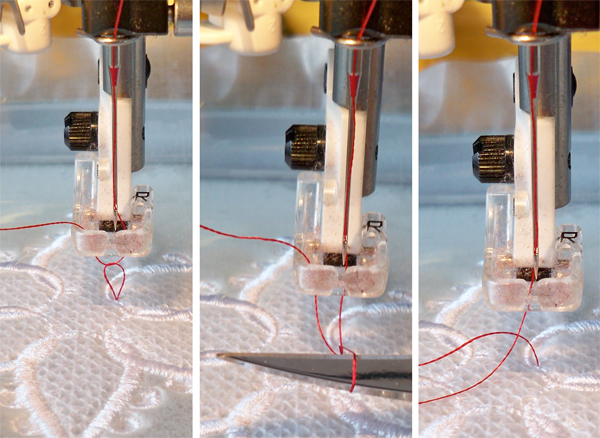
Pull the bobbin thread to the top from the very beginning. That keeps the thread tail from becoming entangled with other stitching. At the first stitch of a color change, lower the needle through the stabilizer to catch the bobbin thread and pull it to the top. Hook a seam ripper or the point of your scissors through the bobbin loop and pull the thread end to the top. That way you can keep both thread tails out of the way of the embroidery.
Good to Know: Most of the time, designs are digitized for 40 wt. thread. Using a heavier thread will produce a thicker embroidery, which tends to appear less delicate.

When the embroidery is complete, it may not look quite like you imagined. Do not worry!
3. Remove the Stabilizer
Clip away the excess stabilizer. To get the rest off, rinse the lace in warm water, rubbing the piece between your fingers to dissolve the stabilizer around the edges. Soak the piece in warm water. Change the water several times to remove the bulk of the stabilizer. Leaving some stabilizer in the stitching gives the piece a crisp appearance, as if it has been starched. Blot the piece dry on paper towels and lay it flat to dry overnight.
 Once your snowflake is finished, use some excess thread to tie a loop and hang it on your tree!
Love to make some to use with tags
Hus
What is the price?
Under "What You Need," the first item should be an embroidery sewing machine.
I stitch out similar designs. I use 2 pieces of water soluble stabilizer( the type you can see fibers). I just hoop both layers for support as there are a lot of stitches. I have done this for years with lots of success. I give them as gifts or tie them on Christmas packages. 🎄
I'm anxious to try this one. Just got an embroidery machine
I'm sort of confused about the stabilizer. Are you saying it's 3 layers of water soluble? You hoop one layer and then it said a layer on top and bottom? Can you clarify? I thought 2 layers of water soluble hooped would be fine.
Beautiful
It looks fantstic. But do I need a sawing machine to do this?
Thank you