
Materials used:
- A piece of watercolor paper (for a card, cut it to 5″ x 14″)
- A size 8 pointed round watercolor brush (or any size with a pointed tip)
- A white plate or mixing palette
- Clean water for wetting and cleaning your brush
- A rag or paper towel for cleaning and drying your brush
- A pencil for sketching
- Split-primary, limited palette of watercolors (more below)
Colors used:
- Cool yellow (such as Hansa Yellow Light)
- Warm yellow (such as New Gamboge)
- Cool blue (such as Phthalocyanine Blue GS)
- Warm blue (such as Ultramarine)
- Cool red (such as Quinacridone Rose)
- Rarm red (such as Transparent Pyrrol Orange)
First let’s take a look at what the suggested paints might look like:
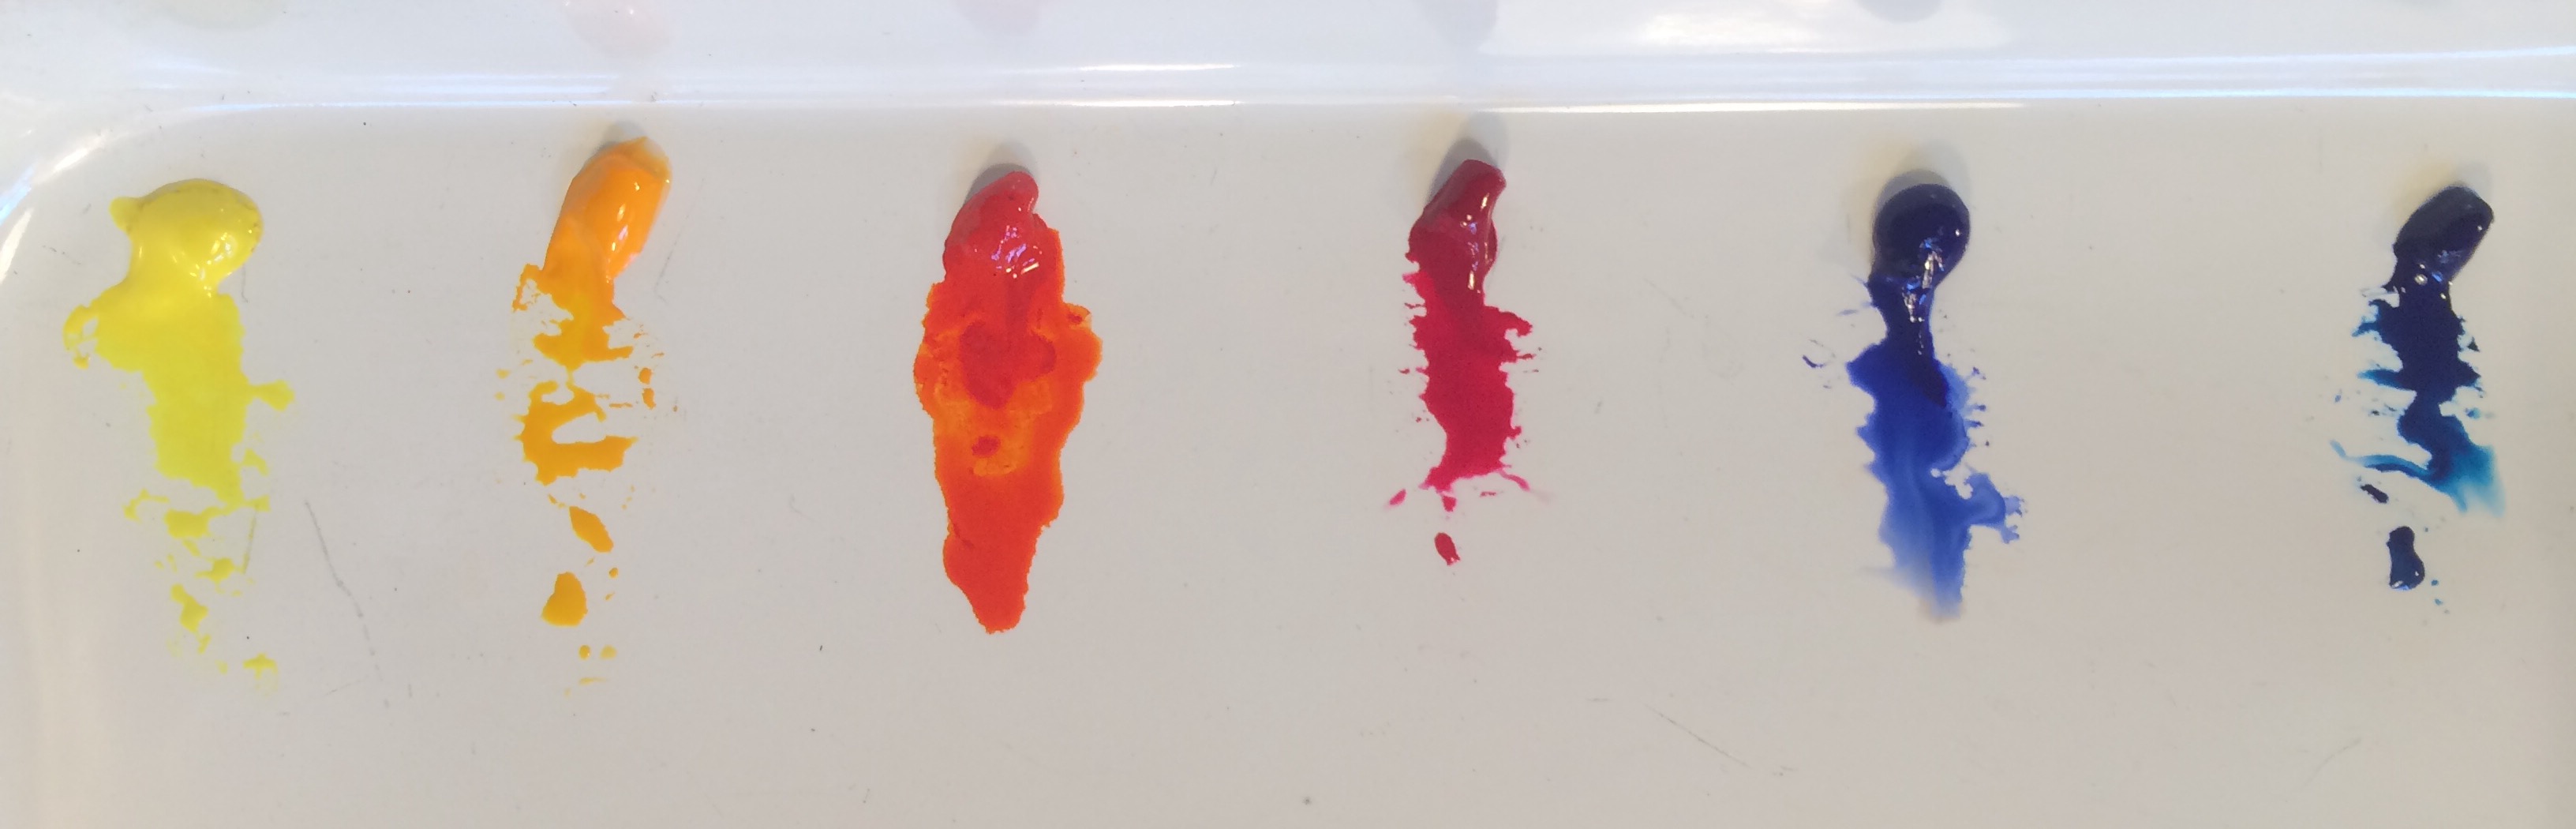
From left to right: Hansa Yellow Light, New Gamboge, Transparent Pyrrol Orange, Quinacridone Rose, French Ultramarine and Phthalocyanine Blue GS. All paints by Daniel Smith.
Start by sketching the shapes you plan to paint.
With your watercolor paper flat, use a pencil to very lightly draw leaves across the bottom of the paper. You can use my sketch a guide, but fear not if yours doesn’t look the same — as long as you keep the shapes simple and similar to what I’ve drawn, they will look great!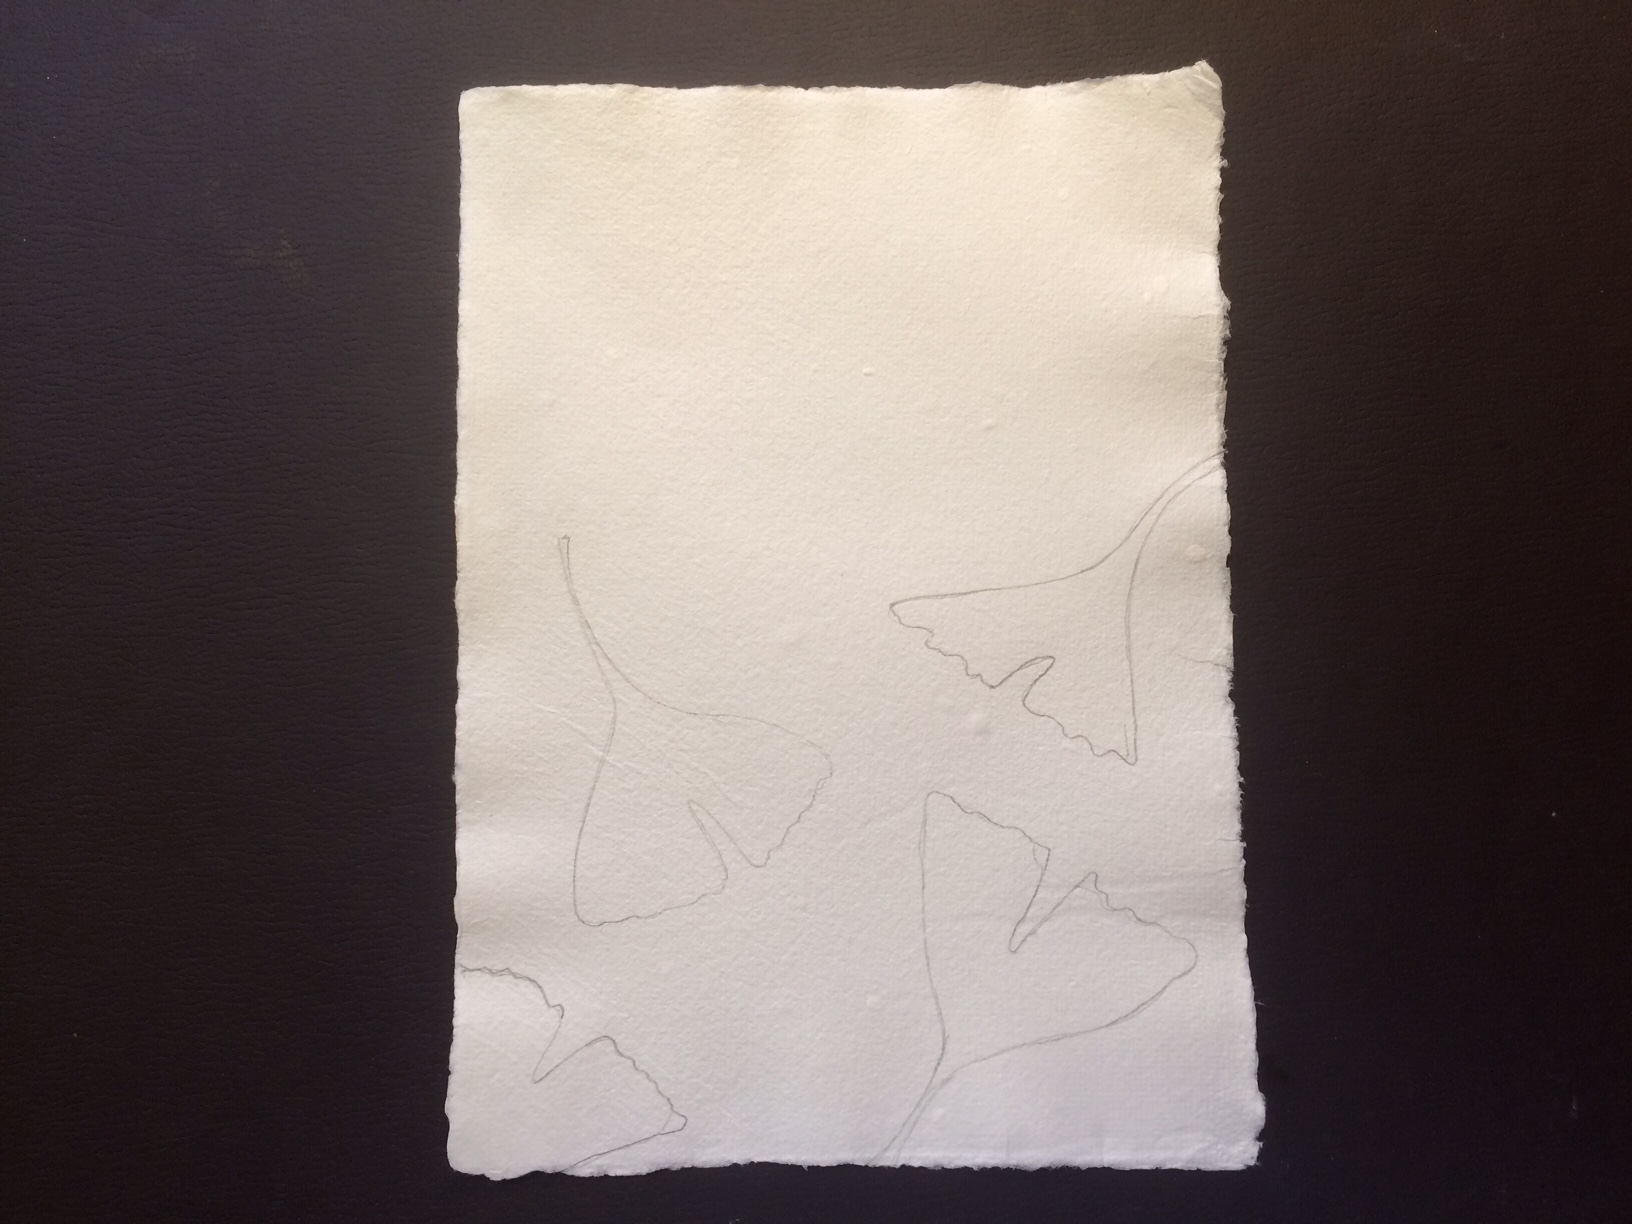
The next step is to mix up some colors on your palette or plate.
With a wet brush, mix together several different greens. One can be a mix of cool blue and cool yellow, one can be warm blue and warm yellow. Then mix up a darker version of each by adding a very small touch of cool red to the cool green, and warm red to the warm green. Why red? Adding a very small amount of red to green mutes the color and make it a bit darker, because red is the opposite of green on the color wheel. Also make a small puddle of warm yellow mixed with warm red, a small puddle of just cool yellow, and also of just warm yellow. We will use these to make the colors of the leaves more varied and interesting.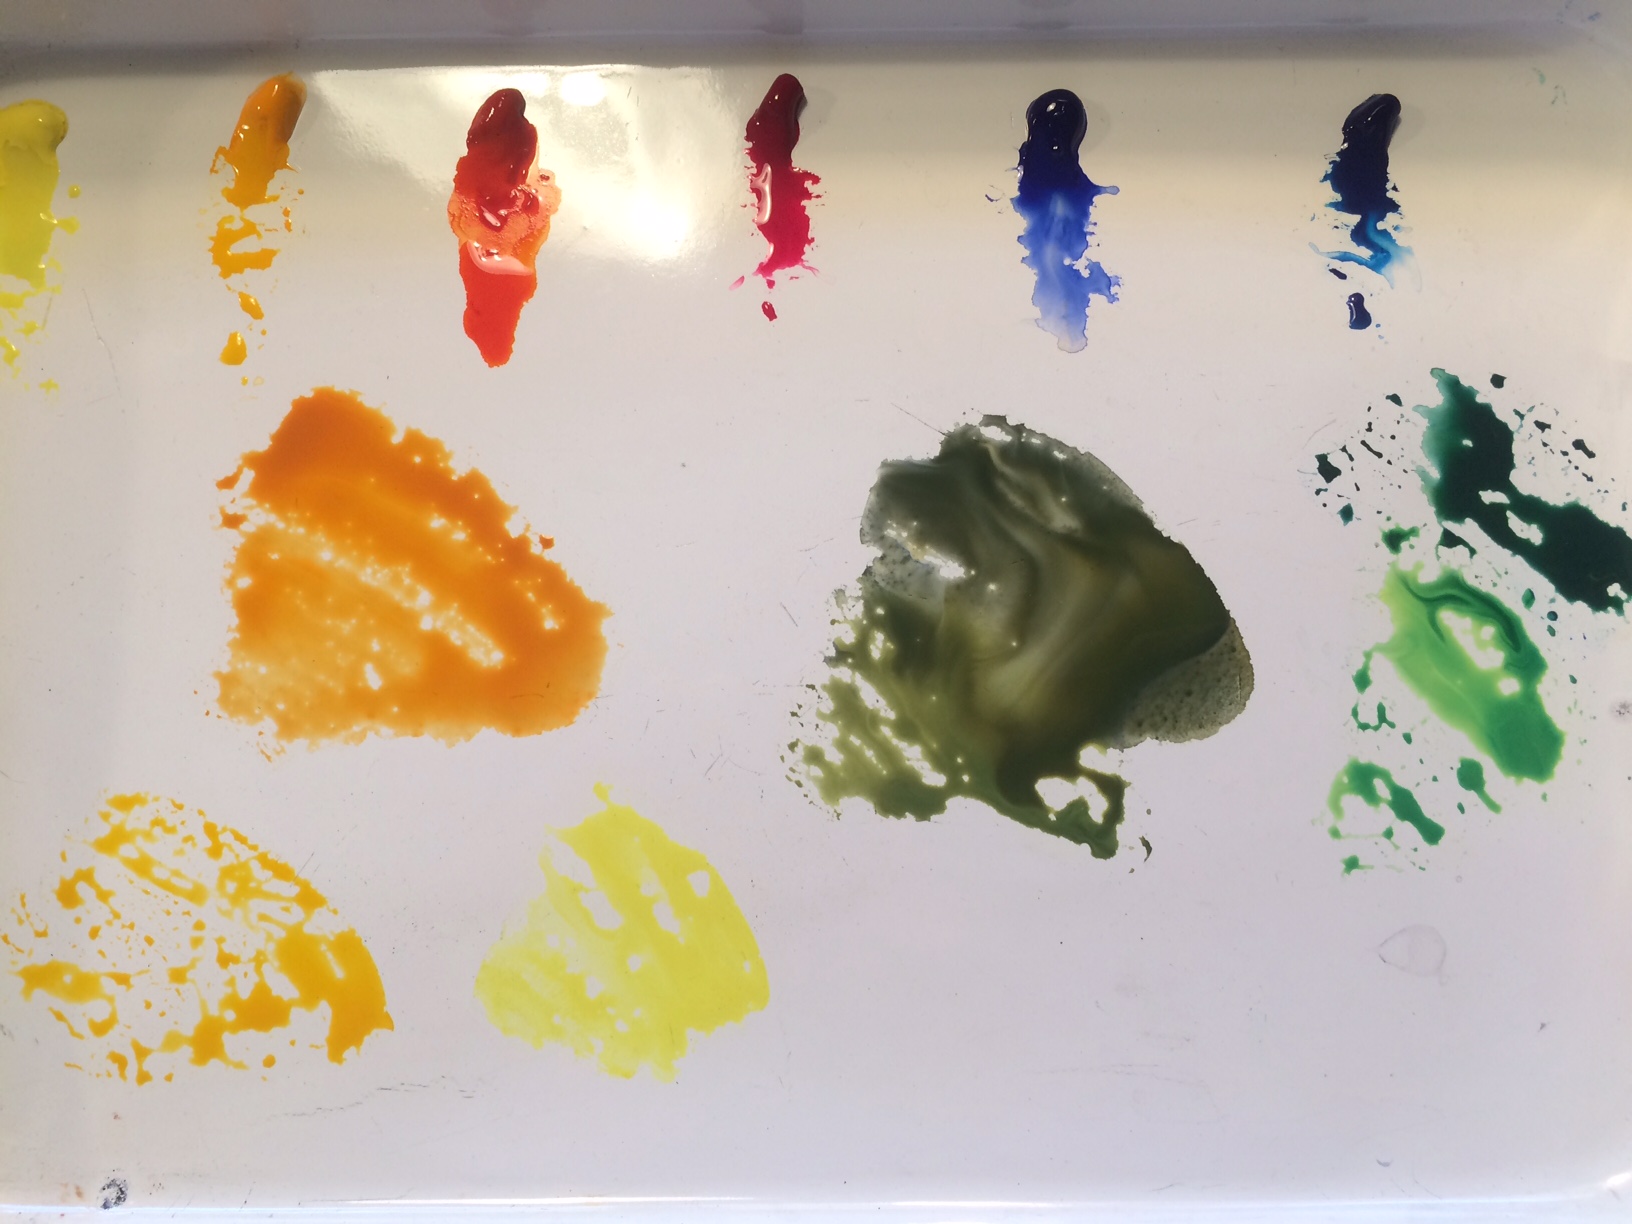
Once your colors are mixed, you are ready to paint!
Begin with one leaf and start by adding a clear glaze of water over the entire leaf. You want just enough water to make a nice, even surface of water for the paint to glide over. If it is too wet, the paint will pool. You can always swipe over the water glaze with a clean, damp brush to be sure the surface is wet with a nice and even water glaze. This takes a little practice, so feel free to try out a practice leaf in your sketchbook first. Now that you have a water glaze, work quickly to pick up one of the darker greens and drop it into the water glaze. Continue down the leaf, randomly dropping in your different mixes, including some of the yellows you have mixed. I used three or four different mixes in each leaf. Mix them up, and allow for some randomness! Once the leaf is covered with paint, clean and dry your brush and use the tip to trace around the edges to clean them up and pull the paint right up to the pencil line.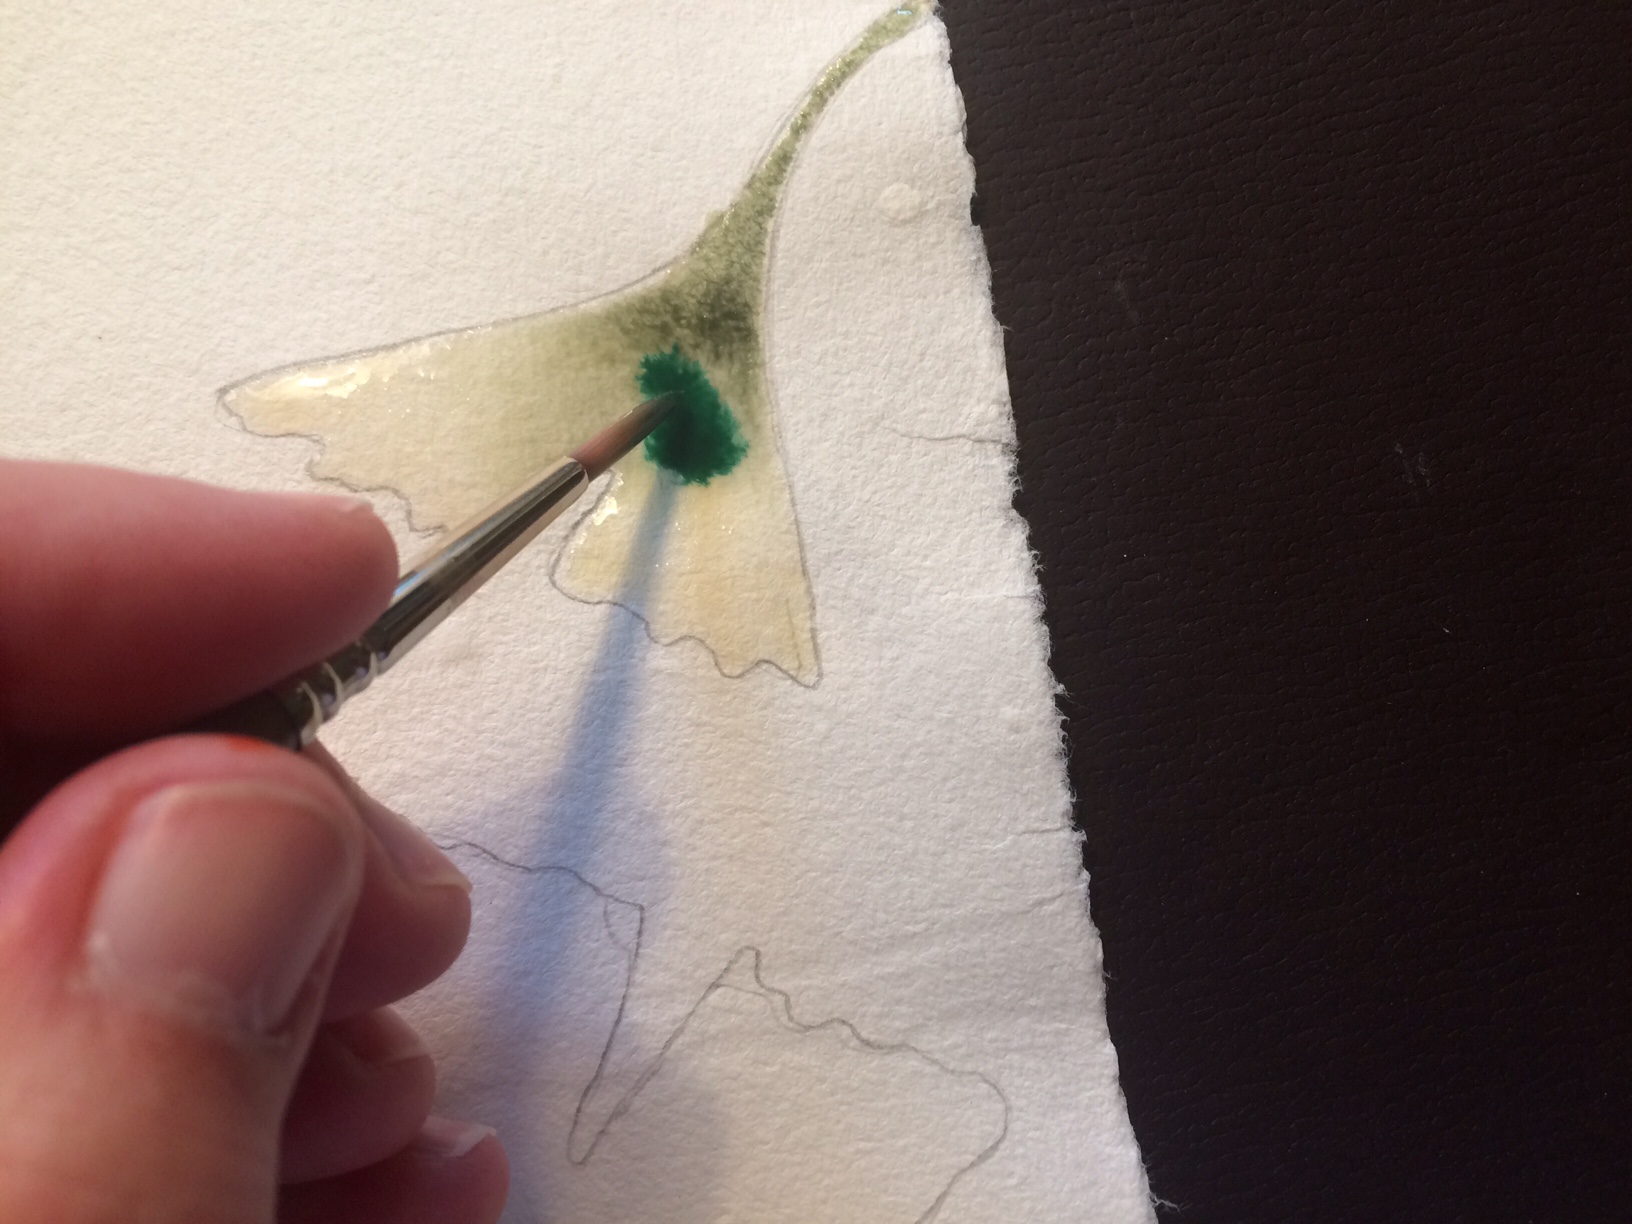 You can see below my progress as I moved from one leaf to the next. As I went, I randomly added in colors from my palette and then used a clean, damp (not wet!) brush to bring the paint neatly to the edges.
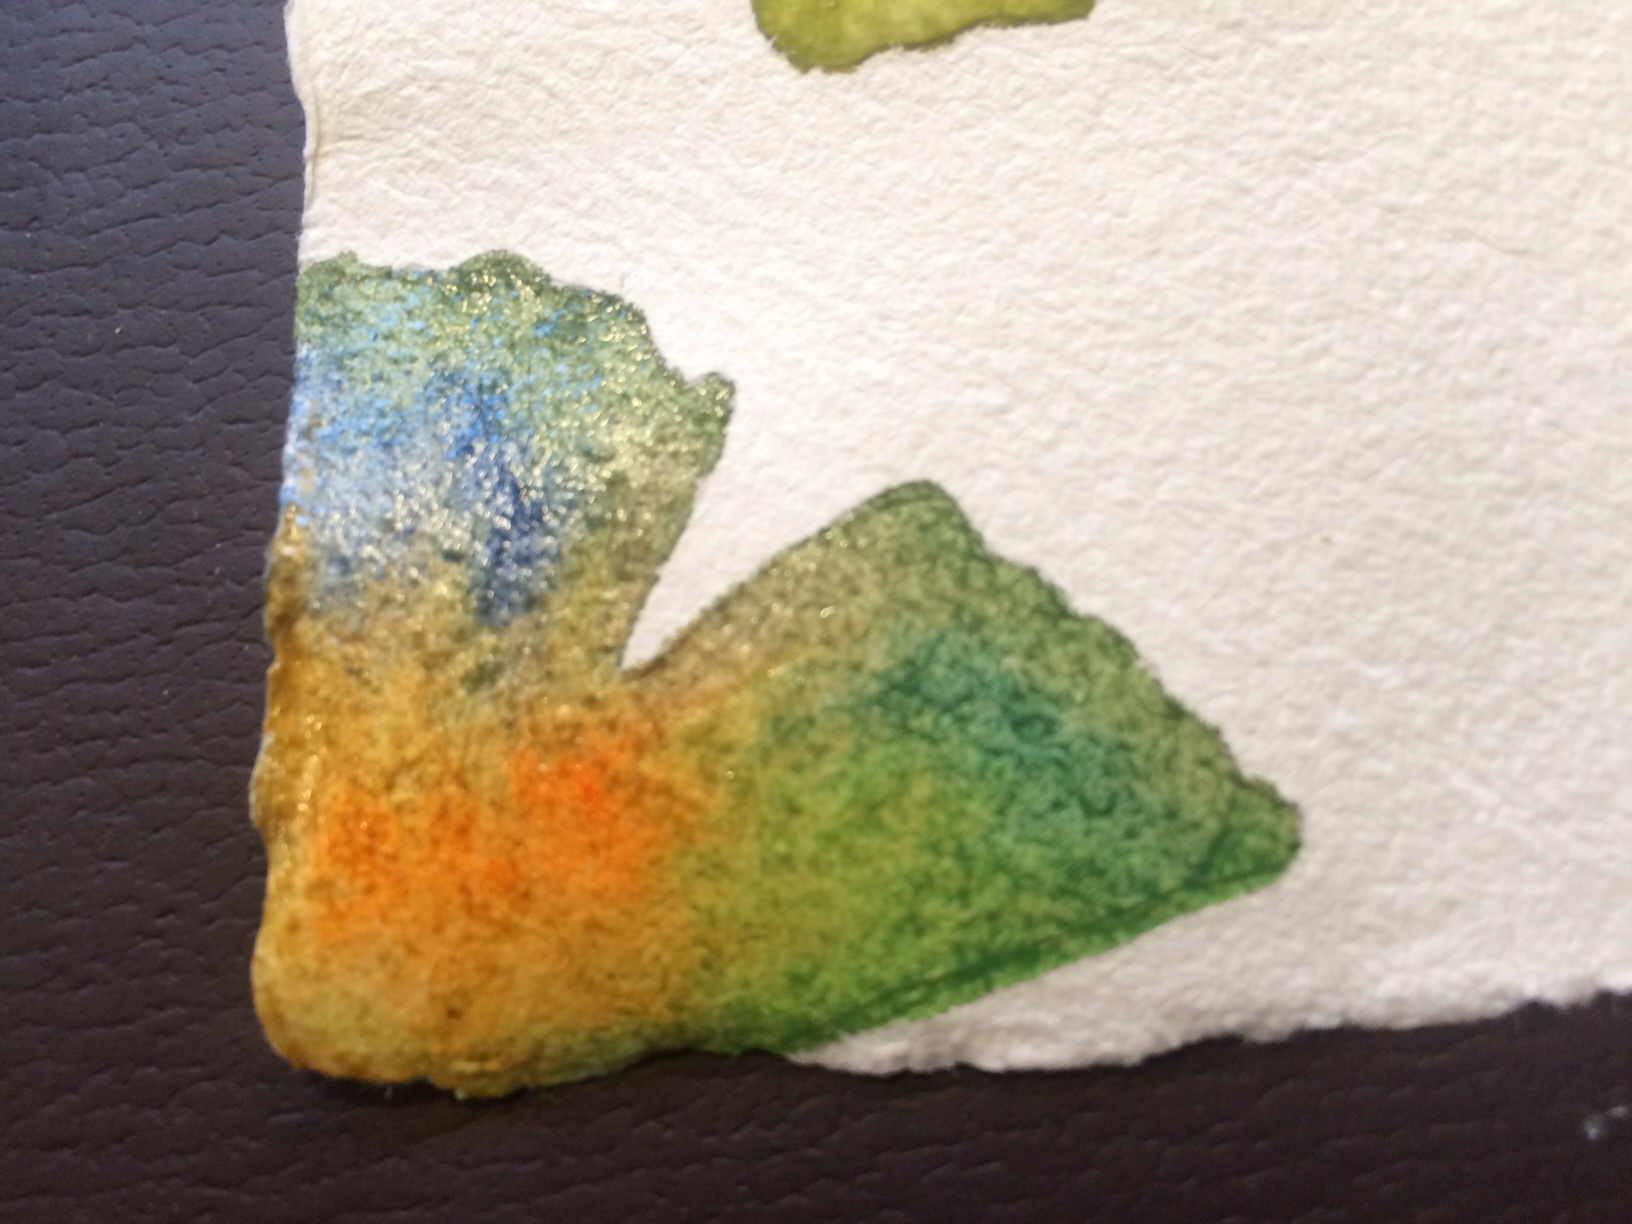
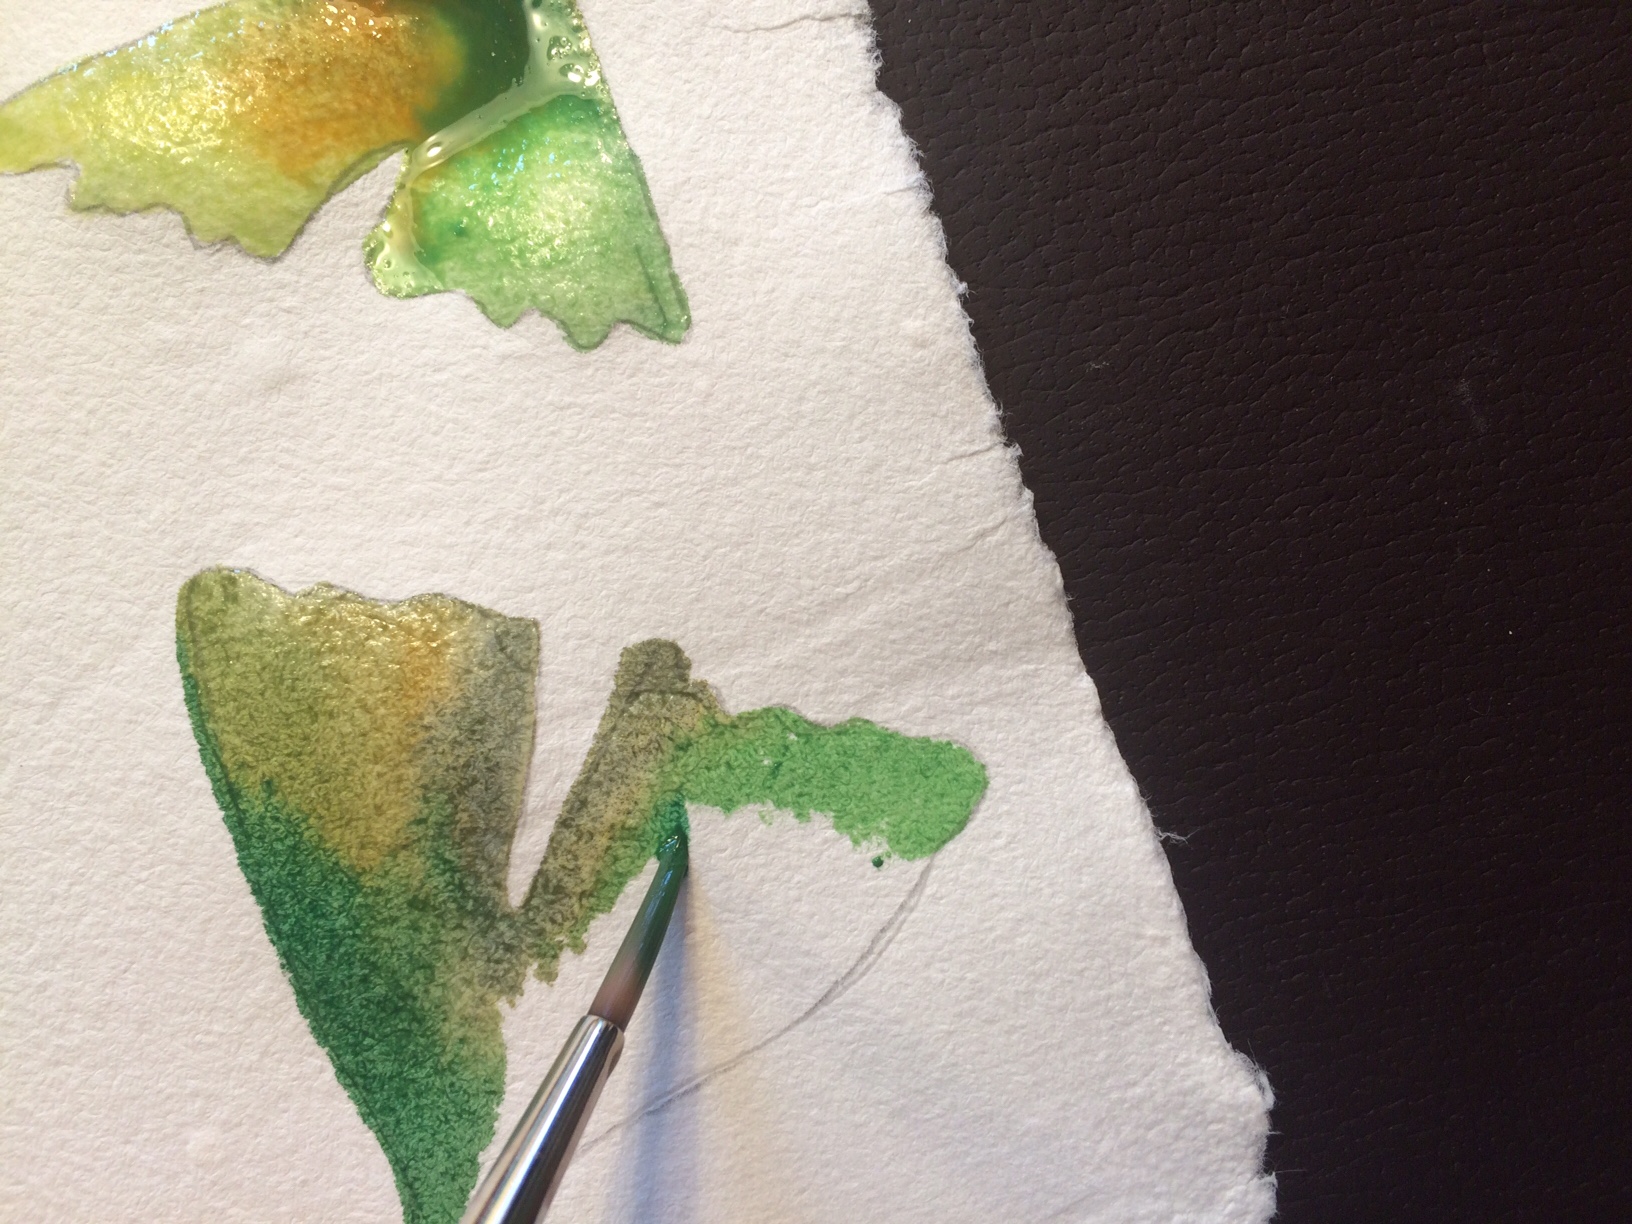 Above, you can see one leaf painted over a wet water glaze and one without a wet glaze. Try both techniques and see which works better for you. Just be sure to mix up the colors you use in each leaf as you work across the paper.
See how lovely it looks when you drop in some orange and yellow? Mix it up! Play and have fun!
Above, you can see one leaf painted over a wet water glaze and one without a wet glaze. Try both techniques and see which works better for you. Just be sure to mix up the colors you use in each leaf as you work across the paper.
See how lovely it looks when you drop in some orange and yellow? Mix it up! Play and have fun!
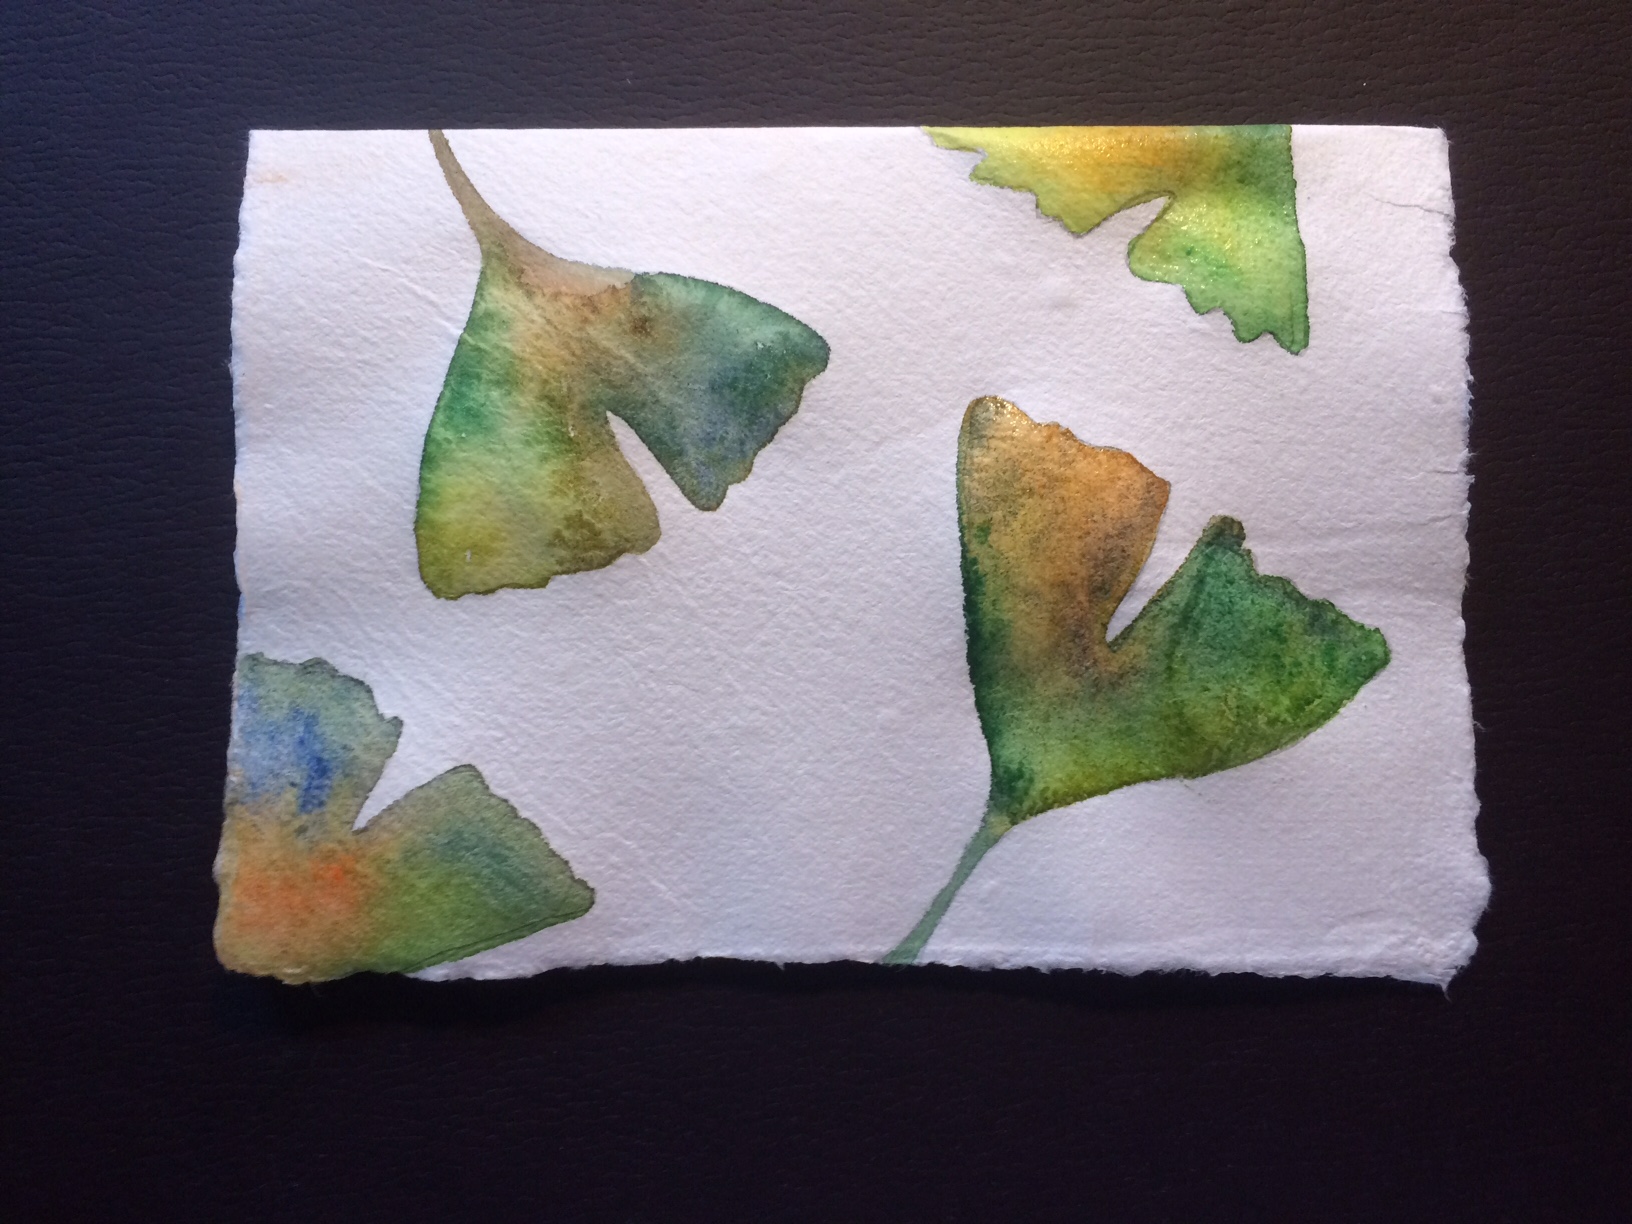
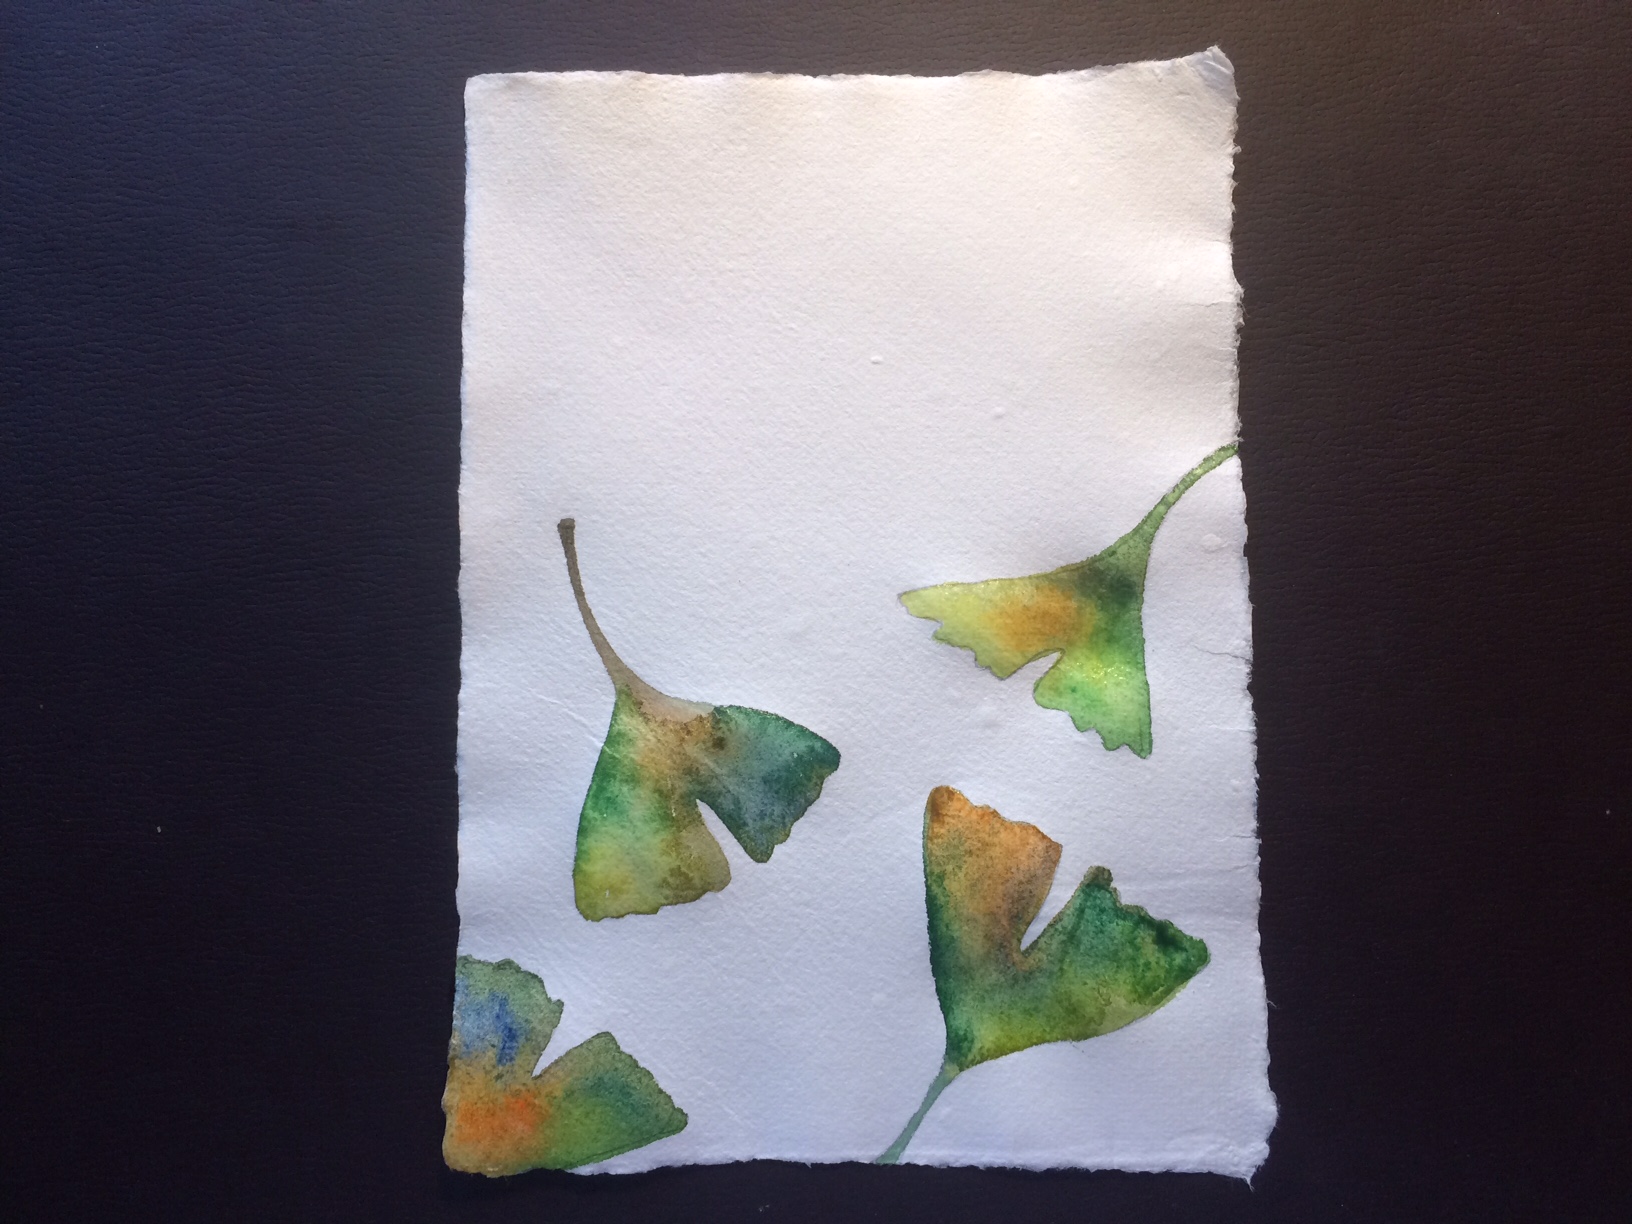
 Finally, I have applied paint to all of the leaves on the paper. I’ve taken a little time to make sure my edges are are neat as possible. Now it’s time to let the paint dry before I fold the paper in half to make a card.
 Keep practicing! Each time your technique will improve and you will end up with many beautiful paintings or cards. You could even make a stack of cards, include some envelopes, and tie them together with a beautiful ribbon to give as a gift. Enjoy and please share your results!
Love this. Great ideas spring from this idea. Thanks.