
There are two main problems that oiling out will help you solve:
- Blending wet paint into previous, dry layers of paint
- Restoring luster to dull, sunken-in paint after it dries
How to oil out your painting
Before you plan on oiling out, make sure the area of the painting you’ll be working on is dry. There is absolutely no point to oiling out a wet area of paint; you’ll only create a mess!Step 1: Adding (and removing) oil
Apply the oil to the area of the painting that needs to be worked on. This can be done using a clean brush, a lint-free rag, paper towel or even some cheese cloth. Next, most of that oil needs to be removed. It’s important not to have a pool of oil on your canvas — you want just an ultra-thin layer. It’s best to remove all of the oil possible up until the point of wiping away the shine. Get as close to removing that shine away without actually removing it. This way you can be sure there is a very thin layer of oil.Step 2: Painting into the oil
Once the area has been oiled out, it can be painted on. The beauty of this whole process is that the painting will not have obvious visual separations between layers. The new layers of oil paint can be feathered into the thin layer of oil, yielding a seamless look to the final painting! Not only does oiling out give you the advantage of blending into dry layers of paint, but it also restores the luster of the paint. Yes, oiling out will reverse that dreaded color change that some colors undergo, better informing you of how the painting looked when it was once wet.Oiling out example
As an oil painter working in the realist tradition, I often encounter areas of my paintings that need to be reworked. Making an area darker or slightly adjusting a color is a very common need of realist painters. Let’s walk through an actual example of how I’ve used the oiling out method on one of my fishing lure paintings! After getting all areas of this canvas covered with paint, I let it dry for a couple days. Upon reexamination, I realized that the cast shadow to the left of the fishing lure was not dark enough and needed some subtle changes in hue.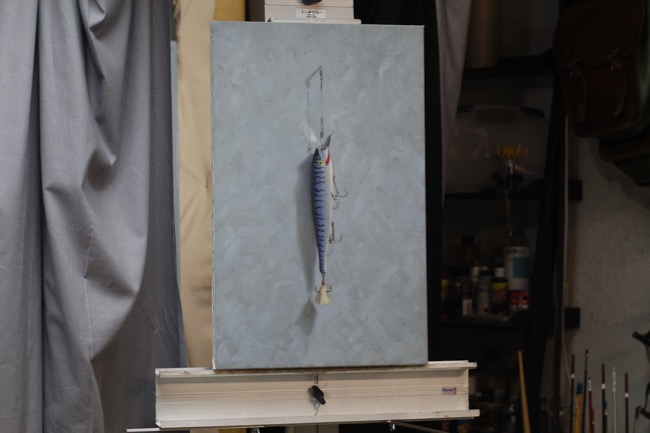
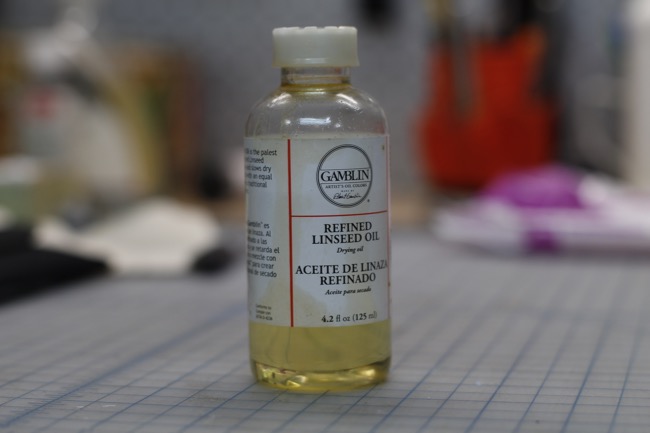
With a soft bristled brush I brushed on a thin layer of linseed oil.
I made sure the linseed oil extended beyond my proposed area to be repainted. This is so I can give the illusion that this layer of paint has been seamlessly blended into the previous, dry layer of paint.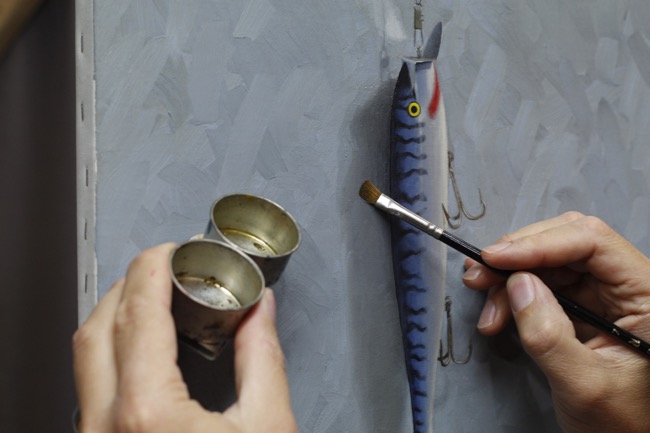 Without too much aggressive scrubbing, I continued adding linseed oil to areas of the canvas, working from top to bottom.
Even though I applied a really thin layer of oil, it was still too much.
As you can see in the image below, I used a rag to remove some of the oil so that the absolute minimum amount of oil remained.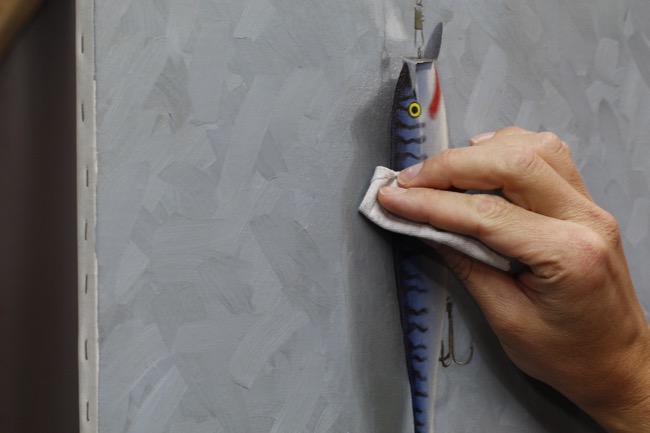
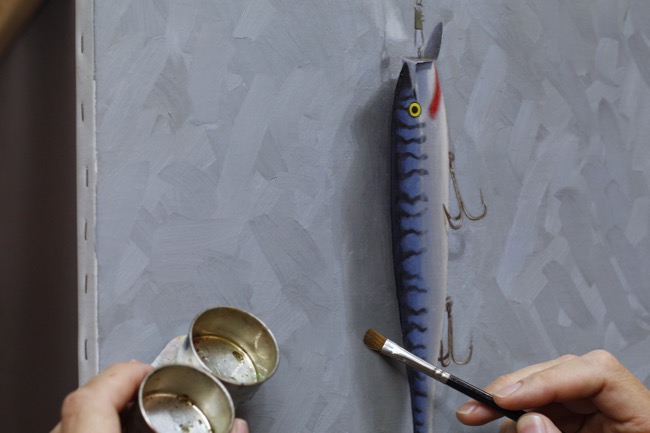
Then I could paint right into the oil.
The paint felt nice and slippery, much like the way it does when working into wet layers of paint! I added some darker colors and spread them around evenly.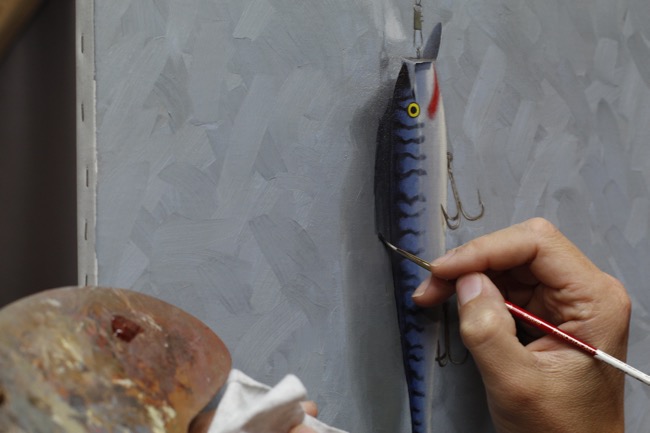 Finally, I used a very soft brush to carefully soften and feather the new paint into the layers below. This takes some patience and a careful touch, so don’t rush this.
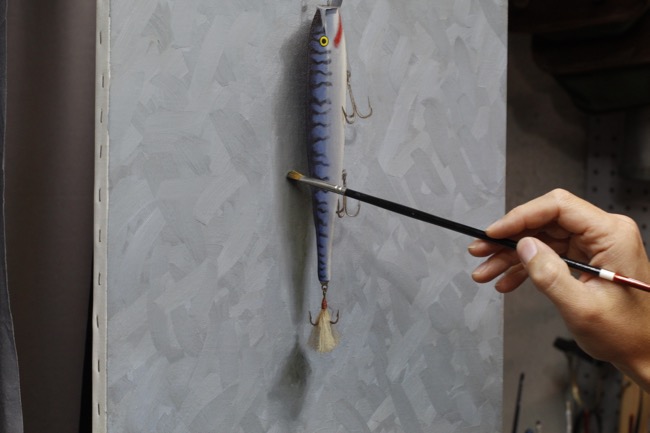 After I was satisfied with my newly painted shadow, I let the painting dry in a horizontal position. I still had some more work to do.
Even though it’s called “oiling out,” other mediums can be used as well. Any of the popular alkyd-based mediums — such as Liquin or Galkyd — can be used to oil out as well. Just remember that these mediums dry much faster than traditional linseed oil, shortening the window you have to work into the wet area.
It’s a good idea to keep oily rags or paper towels in a metal container with a lid.
After I was satisfied with my newly painted shadow, I let the painting dry in a horizontal position. I still had some more work to do.
Even though it’s called “oiling out,” other mediums can be used as well. Any of the popular alkyd-based mediums — such as Liquin or Galkyd — can be used to oil out as well. Just remember that these mediums dry much faster than traditional linseed oil, shortening the window you have to work into the wet area.
It’s a good idea to keep oily rags or paper towels in a metal container with a lid.
I have attempted my first oil painting on board, the plain single colour backgrounds are drying mottled, or shiny in places and not in others where I have touch it up. Should I over paint the whole areas again with a thicker layer of paint or try and oil it out?