
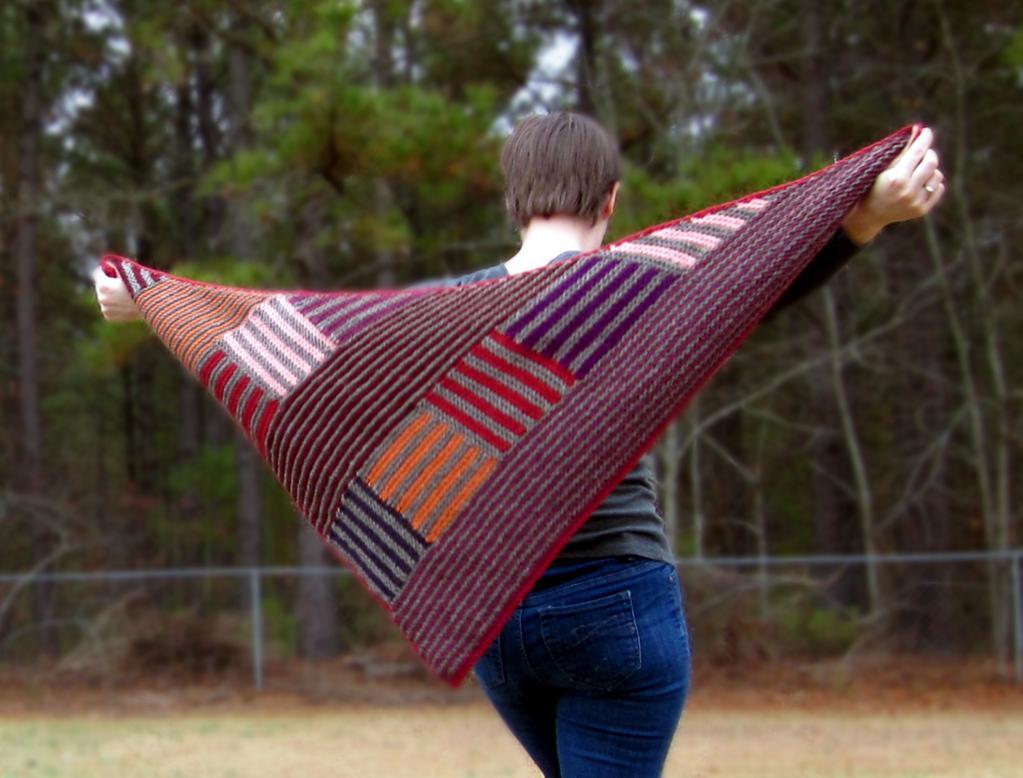
Log Cabin Shawl Pattern via Craftsy member Azalea820
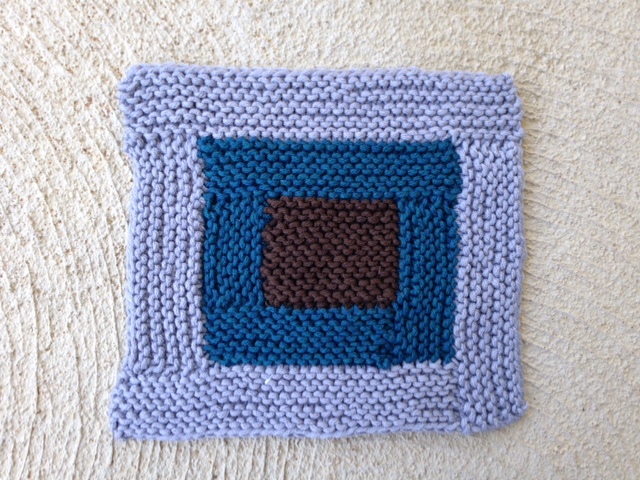
Did you know that today is Log Cabin Day? The holiday, which originated in Michigan, celebrates not only log cabin homes, but also the simple lifestyle they represent. Bring the idea behind this unique holiday to your knitting by making a classic project using the log cabin knit technique. Log cabin knitting is a traditional pattern that involves creating a main, center square, and then building upon the center by knitting additional strips to each side of the square. If you’ve never knit this timeless and versatile pattern, I’m here to show you how with this Log Cabin afghan square tutorial!How to knit a Log Cabin afghan square
Materials
- 3 colors of worsted weight yarn.
- Needles the appropriate size for the yarn weight (I used US 8)
Directions
Step 1:
With Color 1, cast on 12 stitches. Work in garter stitch (knitting every row) for 18 rows. Bind off all stitches.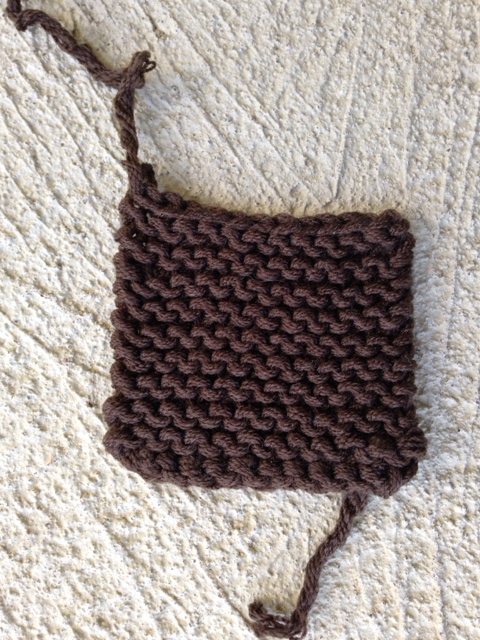
Step 2:
Turn square clockwise. The left side of the square should now be the top. With Color 2, pick up stitches along the top of the square. Knit 10 rows. Bind off to the last stitch. Do not cut the yarn, and do not pull through. You should have one bound of stitch remaining on the needle.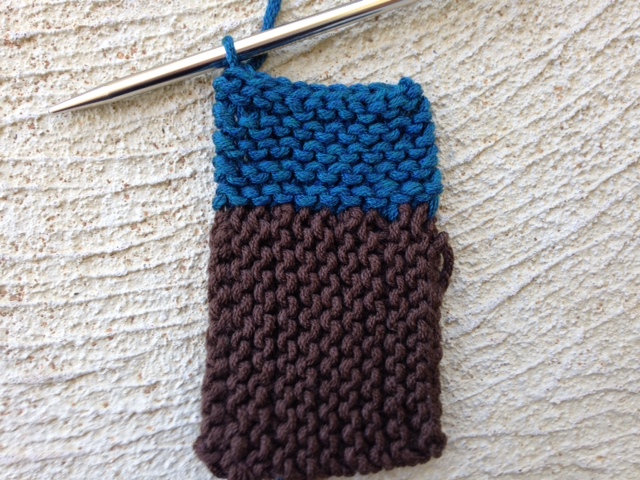
Step 3:
Turn work clockwise — left side of work is now the top. Pickup stitches along the top. Knit 10 rows. Bind off to the last stitch. Do not cut yarn, and do not pull through. Again, you should have one bound of stitch remaining on the needle.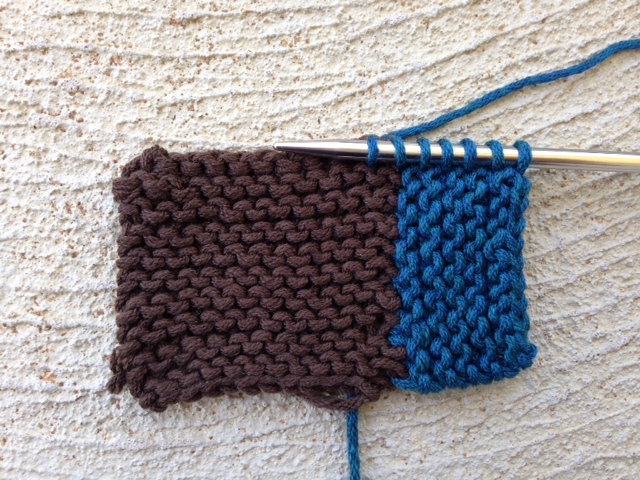

Step 4:
Turn work so the left side of the square is now the top. Using Color 3, pick up the stitches along top of work.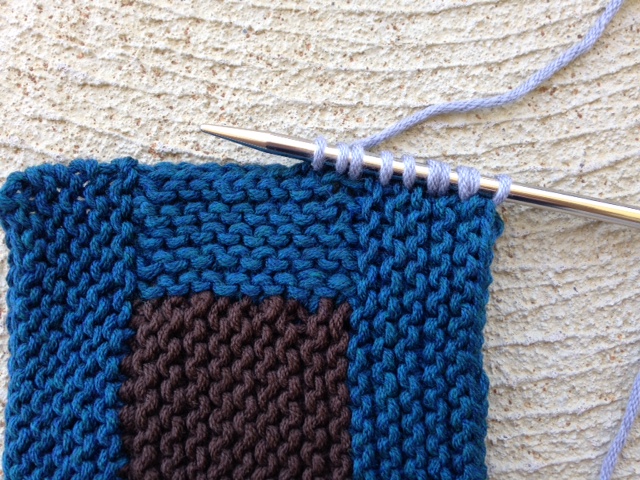
Share tips, start a discussion or ask one of our experts or other students a question.
No Responses to “The Log Cabin Knitting Technique: An Easy Step-by-Step Photo Tutorial”