
When a cake pop artist is tasked with making treats for macaron lover, you get these macaron–cake pop hybrids — yes, they’re made of cake but look just like delicate French macarons! They are so much fun to make. The technique for coating the cake portions is nothing like we’ve done before!

Macaron pops: Cake pop shells filled with anything you like!
You’ll need:
Cake pop dough- ready for shaping
- Teal candy wafers (or colors of choice)
- White candy wafers (or filling preference)
- Paramount crystals
- Toothpicks
- Waxed paper
- Zip-top bag
Step 1:
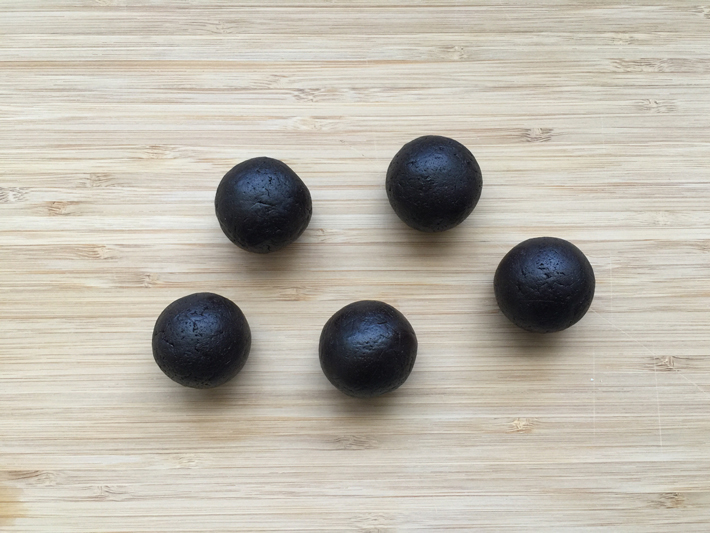
Line your work surface with waxed paper. Use a tutorial to create perfect cake pop dough. Portion cake pop dough using a cookie scoop, then form them into a ball.
Step 2:
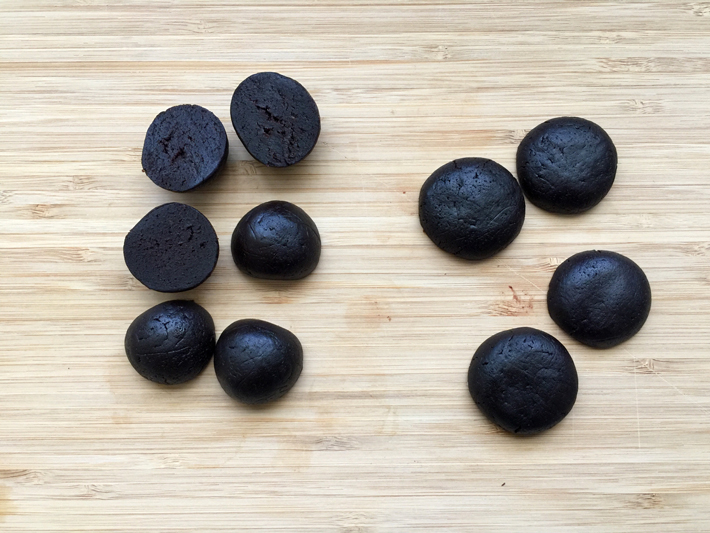
Cut each ball in half and slightly flatten each half so they look like macaron shells. Place all the pieces on a waxed paper–lined cookie sheet and refrigerate at least 10 minutes.
Step 3:
Next, we’ll melt both candy coatings in separate microwave safe plastic bowls or cups. Microwave them for 1 minute at 50 percent power and stir. Continue to microwave at 50 percent power in 30-second bursts, stirring between each interval. Use paramount crystals (or Wilton EZ Thin, or virgin coconut oil) to thin out the coating into a paint-like consistency. You can get a full tutorial for melting candy coating here.
Step 4:
Line another cookie sheet with waxed paper and place an elevated cookie rack over it. Grease the surface of your rack thoroughly with shortening, coconut oil or melted paramount crystals. Have another piece of clean waxed paper on your work surface.
Step 5
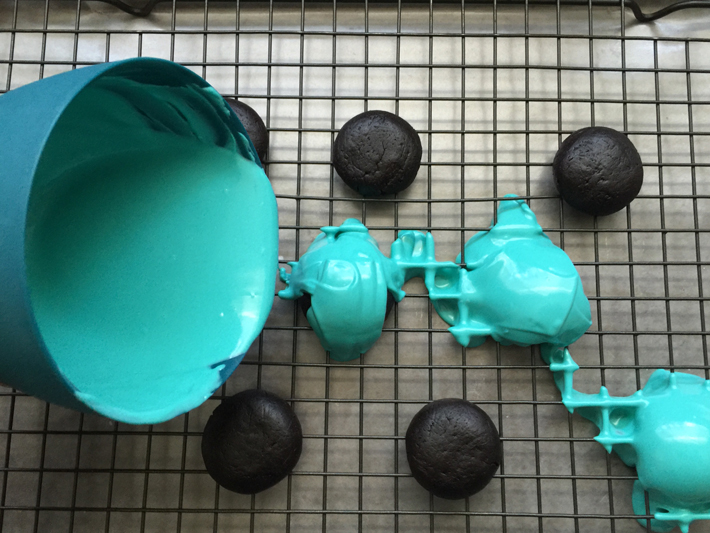
Remove the cake pop portions from the fridge and let rest at room temperature. They’ll be pretty thin, so it should only take 2 minutes or so to take the chill off. If they’ve been in the fridge longer than an hour, wait about 5 minutes before coating. Place 6-8 on the rack — we’ll work in small batches.
Step 6:
Pour candy coating over the cake pieces.
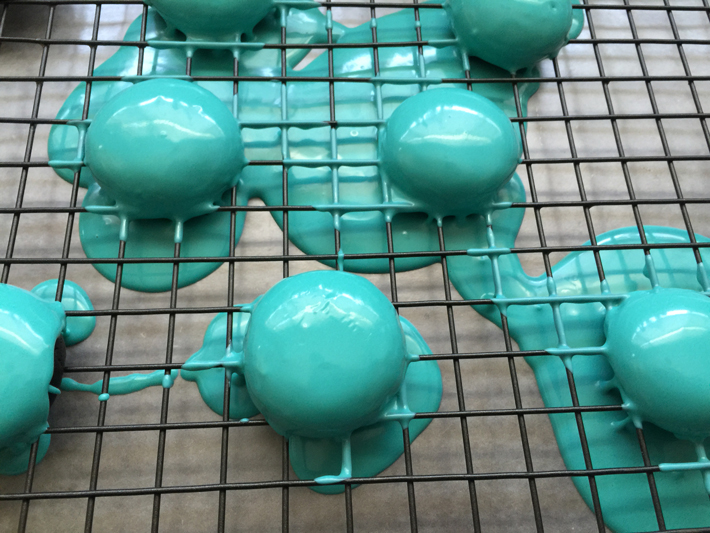
Lift the rack with both hands and tap it onto the pan to get the excess coating to run off the pieces.
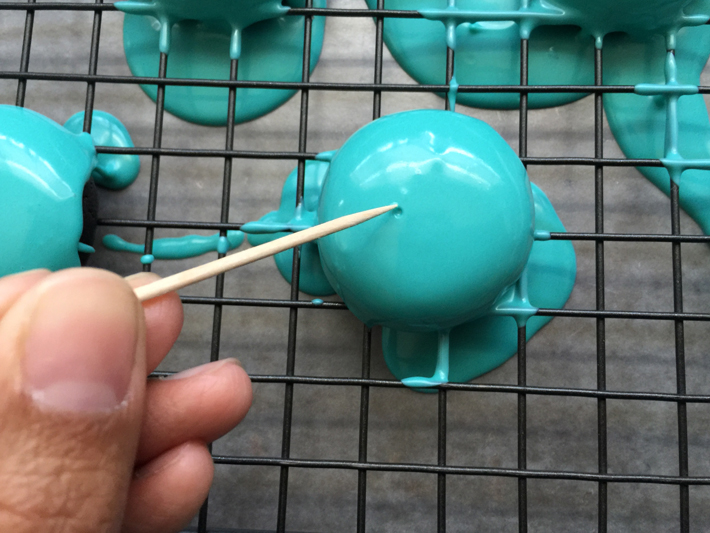
Quickly pop any air bubbles with a toothpick if necessary.
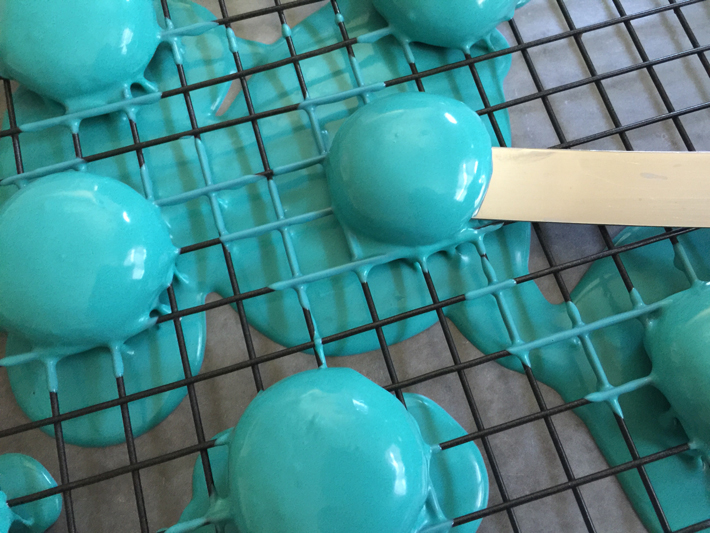
Use a small spatula or a fork to lift the pieces onto the clean sheet of waxed paper on your work surface.

Let the excess coating harden; break it up, re-melt and repeat Steps 5 and 6 until all pieces have been coated. If you notice any cake pieces within the coating, scoop it out and discard it. Clean the rack and re-grease if necessary.
Step 7:
Next, we’ll add the filling to the macarons. I’m using candy coating, but don’t feel limited to that — you can use any kind of filling you desire, but the thicker, the better. Don’t feel limited to just using candy coating. If you’re using filling, do Step 8 before filling.
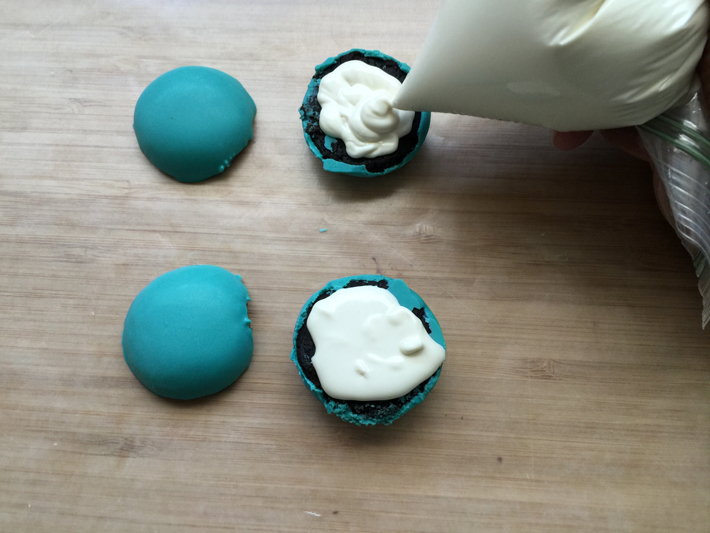
Reheat the white coating if necessary and pour it into a zip-top bag. Snip the tip and pipe the “filling” onto the inside of the shell. Place another shell on top to sandwich the filling. Let set completely.
Step 8:
Lastly, we’ll create the “foot” of the macaron shells. You have two options: using a toothpick or piping the detail.
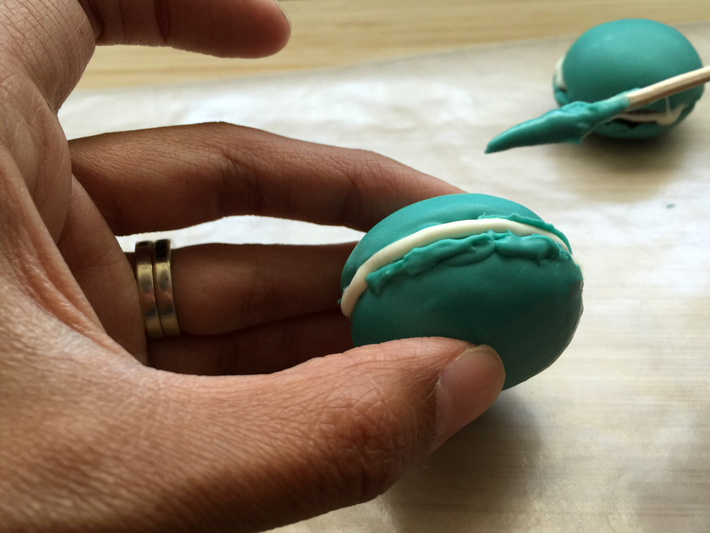
If using a toothpick, dip the toothpick into the coating and create a rough, textured line around the base of the shell. If piping, pour the coating into a zip-top bag, snip the corner and pipe around the base of the shell.
Enjoy your macaron pop!
Share tips, start a discussion or ask one of our experts or other students a question.
No Responses to “Macaron Cake Pops? Yes, Really!”