
Machine embroidery appliqué with the E-stitch, or as it is better known, the blanket stitch, is one of the most challenging methods of machine appliqué because it’s an open stitch. In order to machine embroider with this stitch, the appliqué shape must be cut to the exact size and the tackdown stitch must be removed or disguised.
There are two methods to use with this stitch.
1. A modern method is to pre-cut the shape so that it fits the appliqué and the fabric is fused so that no tackdown stitch is needed. With modern die cutting and electronic cutting machines, it’s very easy to prepare pre-cut appliqué shapes.
2. The traditional machine appliqué method is to use a tackdown stitch over the fabric, trim the shape to fit the stitches, and remove the tackdown stitch after the appliqué is complete.
An explanation of both methods is shown below.
Method 1: Using pre-cut shapes.
Step 1:
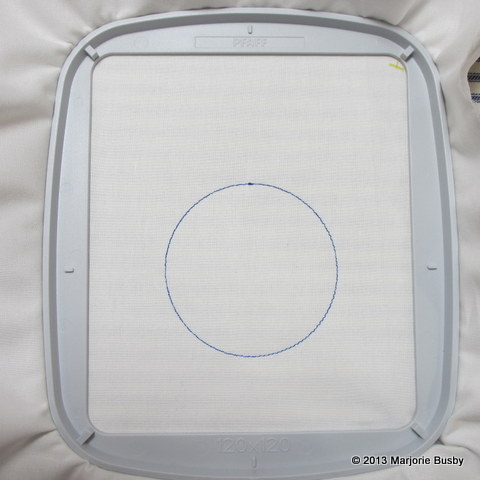
The first step in both methods is to stitch a placement line. This line is the exact shape of the applique patch.
For simplicity, I am using a circle appliqué shape.
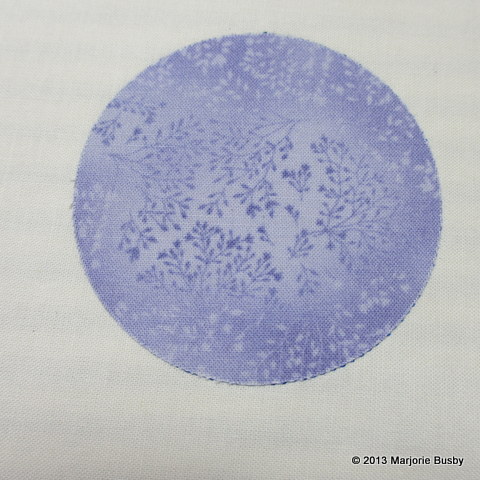
Step 2:
Fuse the fabric just inside the stitched placement line.
In the photo below, you can see the stitches just around the edge of the fused shape.
Step 3:
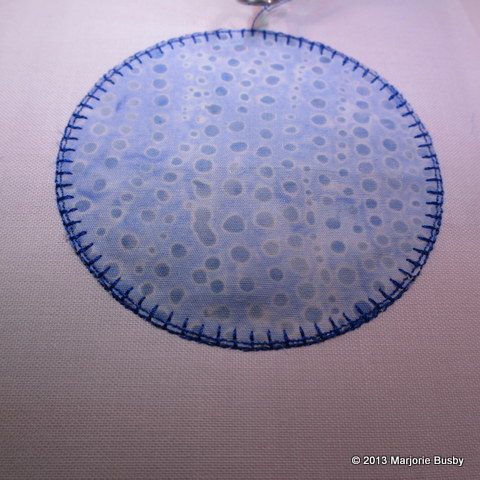
Complete the E-stitch/blanket stitch around the circle.
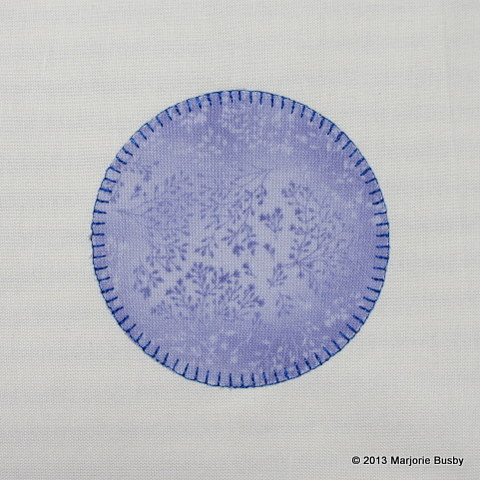
And that’s all there is to machine embroidery appliqué using pre-cut shapes.
Now, let’s look at machine embroidery appliqué using traditional methods.
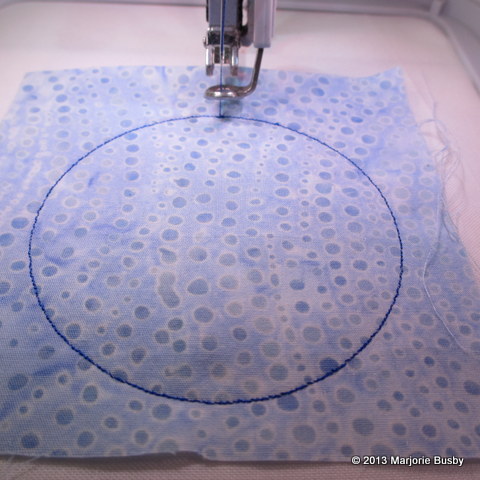
Step 1:
Here again, the first step is to stitch the placement line for the fabric.

Step 2:
Place a layer of fabric over the placement line and stitch a tackdown stitch using the embroidery machine. This tackdown stitch is exactly on top of or just inside the original placement line.
Step 3:
When the stitching is complete, carefully trim the excess fabric away using curved scissors. The fabric remains in the hoop throughout this process.
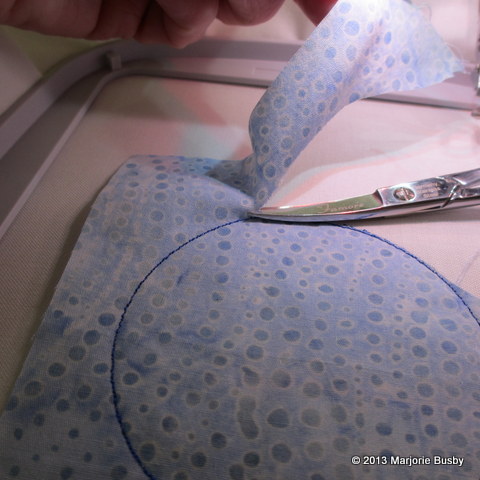
Step 4:
When the fabric shape has been trimmed away, the E-stitch or blanket stitch is completed by the embroidery machine as shown below. However, the difference here is that the tackdown stitch shows through the open E-stitch. If that tackdown stitch is removed, the embroidery below would look as beautiful as the embroidery shown above using pre-cut shapes.
Step 5:
To make this possible, the tackdown stitch must be disguised or removed. To disguise the stitch, one can use a thread that matches the fabric as closely as possible and leave the tackdown stitch as part of the embroidery. The stitches are still visible, but are less noticeable than using a thread that matches the decorative stitches.
This works fine for a firm fabric such as a cotton. For softer fabrics, like silk or felt, even stitches created with matching thread are too visible.
The best method is to actually remove the tackdown stitches.
Because those stitches may be small (depending on the embroidery digitizer), a very simple method for removing those stitches is to use a water soluble thread in the bobbin when stitching the tackdown stitches.
The key here is to be sure to change the bobbin back to regular bobbin thread before stitching the decorative E-stitch. After the E-stitch is complete, it is very easy to use a wet cotton ball, foam paint brush or washcloth to wet those dissolvable stitches and pull the upper thread gently from beneath the E-stitches.
Share tips, start a discussion or ask one of our experts or other students a question.
No Responses to “Machine Embroidery Appliqué With the E-Stitch, AKA Blanket Stitch”