
If you have embroidered long enough, you probably have a few machine embroidery tricks and tips under your sleeve. Fortunately, embroiderers are very generous when it comes to sharing their knowledge with others.
Read on to discover five machine embroidery tips and tricks you will not want to miss!
Learn five tips, tricks, and hacks for machine embroiderers.
Photo via Sammy Payne Meadows
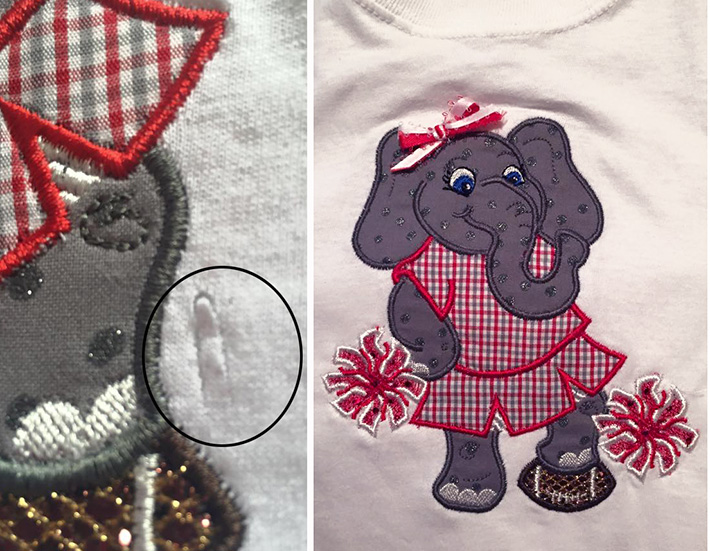
1. Best. Bandage. Ever.
It has happened to all of us. You are finished embroidering a design on a shirt and clipping away the excess stabilizer when you accidentally clip the shirt.
Samantha Payne from Red Hill, Alabama, came up with a great save. Instead of scrapping the project, she uses her editing software to copy another pompom and stitch it over the cut area. Catastrophe averted! And it looks fantastic. Except for sharing this wonderful tip, no one would ever know the difference.
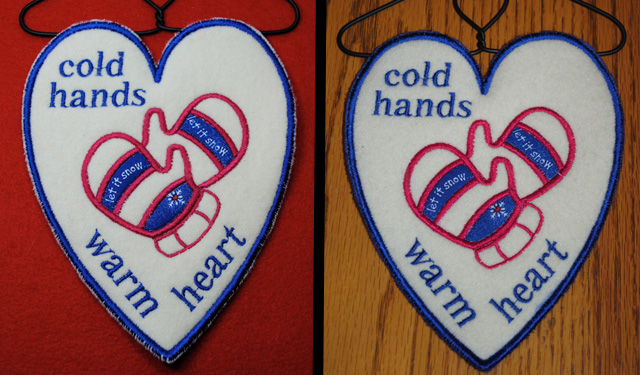
Photo via Debbie Henry
2. Color cover-up
Whether it is tearaway stabilizer showing around the edges of your freestanding appliqué (above) or a malfunction that shows too much background when a 48,000-stitch design is almost finished (below), it always pays to have some permanent markers in your stash.
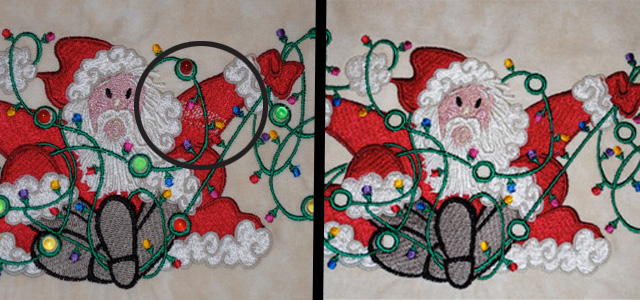
I slid the tip of a blue marker around the edge of the heart and the tearaway stabilizer “disappeared.” Coloring in Santa’s splotchy arm made the mistake much less noticeable. You can also invest in textile markers, but standard office supply permanent markers work just fine and cost much less.
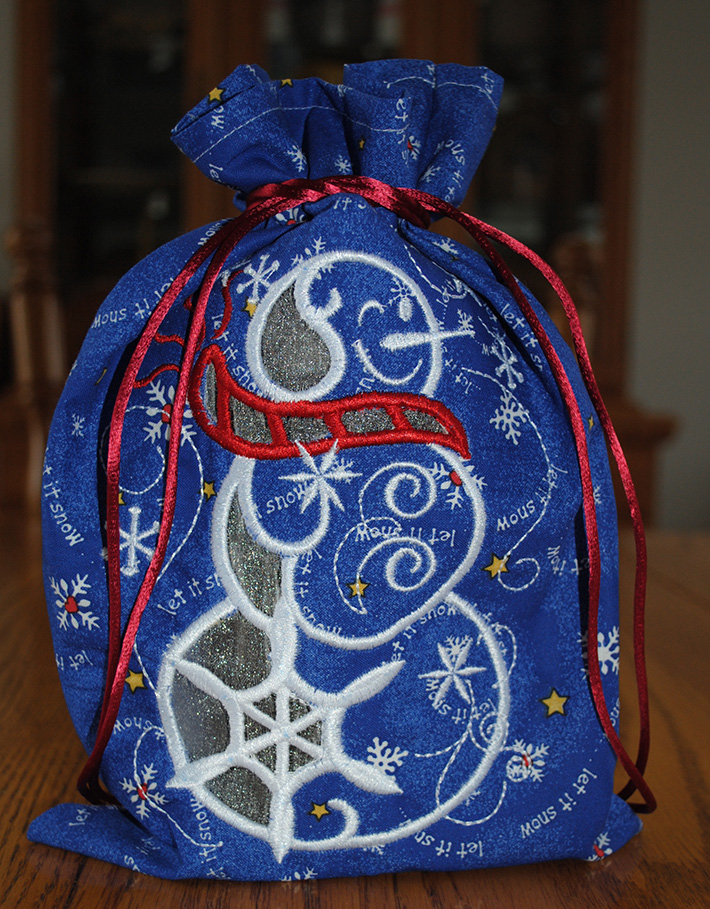
3. Organza windows
Cutwork is a beautiful technique that is often reserved for decorative stitching but can become quite useful with the addition of sheer organza. A
cutwork gift bag would not work well with open areas, so after stitches are placed where fabric will be cut away, lay a piece of organza on top and run the cutwork placement stitches again. Cut away the fabric just like you would with appliqué, trim the organza close to the stitch line, and finish up with the satin stitches for a sheer, glistening window.
4. Electronic reminder
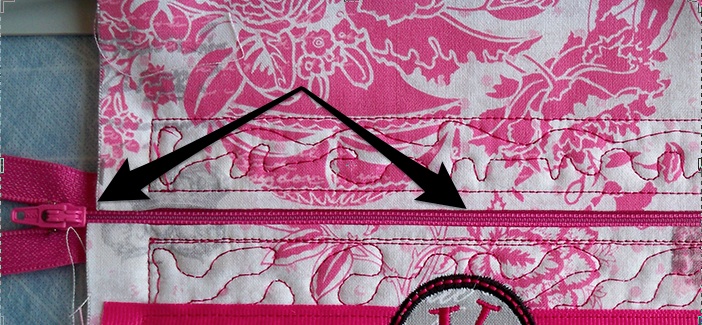
If you have ever stitched a zippered bag in the hoop, you may have had the misfortune of not moving the zipper tab to the middle before attaching the back of the bag. That means when you turn the bag right-side-out, the zipper is in the seam allowance and you can not unzip the bag.
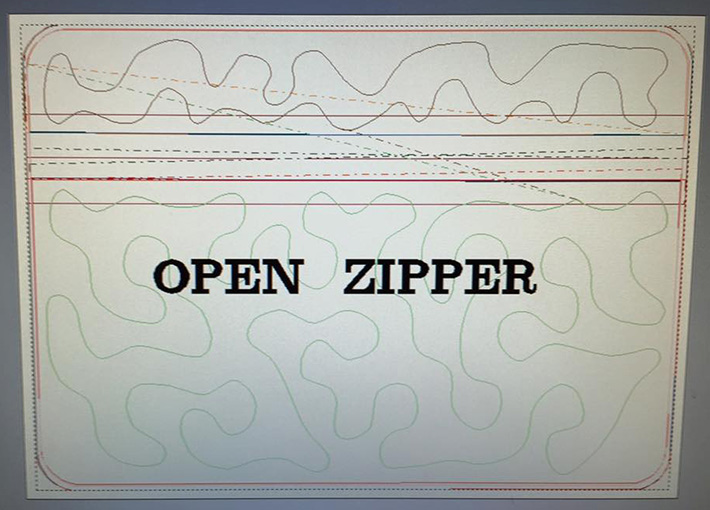
Photo via Sandy Kleypas
Sandy Kleypas of Crawford, Texas, came up with a stellar solution to make sure this didn’t happen to her. Using editing software, she added the words “open zipper” to her design just prior to the final step, saving precious time, supplies, and a lot of frustration!
5. Cleaning sticky hoops
The best way to avoid sticky hoops is to not ever spray adhesive in the hoop (spray it on the back of the fabric you are placing in the hoop). Still, hoops can get gummed up when using adhesive stabilizers and stick adhesives.
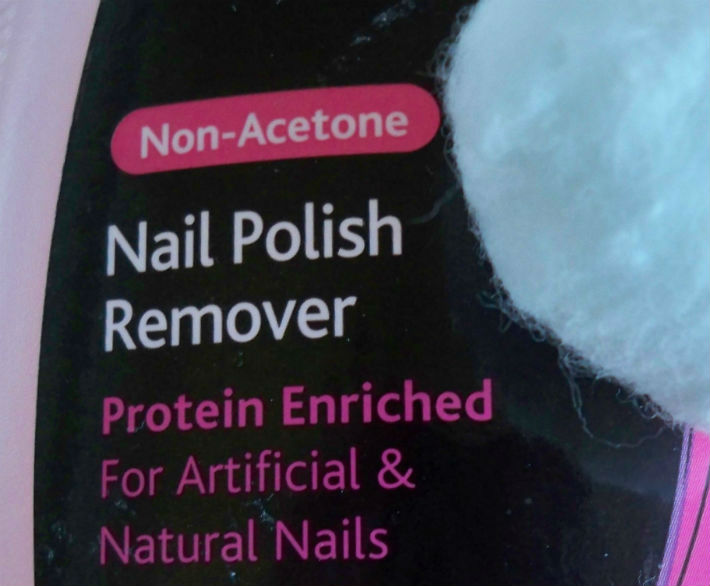
Photo via Debbie Henry
When they do, use non-acetone nail polish remover on a cotton ball. Be sure to use non-acetone which is safe for artificial nails and won’t hurt your plastic hoops.
Excellent tips. Particularly the Zipper one.