
Have you been frustrated by miter joints that don’t quite fit, leaving gaps in the corners? I’ll show you a jig I use to cut dead-on miters that match up perfectly every time. In this post, I’ll demonstrate how to make my miter/bevel jig and on Friday, I’ll follow up with a post on how to use it to make boxes with mitered corners. Sometimes I think I enjoy making jigs as much as I enjoy making furniture, because they are easy to build, improve my accuracy and expand the capacity of all my woodworking machines.
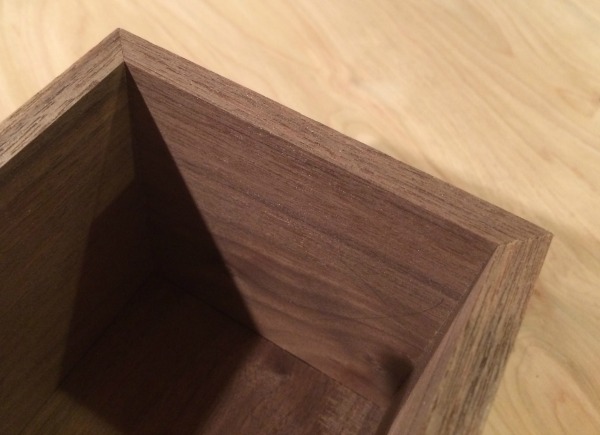
Miter joints that fit perfectly are a sign of attention to craftsmanship.
Jig options for cutting miters
There are lots of jigs out there to cut miters. I have one that holds the board at 45 degrees but I have two problems with it. First, I don’t like how the little cut off piece rattles around on the blade after it comes off. Second, I find it difficult to keep longer pieces parallel to the blade. It’s also difficult to make repeat cuts so all the boards have the exact same dimensions.
My solution
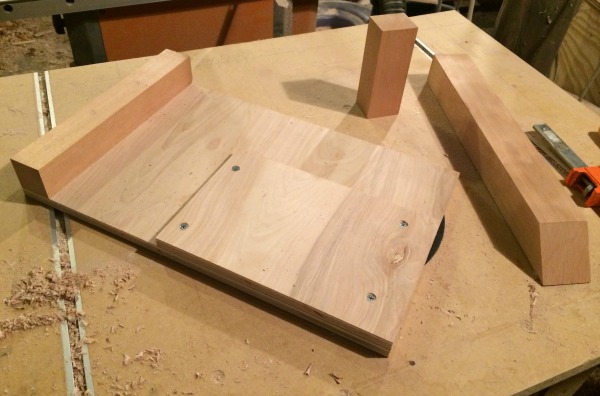
My solution is a flat jig that rides against the table saw fence. It consists of a rectangular piece of plywood with a hardwood fence on the near end and a smaller rectangle with one edge that is parallel to the blade. To adjust for boards of different widths, you adjust your table saw fence.
Making the jig
Step 1:
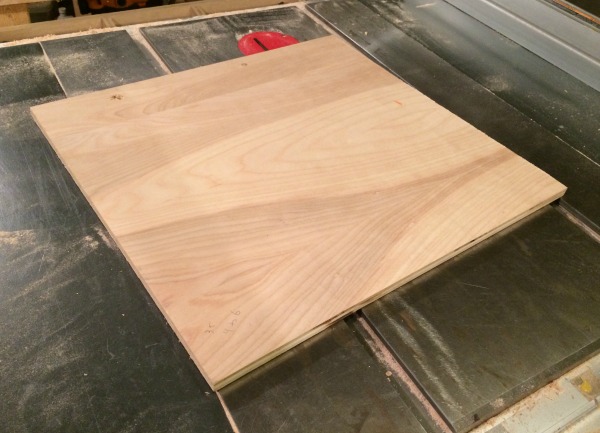
To make the jig, start with a piece of ½” plywood a little larger than 16” square and a piece of hardwood about 1.5” by 1.5” by 20”.
Note: I say “about” because the dimensions aren’t critical and you can change them depending on the size of boards you want to cut.
Step 2:
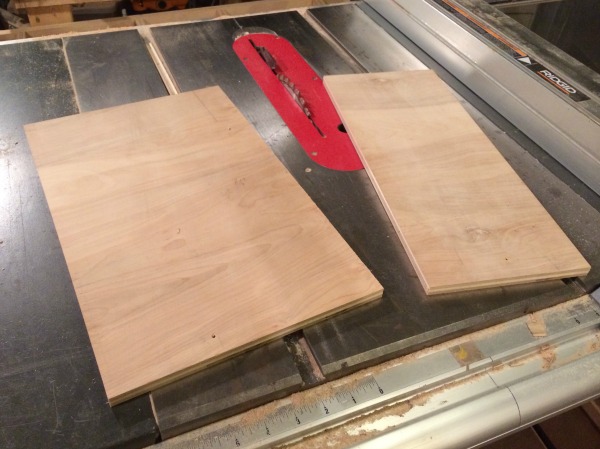
Rip the square at 10” so you have two rectangles — one at 10” by 16” and the other at about 6” by 16”. Crosscut the smaller rectangle to about 6” by 10”. Crosscut the piece of hardwood at 10” to fit the base of the jig. The off-cut can be used as a stop block.
Step 3:
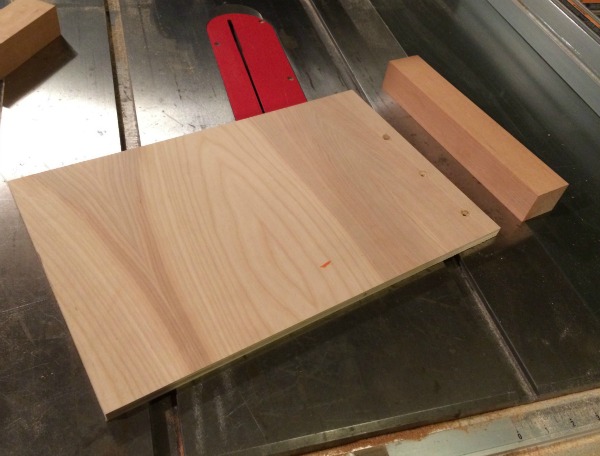
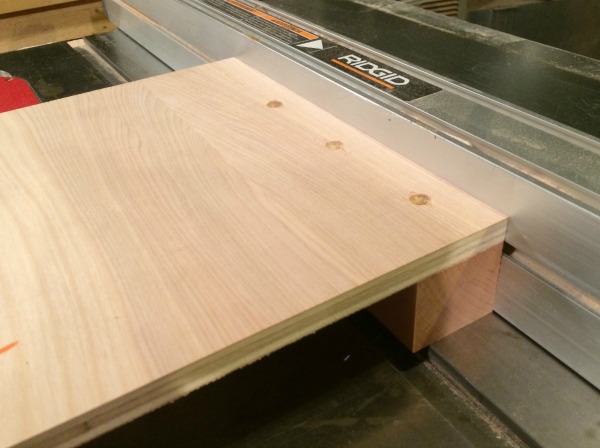
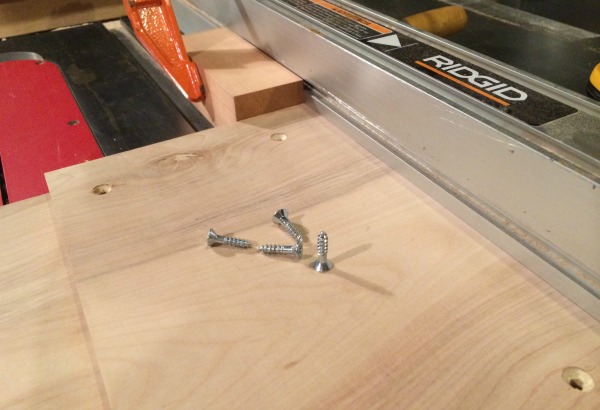
With the parts cut to size, it’s time to put the jig together. I find the top of my table saw, with the blade lowered under the table, to be the perfect place to assemble the jig. Attach the hardwood fence by drilling several countersunk holes near the edge of the plywood base from the underside up. Countersinking puts the head of the screw below the surface of the plywood so the plywood can slide freely on the table saw. The pilot holes for the screws should be slightly wider than the shafts of the screws.
If you are attaching two pieces together, using a wide pilot hole allows the screw to pass through one piece unobstructed so that its teeth bite into the other piece, pulling them snug to each other. Otherwise, the boards tend to scoot around while you are fastening them, making it difficult to control their position. While you’re at it, drill countersunk pilot holes at the corners of the small rectangle so they can be attached to the base.
Step 4:
Place the piece of hardwood upside-down against your table saw fence. Then, turn the plywood base upside-down and place it on top of the hardwood fence, registering them both against the table saw fence. You will need an off-cut piece at the other end of the plywood so that it sits securely on top.
Drive in several screws to attach the hardwood fence. Be careful not to drive screws within a couple inches of the left edge of the base. You might eventually rip through the jig at some point, and you don’t want the screws to come in contact with the table saw blade. I mark their locations on top of the fence with stars just so I remember where they are.
Step 5:
Clamp a piece of wood to the fence to make a sturdy corner. Flip the base over and register it against the corner. Place the smaller rectangle on top of the base so the back and right edges are perfectly flush. Carefully drive in the four screws.
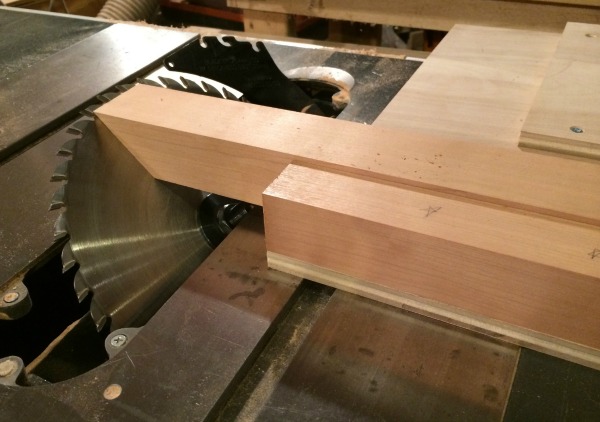
The downside of this jig is that you have to adjust your table saw blade to 45 degrees instead of leaving it at 90. To make it easier to adjust the blade, I cut a 45 degree angle on a thick piece of scrap hardwood. I hold this board against the fence of the jig and extend it to touch the blade. When the blade lines up with the angle of the board, I know I’m at 45 degrees.
Quick and easy
That’s it. If you want to get fancy, you could add a hardwood edge to the small rectangle. You could also add a few hold-down clamps if you prefer. I find it easy to hold boards on the jig as I run it against the table saw fence. The majority of the boards I will cut with this jig are about 4” wide, so I built the jig to accommodate that width. Feel free to change the dimensions to suit your needs.
On Friday, I’ll describe how I use the jig to make a box with mitered corners. The jig may seem simple, but i think you’ll be amazed at the accuracy you can achieve with it.
Share tips, start a discussion or ask one of our experts or other students a question.
No Responses to “Make a Jig for Cutting Miters and Bevels: Part 1”