
Do you have a wishlist of quilting projects you’d like to make? Does it seem like that list is constantly getting longer? In the past, quilters stitched faster and slept less in order to make as many of their wishlist quilts as possible. But recently, we’ve found a new solution: mini quilts!
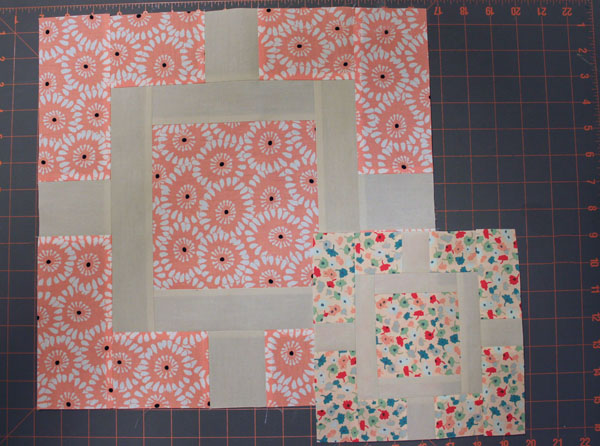
Making mini versions of our favorite quilt patterns allows us to make these beautiful quilts faster, and display them easily. Several pattern makers, including Thimble Blossoms and Jaybird Quilts, have started releasing mini quilt patterns. If you have a quilt on your must-make list that isn’t yet offered as a mini pattern, it is simple to miniaturize it on your own, and you don’t need a black belt in algebra to make it happen (I promise)!
Your first option in making a mini version of a quilt is to make a single block. Piecing one block, quilting and binding it is a simple and fast way to make a mini of any quilt. If the quilt blocks are smaller than 14″, consider making four blocks. If the blocks are 4″ or smaller, consider making nine. This will give you the look and feel of the quilt, without the financial or time commitment of making a bed-sized quilt.
If you’d like your quilt even smaller, or the pattern is best achieved with multiple blocks, you can do some basic math to figure out what size you need to cut your pieces. In this post, I’ll give you two examples. In my next post, we’ll move on to some (seemingly) more complicated examples.
The basics of a quilt block
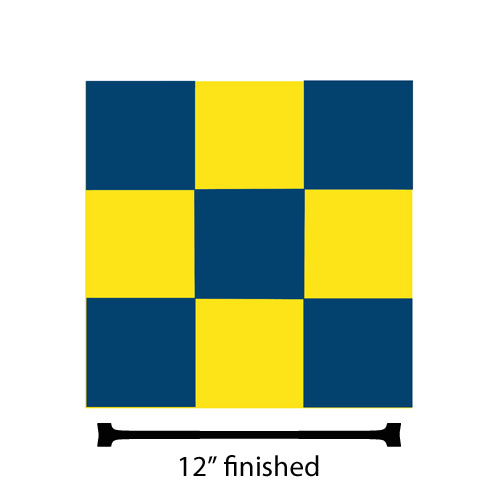
We’ll use this 12″ finished 9-patch block as an easy example. First, we need to understand what 12″ finished’ means. 12″ finished means that when the block is finished (in the quilt), it measures 12″ square. In quilting, we use a ¼” seam allowance, so that means that before the block is sewn into the quilt, each side measures 12.5″, because a ¼” seam is added to the top, bottom, and each side.
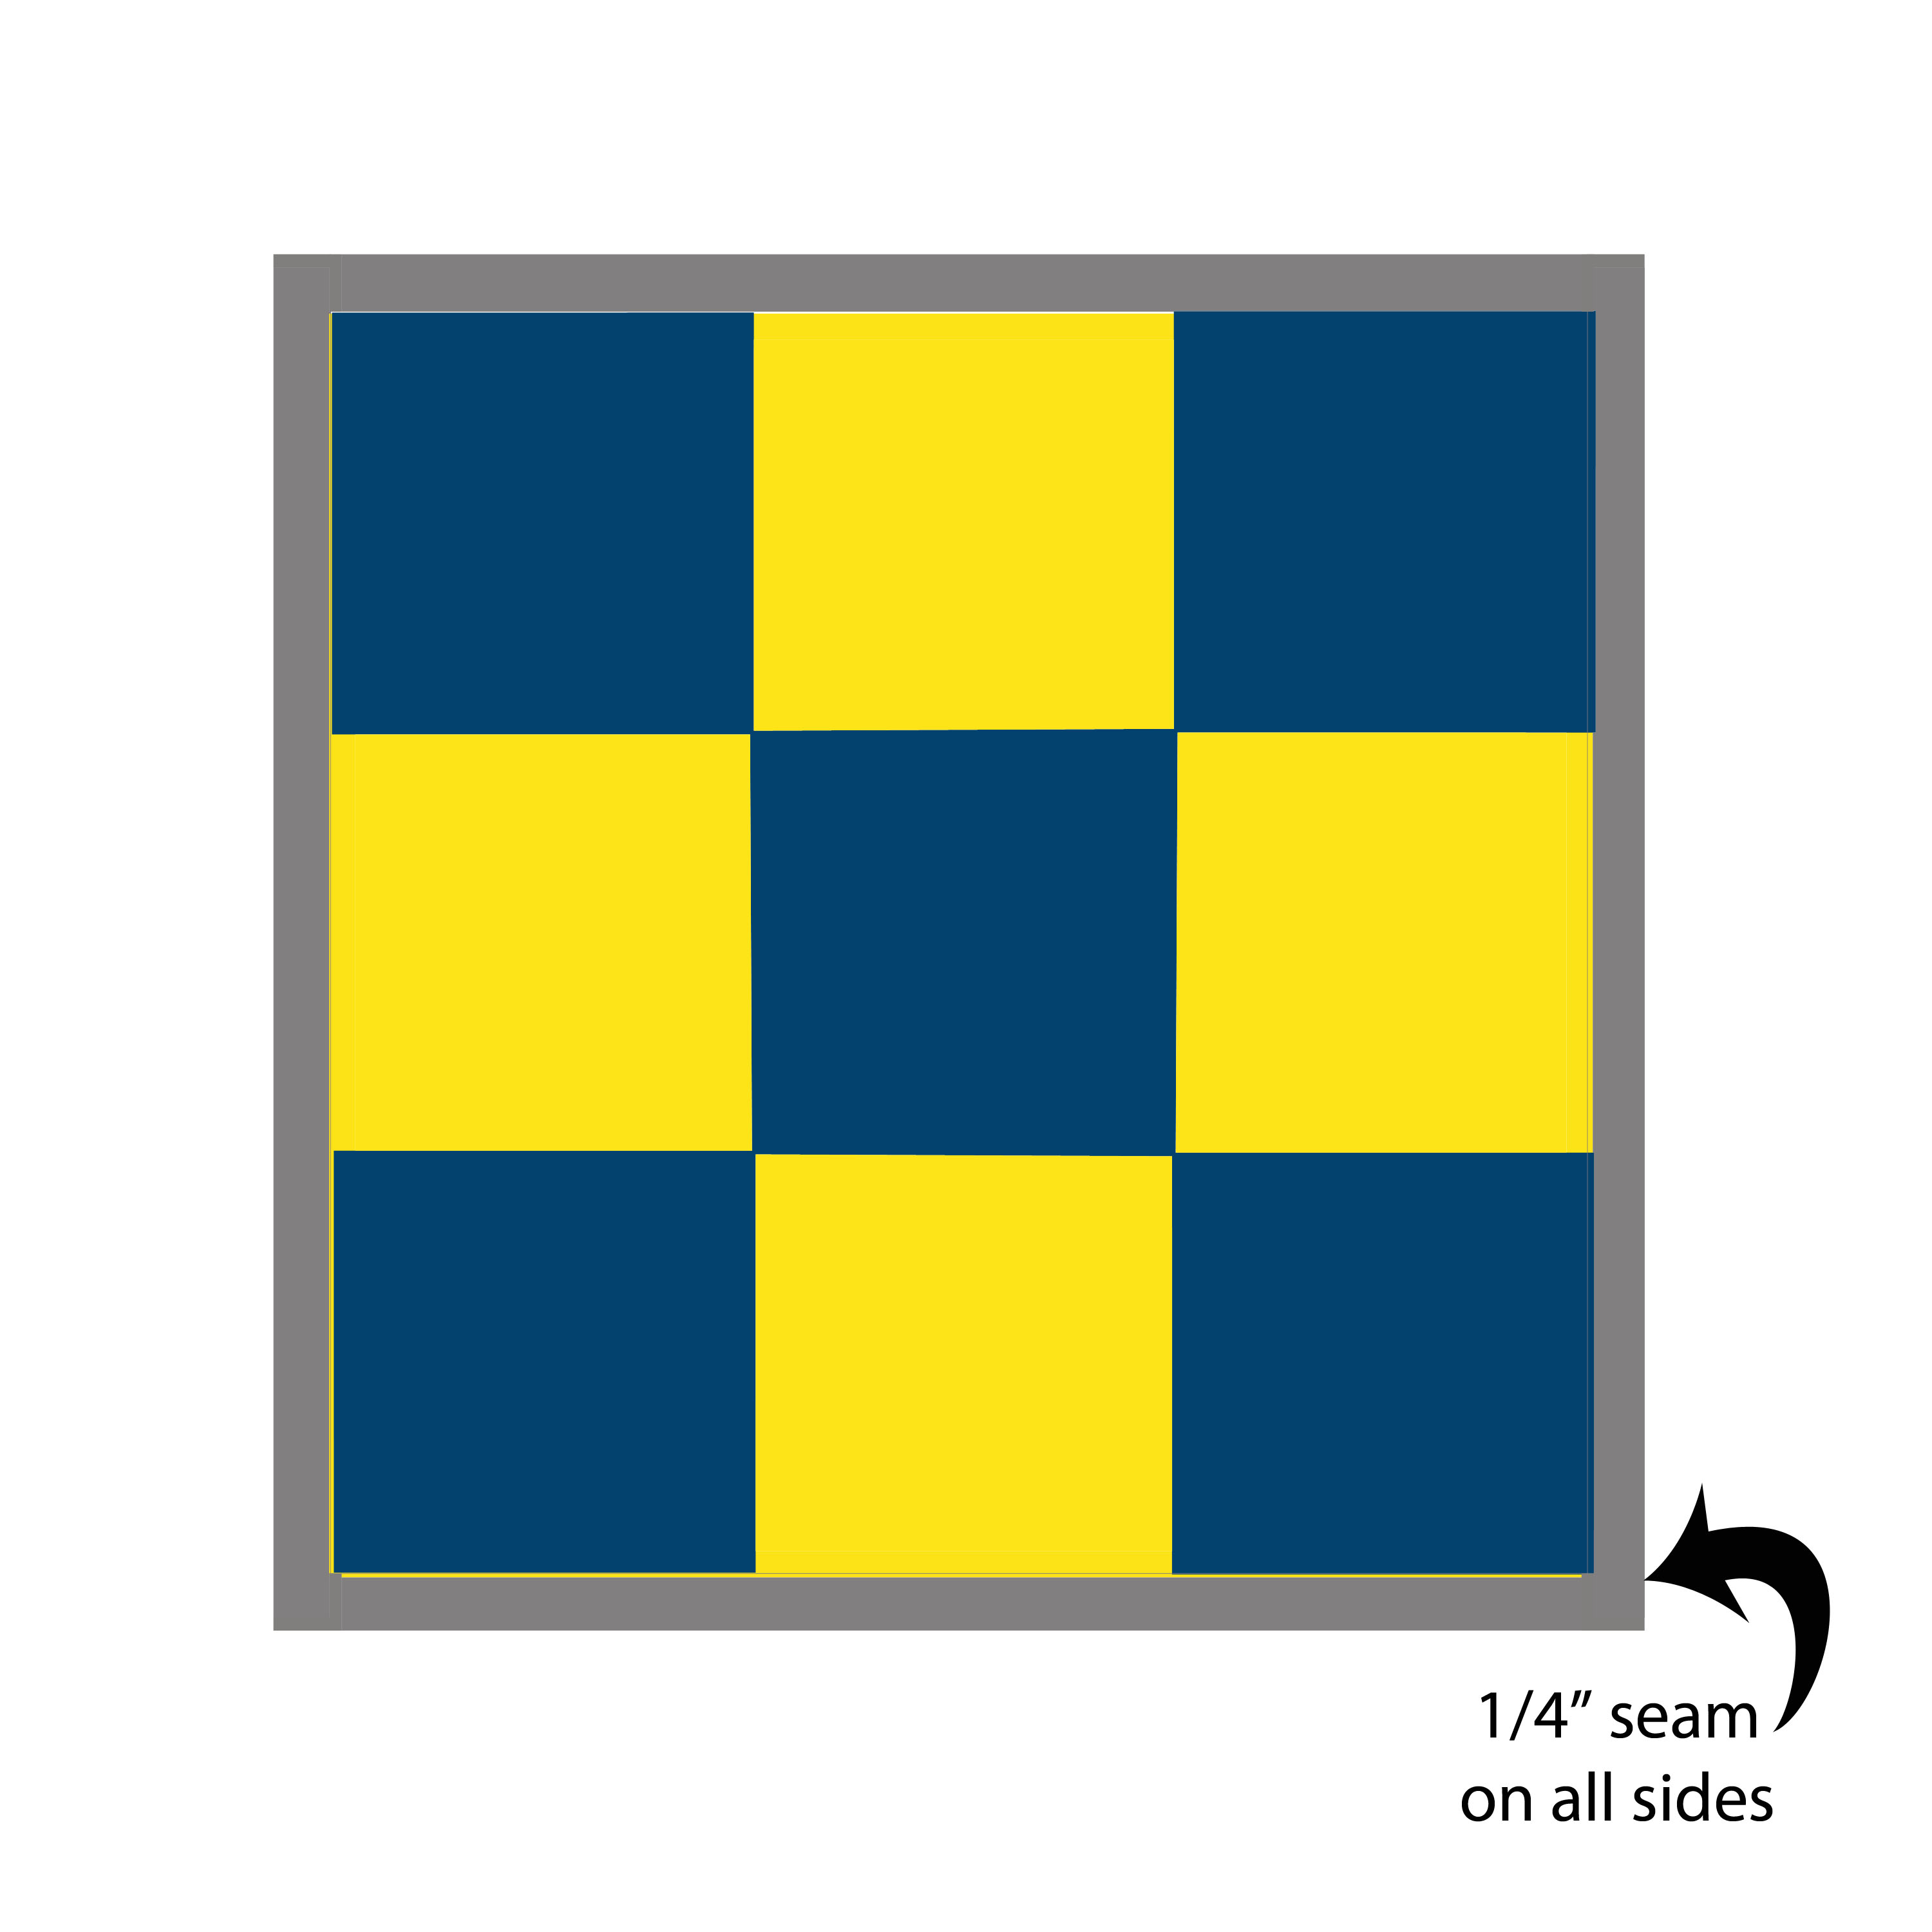
That also holds true for the pieces of the block. On a 12″ finished 9-patch block, each of the pieces will be 4″ finished, which means 4.5″ when they are cut, because ¼” is added to all sides. Once you understand that the difference between a rectangle or square when it is cut, and after it is stitched is ½”, you’ve won half the battle.
Making mini quilt blocks
To miniaturize the block, we take these steps:
1. Start with the piece sizes.
2. Decide how small to make the block.
3. Come up with your divisor.
4. Remove seam allowances from BOTH sides (subtract ½”).
5. Divide BOTH sides by divisor.
6. Add seam allowances to BOTH sides (add ½”).
Make a mini 9-patch
Let’s follow the steps with our 9-patch.
1. The directions for making this 12″ finished 9-patch block would call for us to cut five dark 4.5″ squares and four light 4.5″ squares.
2. We want to make the block 6″.
3. To make the block 6″, we divide by 2 (12 divided by 2 = 6).
4. Removing the ½” of seam allowance from BOTH sides would mean five dark 4″ squares and four light 4″ squares.
5. Divide both sides by 2 makes five dark 2″ squares and four light 2″ squares.
6. Add back in the seam allowances means cutting five dark 2.5″ squares and four light 2.5″ squares.
WHEW! That wasn’t so bad, right?
Make a mini Garden Path block
Ready for something a little trickier? How about this Garden Path block?
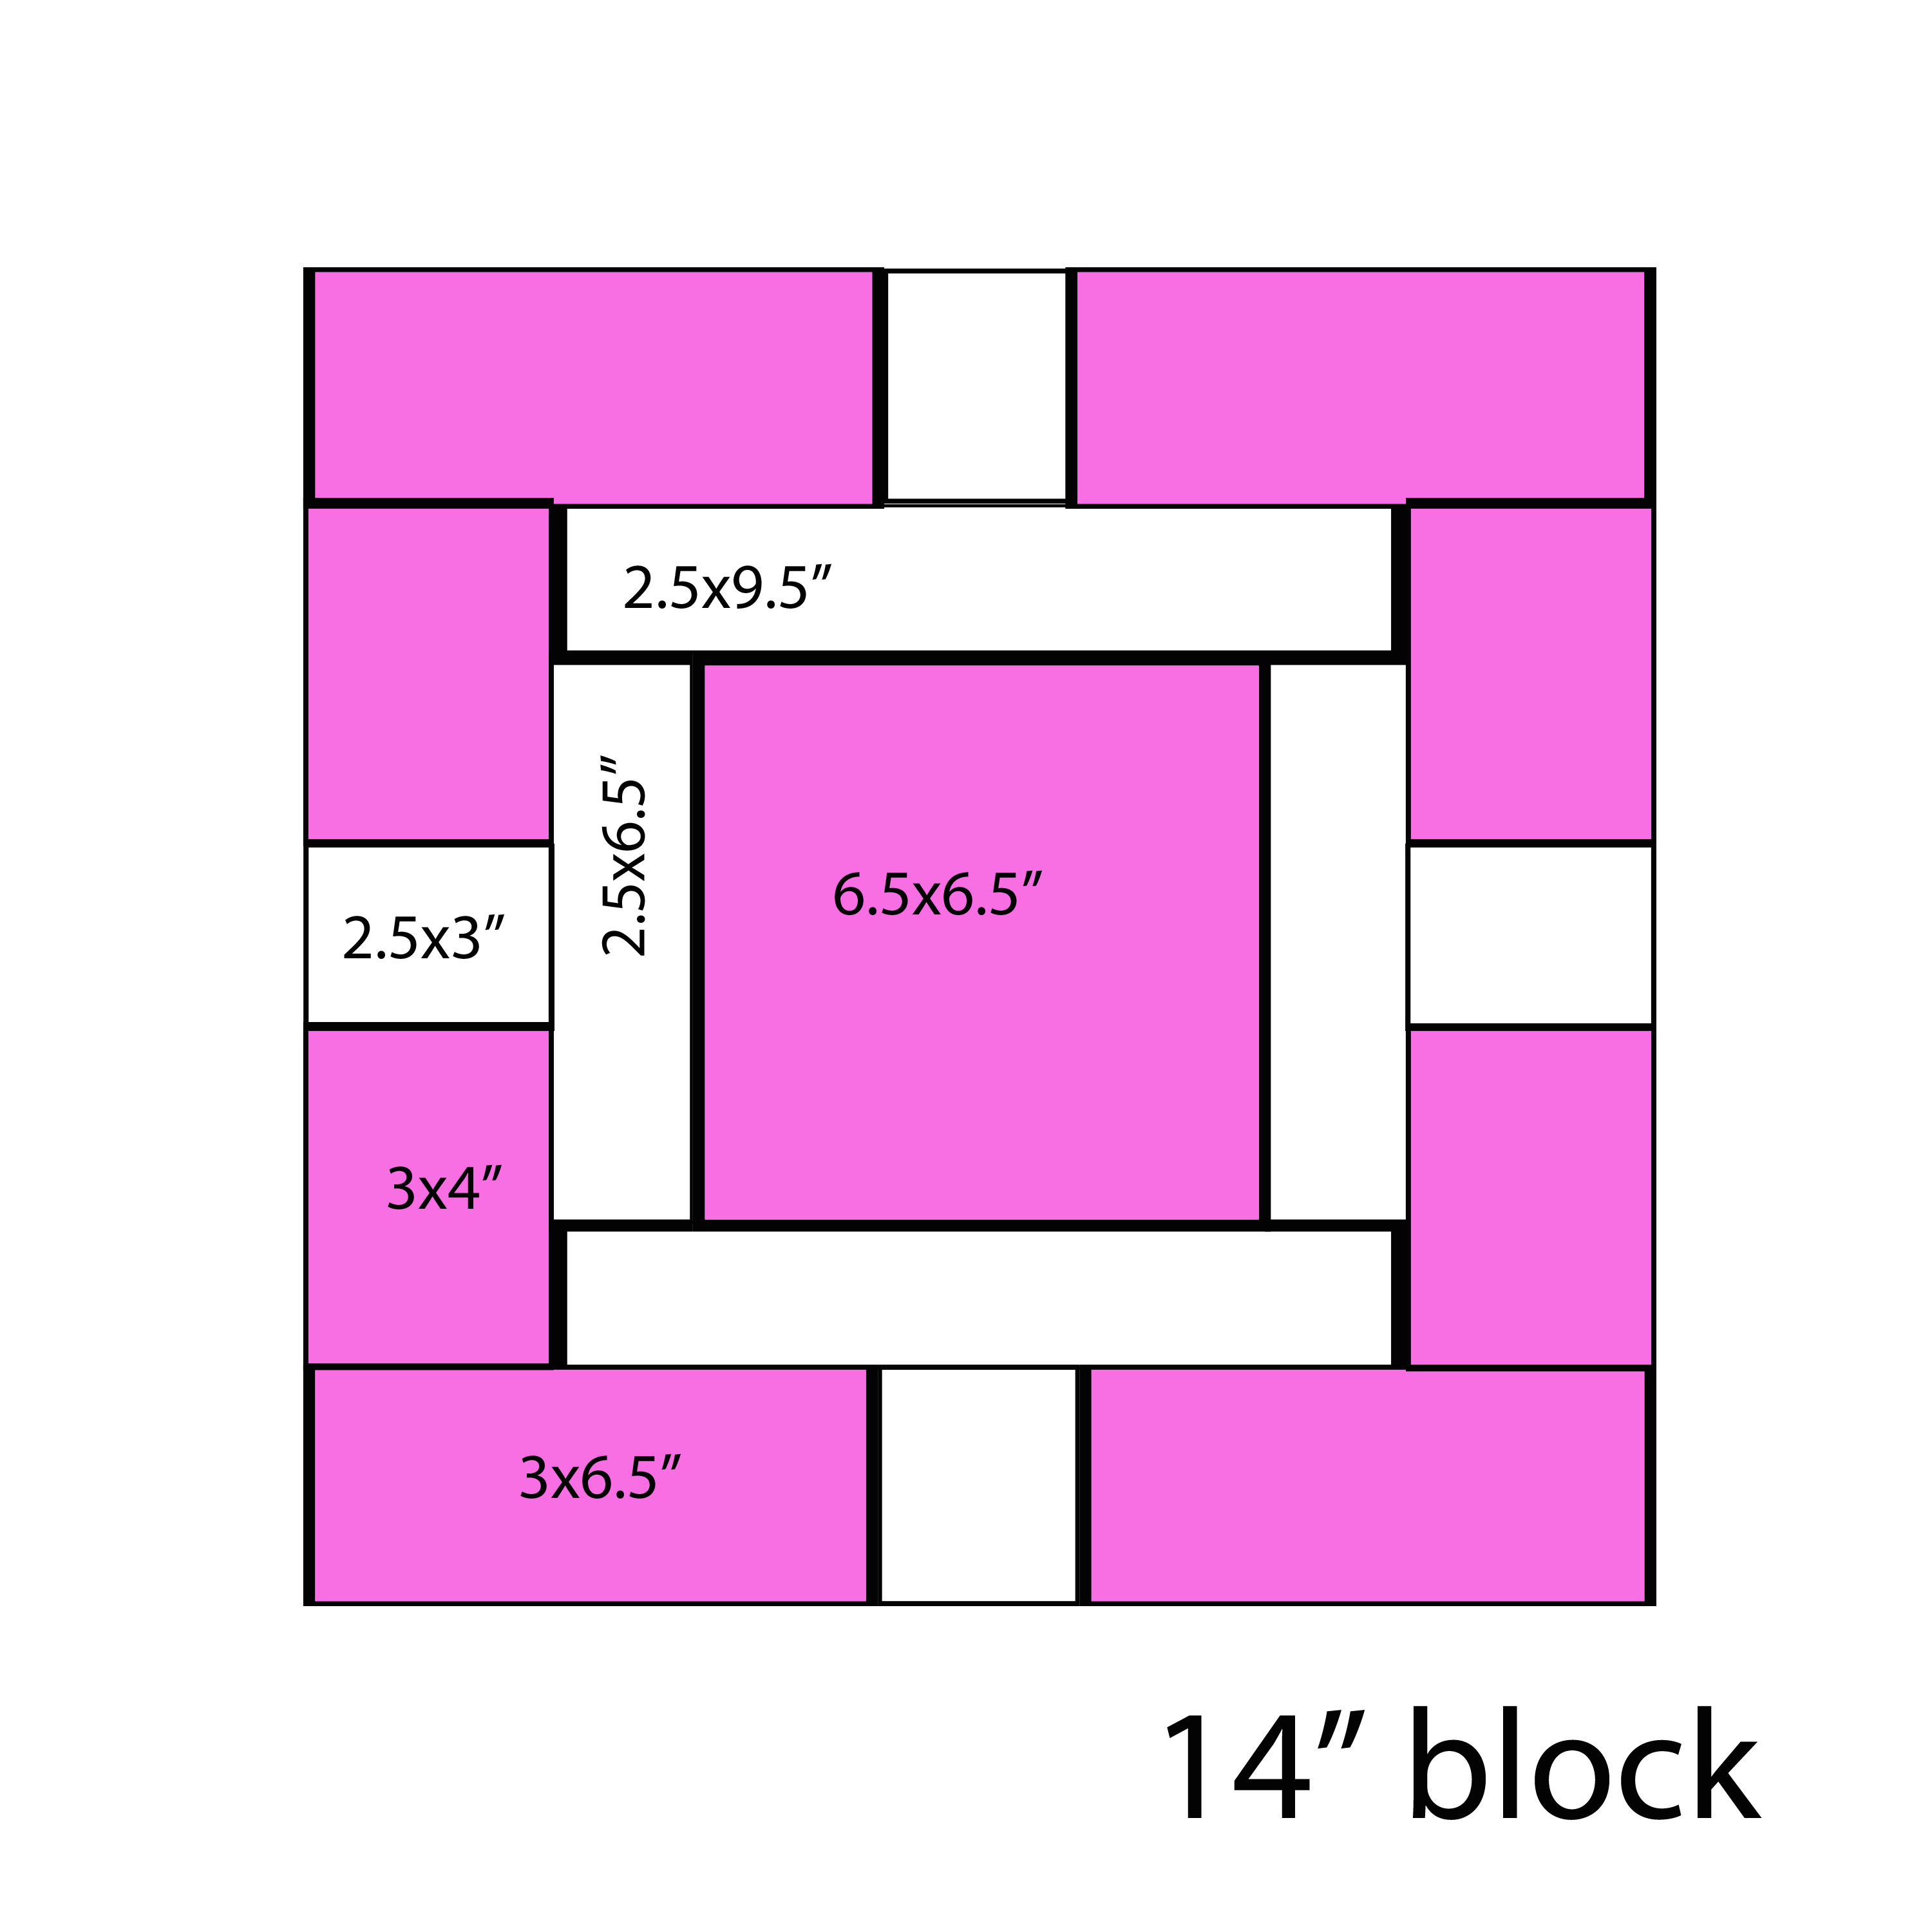
OK, this one has a lot going on. But we use the exact same steps as before, just on more pieces. Let’s start.
1. Dark print
- 1 square 6½˝ x 6½˝
- 4 strips 3˝ x 6½˝
- 4 rectangles 3˝ x 4˝
Cream print
- 4 rectangles 2½˝ x 3˝
- 2 strips 2˝ x 9½˝
- 2 strips 2˝ x 6½˝
2. Let’s take this 14″ block down to 7″.
3. That makes the divisor 2.
4. Pattern pieces minus the seam allowances:
Dark print
- 1 square 6˝ x 6˝
- 4 strips 2.5˝ x 6˝
- 4 rectangles 2.5˝ x 3.5˝
Cream print
- 4 rectangles 2˝ x 2.5˝
- 2 strips 1.5˝ x 9˝
- 2 strips 1.5˝ x 6˝
5. Now dividing BOTH sides by our divisor of 2 (feel free to use a calculator!):
Dark print
- 1 square 3˝ x 3˝
- 4 strips 1.25˝ x 3˝
- 4 rectangles 1.25˝ x 1.75˝
Cream print
- 4 rectangles 1˝ x 1.25˝
- 2 strips .75˝ x 4.5˝
- 2 strips .75˝ x 3˝
6. Add back in seam allowances:
Dark print
- 1 square 3.5˝ x 3.5˝
- 4 strips 1.75˝ x 3.5″
- 4 rectangles 1.75˝ x 2.25˝
Cream print
- 4 rectangles 1.5˝ x 1.75˝
- 2 strips 1.25˝ x 5˝
- 2 strips 1.25˝ x 3.5˝
It looks like a lot of steps, but it really isn’t that complicated! Just follow each step, apply it to each cut size, and you’ll be making mini quilts in no time!
Get even more advice on properly cutting strips and blocks in the FREE class Piece, Patch, Quilt.
A few more tips for making mini quilt blocks:
- When making a full mini quilt, don’t cut all your blocks after doing the math. Cut a single block and stitch it together before cutting all your pieces. This is a simple way to double-check your math.
- If your divisor is 2, you won’t be making a block half the size, you’ll be making a block one-quarter the size, because you’re dividing both the height and width in half. Similarly, if your divisor is 3, you’ll be making a block 1/9th the size of the original block.
- Remember the scale of your print. A large print may be cut up so small that it doesn’t read well on a mini. Solids work well, as do smaller prints.
- When making a mini quilt, you will be making smaller blocks — it may make sense for you to also make less blocks. Whereas you might make 20 blocks for a bed-sized quilt (4 blocks by 5 blocks), a total of 9 blocks (3 blocks by 3 blocks) might be a better format for your mini quilt.
What about blocks with triangles? Triangles have a special way of being re-calculated, and we’ll tackle that tomorrow on the Craftsy blog!
You might also enjoy our post on mini quilt patterns and projects and our 10 fresh mini quilts to inspire.
About the author
 Carolina Moore has been crafting her whole life. She started cutting and gluing as soon as her fingers could manage the scissors and paste, and started sewing when she was 6, and quilting when she was 12. She has made more quilts than her house can hold, but that doesn’t stop her!
When Carolina’s online you can find her at 30 Minute Crafts and Always Expect Moore. When she’s not working at the computer, she’s behind a sewing machine, wielding a glue gun, or chasing her two young boys. She loves picnics in the park, snuggles with her kiddos, and has never managed to find enough hours in the day…
Share tips, start a discussion or ask one of our experts or other students a question.
No Responses to “Make Mini Quilt Blocks With Just a Little Bit of Basic Math”