
What if I told you you’d never have to purl again when you’re knitting stockinette stitch flat? Is that exciting for some of you knitters out there who detest purling?

A technique called mirror knitting lets you knit back and forth without ever purling or even turning your work.
I know. Crazy, right?
The mirror knitting technique has other names, too: It’s also called backwards knitting or reverse, for example. And if you’re a left-handed knitter, it’s possible that you already knit using mirror knitting!
I’ll warn you: mirror knitting feels super awkward at first, especially for right-handed knitters and experienced knitters who’ve been knitting the same way for decades. But it’s a great way to make stockinette stitch more exciting.
Why try mirror knitting?
Some knitters just hate purling. Others are slower at purling, and mirror knitting can help you complete projects faster.
Even if you like purling, mirror knitting is still worth a try. It’s a fun challenge, and trying something new can make you a better knitter. Plus, it can break up the monotony of a project with lots of stockinette stitch, as you’ll work every other row in reverse (and laugh at yourself as you fiddle with the new technique).
Next time you’re working on a project that requires several rows of stockinette stitch, give this tutorial a try to challenge yourself!
Mirror knitting tutorial
Setting up your swatch
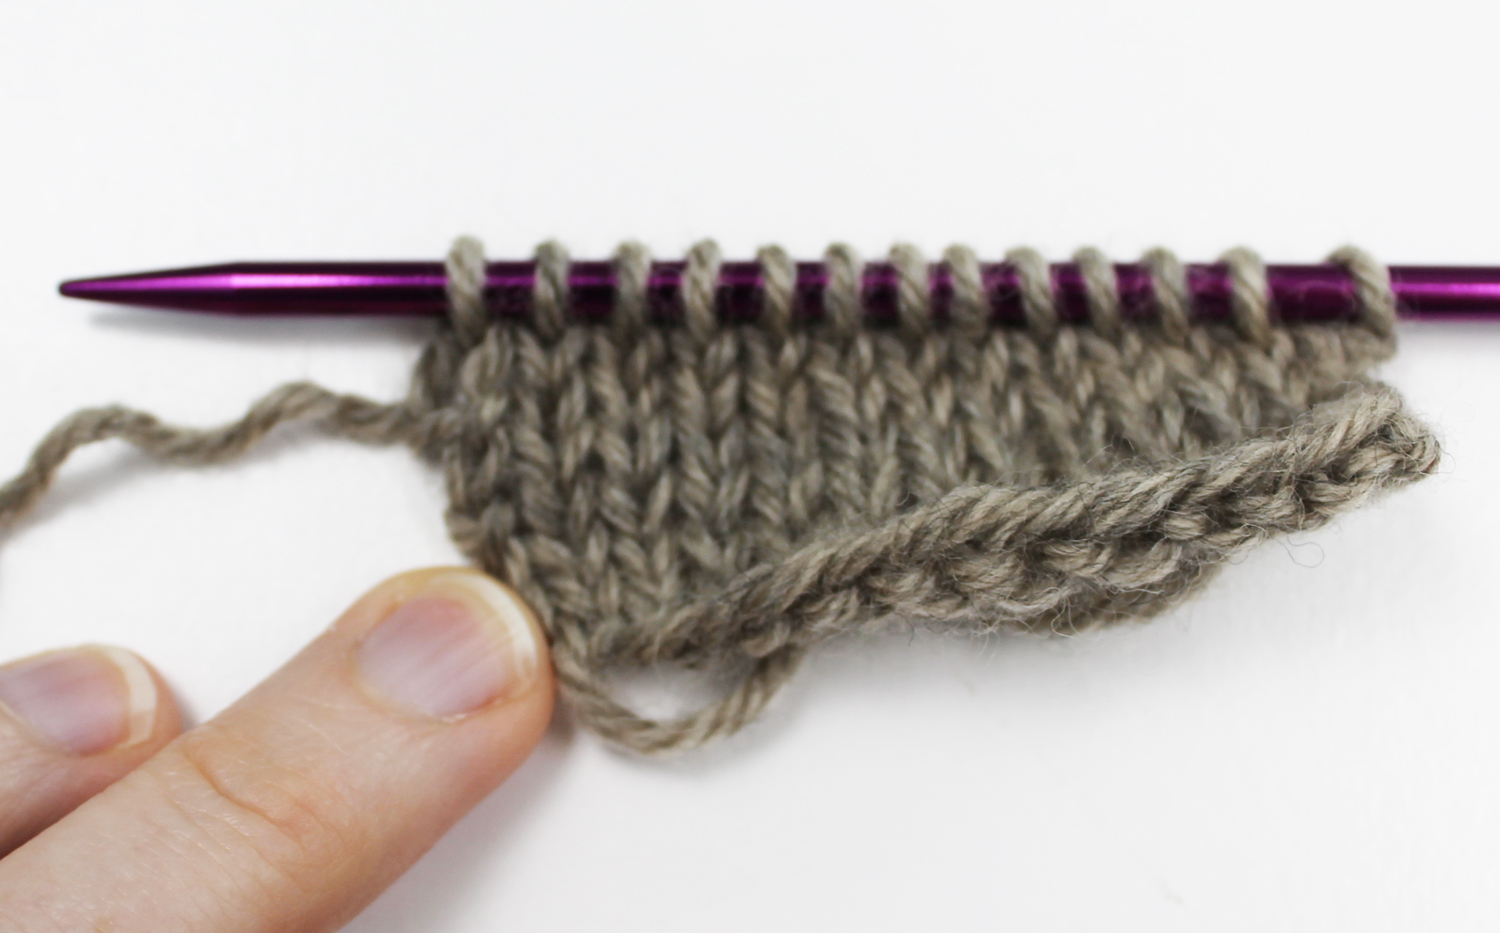
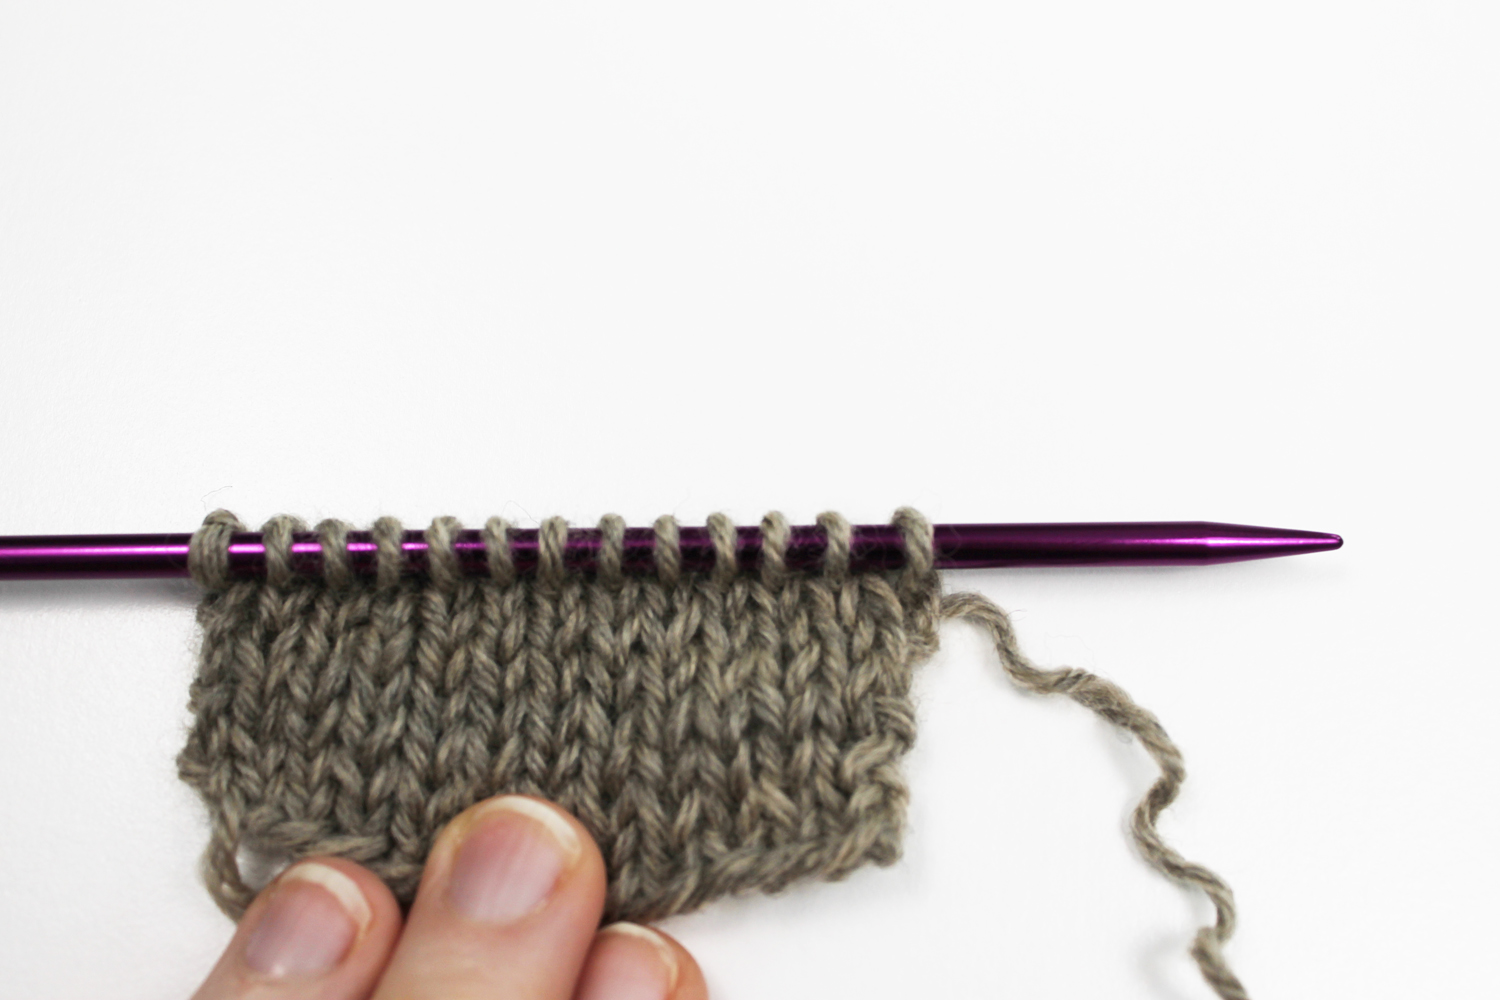
I’ve created a stockinette swatch here with Cloudborn Superwash Highland Worsted in Shaela Heather. Knit the first row as usual, which for me is knitting the stitches on the left needle onto the right needle.
Then, instead of turning your work as usual, keep everything where it is, with the right side of the work facing you. The working yarn, as pictured above, will be to the left of your work.
Note that this is the opposite of our usual knitting. Usually when we turn, the working yarn is to the right. But since we’re working in reverse and never turning, we’re starting from the left side.
Step 1:
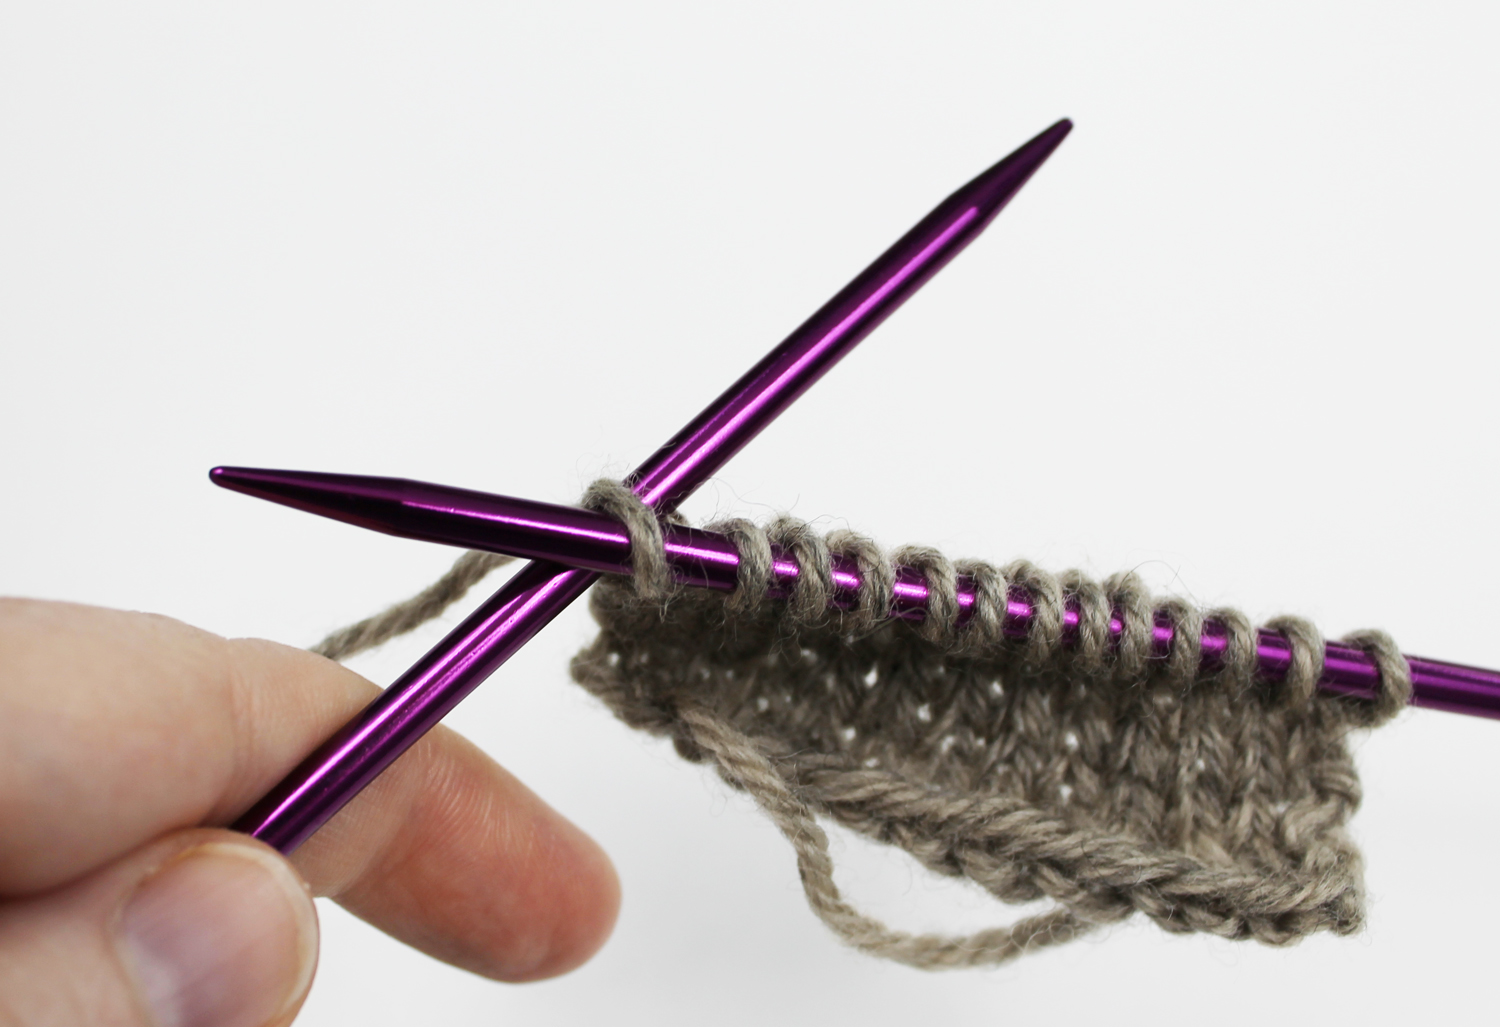
Insert the left needle into the first stitch on the right needle, from front to back. Your left needle will be pointing toward your knitting.
Step 2:
Wrap the working yarn counter-clockwise around the needle, just as you would if you were knitting normally.
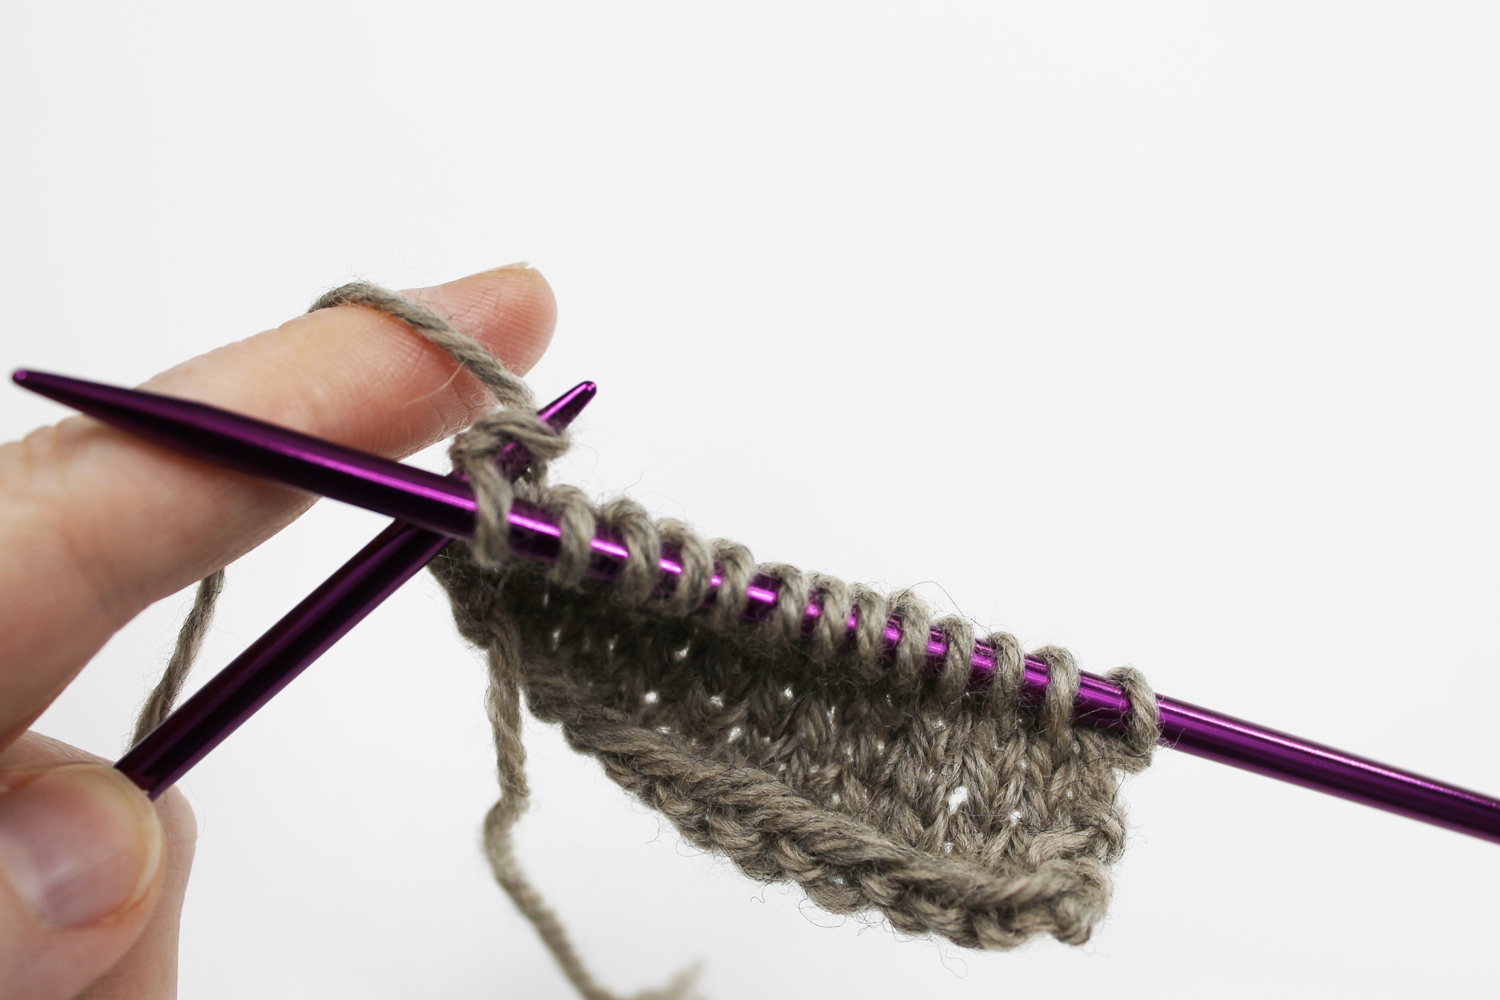
Step 3:
Pull the stitch through, then drop the old stitch of the previous row from the right needle. You’ll now have one stitch on your left needle.
Step 4:
Repeat Steps 1-3 across the row.
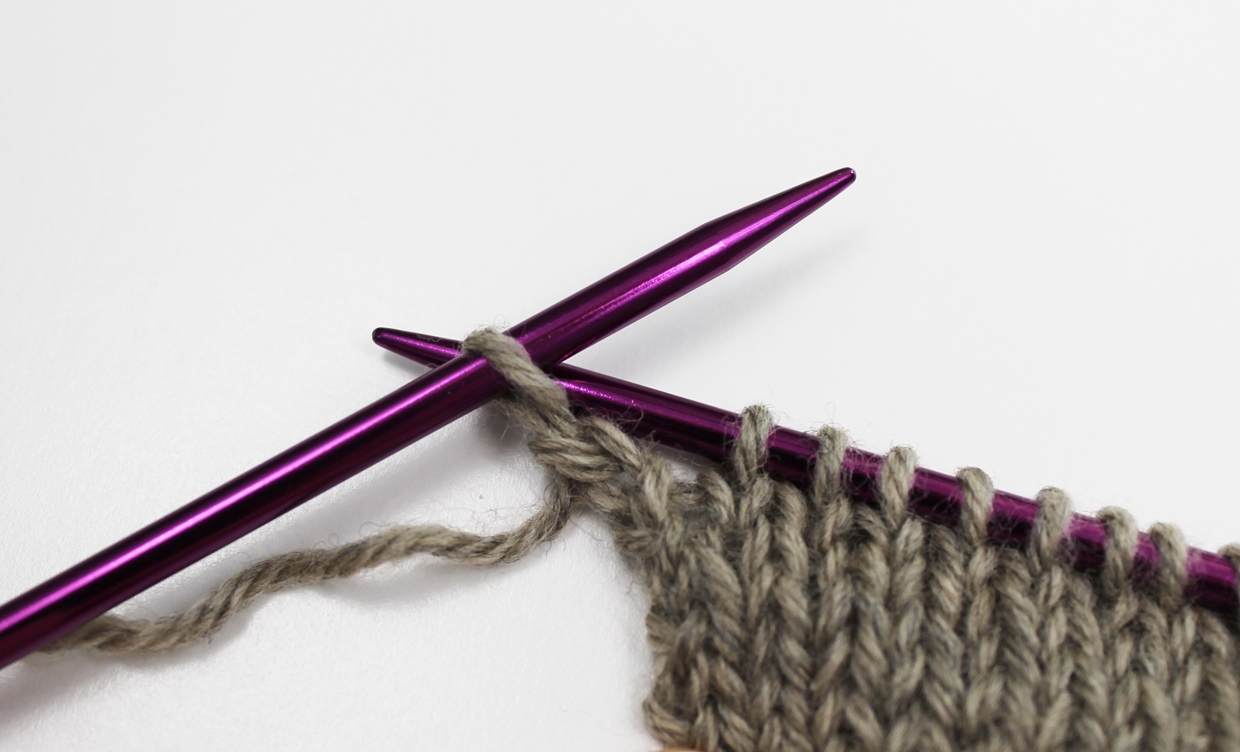
When you finish the row, your working yarn will be on the right side of the work, close to your needle tip. This should look familiar! Every other row of mirror knitting will be knit right to left, just like normal knitting. However, the rows in between will be knit from left to right, just like in our tutorial.
If you flip the piece over, you’ll still see purl bumps, just like you normally do with stockinette stitch.
Feels weird, doesn’t it? The first time I tried mirror knitting, it felt really awkward. But like any other stitch, if you practice it enough, you’ll get used to it!
One tip for knitters who are finding this awkward is to try a different knitting style. For example, if you’re a continental knitter who usually holds the yarn in your left hand, see what it feels like to try English style and throw the yarn with your right hand.
Share tips, start a discussion or ask one of our experts or other students a question.
No Responses to “Hate Purling? With This Technique, You Don't Have To!”