
This special guest post is from Marilee Rockley, instructor of the Craftsy class Shuttle Tatting. Sign up today to learn how to make lovely lacy jewelry and embellishments to enhance your quilts, paper crafts and more!
Tatting tutorial for a self-closing mock ring
Gorgeous tatting jewelry projects often feature a central bead in their design. A technique to achieve this is “self-closing mock ring” (abbreviated as SCMR), or simply “mock ring.” Learn how to make a mock ring for your tatting designs with this step-by-step tutorial.
Step 1: Begin by tatting a chain.
A self-closing mock ring is actually a tatted chain with a loop left at the beginning.
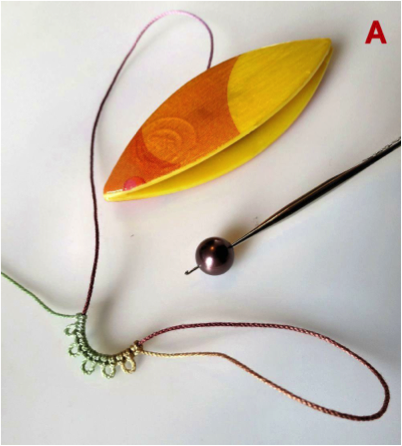
Step 2: Slip a bead over the starting loop.
To add a bead in the center, tat to reach halfway around the bead, and then slip the bead onto the loop. I’ve put the bead onto a small crochet hook to pull the loop through the bead.
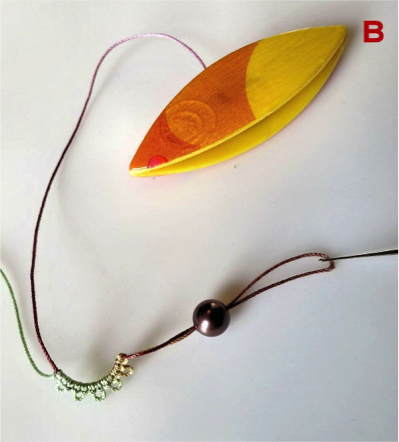
Step 3: Put the shuttle through the loop.
After the bead is placed onto the loop of thread, put the shuttle though the loop. A trick I like to use is to leave a paper clip in as a space saver, to make the final join easier. The paper clip is hanging between the start of the tatting and the bead, so it’s sort of like holding a small picot temporarily.

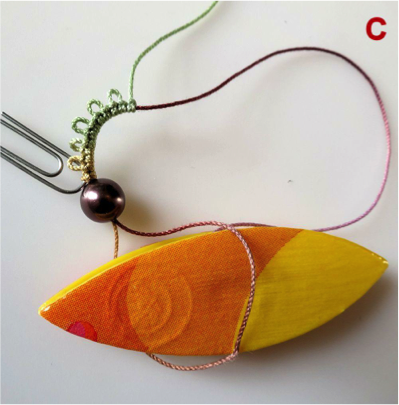
Step 4: Tighten and continue.
Tighten the core (shuttle thread) around the bead. Then, continue tatting the rest of the way around the bead.
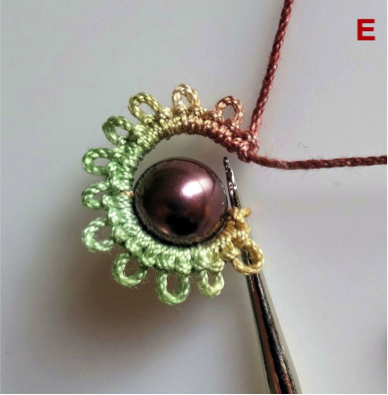
Step 5: Finish with a lock join.
Tighten the tatting, then remove the paper clip, and insert a crochet hook into the small space.
Finish by pulling up a loop of the core thread, then put the shuttle through and tighten for a lock join.
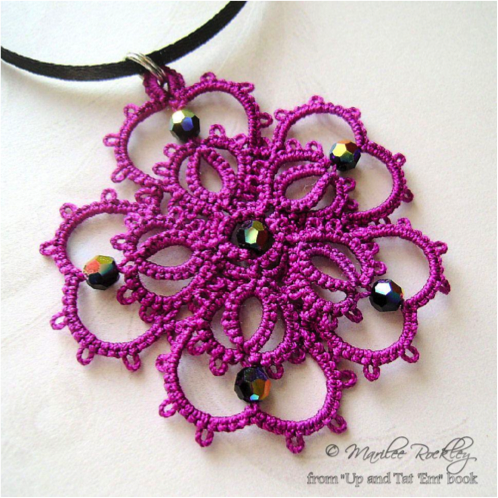
Looking for more inspiration?
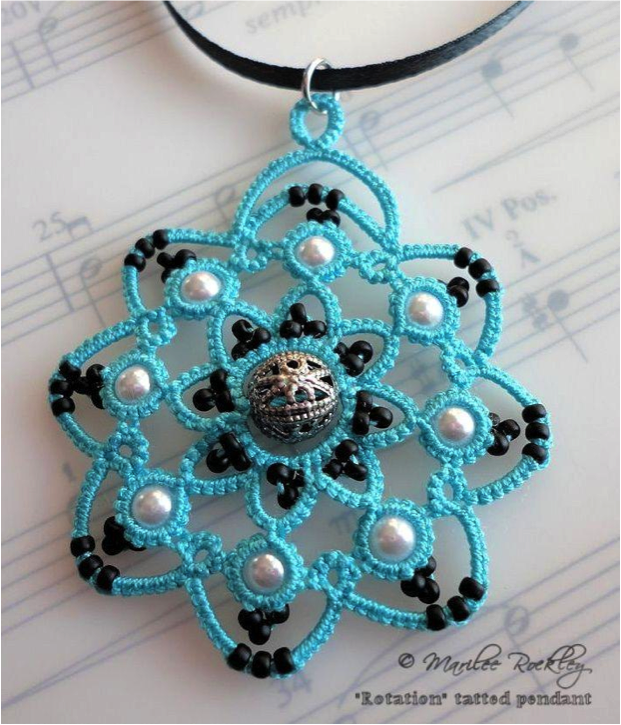
Here are a few more examples of tatted jewelry projects in which this technique is used.

Want to learn more? In my Shuttle Tatting course, we begin with the basics of tatting and then move on to how to add beads. Try this fun new craft that’s inexpensive and portable by signing up today!
Have you tried tatting yet?
About Marilee Rockley

With a background in many arts and crafts, Marilee currently focuses on tatted jewelry design and dyeing tatting threads in unique colorways that can’t be found elsewhere. Her work has appeared in magazines as well as her four pattern books. Take a look at her latest experiments on her blog, Yarnplayer.
I have your book Tatted Jewelry and Your work is sooooo amazing!!! I hope one of these days I can tatt like you!!!
Took a bit of finding but managed to locate your "Rotation tatted pendant" on your Etsy shop :-) So Happy, I shall put a button in it :-)
HI Marilee I am mad about tatting, I bought your class on beginners tatting and have almost worked through it. May I contact you if I need to find out more about tatting please. Your tatting is absolutely beautiful.