
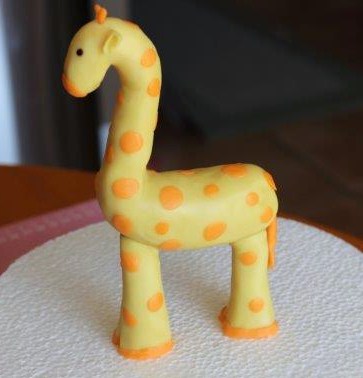
Giraffes are beautiful creatures, but due to their very long legs and neck, they can seem somewhat tricky to make in sugar. We are going to explore a fun and easy way to make a modeling chocolate giraffe that would be a perfect topper for 1st birthday cakes or baby shower cakes.
Modeling chocolate giraffe tutorial
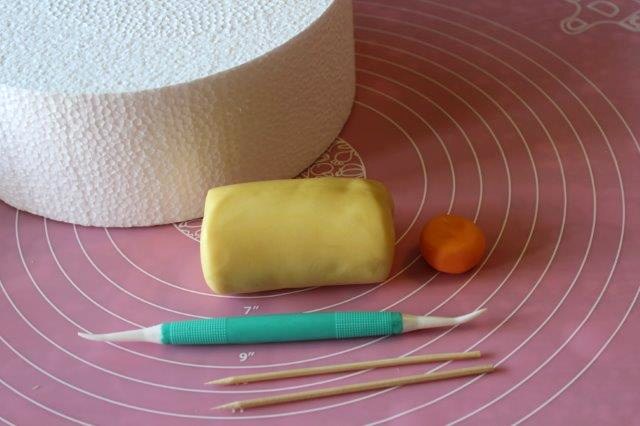
You will need:
- A block of Styrofoam or a cake dummy
- Modeling chocolate in any color you choose. I chose yellow with orange spots but blue giraffes are really cute too!
- Two long skewers
- A flower leaf fondant tool
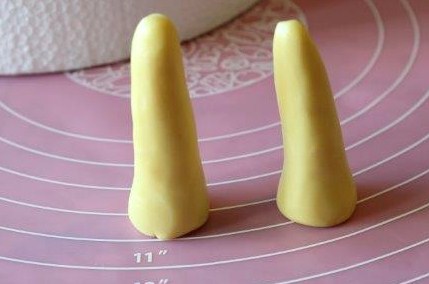
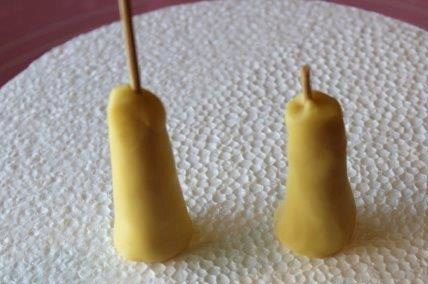
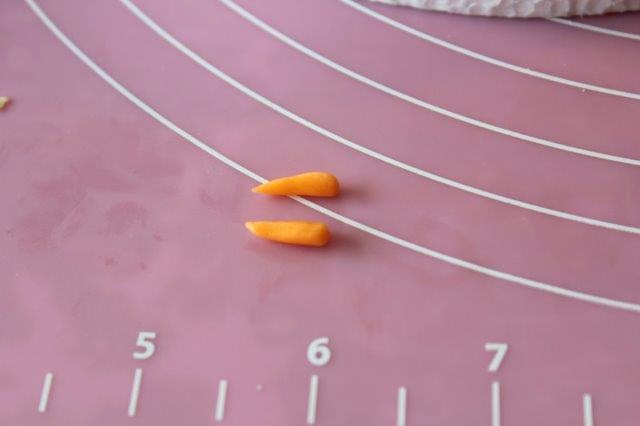
Legs
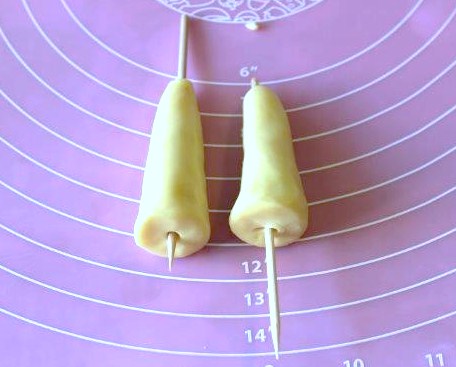
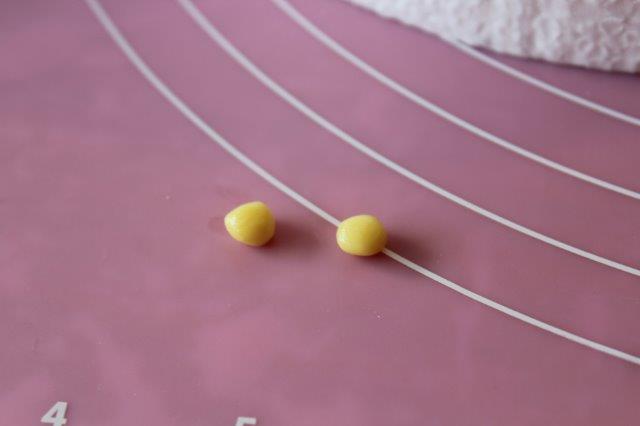
First, we’ll make the legs. Now I know that giraffes have four legs, but for now, we’re only making two large legs. Trust me! Shape the legs so they are larger at the bottom and taper at the top. Once you have your legs the height you want, insert the skewers. The front leg should have most of the skewer coming out of the top which will help the giraffe’s neck stand up straight. The back leg should have most of the skewer sticking out the bottom — this will anchor the giraffe in the cake while holding up the back end of the giraffe.
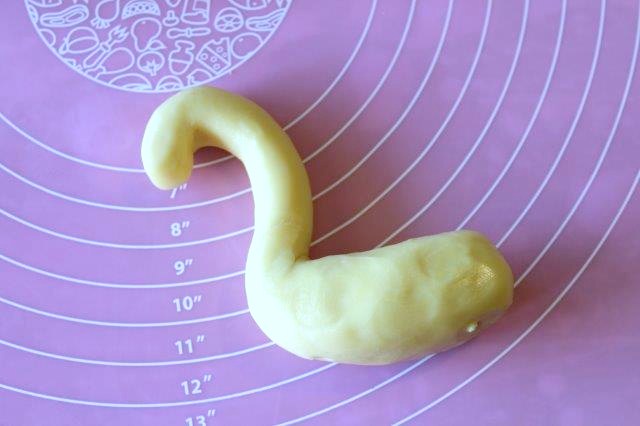
Body
Insert the legs into the Styrofoam about an inch apart. Use the remaining modeling chocolate to form the body. Roll the modeling chocolate into a ball, then elongate 1/3 of the modeling chocolate into a long neck. Curve the neck up and form the head.
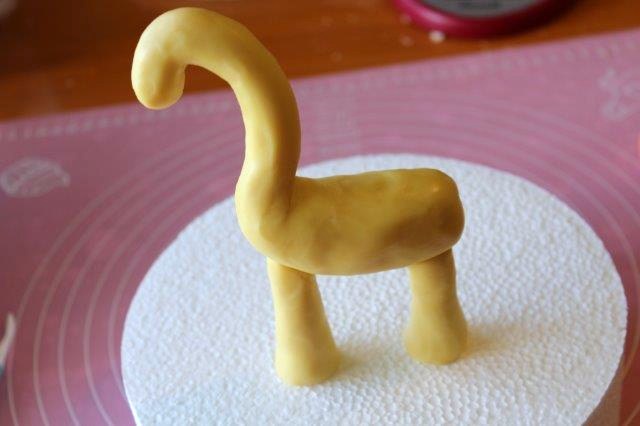
Assemble
Place the body onto the legs with the skewer in the front going into the neck to help with support.
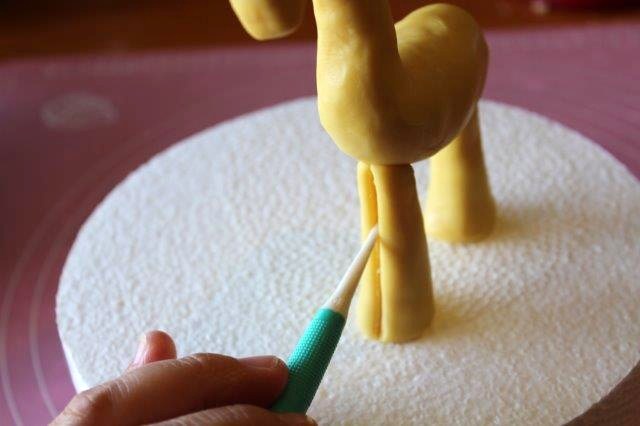
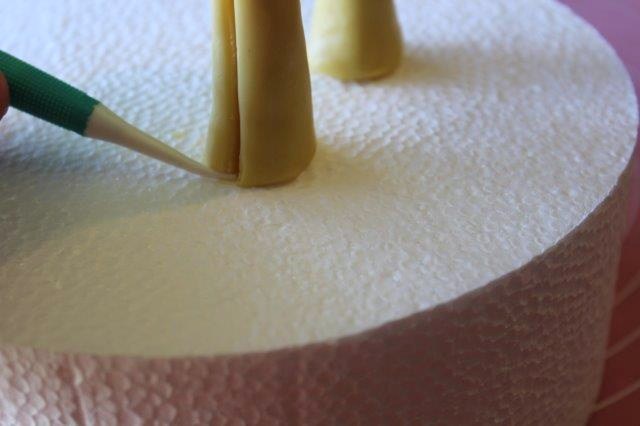
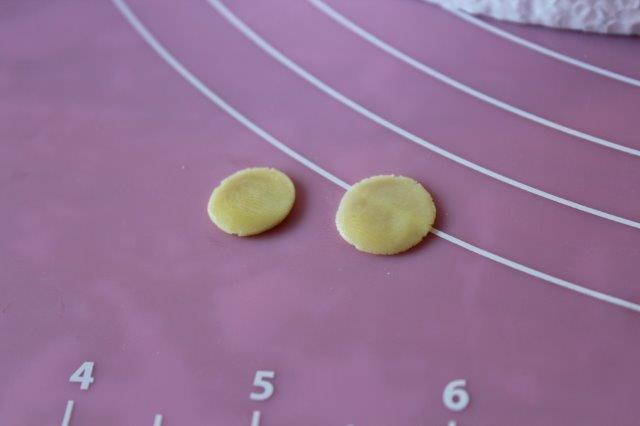
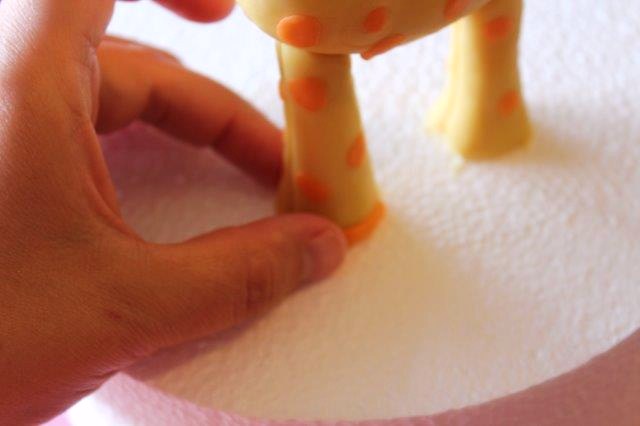
While the neck dries, use the flower leaf tool to create lines down the front and back of each leg. You do not need to go deep enough to hit the skewer, but deep enough to make it look like two legs. Carve the bottom of the legs out just a little to help them look more separated.
Nose
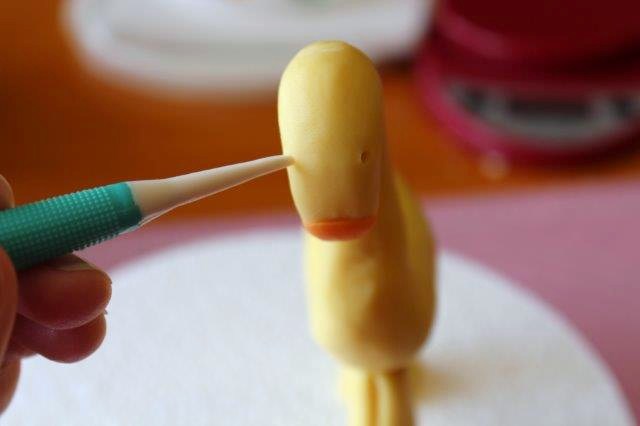
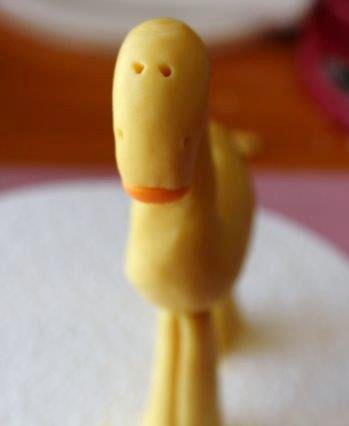
Once your giraffe is dry, grab your accent color. I chose orange. The first thing we will make is the nose. Take a small piece of modeling chocolate and roll it into a ball. Smash the ball into a flat oval about the size of the nose. Apply the nose to the very tip of the head. Use the tip of the flower leaf tool to make two little indentations in the end of the nose for nostrils.
Eyes and horns: Part 1
Using the flower leaf tool again poke holes where the eyes and horns will be. The eyes are on either side of the head and the horns are on the very top of the head in line with the ears. We will be inserting eyes and horns soon.
Ears
Take two very small pieces of modeling chocolate, roll them in a ball, and then smash them into flat circles. Then, roll it upon itself, using the flower leaf tool to open up one side of the ear. Attach it to the head just on the outside of where the horns will be.
Horns
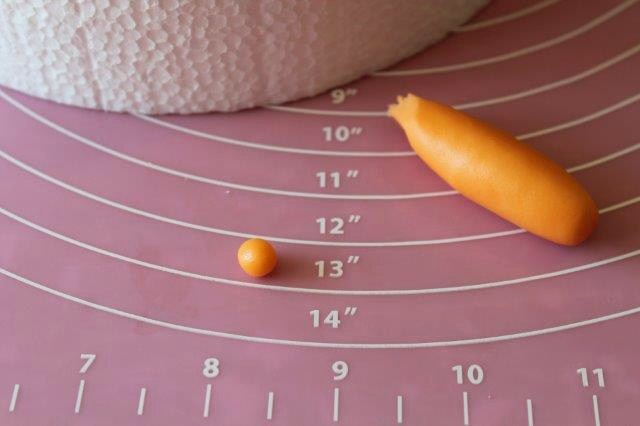
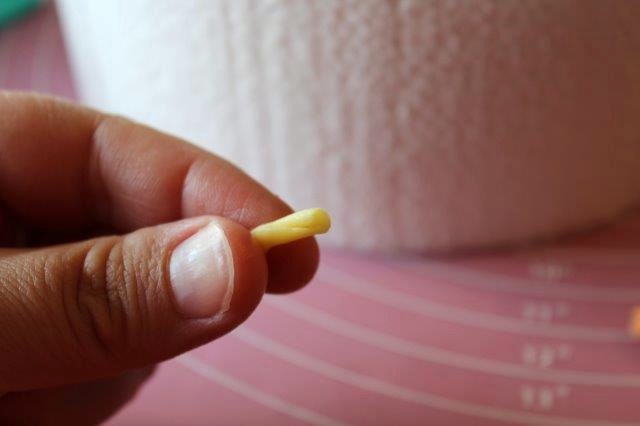
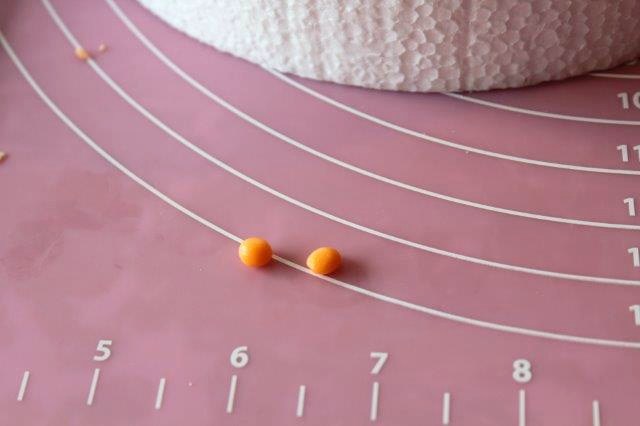
Roll two small pieces of your accent color into balls, then elongate them into small cones. Let them dry for a few minutes while you work on the spots. They will be much easier to get in if you let them dry.
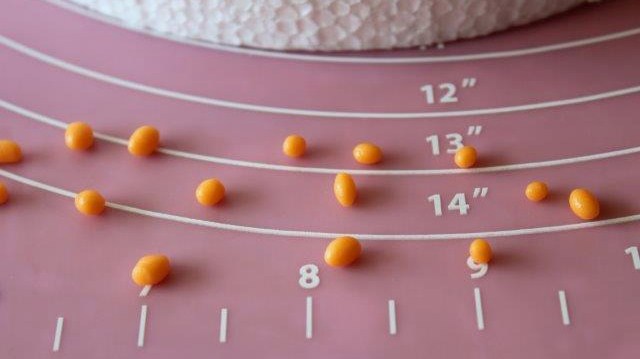

Spots
Make lots of little round balls of your accent color. Take each round ball and place it on the giraffe, gently pressing down to make the ball squish flat against the giraffe.

Hooves
Once our giraffe has spots, he is ready for hooves. Roll out four small ropes, wrap each rope around each foot, then gently press the hoof into the foot.
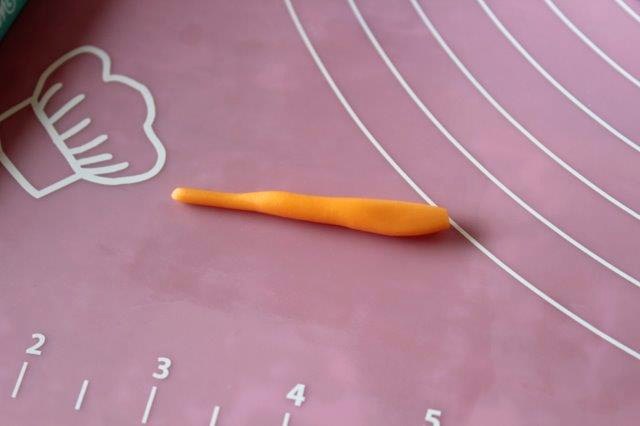
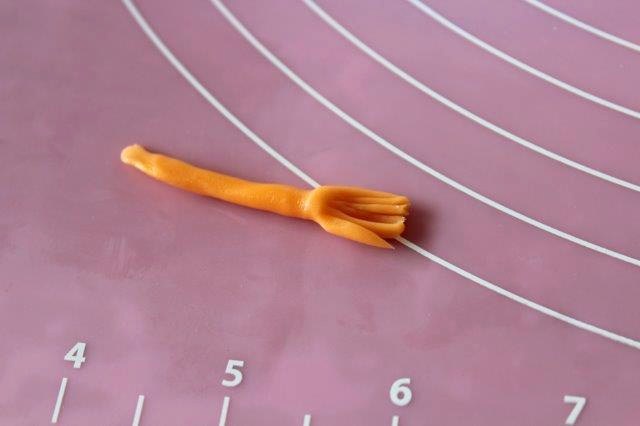
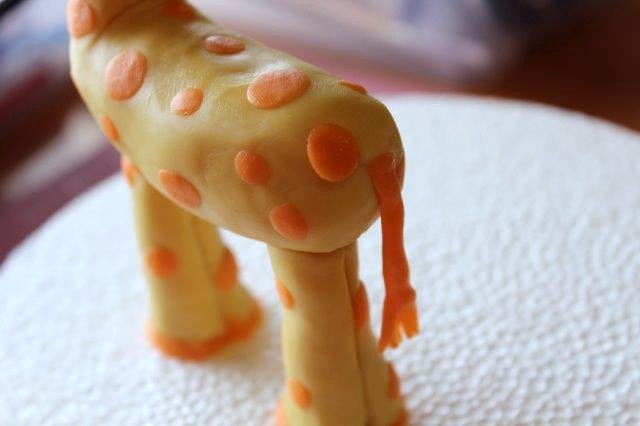
Tail
Roll out another small rope that is a little larger at one end. Use an X-Acto knife to cut small slits in the larger end of the tail. Press the tail gently onto the rump of the giraffe.
Horns and eyes: Part 2
Place the little horns inside the holes you made earlier. Use black fondant or chocolate modeling chocolate to make tiny little eyes so your giraffe can see.
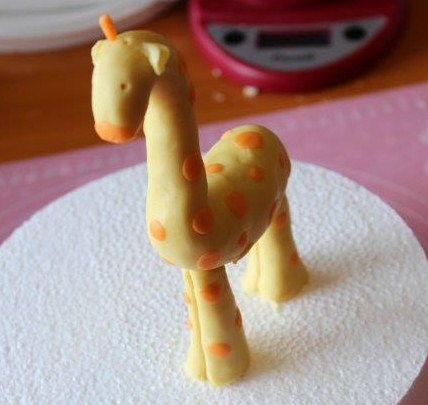
We are now finished with our adorable giraffe!
Learn how to make more animal cake toppers in the class Cake Topper Techniques: Fondant Animals with Sharon Wee. For more baby shower and 1st birthday cake ideas, check out our tiny fondant sneaker tutorial and our cute little faces tutorial.
Did you know tomorrow is National Cherries Jubilee Day? We’ll be celebrating on the Craftsy blog with a delicious recipe for cherries jubilee cupcakes!
Share tips, start a discussion or ask one of our experts or other students a question.
No Responses to “How to Make a Modeling Chocolate Giraffe”