
It’s said that hands are one of the hardest things to draw because they are so familiar to us. We know them, well, like the backs of our hands, so can easily spot when they’re wrong.
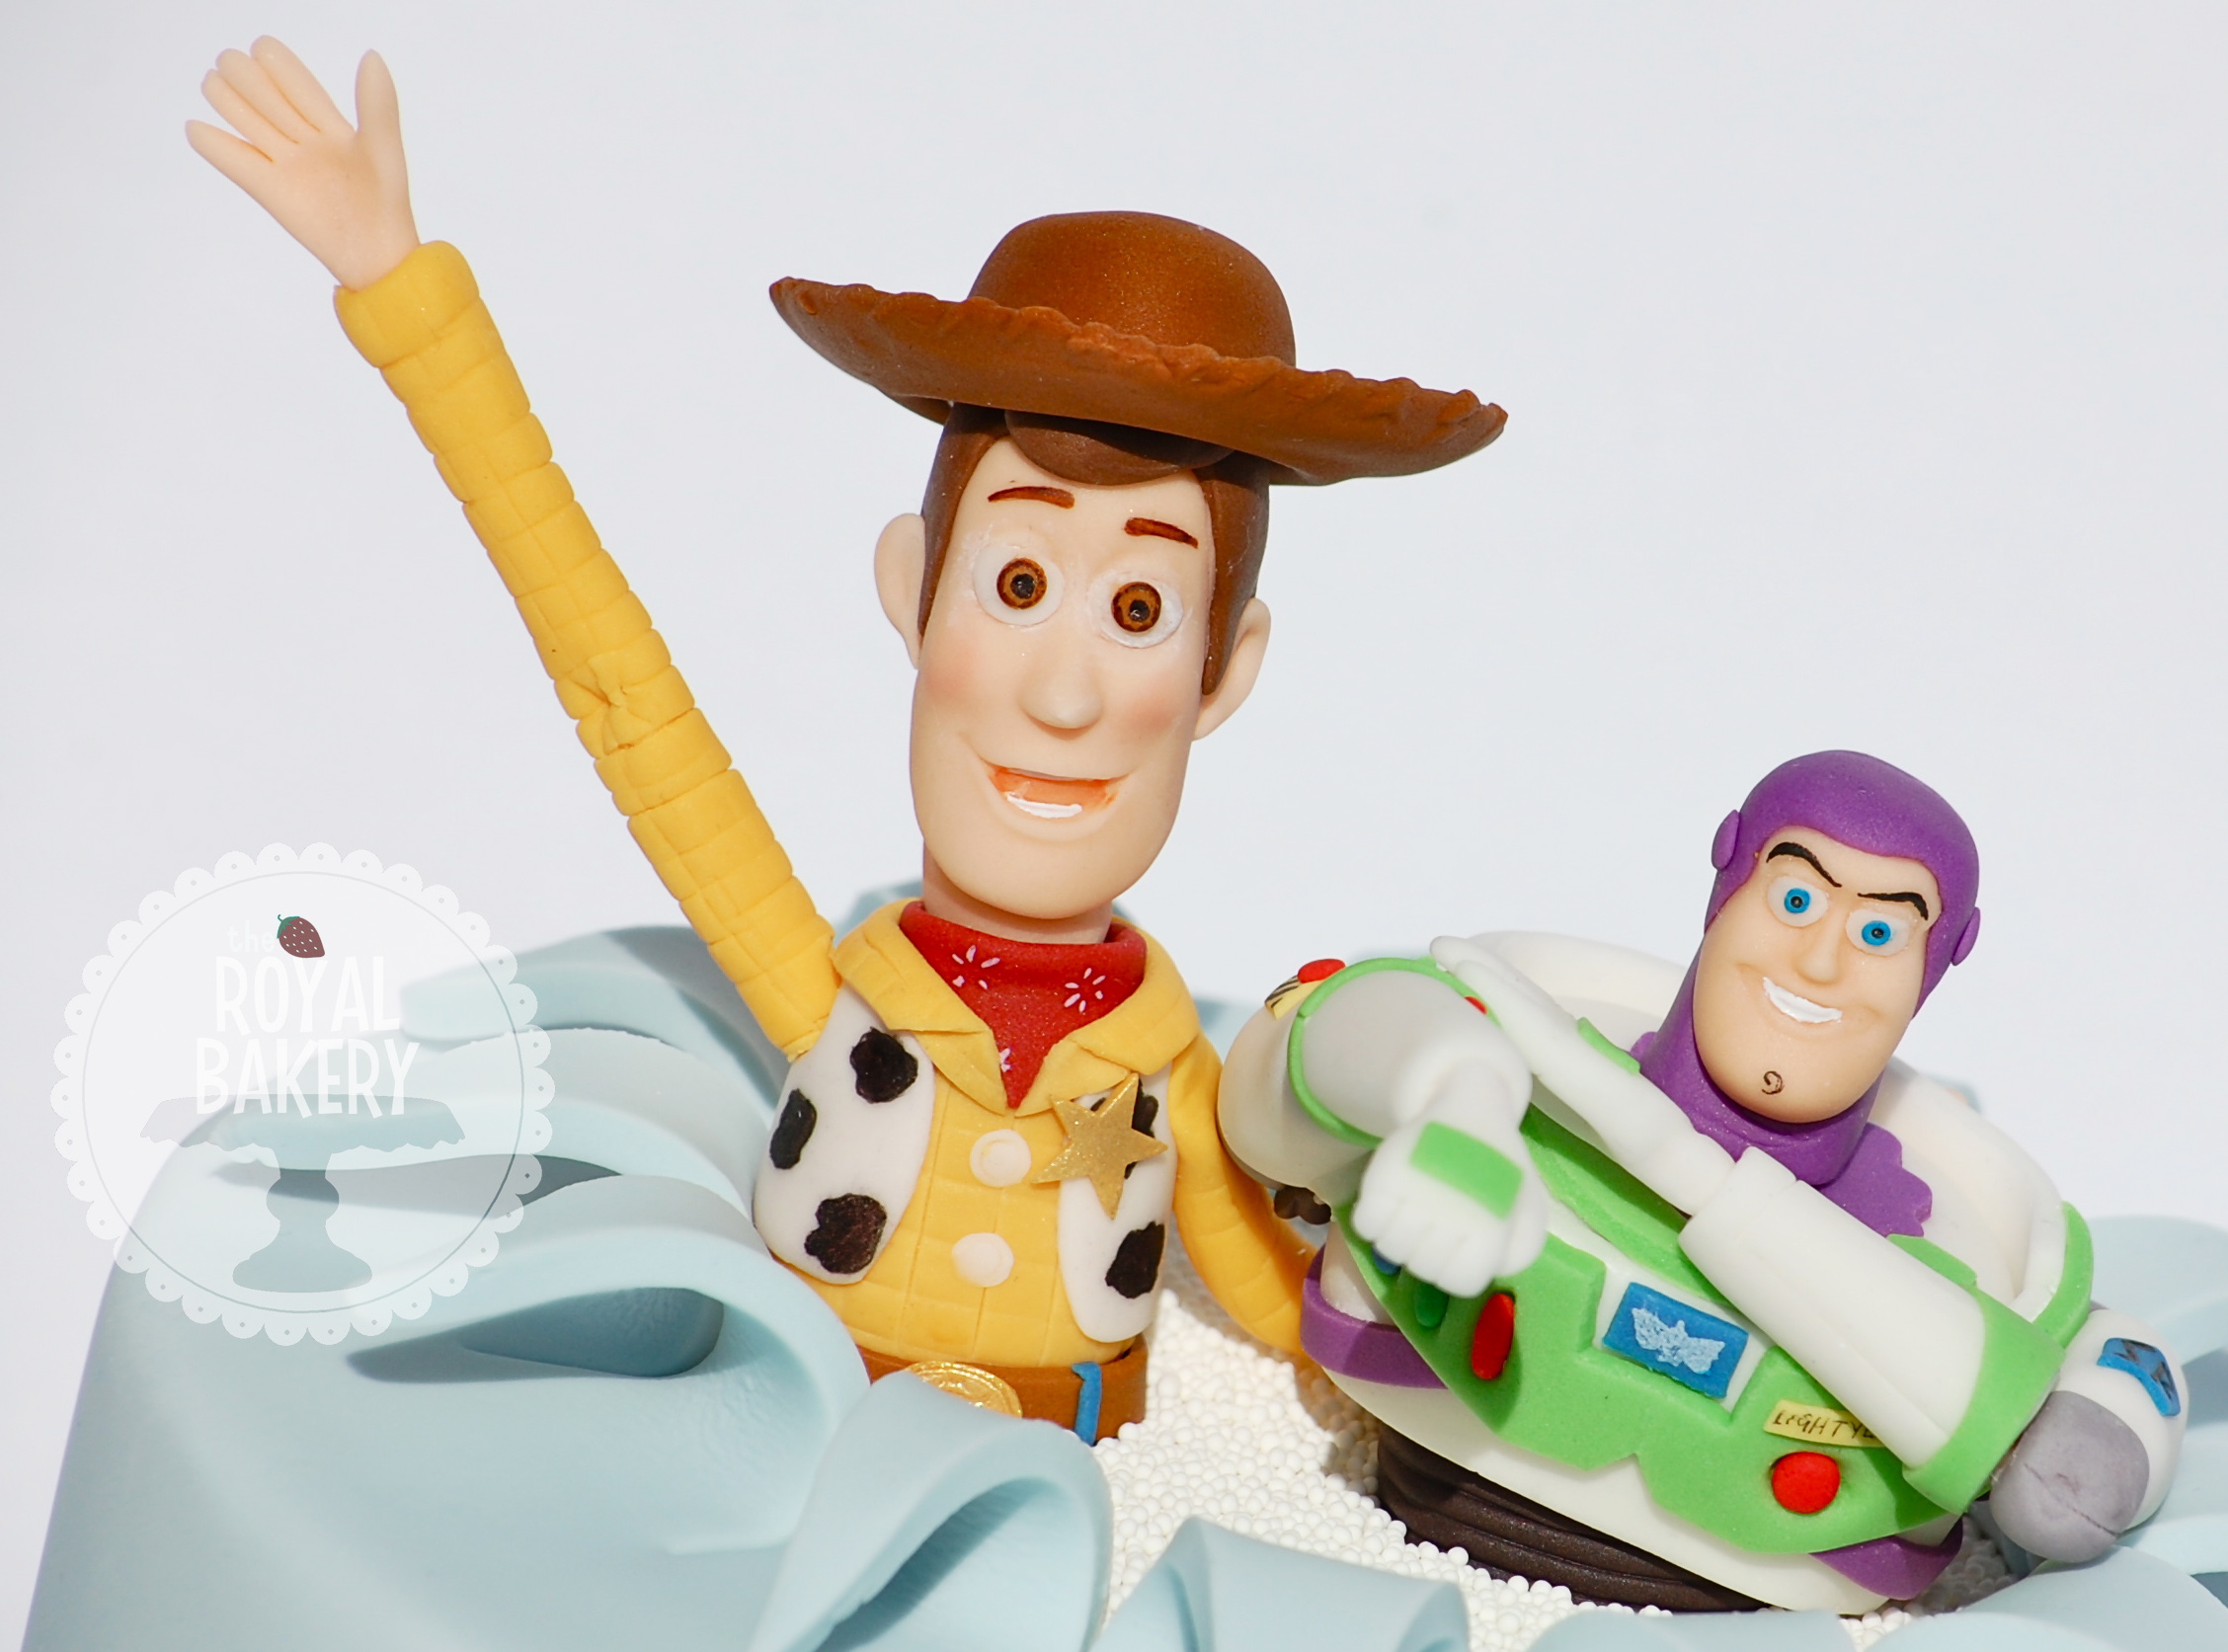
Photo via The Royal Bakery
Modeling hands from fondant or gum paste can be just as problematic, but with this detailed tutorial, you should soon be creating realistic hands ready to pose into any gesture.
Creating realistic hands involves a gentle touch and just a little bit of know-how. Take a look at your own hands and wrists — a little observation goes a long way!
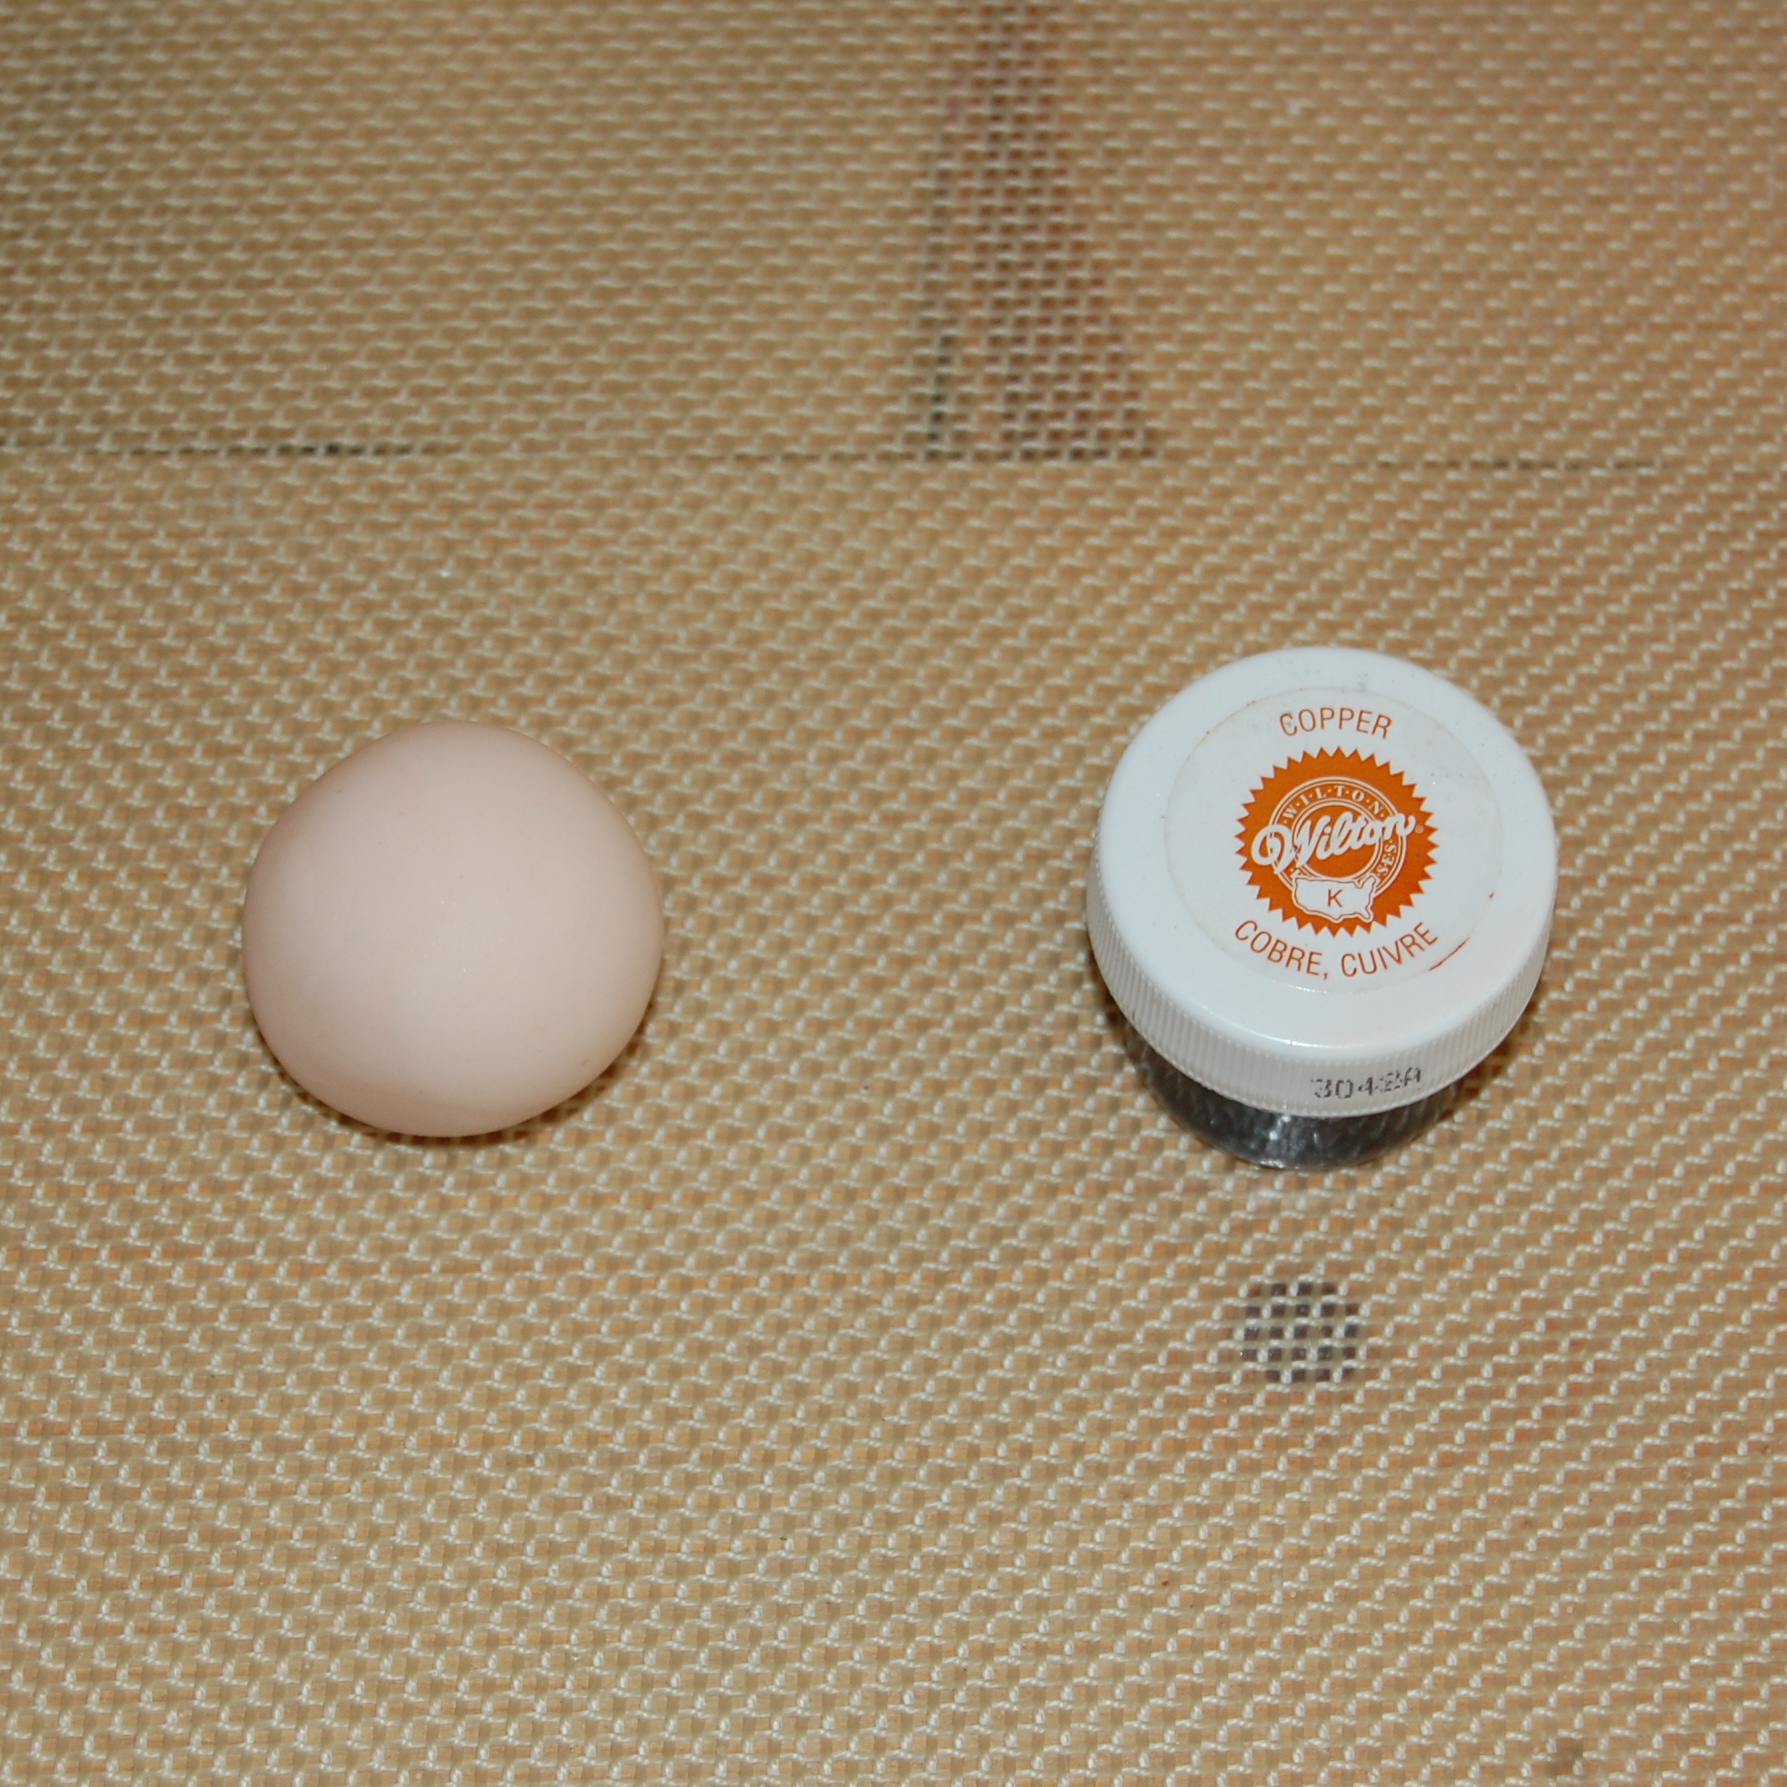
Step 1:
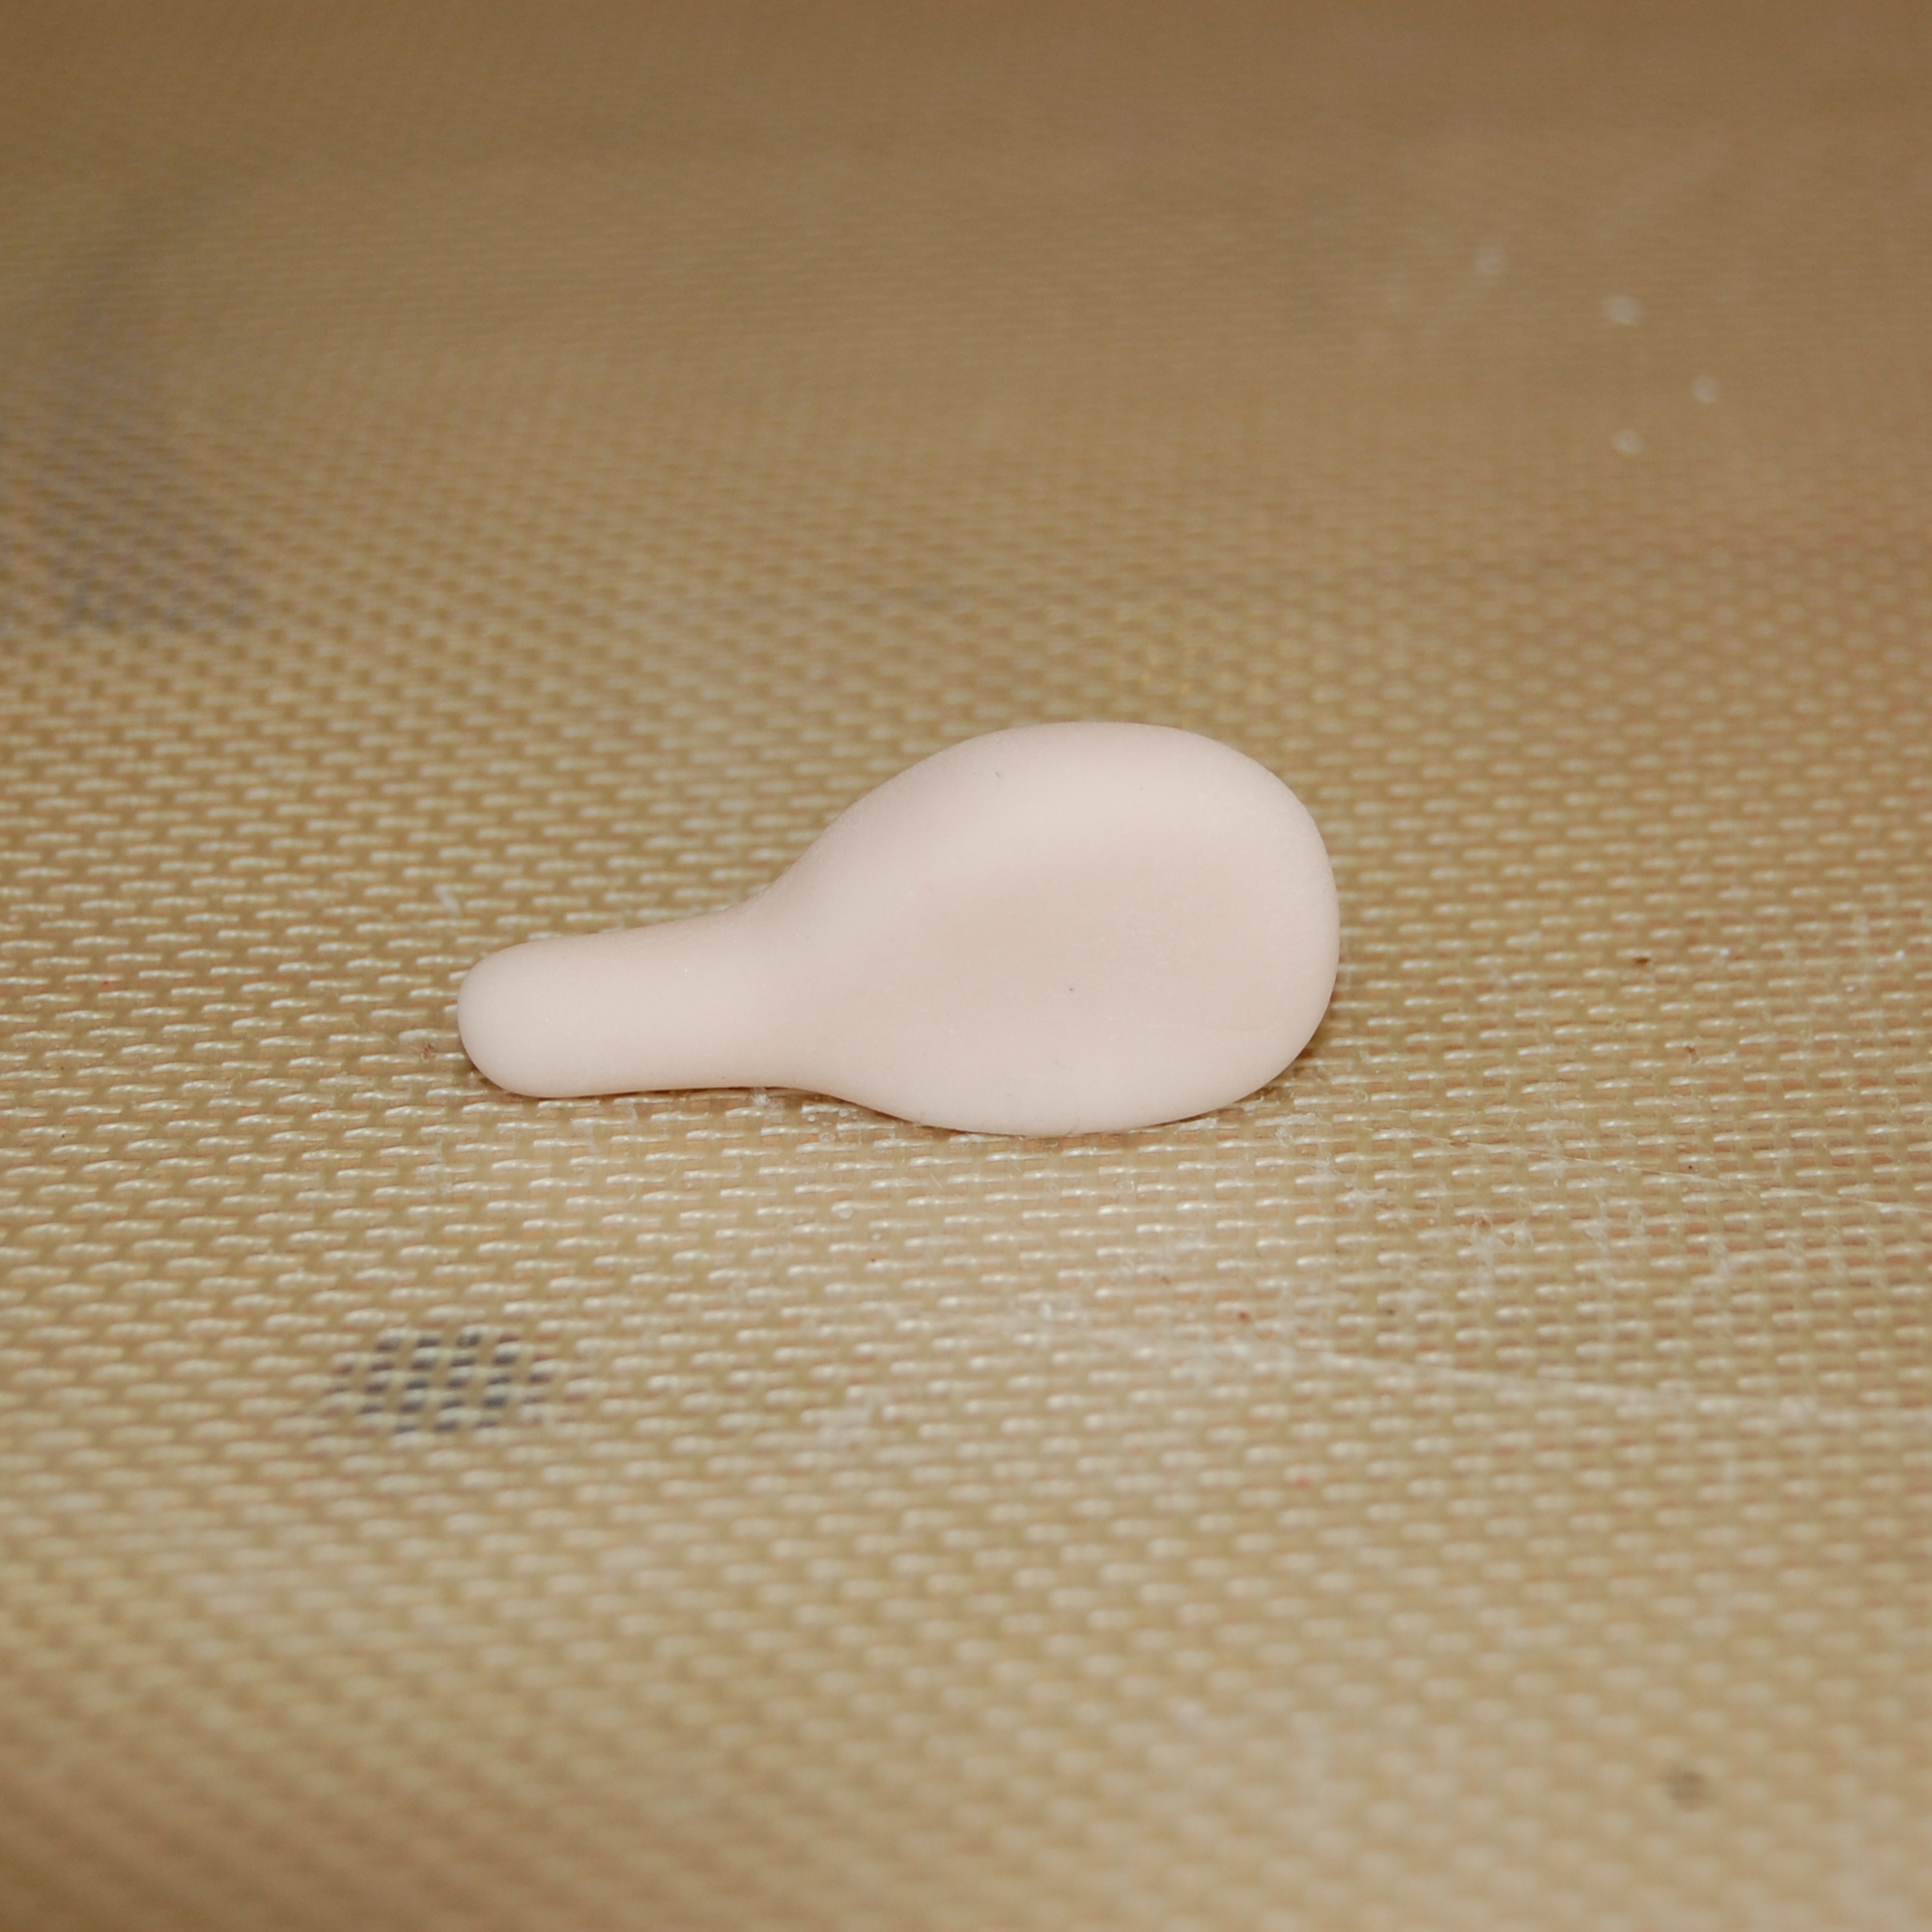
Color some fondant or gum paste to a flesh tone. (I prefer to use Wilton fondant without tylose added and color with Wilton Copper.) Roll the required amount into a smooth ball.

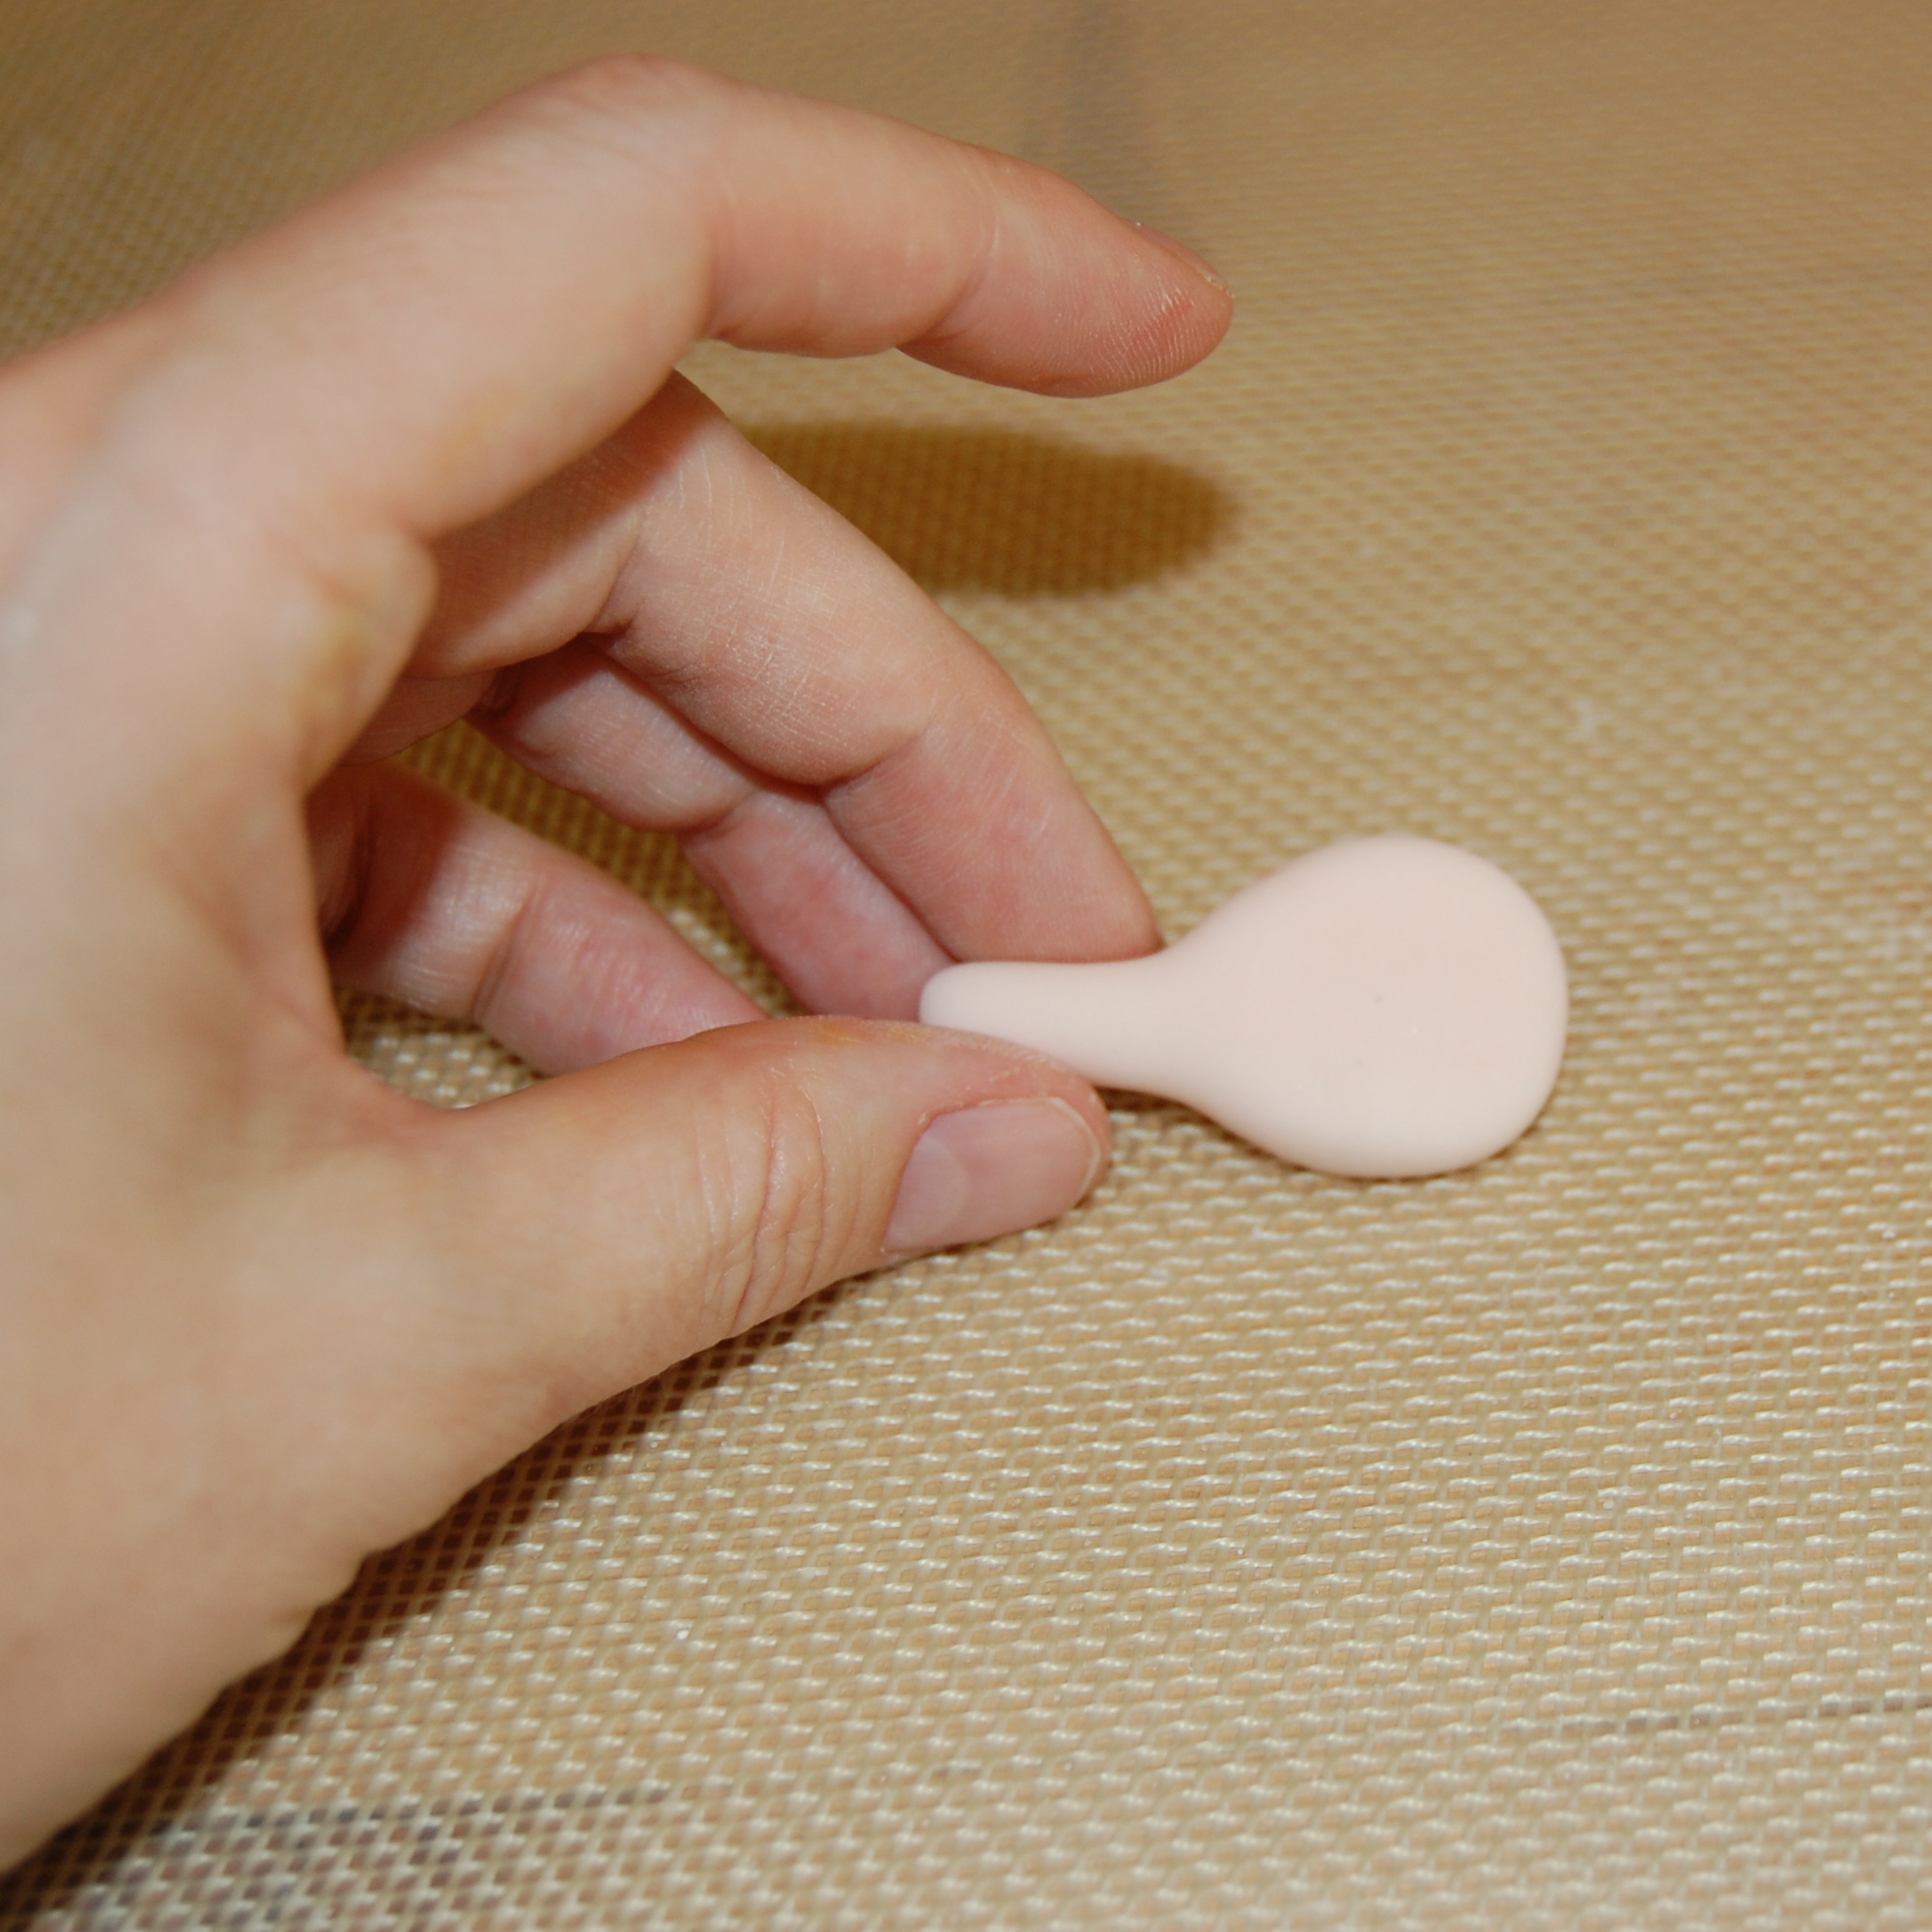
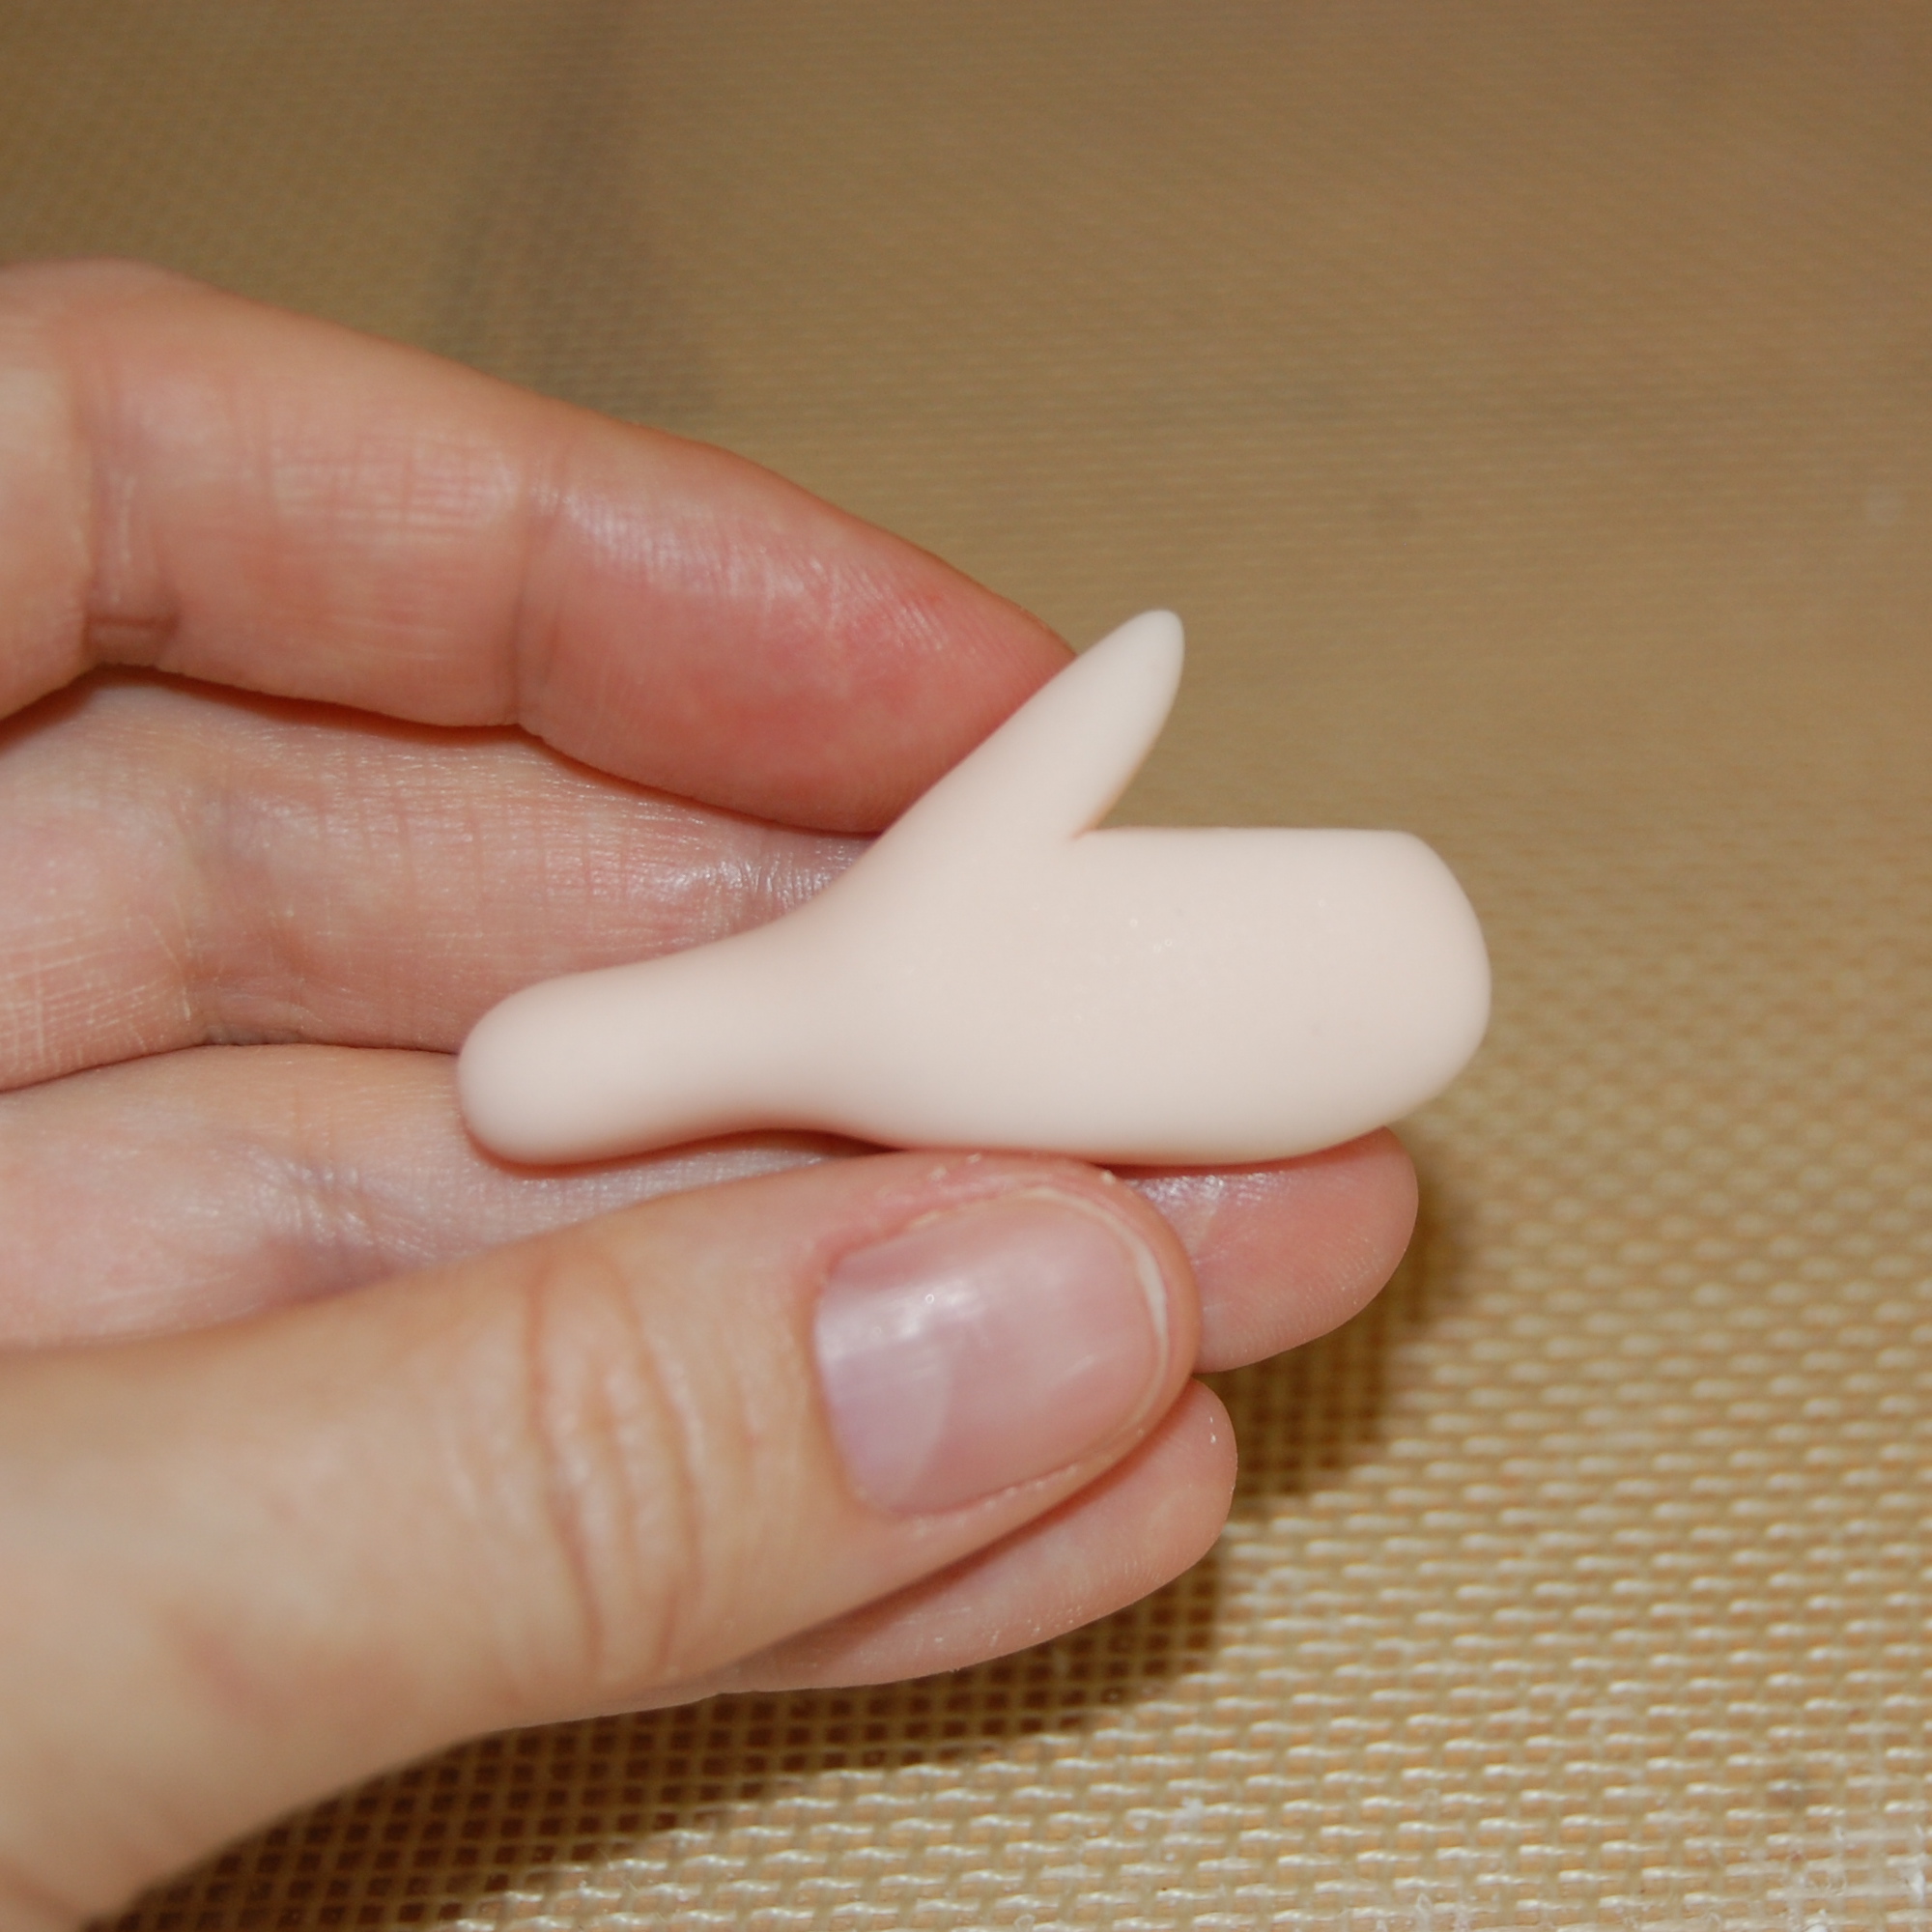
Step 2:
Roll one half of the ball between thumb and forefinger to create a wrist. The length of the wrist doesn’t matter as you can cut off any excess later, but it’s best to make it long enough to insert into the clothes on your figure.
Step 3:
Flatten the other end.
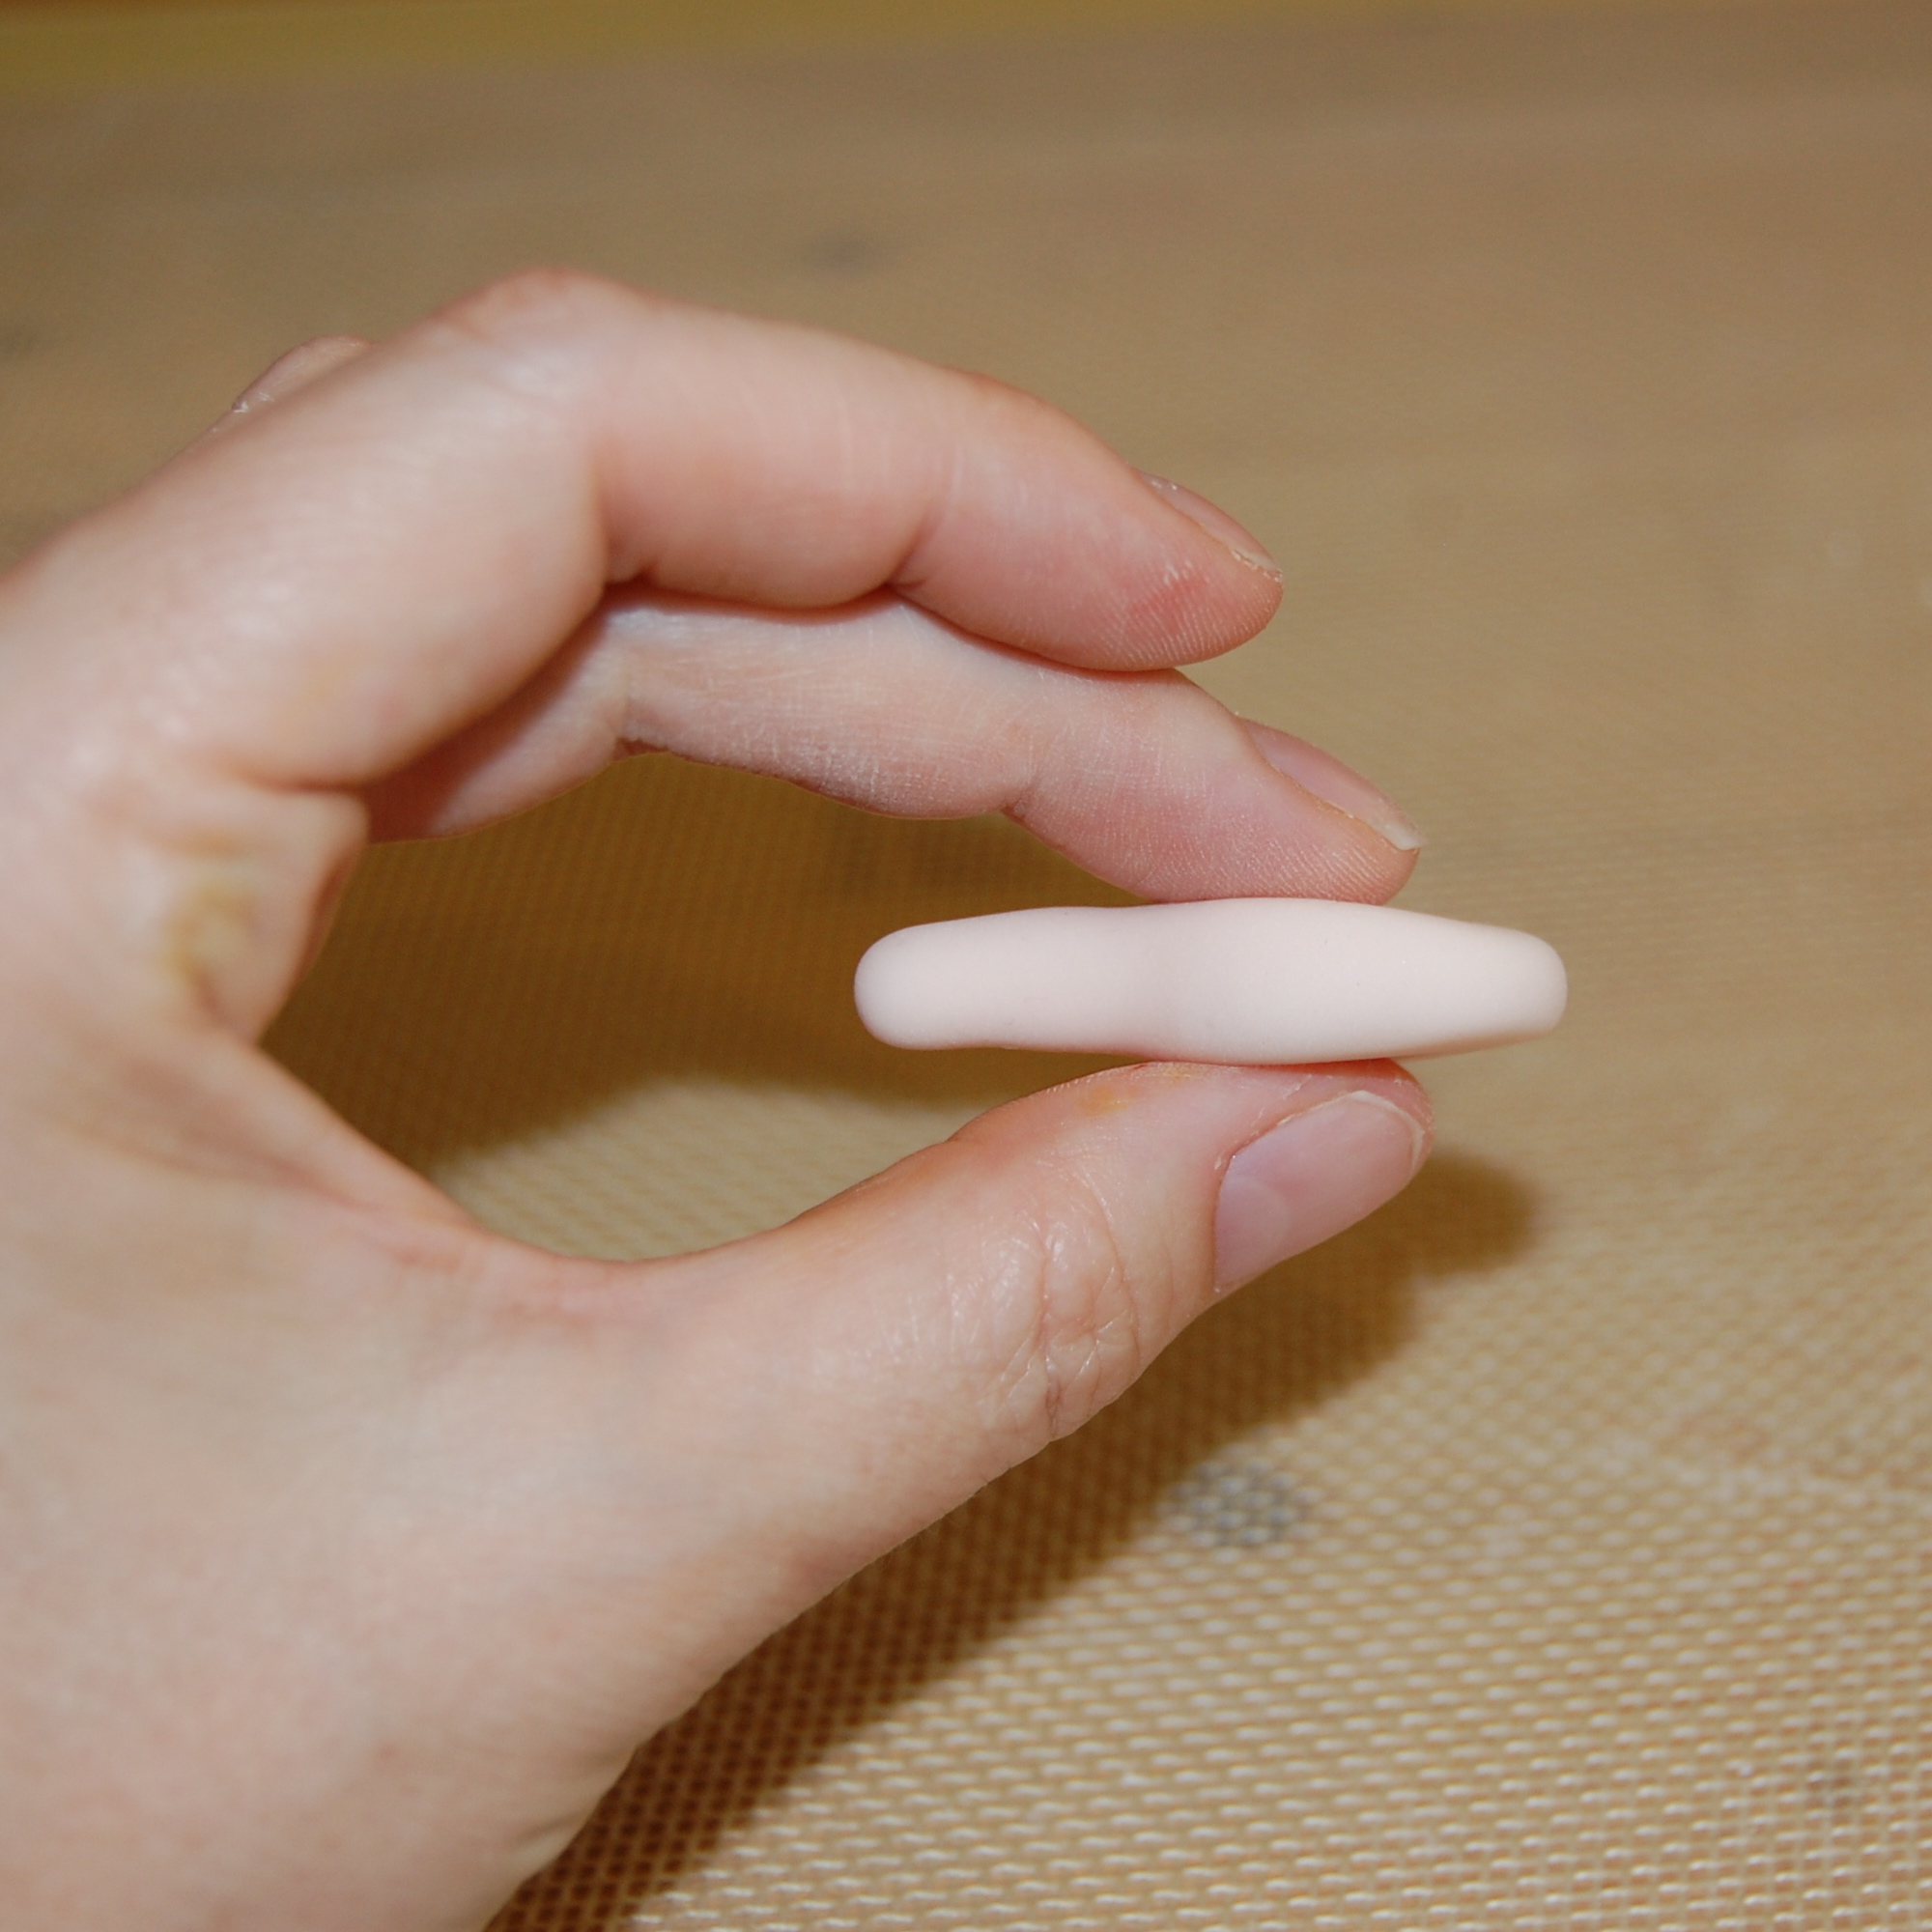
Step 4:
Flatten the shape a little more toward the edges.
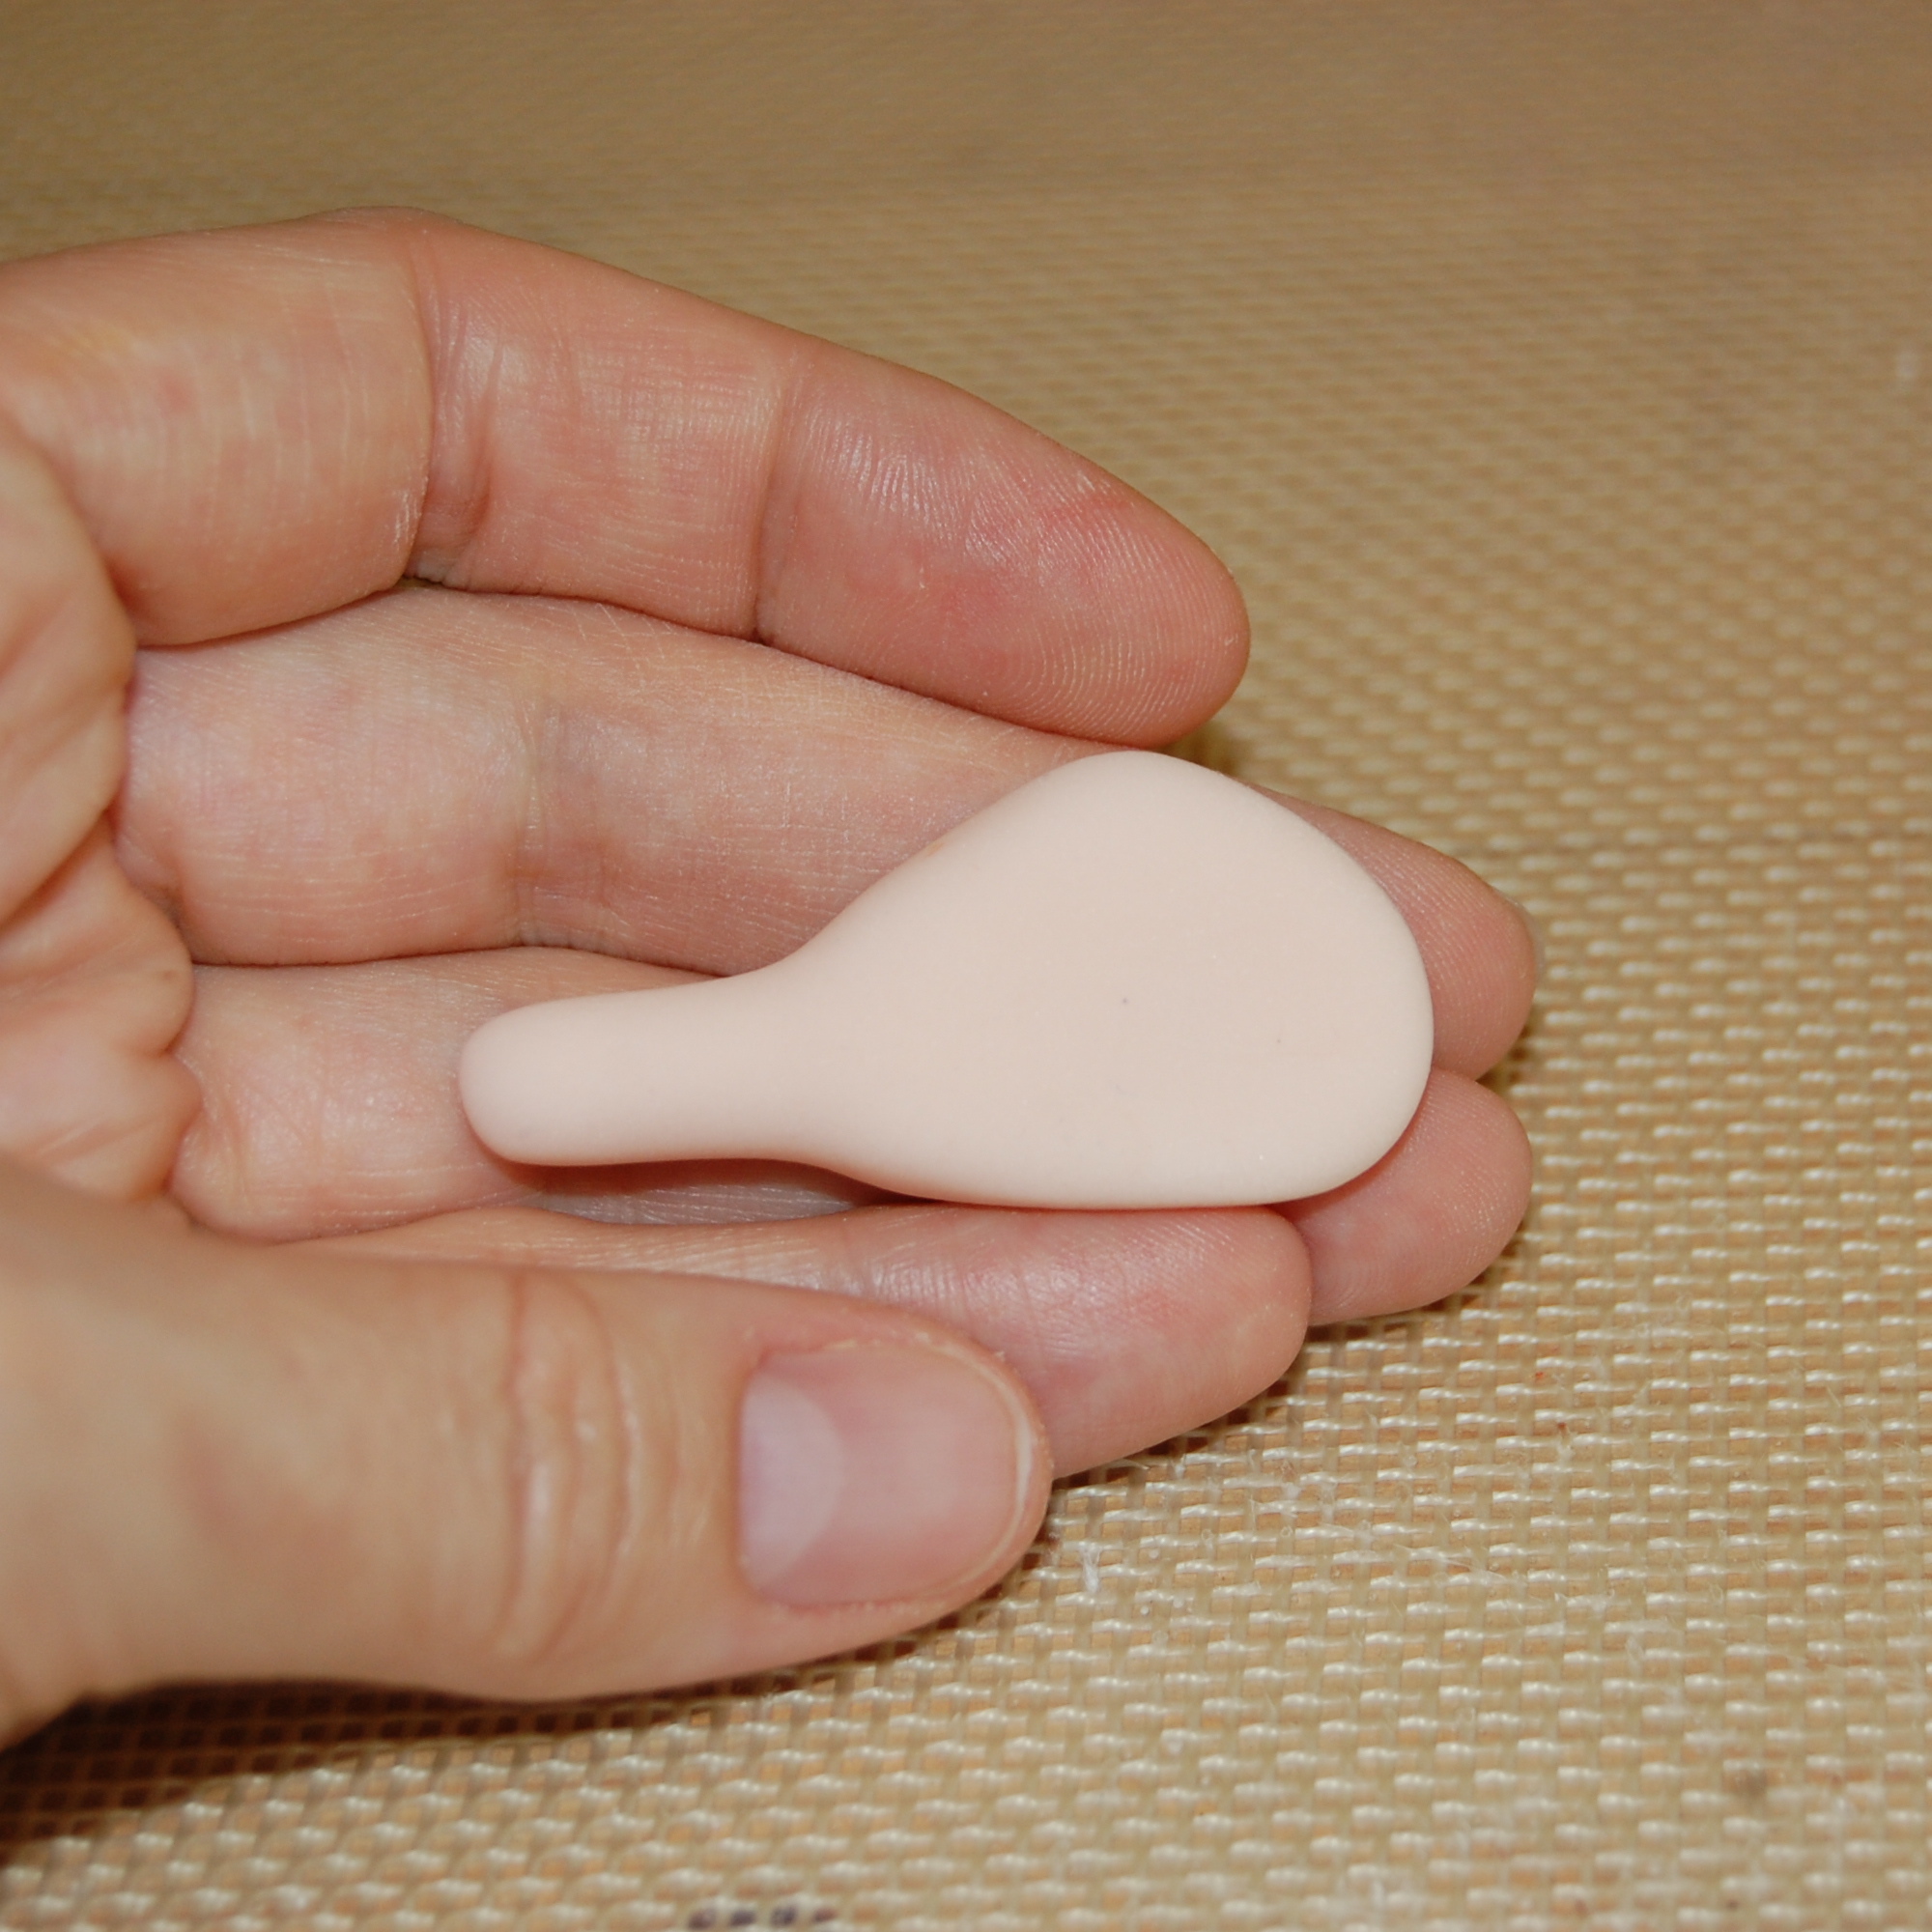
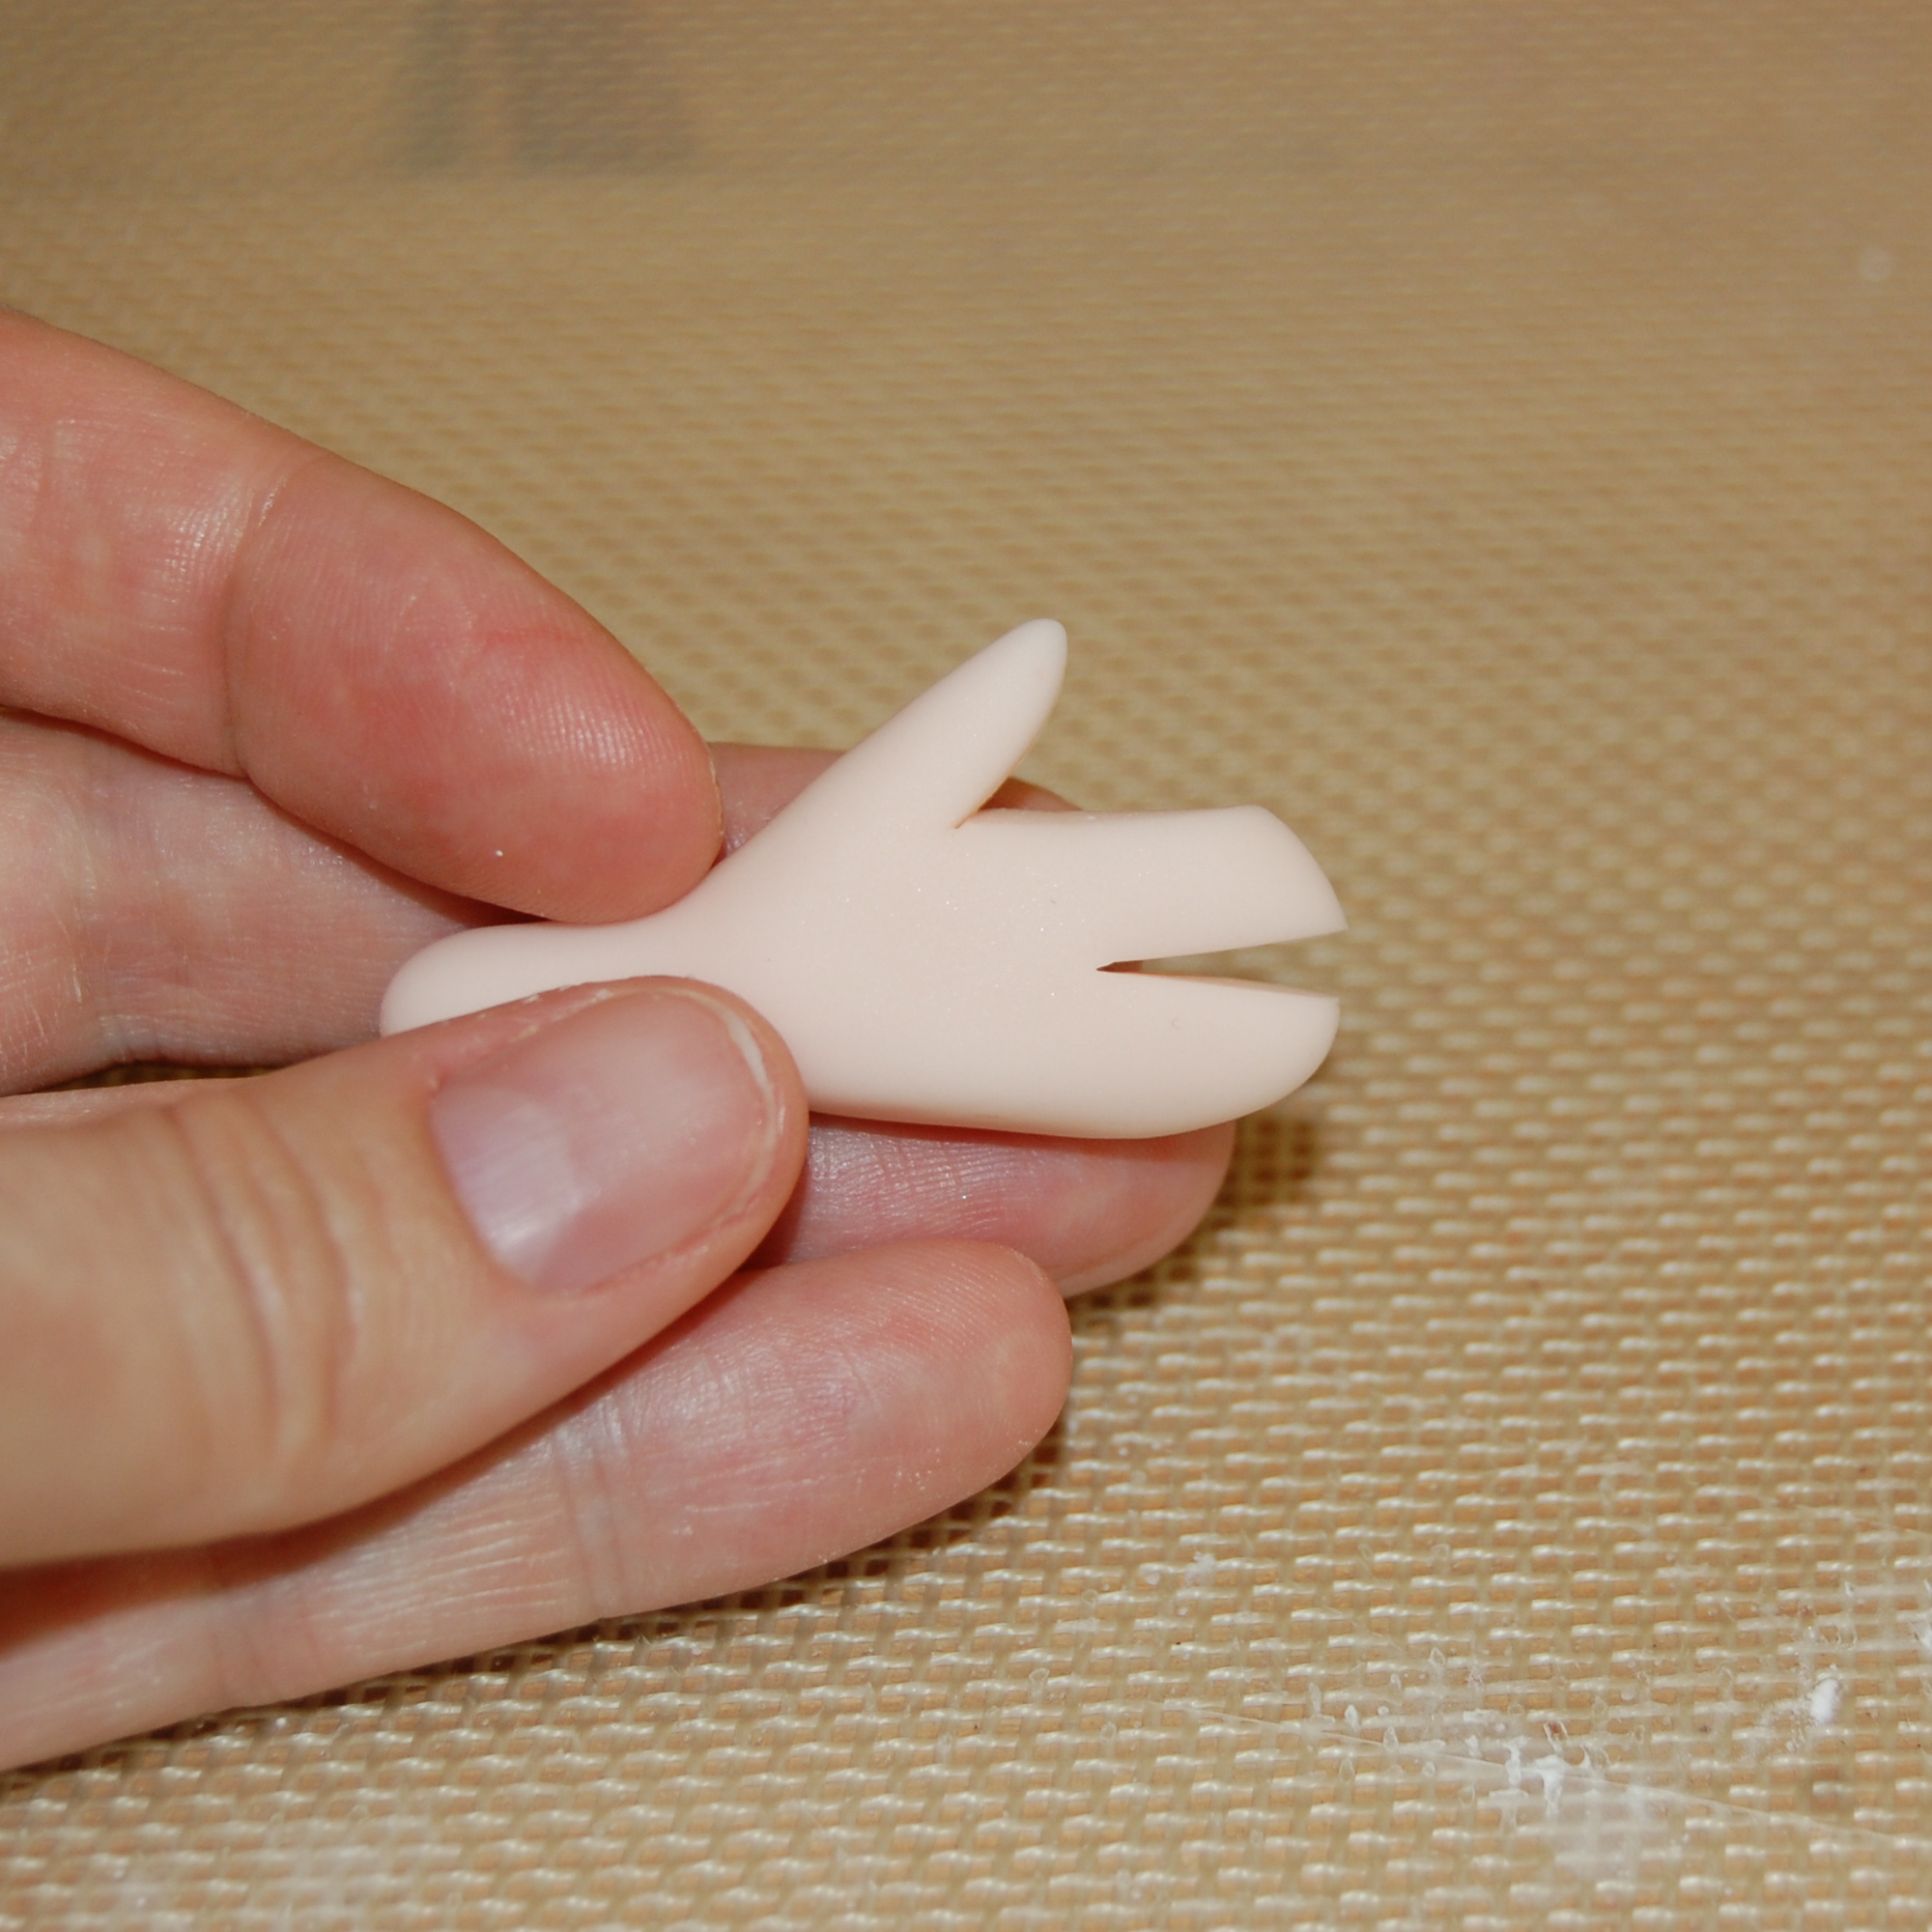
We’re making a left hand, so hold your own left hand up, palm facing you. Notice how the pinky side of your hand is a pretty straight line from your wrist, but the thumb side has a very definite angle?
Step 5:
Place the shape on its side on your work mat to create the flat pinky side of the hand. Continue to gently smooth and flatten the hand toward the edges.
Step 6:
Spend a little time creating the angle on the thumb side of the hand. You’re aiming for a very soft triangle shape, with the top of the triangle being the future tip of the thumb.

Step 7:
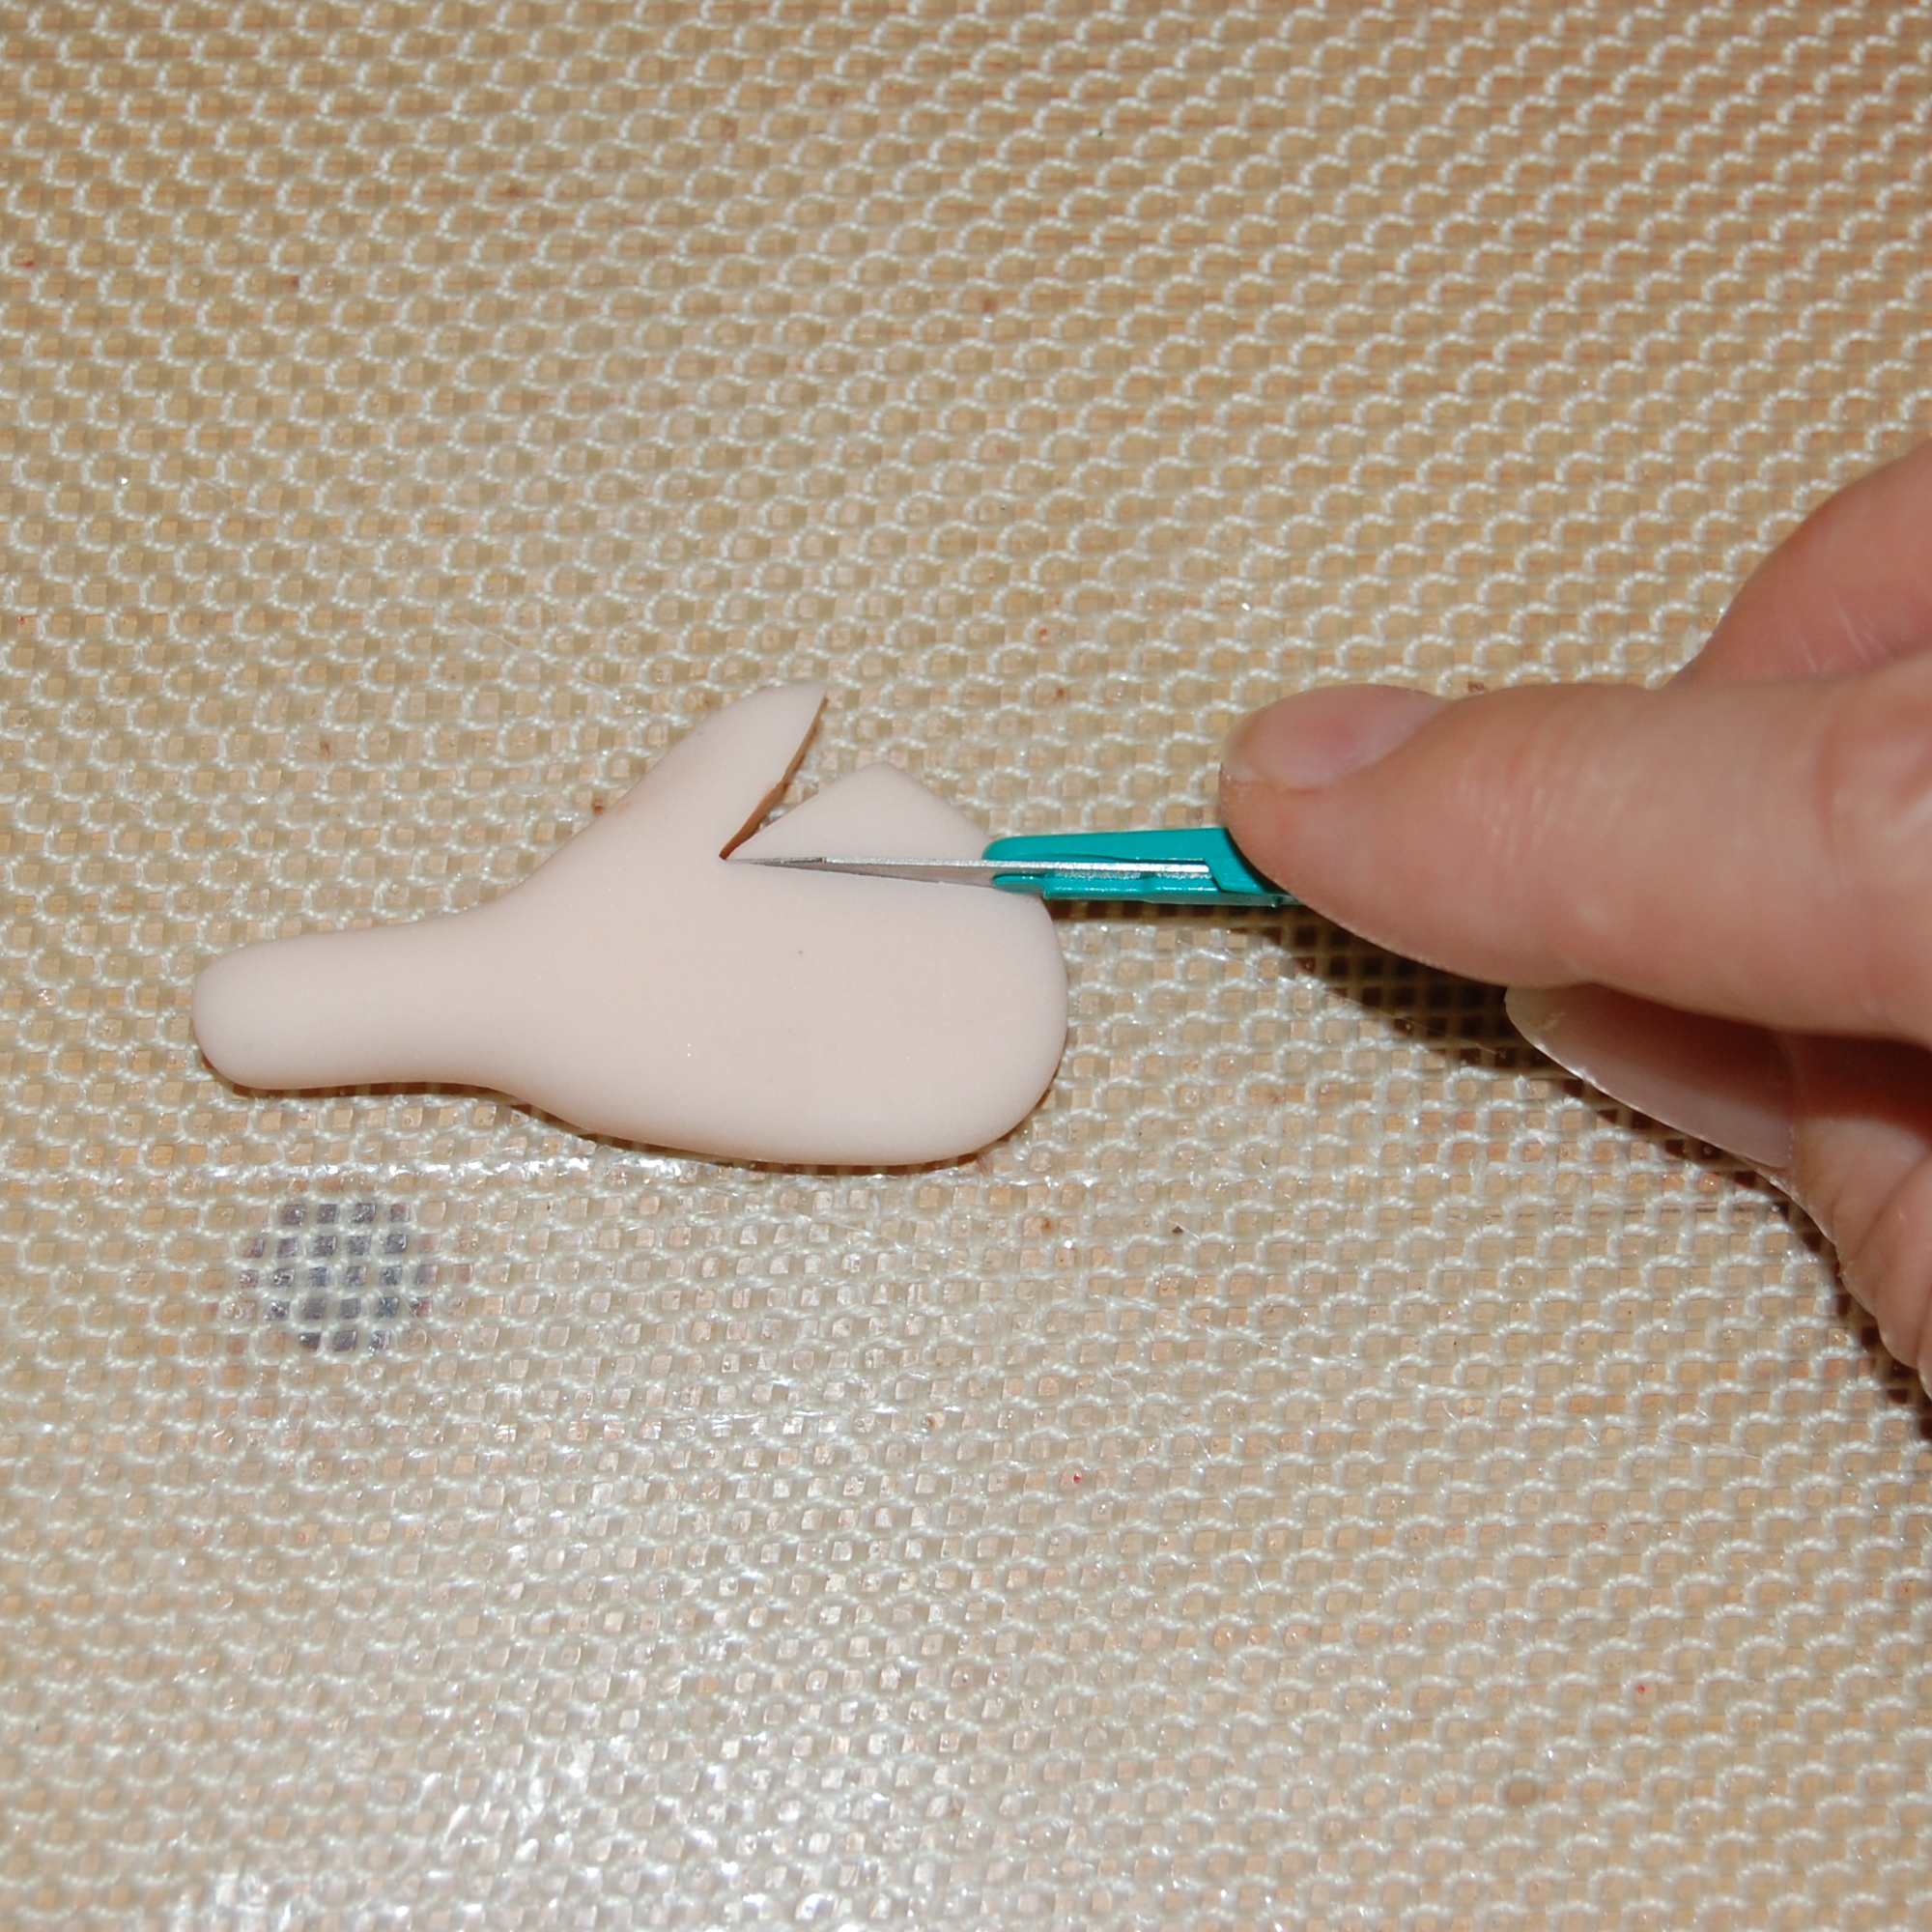
Make a cut parallel to the angle of the thumb and about half the length of that side of the “triangle.”
Step 8:
Make a second cut parallel to the bottom of the triangle.
Step 9:
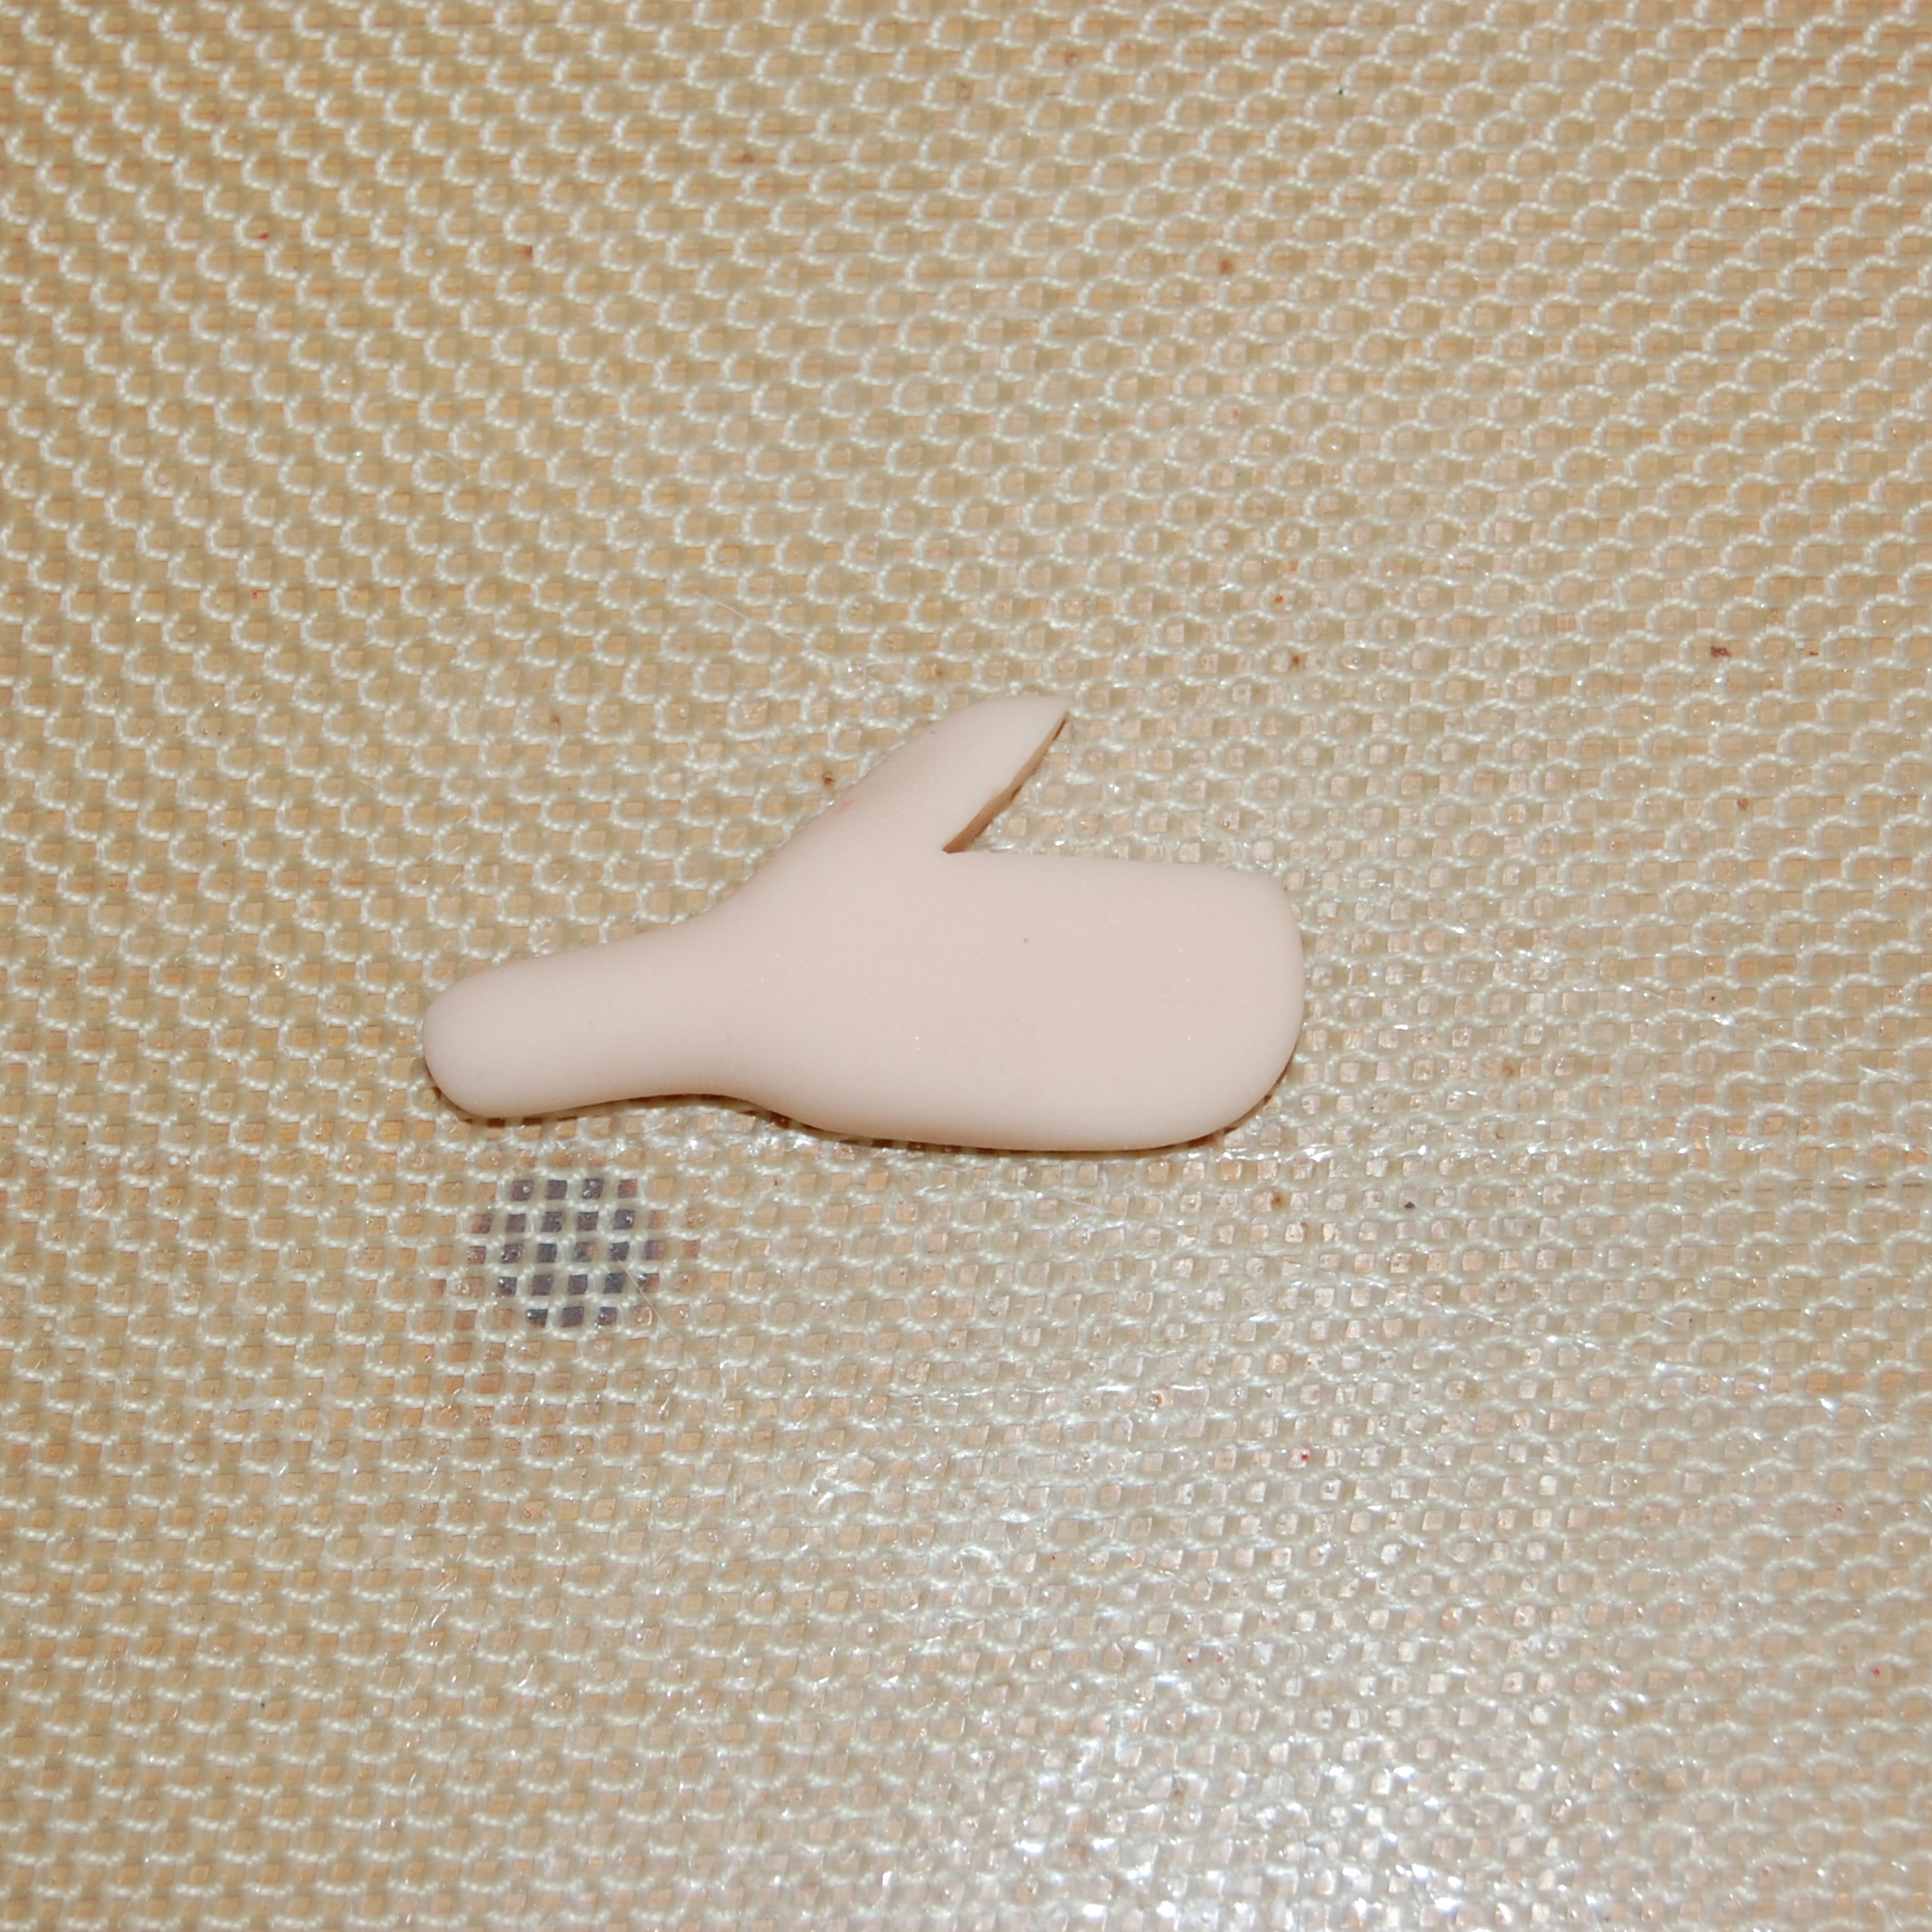
Remove that section of fondant.
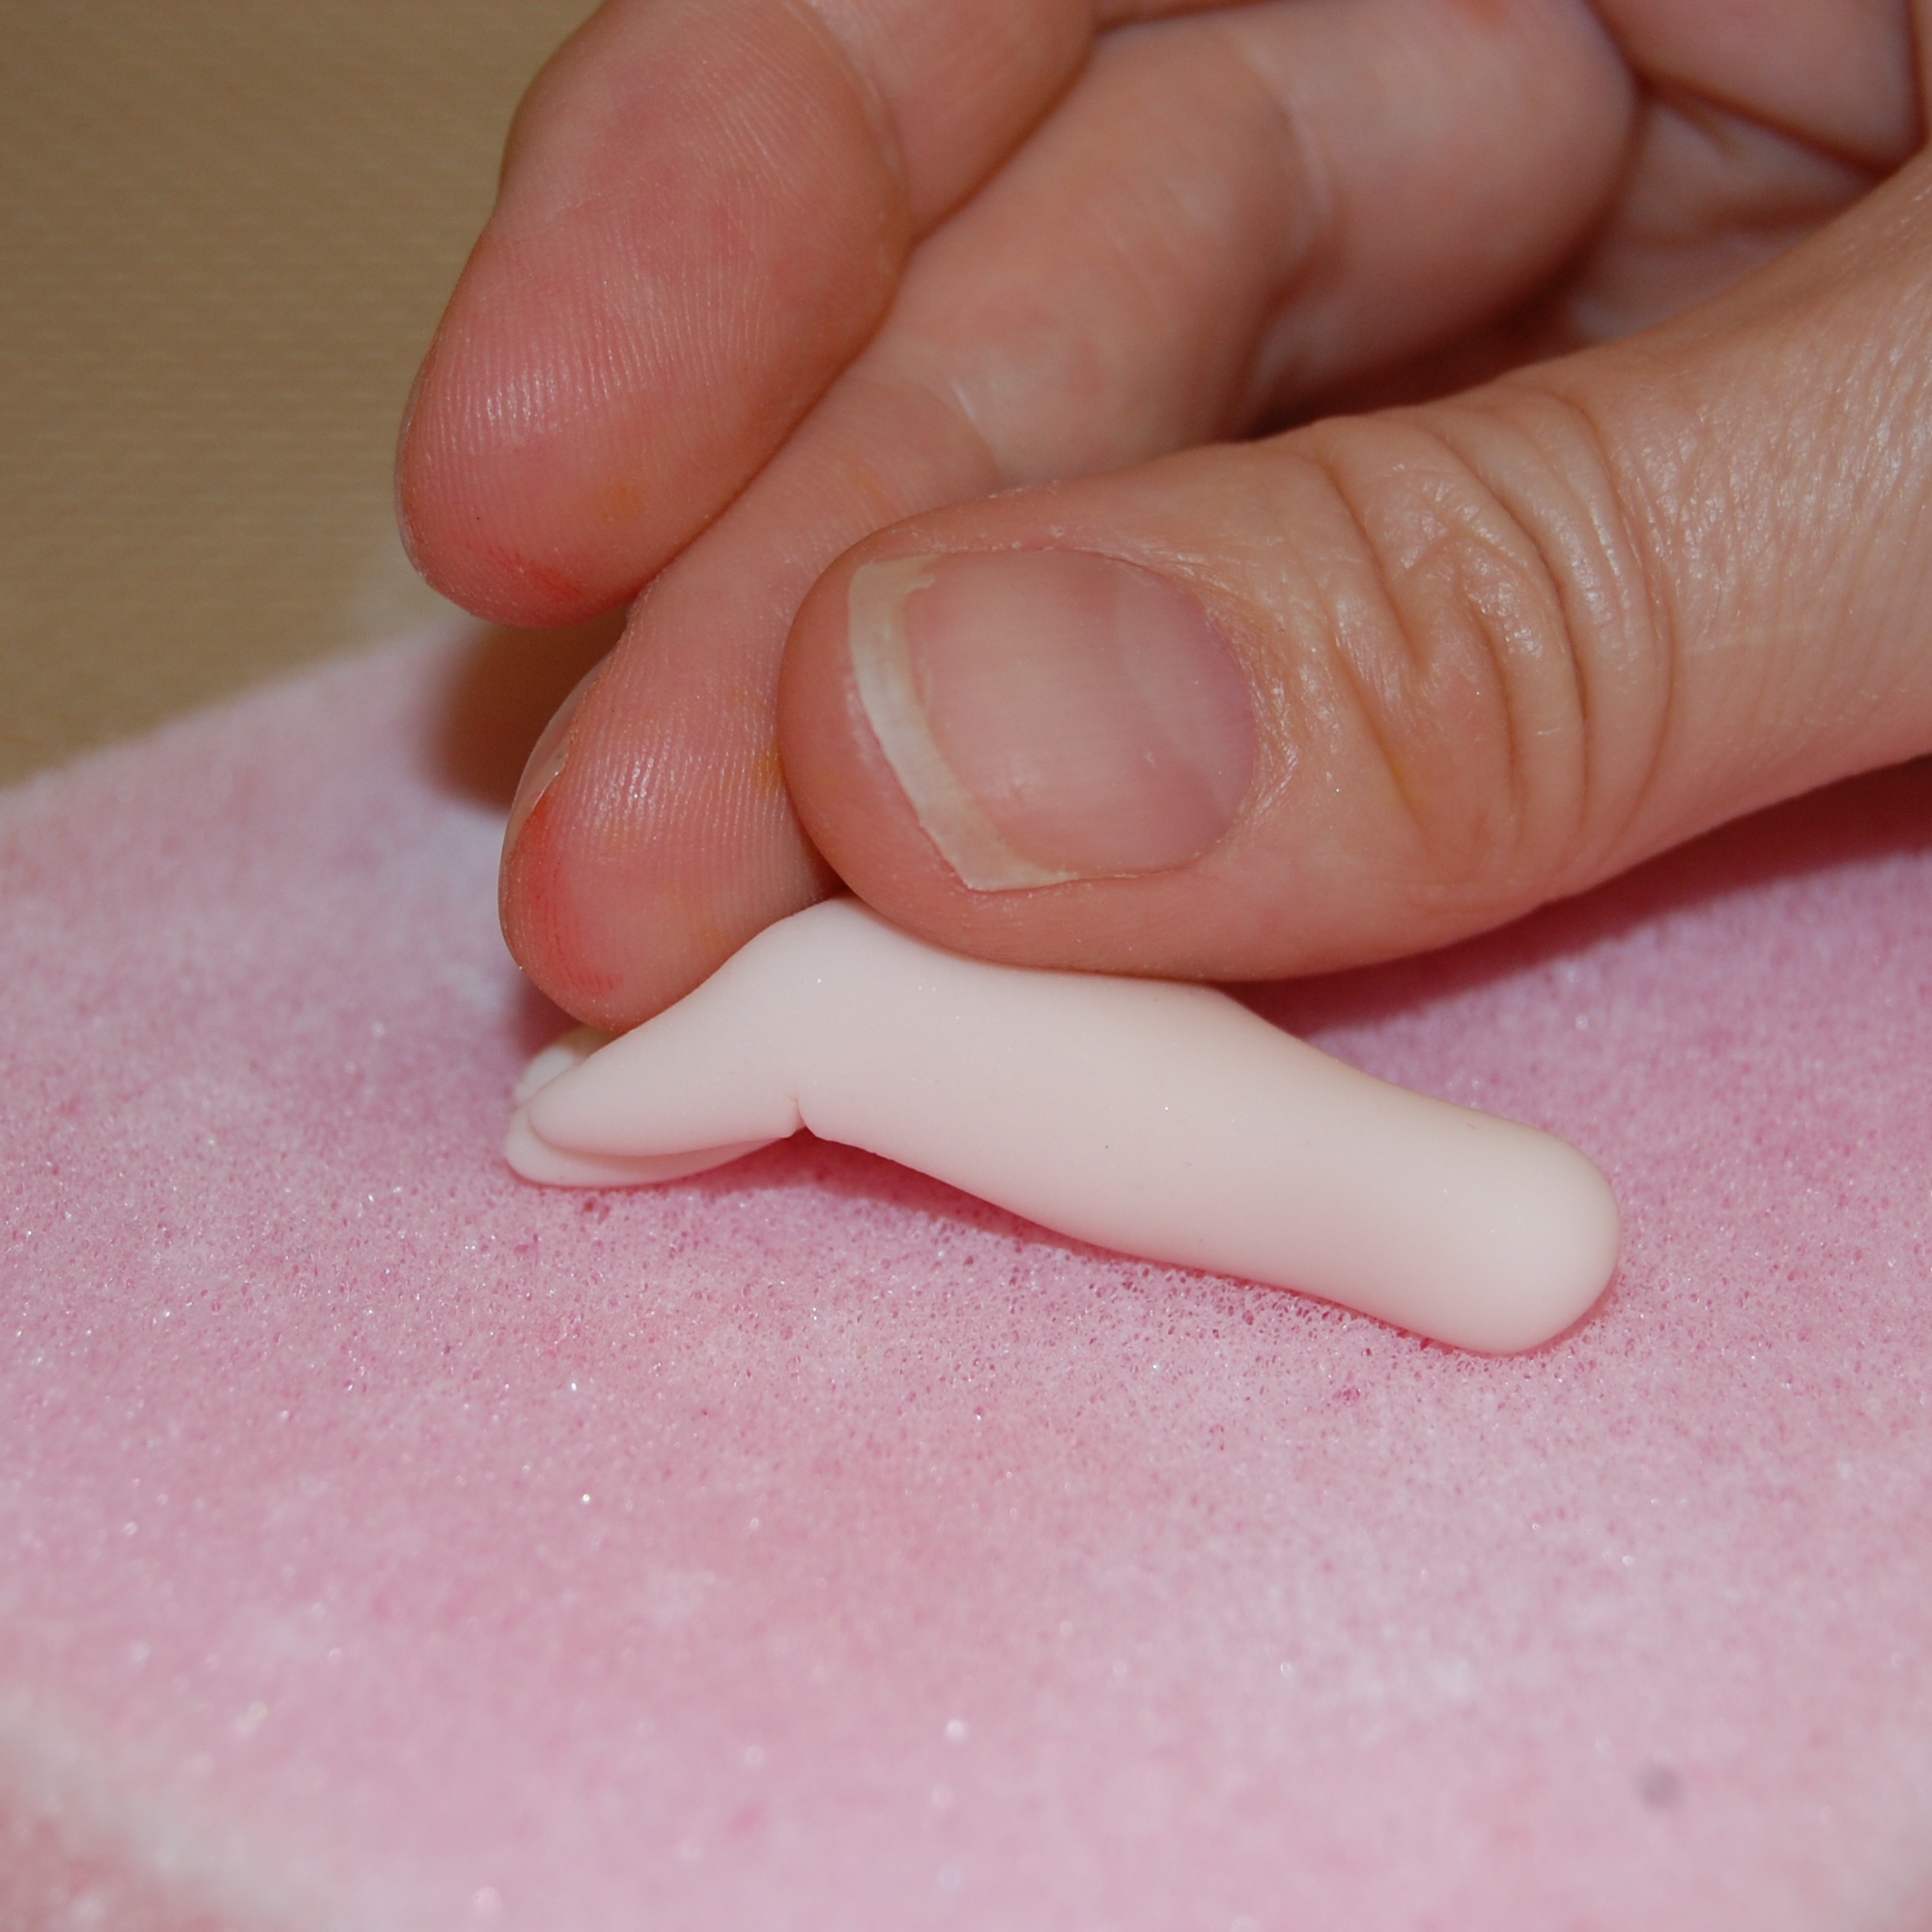
Step 10:
Roll the thumb very gently between your thumb and forefinger to round it slightly. Rub the other cut edge to smooth and thin it slightly.
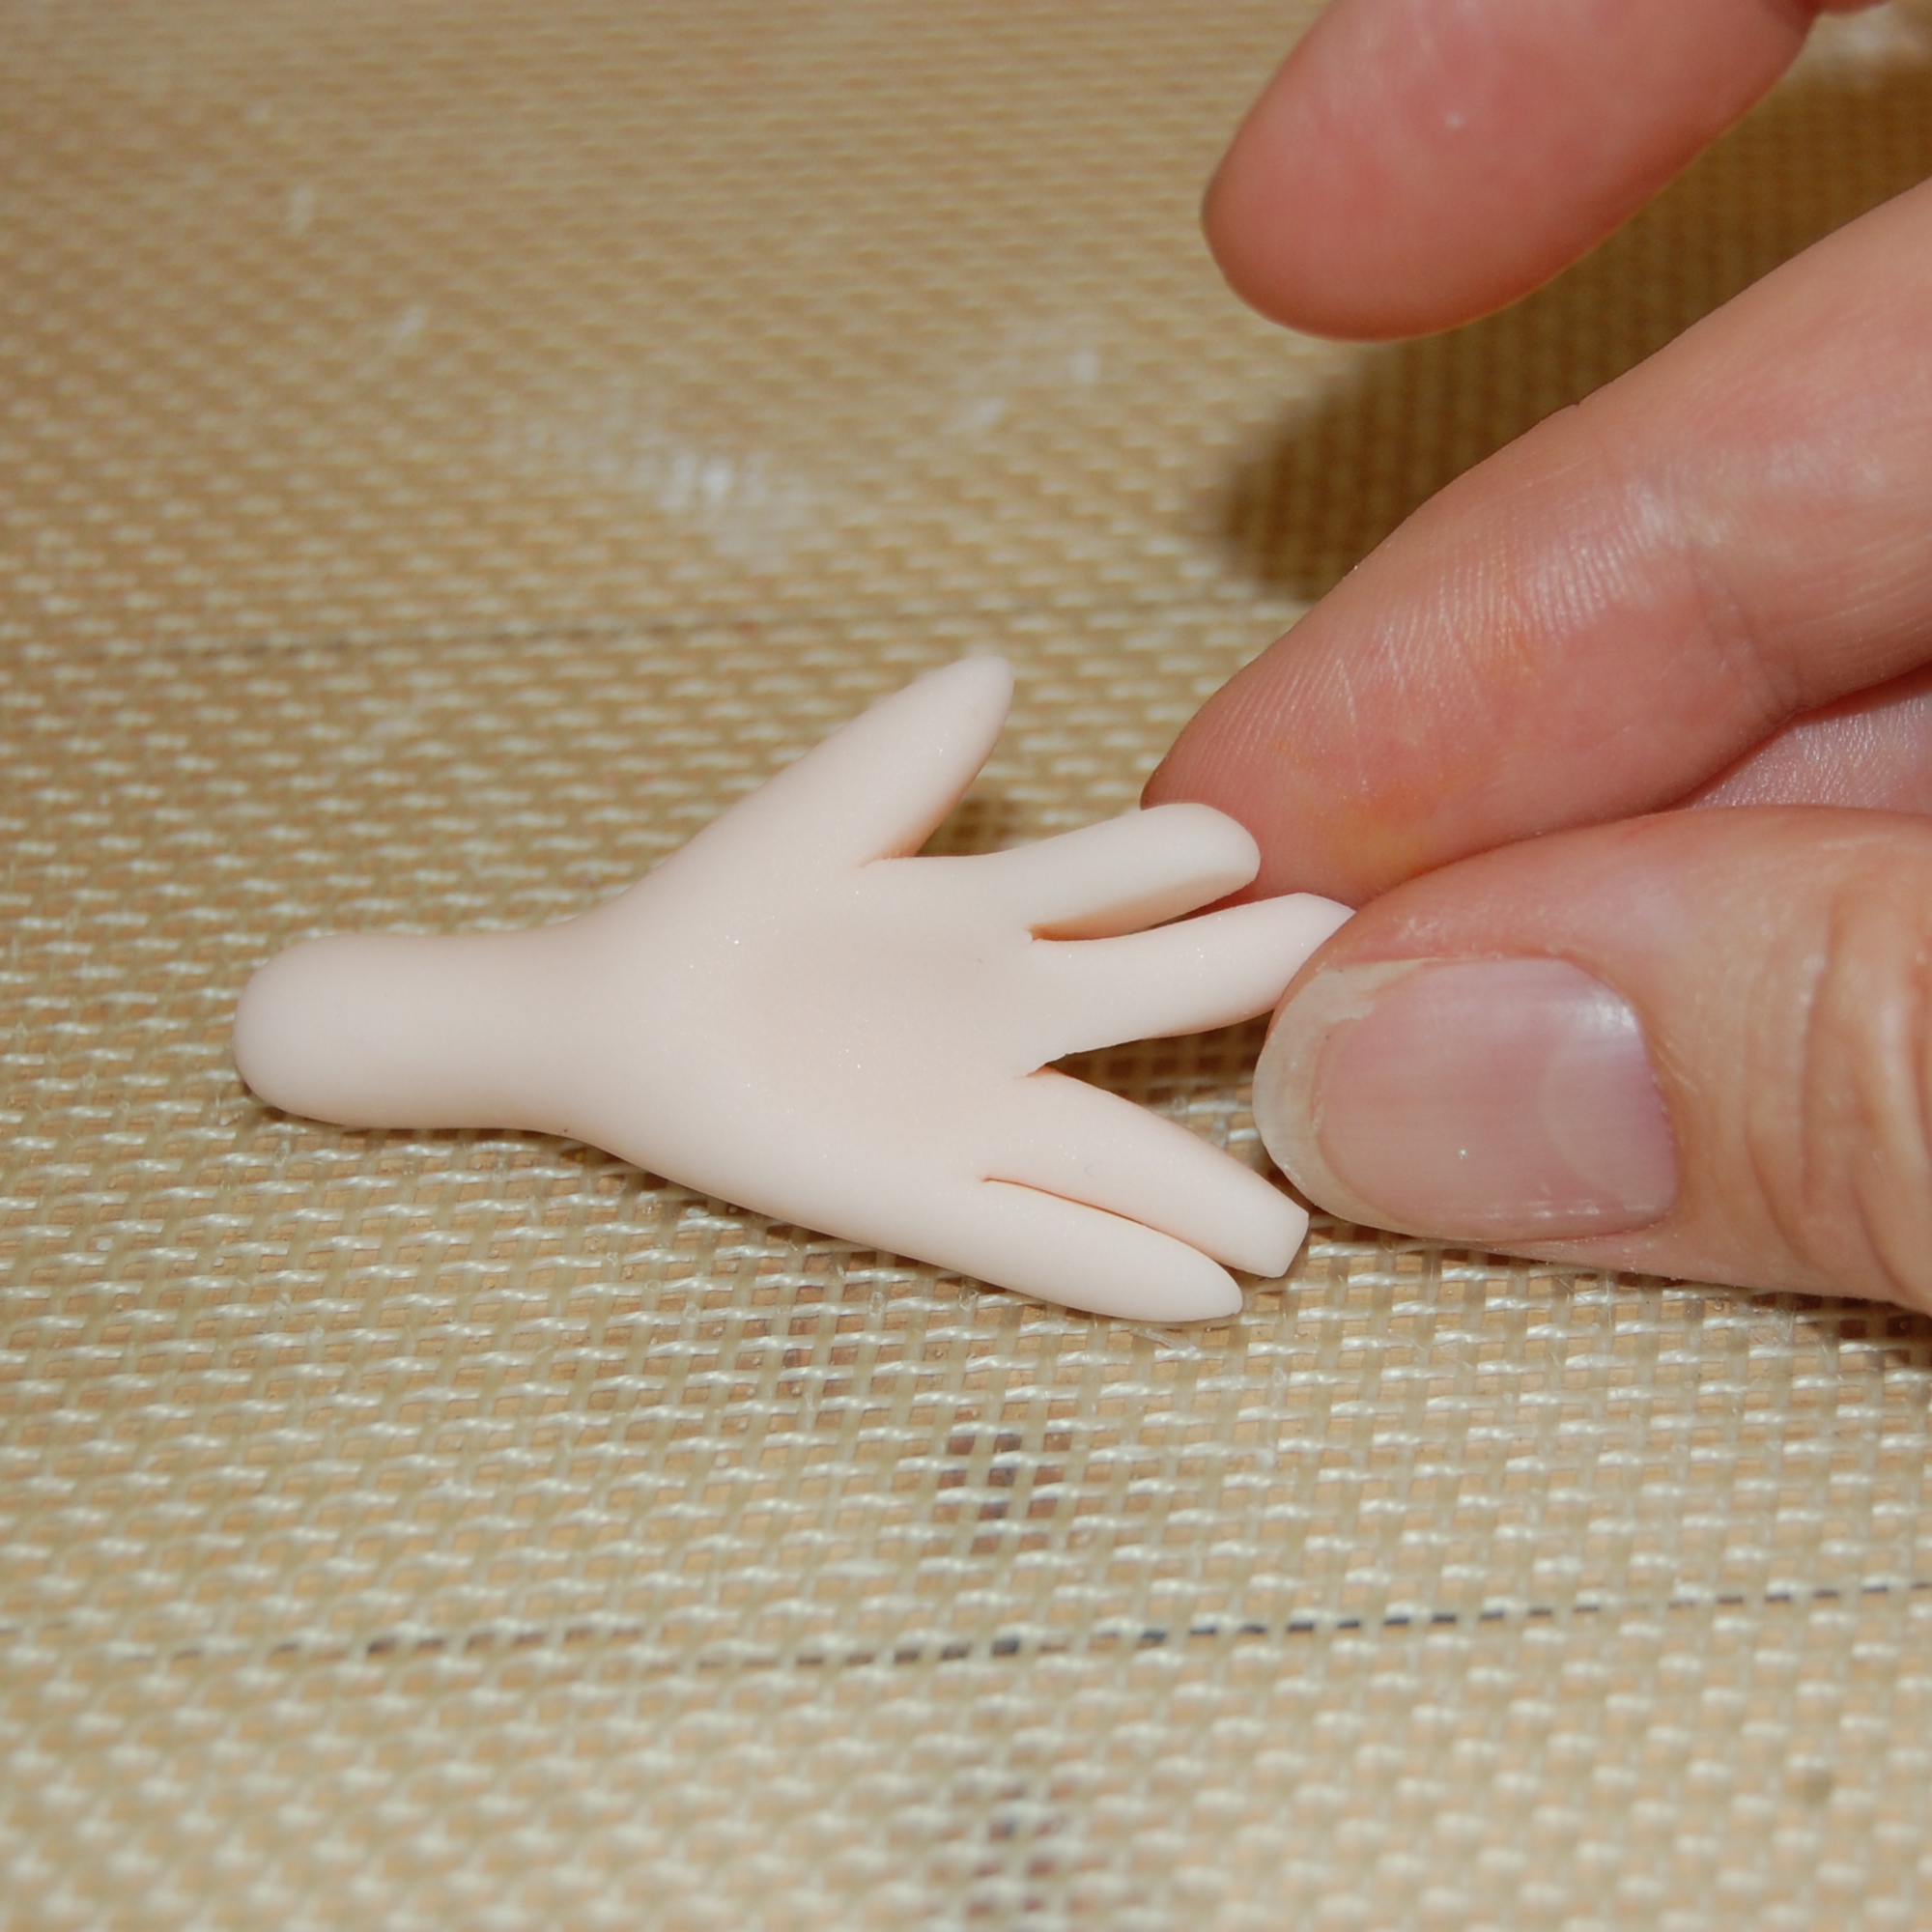
Once again, have a look at your own hand. You will notice that your fingers join your hand at about the point where your thumb ends.
Step 11:
In order to cut four equal-sized fingers, make the first cut in the center of the hand. The cut should end level with the tip of the thumb.
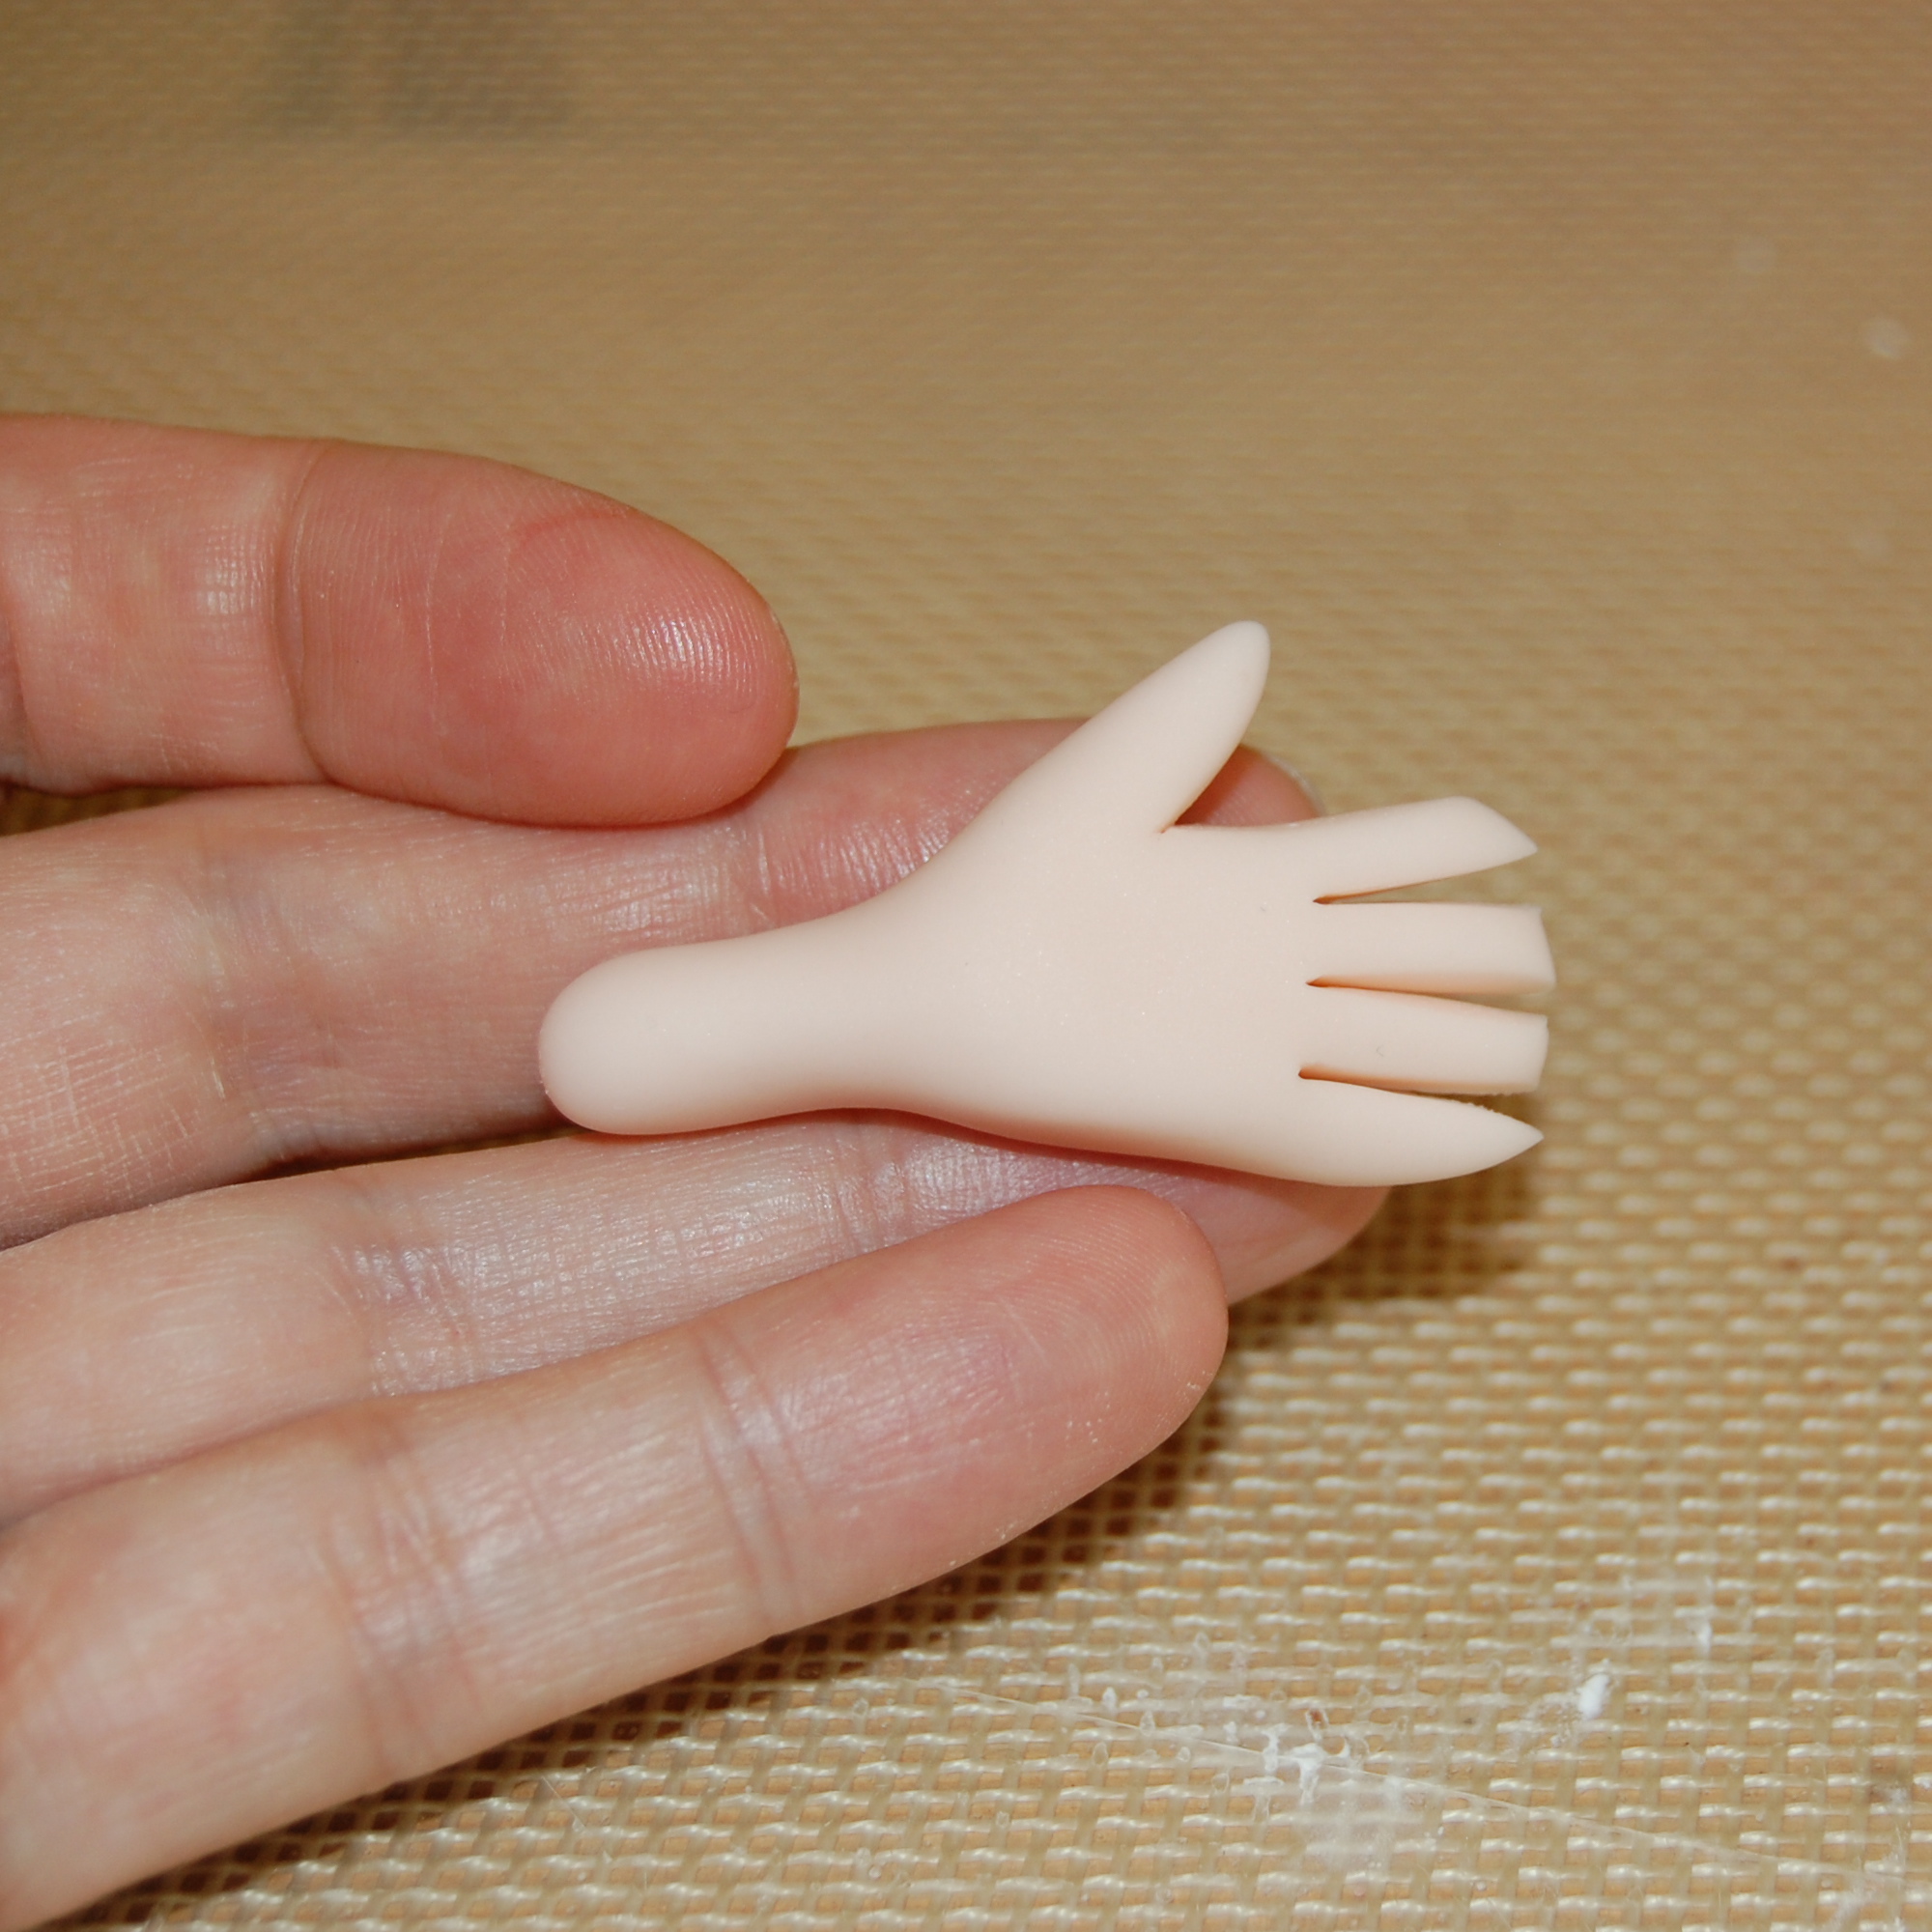
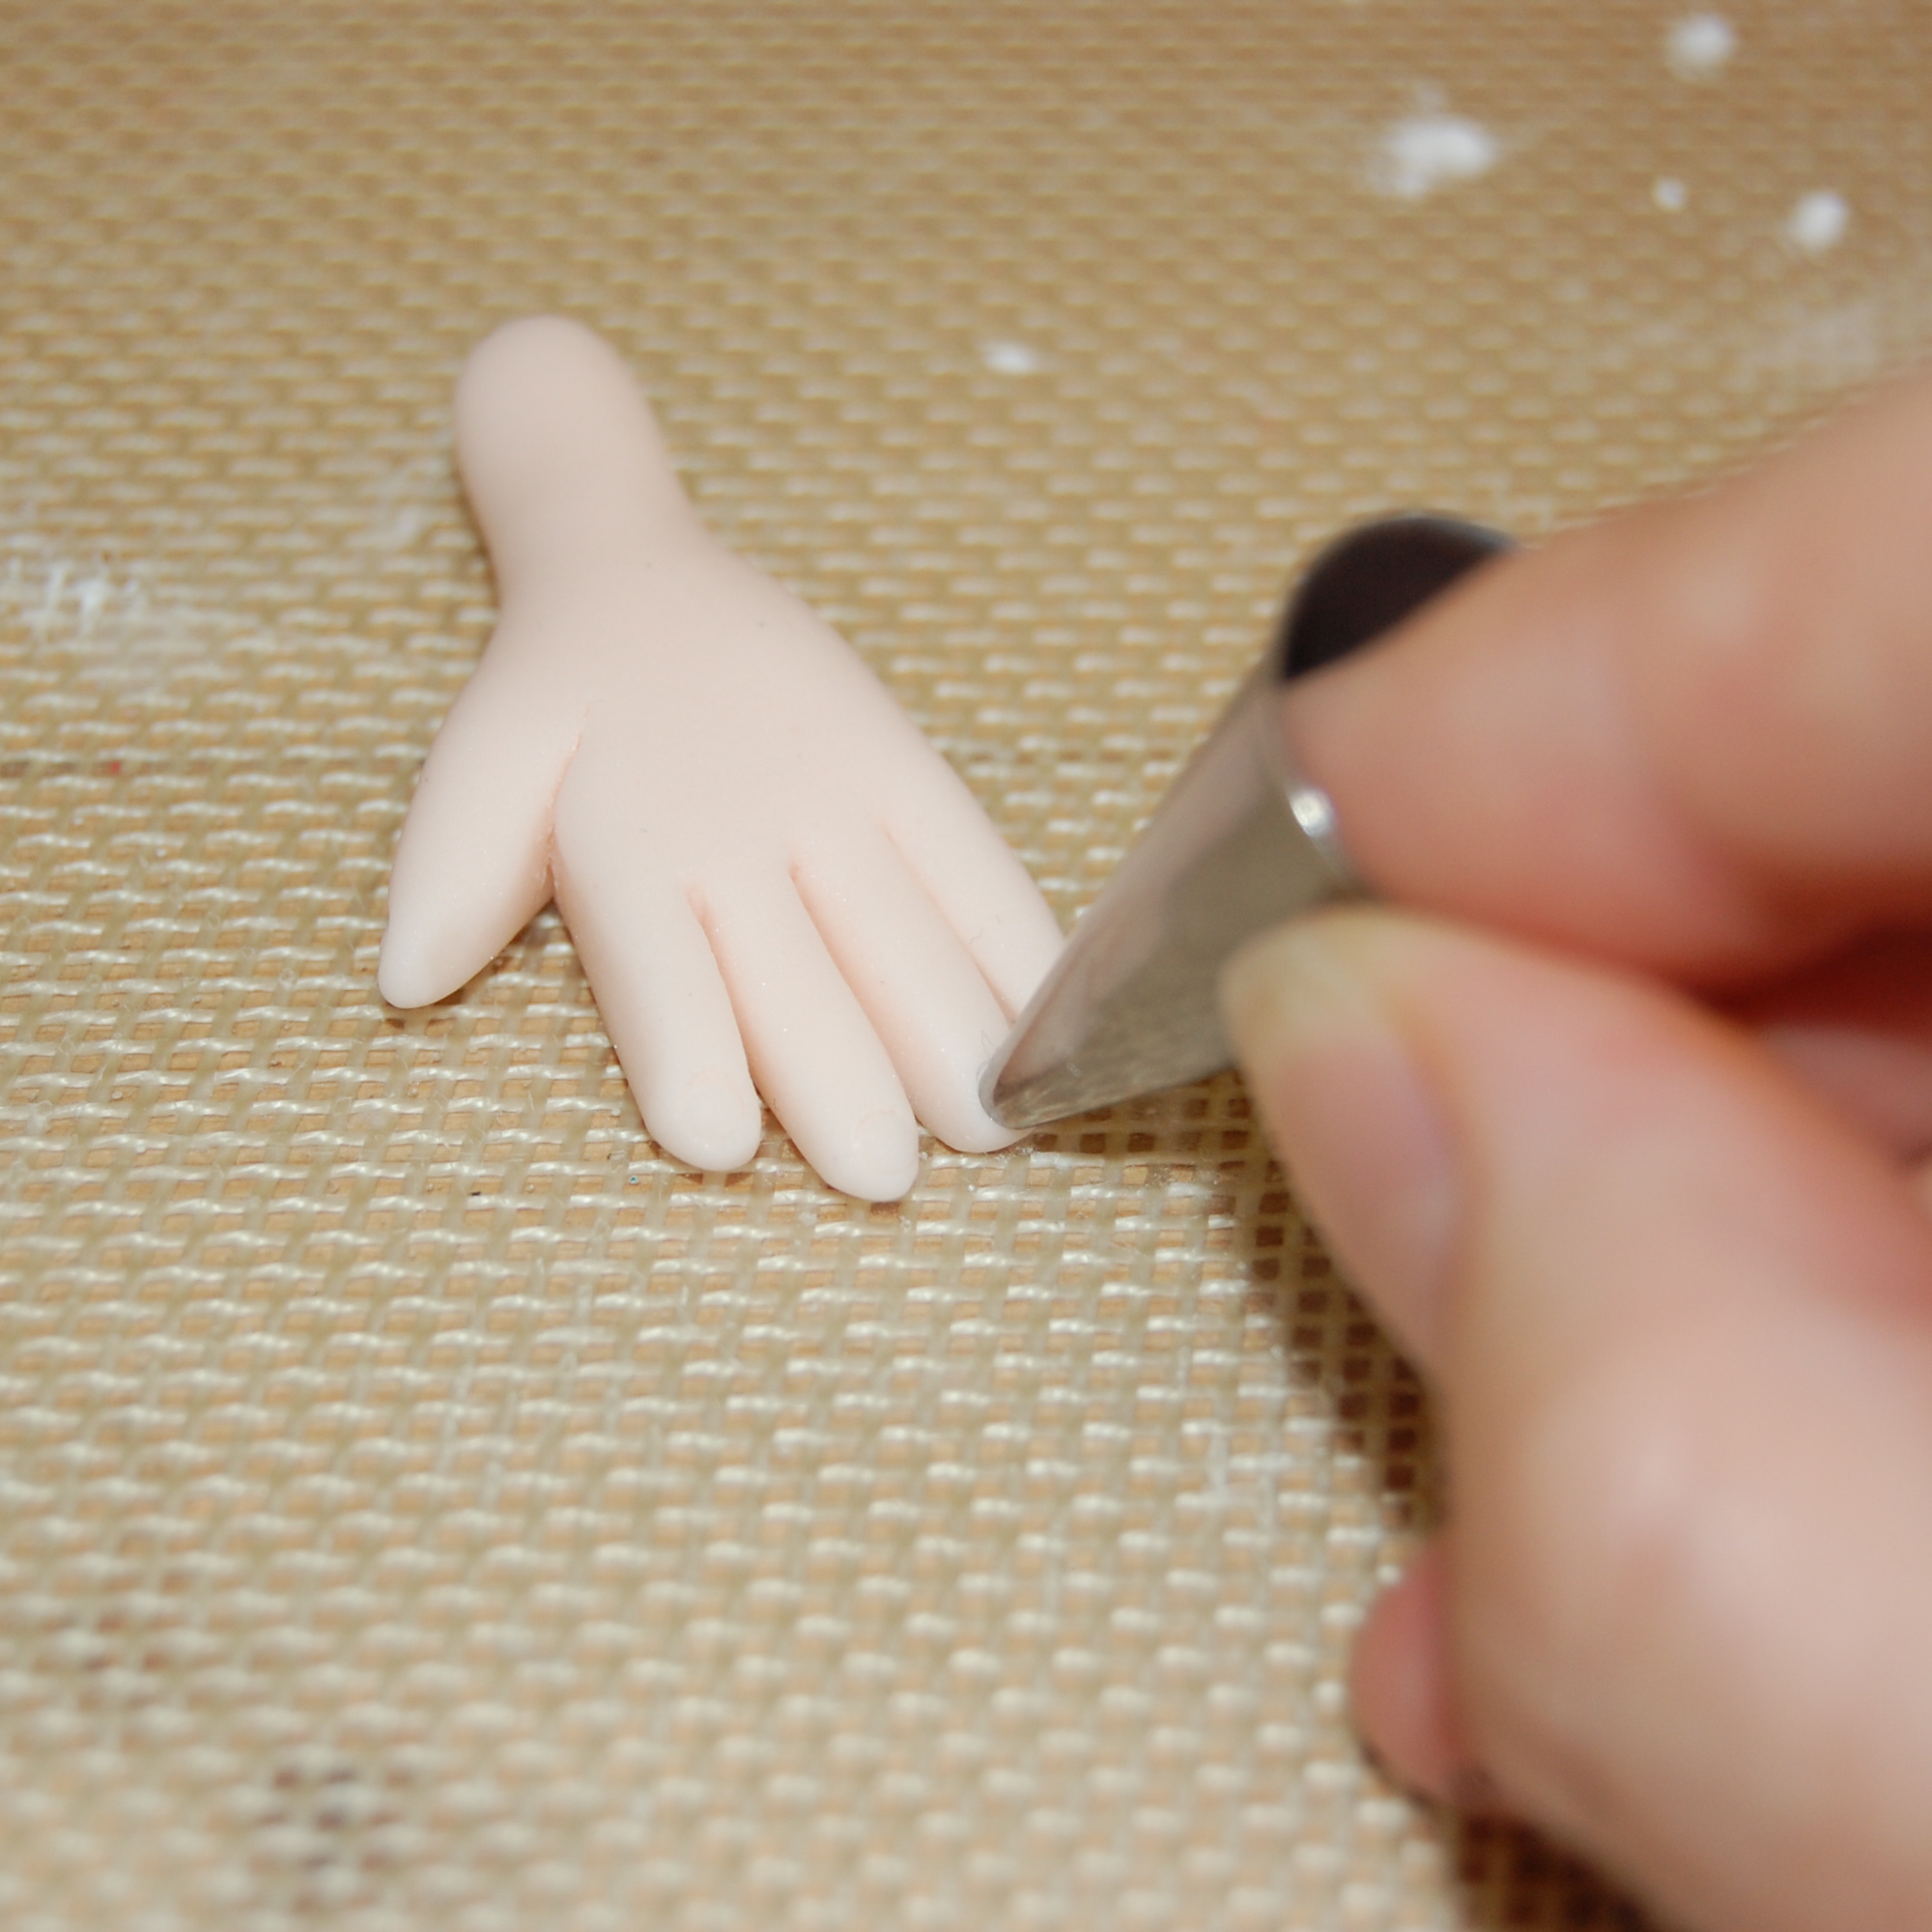
Step 12:
Make two more cuts to create four equal-sized fingers.
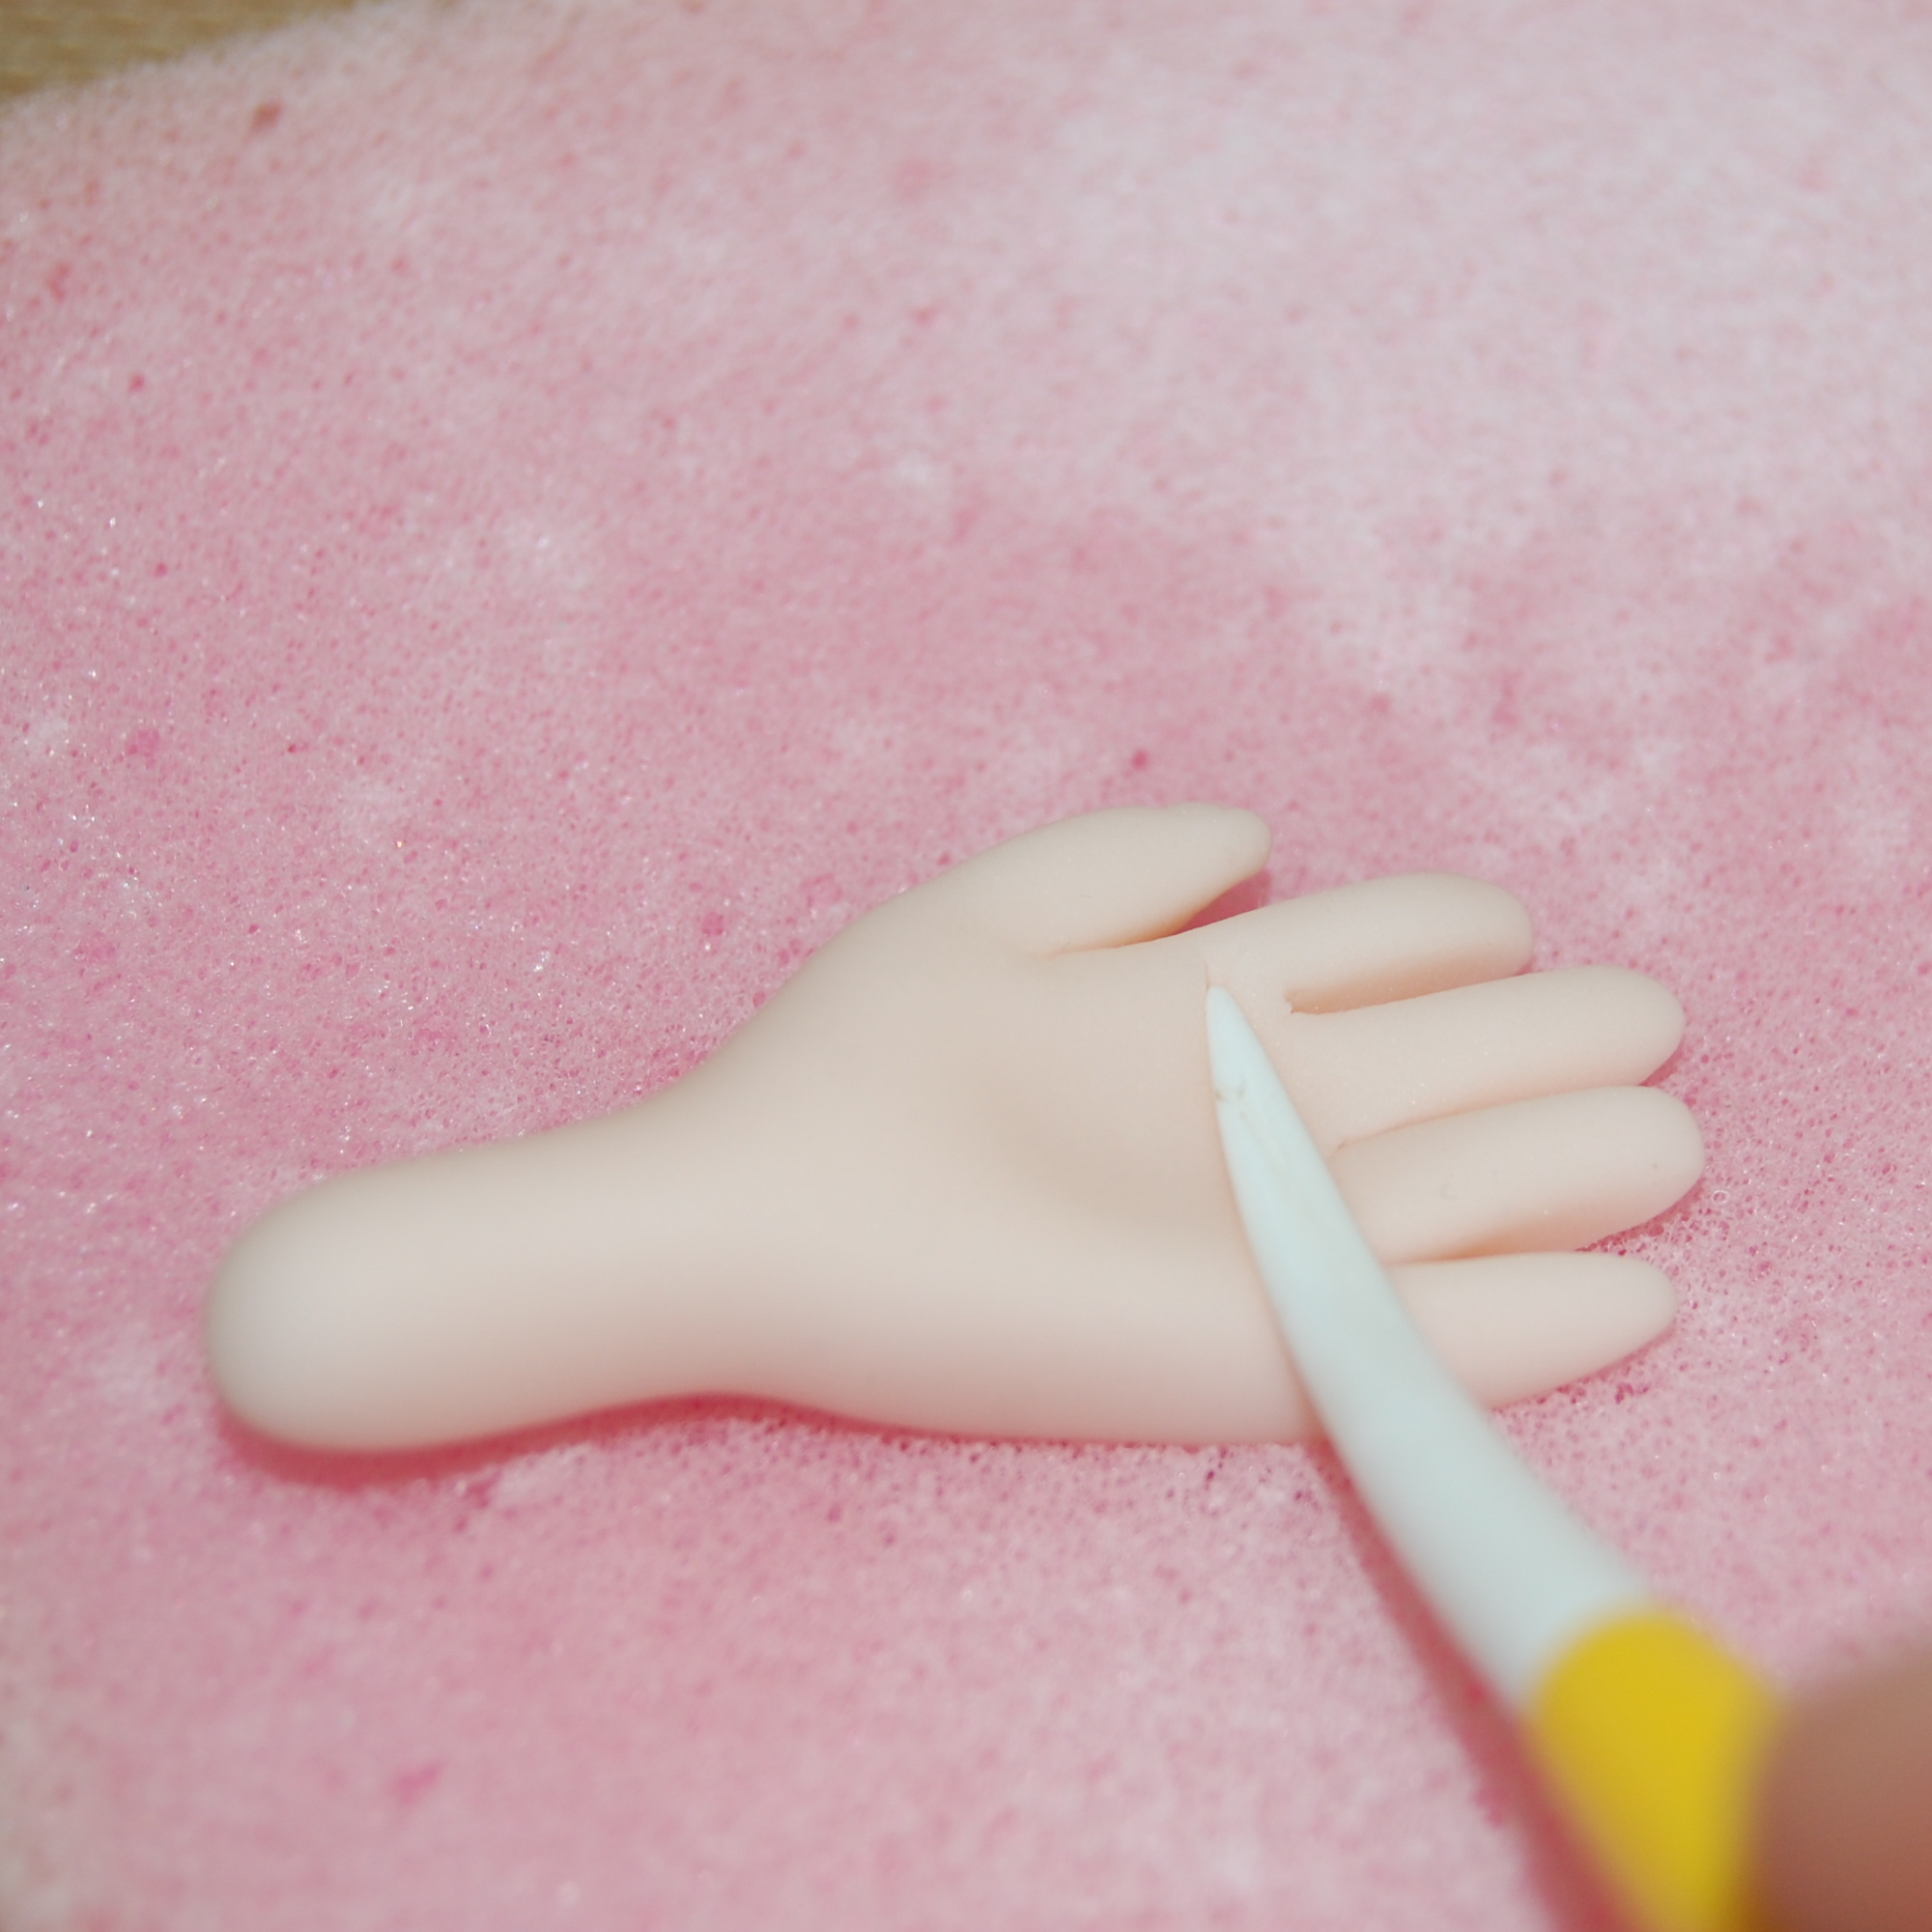
Step 13:
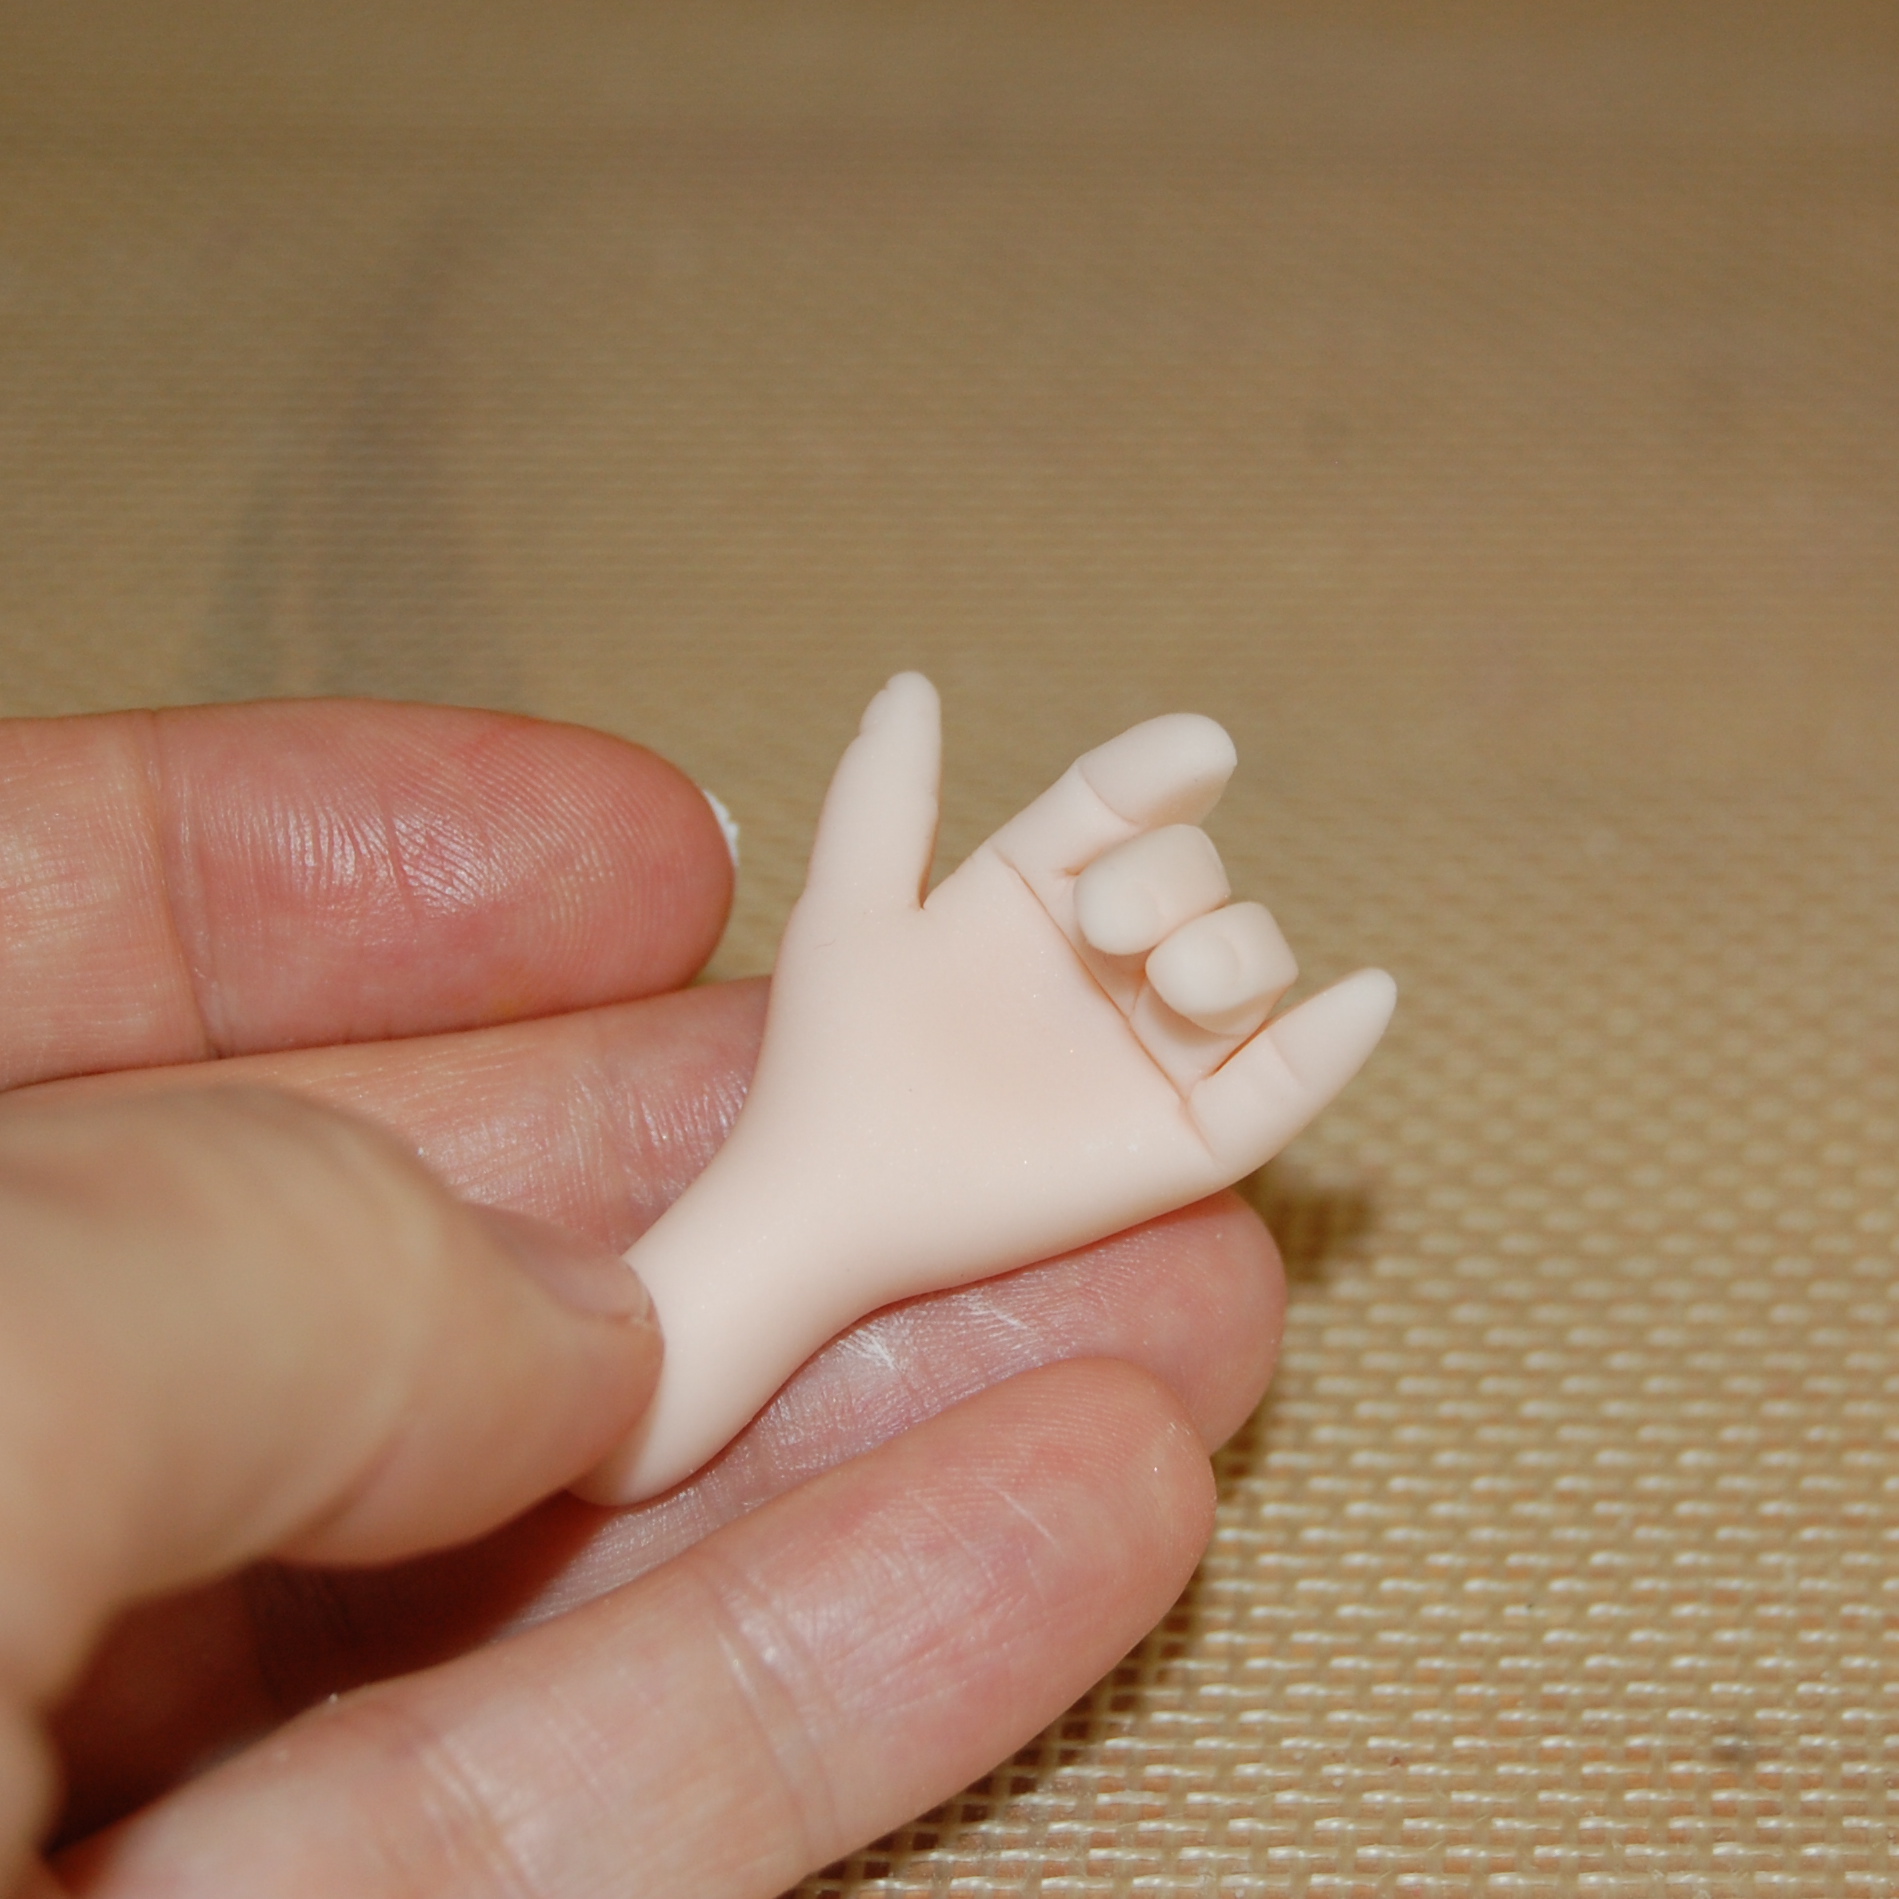
Place your hand on a foam pad and use a ball tool to create an indentation for the palm. This will bring your hand to life.
Step 14:
Gently roll each finger to create a rounder shape and smooth the cut edges.
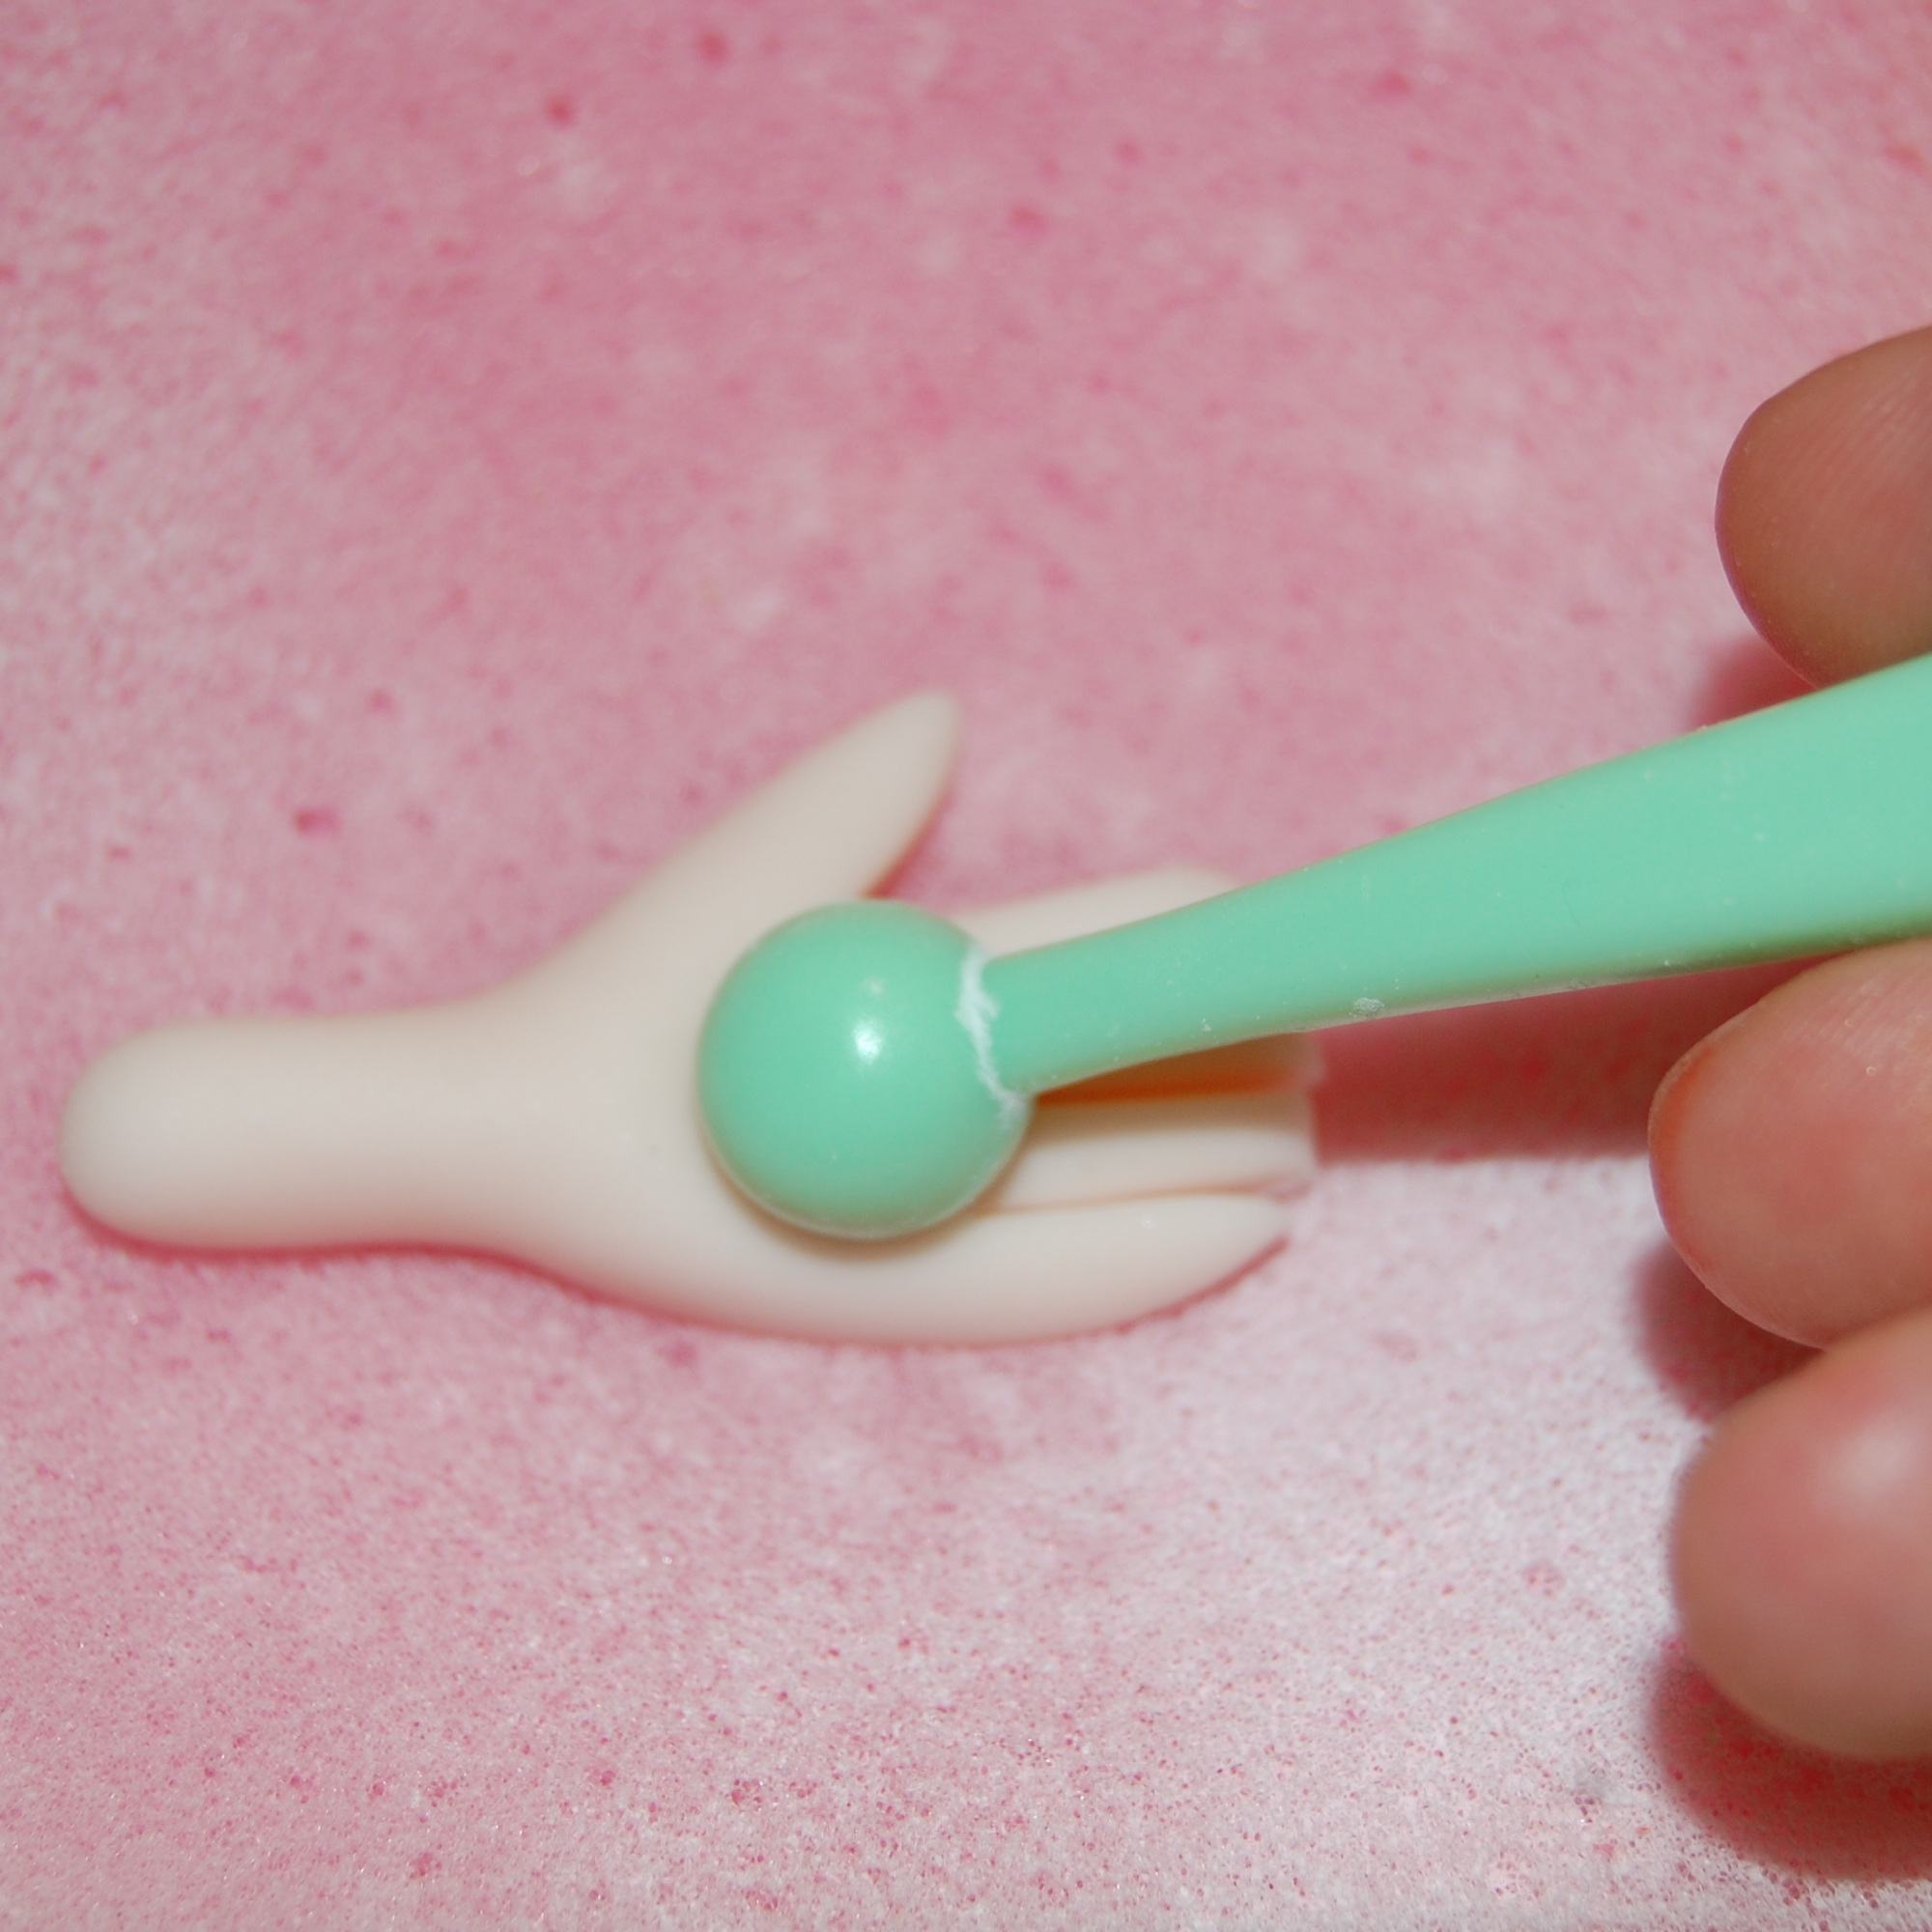
Step 15:
You can add details like fingernails using small piping tips, and make knuckle indentations with a toothpick.
If you need to form the hand into a fist, there are a couple of extra steps that will help create the right shape.
Step 16:
Make a light indentation in the palm of the hand with a boning tool or knife. The indentation should be just behind the fingers. Refer to your own hand to see where it creases.
Step 17:
Flip the hand over and gently pinch the fondant where it bends to create the knuckle. Repeat Steps 16 and 17 to create the finger knuckles.
What a great tutorial! So easy to follow, definitely recommendable to all! Please keep them coming!!