
To chop a mortise by hand, first get the right tools and then understand how they are designed to produce an accurate result for your woodworking.
It’s all about the chisel
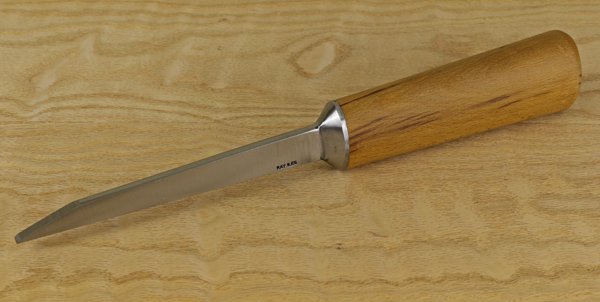
Let’s take a look at the special features of a mortise chisel that make it a combination of strength and accuracy ideally suited for chopping a mortise. First, notice that the chisel is very thick — in fact, thicker than its width. This supplies the strength necessary to chop and lever out the waste.
The width of the mortise is determined directly by the width of the chisel. As you chop and lever, the extra thickness of the chisel acts as a guide to maintain a consistent mortise width and to avoid twisting the blade, which would ruin the accuracy of the mortise walls.
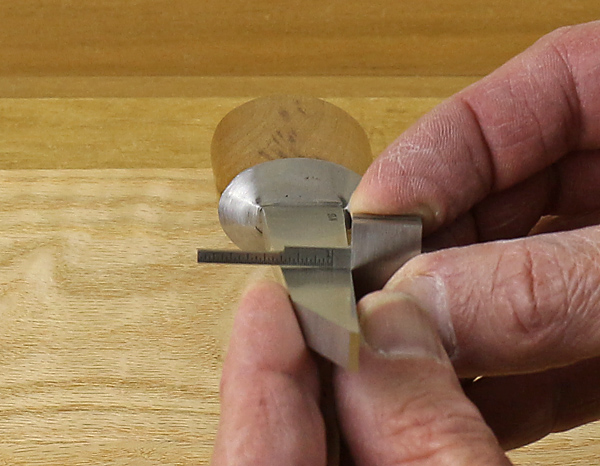
Other important features of a high quality mortise chisel are subtle. Surprisingly, the blade is not quite rectangular in section. Rather, as demonstrated with a square in the photo below, the width slightly tapers toward the top surface of the blade to produce a trapezoidal cross section. This reduces friction from the sides of the chisel against the walls of the mortise as you chop and lever, which prevents the chisel from getting stuck.
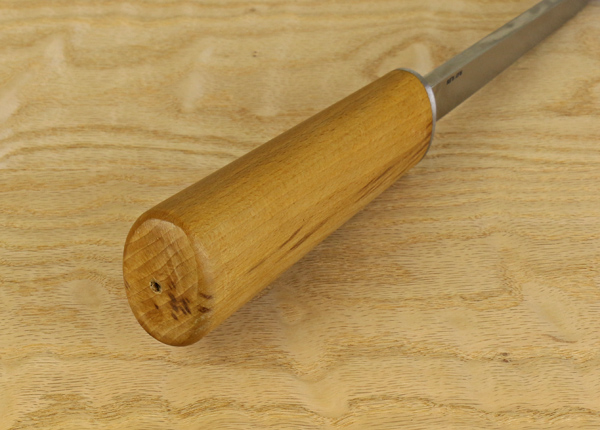
Notice that the handle is oval, not round. This allows you to feel in your hand the proper parallel alignment of the sides of chisel with the length of the mortise, an important aid because when chopping, your eyesight is tasked mostly with determining the placement of the cutting edge and the side-to-side vertical alignment of the blade. Some mortise chisels have flat areas on the sides of the handles for the same purpose.
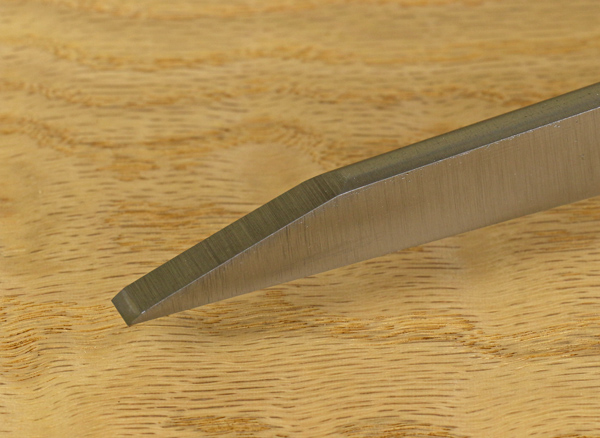
Sharpen your mortise chisel by grinding a low primary bevel of about 20 degrees to reduce the resistance of the blade sinking into the wood. Hone a fairly steep secondary bevel of about 35 degrees to form a cutting edge sturdy enough to withstand heavy chopping.
This particular chisel is a classic English mortise chisel — the finest version of the tool available, in my opinion. Note that the entire cross section of the handle sits in a platform-like bolster at the top of the blade to efficiently transmit power to the cutting edge.
You need a mortise chisel for each width of mortise you intend to make. I suggest start with 5/16″ as a good all-around size for most furniture making. Later add 1/4″ and 3/8″ chisels and wider sizes as needed for larger work.
An additional tool that is usually not necessary but occasionally helpful is a swan neck chisel. This looks like a lightweight mortise chisel with the lower section of the blade bent to a hook. It is used with levering and scraping motions to clean waste from the bottom of the mortise.
Mortise gauge is a must
The mortise gauge works in conjunction with the mortise chisel to create a properly placed mortise and an accurate matching tenon. Here’s how this clever system works:
The gauge has a pair of sharp marking pins; the outer one is fixed. The other pin is moved with a screw feed mechanism to match the width of the mortise chisel. This setting will be used to layout both the mortise width and later, the tenon thickness.
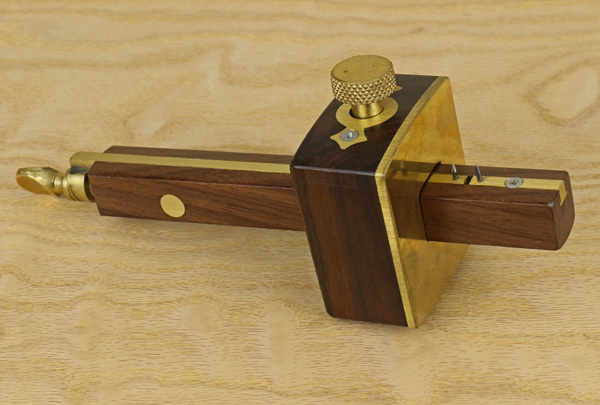
The photo below shows a setting. Make sure the points of the pins are no closer than the width of the chisel — a one-sided tolerance. The pins “write” the width of the mortise on the wood but the actual width of the mortise is determined by the size of the chisel and how precisely you use it. Of course, the mortise can never be narrower than the width of the chisel but realistically may be a hair wider. You certainly do not want to layout the tenon narrower than the width of the mortise, so keep the tenon in mind when setting the pins.

The fence on the gauge moves independently from the pins and is tightened by the top knob. In a future post, I’ll discuss the fence setting in detail but for now know that it determines the inset of the mortise from the face of the wood and in many cases must be reset to mark out the tenon – without resetting the pins! Some gauges move the pin with a simple slider but I urge you to avoid this frustrating design because it can slip as you set and reset fence.
This work cannot be done with a single-point marking gauge. Get a mortise gauge.
Think big
To chop your mortises, use a big wooden joiner’s mallet with a flat, angled striking face. When the mallet strikes the chisel, your eyes will be on the chisel blade, not the top of the chisel handle. The large flat mallet face avoids glancing blows that are more likely with a round mallet, which is more suited for carving. Similarly to the design of the chisel handle, the rectangular mallet handle helps ensure square-on blows by feel rather than by sight.
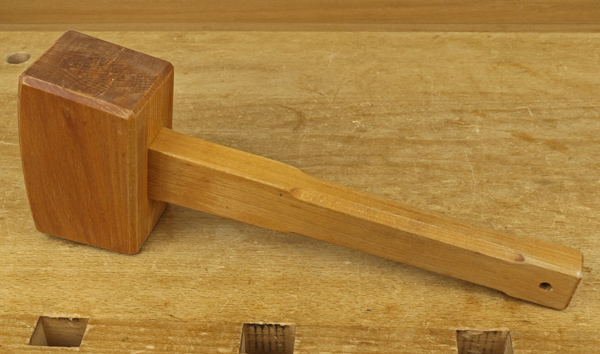
A hard wooden mallet delivers force in an instant. Japanese woodworkers tend to prefer a steel hammer, which has a similar effect. This is more effective for fracturing wood than the slower impact dynamics of a hard rubber dead blow mallet.
You’ll be doing some serious pounding, so try to use a heavy, sturdy workbench. Secure the work piece directly on the bench surface, preferably over or near a leg. Do not grip the work piece on its sides in the front vise — it will surely move and eventually damage the vise.
You already have these
A square and a marking knife will be used to layout the ends of the mortise. Also helpful is a rigid six-inch rule to check the depth and accuracy of the mortise, and a 0.5 mm mechanical pencil to enhance the layout lines made with the mortise gauge.
Next: we start chopping.
Share tips, start a discussion or ask one of our experts or other students a question.
No Responses to “Understanding Tools for Mortising by Hand”