
Ask anyone and they’ll tell you the name of the game in photography is sharpness. Everything in your photos is supposed to be sharp, sharp, sharp — right?
Well, to quote photographer David duChemin, “If the best thing you can say about your photograph is that it’s sharp… well, there’s got to be more than that.” I’d have to agree.
Create a motion blur to add impact and a sense of action by using subject or camera movement.
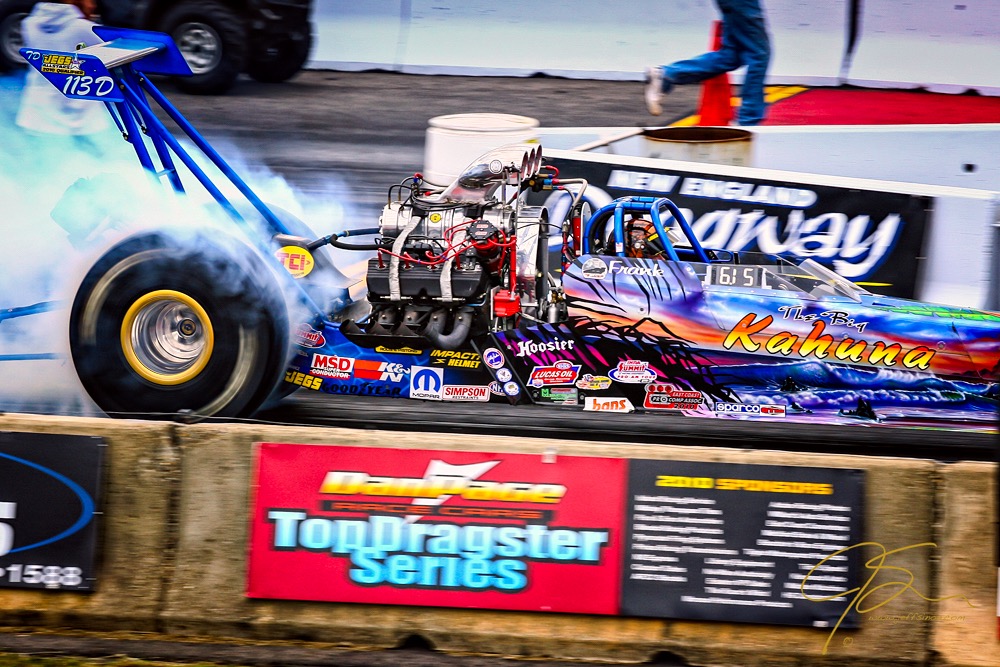
Motion blur photography can give your images life. Without the purposeful blur in the image above, the viewer would be left with no sense of what it’s like to watch a 3,000+ horsepower Top Fuel dragster violently launch from the starting line. By selecting a shutter speed of 1/250th of a second and panning with the car as it left the start line, I captured some of that power and tire-smoking excitement.
When the subject is in motion, shutter speed is everything.
But there’s a catch. There is no go-to shutter speed to use when capturing the motion blur of a moving subject. The shutter speed you choose will be determined by the speed of your subject and no small amount of experimentation.
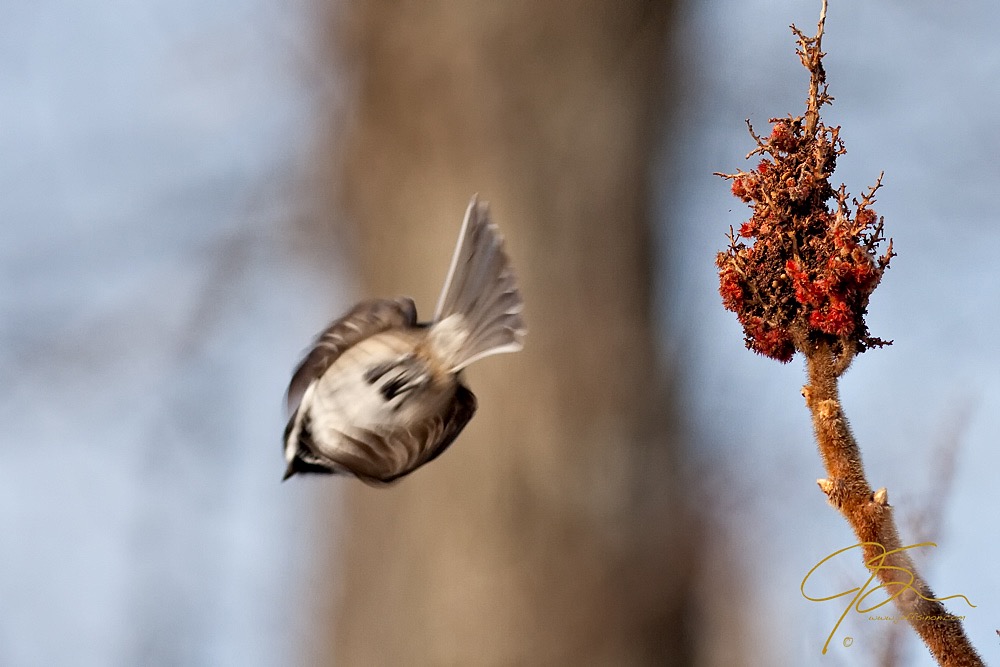
While the shutter speed for the photo of the race car was 1/250th of a second, this next photo of a black-capped chickadee was taken with a shutter speed of 1/800th of a second.
How to manipulate shutter speed
1. Vary the aperture. A smaller aperture will usually lead to a slower shutter speed. On the other hand, a larger aperture often results in a faster shutter speed while maintaining a correct exposure.
2. Adjust the ISO setting. With an eye toward maintaining a correct exposure for a given aperture, a low ISO setting like 100 will require a slower shutter speed than an ISO setting of 800.
3. Use lens filters. You can also use filters placed over your lens as an aid to lengthen exposure times to creatively capture motion. For this next photo, I used a 10-stop neutral density filter so that I could use a 182-second (just over 3 minutes) exposure. Another advantage of such a filter is using really long exposures during times of day when you’d normally need to use a fast shutter speed for the correct exposure.

I recommend the everyone have a few neutral density filters, each rated for a different number of stops of light, as well as a circular polarizer filter. Not only is the polarizer good for removing the reflections from wet and shiny surfaces, but they also they usually reduce the amount of light hitting your camera’s sensor by from 1½ – 2 stops.
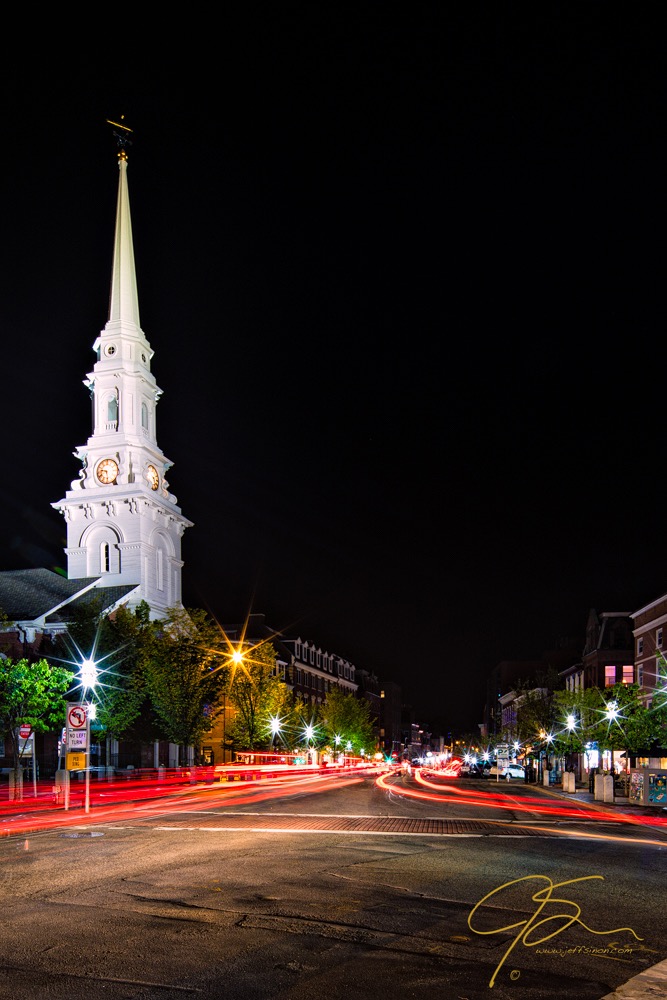
Want some easy practice? An accessible subject for practicing your motion blur photography is the light streaks from the head and taillights of cars. Find yourself a nice, busy street corner at night to set your tripod up, frame your shot and fire away. Try for a 20–30 second exposure.
Creating motion with your camera
Now that you’ve had a chance to use subject motion in your photos, it’s time to try a little camera motion. Purposeful camera motion during exposure creates unique and often abstract photos. This technique requires the most experimentation of all when it comes to capturing motion blur and making a pleasing photo, so be prepared to delete a lot of duds.
Before moving the camera during, I take a test shot to get a good starting point for my exposure setting. Once you’ve taken a simple shot, make adjustments to aperture, shutter speed or ISO to get the longest possible exposure the lighting conditions allow. I’ll often stop the lens way down and use a really small aperture like f/22. Using a small aperture along with a low ISO setting will help produce a slower shutter speed.
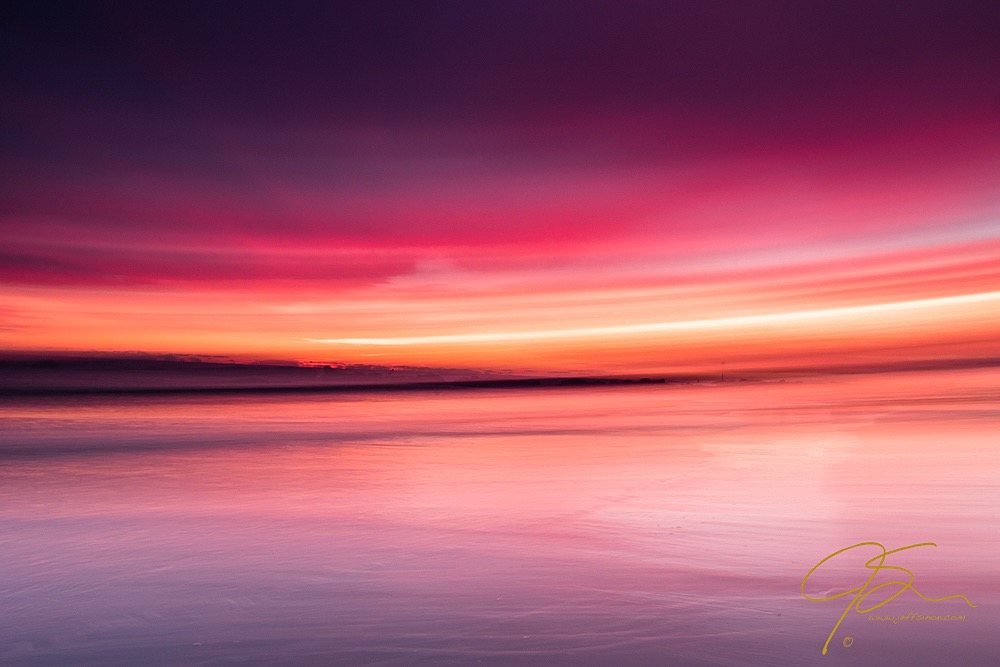
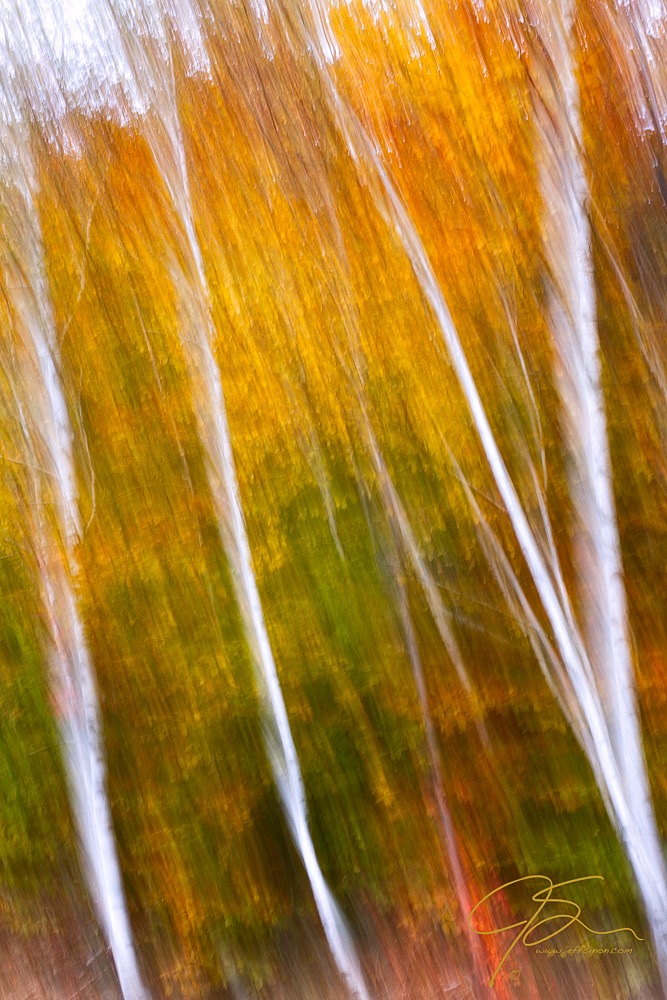
Now all that’s left is which direction and how fast to move your camera. I’ve found the most pleasing results by panning the camera in the same direction as the key elements in the photo. For example, when making the photo of the birch trees, I moved the camera vertically, and for the sunrise seascape photos I panned from left to right.
By practicing some of these techniques, you can add a sense of motion or create interesting abstracts in your photos.
Share tips, start a discussion or ask one of our experts or other students a question.
No Responses to “When Blurry Photos Are Actually A Good Thing: Motion Blur Photography”