
You’ve chosen a sewing pattern and decided to make a test version — fully intending to make some adjustments. What’s the right way to get the most use of your muslin? Follow these tips for sewing up your garment muslin to get perfect fit.
Constructing the muslin
Tip #1: Use similar fabrics
If your pattern calls for a knit, then you need to use a knit fabric for your test version. The fabric can make a big difference when it comes to fit!
Making a muslin might be the time to sacrifice that “What was I thinking?” fabric that you no longer like. Or use remnants from other projects that aren’t sufficient for anything else. Feel free to mix and match fabric scraps in your muslin. Since it’s purely for research purposes and will never see the light of day, it doesn’t matter if it looks nice. Plus, you’ll gain more space to stash something better!
Tip #2: Mark all pattern notations
You may be tempted to sew your muslin without marking every last notation, but resist! Mark every dart and mark and use them to sew a more accurate muslin. I sew the darts as designed on the pattern, and then unpick the darts later to move them for a better fit.
Tip #3: Sew with basting-length stitches and no knots
Sew the muslin with long basting stitches — just turn the dial up and lengthen your stitches. And there’s no need to backstitch: After all, you just want it to hold together enough for you to try on. Using long stitches is both faster and presumes that you might be removing some of the stitches, which is exactly the idea.
Tip #4: Sew both sleeves to really check fit
You may only want to test the fit around the bust, waist or hips, but that doesn’t mean you should only sew the body of the garment. If the garment has sleeves, be sure to sew them in your muslin, as they can make a difference in fit. A sleeveless garment allows full range of arm movement; with sleeves, the difference is apparent. Adding sleeves to your muslin also means you can check shoulder width, slope and mobility.
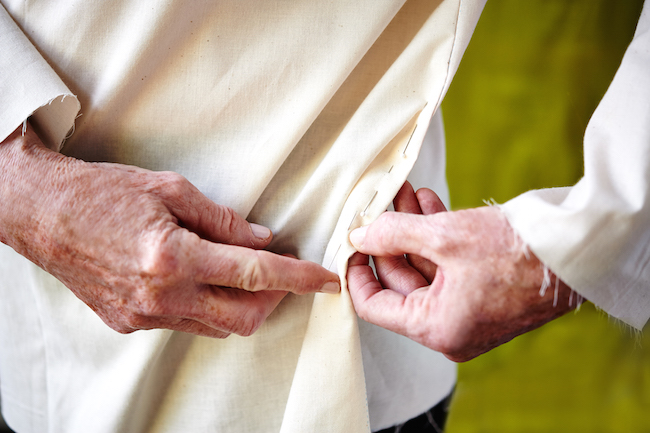
Tip #5: Actually sew in the zipper
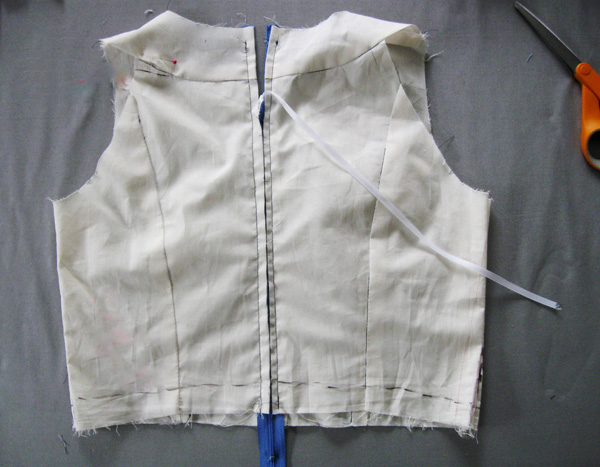
Trying on a muslin by yourself can be a bit challenging, especially if it has a center back zipper. Rather than trying to pin the back together, baste the zipper in by machine. You will get a much better idea of fit!
If you’re on your own, take a tip from scuba diving suits and tie a long piece of ribbon to the zipper — you’ll have more to grab onto to pull the zipper closed by yourself.
One last tip: Reuse your muslin zipper! I have a long, sturdy zipper that I use for all my muslins. After using, I just pull out the basting threads and set the zipper aside for the next one.
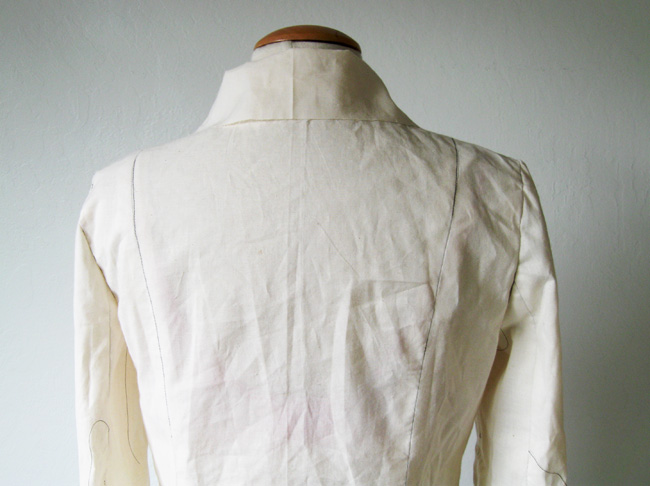
Tip #6: Stay-stitch neckline edges
Remember to stay-stitch all neckline and armhole edges with shorter-length stitch. This serves two purposes:
- First, it “stays” the edges, such as on a V-neckline that’s cut on the bias and could stretch out.
- Secondly, it allows you to see where the actual neckline is.
I like to fold the seam allowance down along the stitching line and pin it to see where the actual garment edge will land. This is a good way to check if the neckline is too high or too low for your liking and then adjust on the pattern pieces.
Trying on the muslin
Tip #7: Watch out for the center front
A critical item to mark on your muslin is the center front, especially when you try on a garment that opens in front, such as a shirt or jacket. When trying on the muslin, be sure to overlap the center fronts along that center line. Don’t make the mistake of matching the front as a standard seam allowance: You’ll need more fabric past the center front to allow space for buttonholes.
Tip #8: Note the hem allowance
Most patterns include the hem allowance. When you cut and sew a muslin, you may include the allowance but actually fold up the hem. Be careful with this! It’s easy to forget and misjudge the hem. Then, you may accidentally sew the garment with the incorrect hem allowance.
If patterns are frequently too short or you happen to be tall, add some length to your muslin as insurance. Or you can note that you need to add some inches at the hem when you cut out the fashion fabric. Don’t forget to do this same thing for sleeves as well!
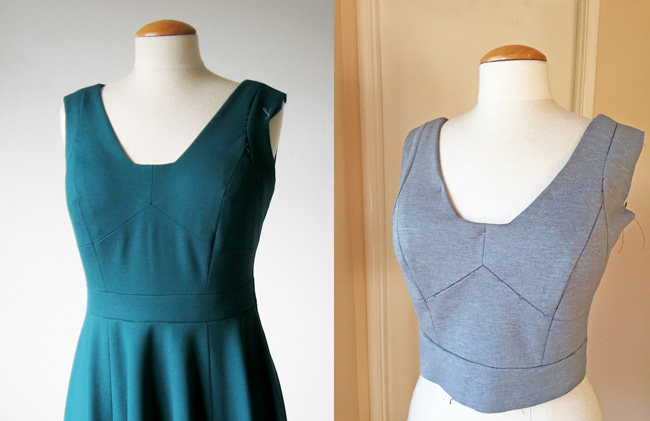
Adjusting the muslin
Tip #9: Mark right on your muslin with pen or pencil
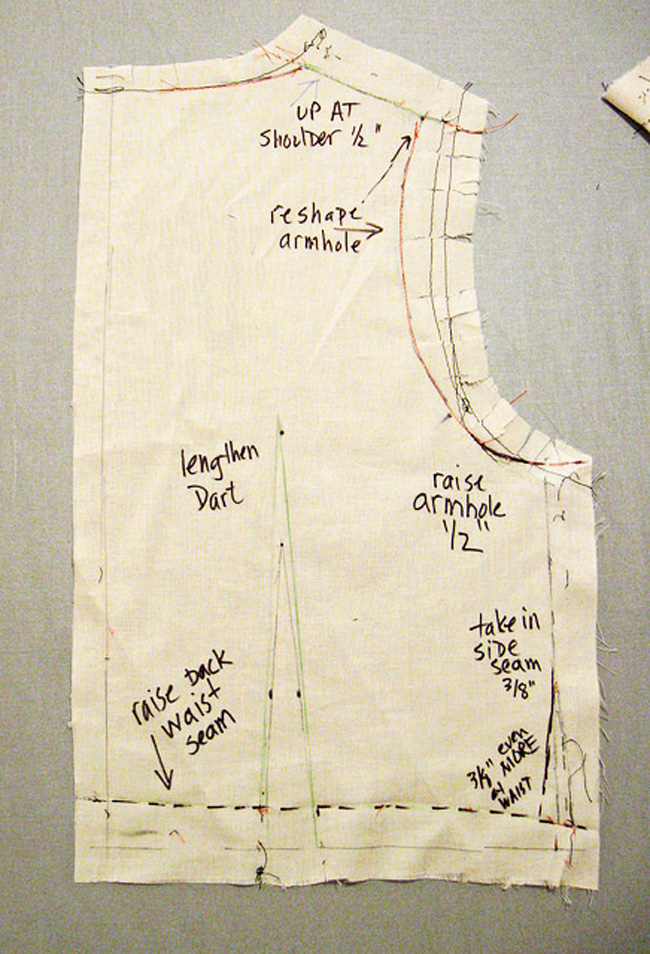
No need to treat your muslin with caution. Mark away! It’s easy to try on the muslin, put a few pins in, then take it off and not recall exactly what adjustment you were planning — so write all over it with a permanent marker, marking new seam lines or pattern notations to really get all the changes down in writing. Felt-tip pens write very clearly on fabric and are much easier to see than pencil or chalk.
Tip #10: Use two contrasting threads
When making a test version of a garment, use a thread color that contrast with the fabric. For example, if you’re using the standard, off-white cotton muslin, then use black thread so you can see where you stitched.
Once you try the muslin on and adjust some seams, I like to use a second thread color (like red) to baste the changes. Then when I go to adjust my paper pattern, I can quickly see which seams are different from the original pattern fit.
Bonus Tip #11: Redesign as you go
Don’t be afraid to do a little pattern re-designing once you’ve tried on your muslin. This is the time to change the neckline from a round to a V-neckline, or adjust the shape of the skirt. Remove or add pockets, create a different sleeve, shrink or toss the collar.
That’s the beauty of sewing your own clothes — you can create a garment that fits you perfectly and pick a style that makes you happy. Remember: You have the final say, not the pattern designer!
Share tips, start a discussion or ask one of our experts or other students a question.
No Responses to “11 Little Tricks for Getting an Amazing Fit”